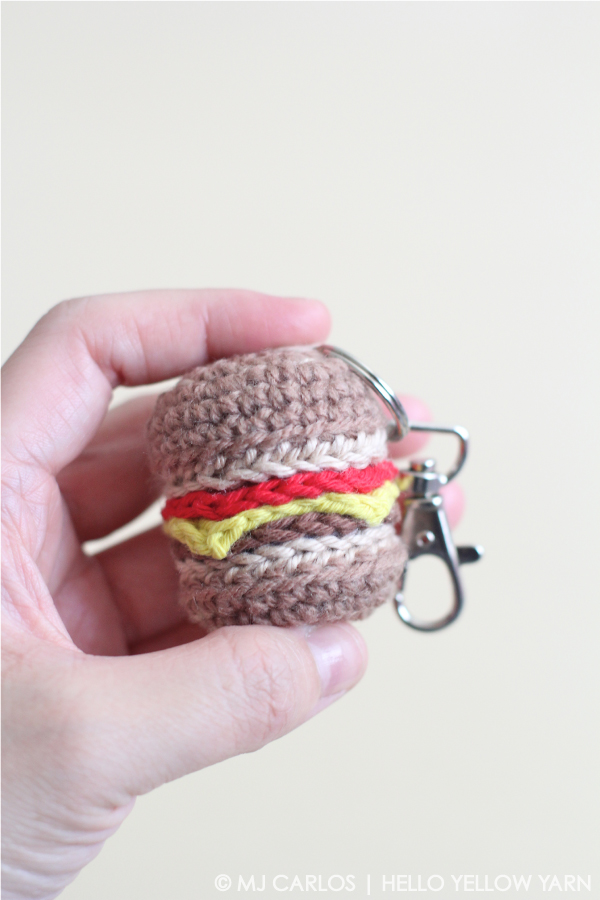
Cheeseburger Keychain – Free Crochet Pattern & Tutorial
Introducing the Cheeseburger Keychain Pattern, a delightful and unique accessory that will add a touch of whimsy to your everyday life! This pattern allows you to create your very own miniature cheeseburger keychain, perfect for showcasing your love for all things delicious and fun. With this pattern, you can unleash your creativity and craft a charming cheeseburger keychain that is sure to turn heads wherever you go. The pattern provides step-by-step instructions, guiding you through the process of combining together the various components of the cheeseburger, including the bun, patty, cheese, lettuce, and tomato.

CHEESEBURGER KEYCHAIN – PATTERN
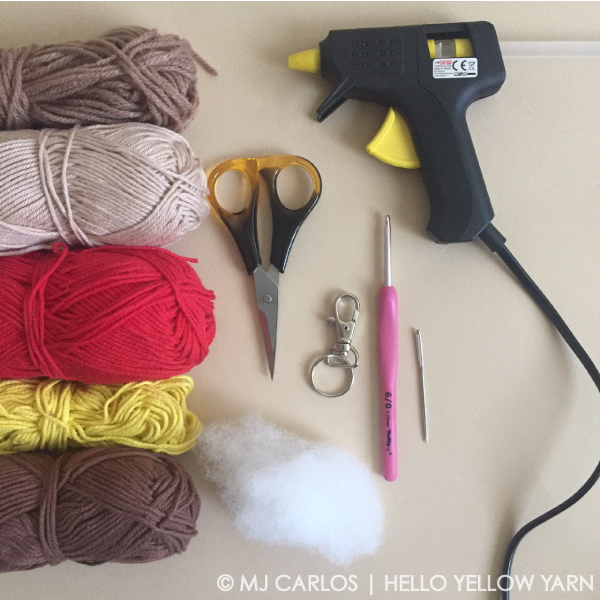
MATERIALS REQUIRED:
- 8 ply cotton (or acrylic) yarn (US = Light Worsted / UK = DK) in light brown, cream, red, yellow and brown
- 3.5mm crochet hook (US = 4/E / UK = 9)
- scissors
- yarn needle
- hot glue gun
- toy stuffing
- keychain or keyring or charm cord
ABBREVIATIONS (US Terminology)
ch – chain
sk – skip
sl st – slip stitch
sc – single crochet
inc – single crochet increase (2 single crochet in 1 stitch)
st – stitch
f/o – fasten off
NOTE – Ch 1 is not counted as a stitch.
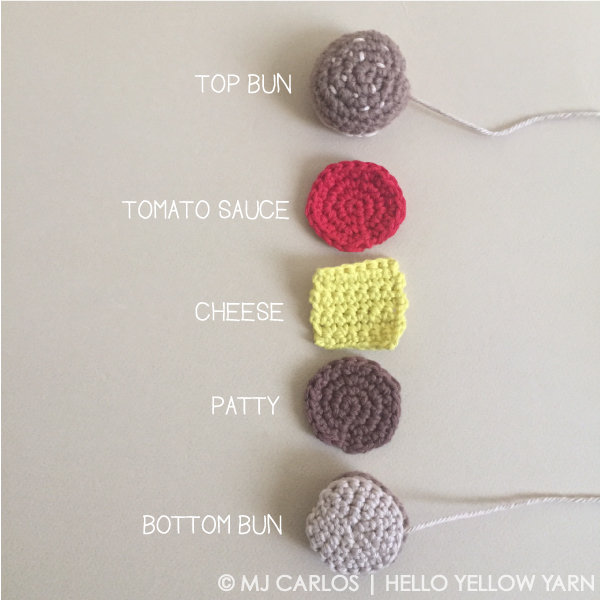
Tomato sauce (Red), Patty (Brown) and underside of buns x2 (Cream)
Rnd 1: Work 5 sc in a magic ring. Join with sl st to 1st sc. (5 sts)
Rnd 2: Ch 1. Inc in same space as sl st from previous round. Inc in each st around. Join with sl st to ch 1. (10 sts)
Rnd 3: Ch 1. Sc 1, inc; rep 5 times. Join with sl st to ch 1. (15 sts)
Rnd 4: Ch 1. Sc 2, inc; rep 5 times. Join with sl st to ch 1. Fasten off. (20 sts)
Weave in tails for the tomato and patty. Leave long tails for the underside of the buns.
Cheese (Yellow)
Ch 8.
Row 1: Sk 1st ch st from hk. Sc in next 7 ch sts. (7 sts)
Row 2: Ch 1, turn. Sc 7. (7 sts)
Rows 3 – 7 : Ch 1, turn. Sc 7. (7 sts)
F/o and weave in tail ends.
Top Bun (Light Brown)
Rnd 1: Work 5 sc in a magic ring. Join with sl st to 1st sc. (5 sts)
Rnd 2: Ch 1. Inc in same space as sl st from previous round. Inc in each st around. Join with sl st to ch 1. (10 sts)
Rnd 3: Ch 1. Sc 1, inc; rep 5 times. Join with sl st to ch 1. (15 sts)
Rnd 4: Ch 1. Sc 2, inc; rep 5 times. Join with sl st to ch 1. (20 sts)
Rnd 5: Ch 1. Sc around. Join with sl st to ch 1. (20 sts)
Rnd 6: Ch 1. Sc around. Join with sl st to ch 1. F/o and weave in tails. (20 sts)
Bottom Bun (Light Brown)
Rnd 1: Work 5 sc in a magic ring. Join with sl st to 1st sc. (5 sts)
Rnd 2: Ch 1. Inc in same space as sl st from previous round. Inc in each st around. Join with sl st to ch 1. (10 sts)
Rnd 3: Ch 1. Sc 1, inc; rep 5 times. Join with sl st to ch 1. (15 sts)
Rnd 4: Ch 1. Sc 2, inc; rep 5 times. Join with sl st to ch 1. (20 sts)
Rnd 5: Ch 1. Sc around. Join with sl st to ch 1. F/o and weave in tails. (20 sts)
ASSEMBLY
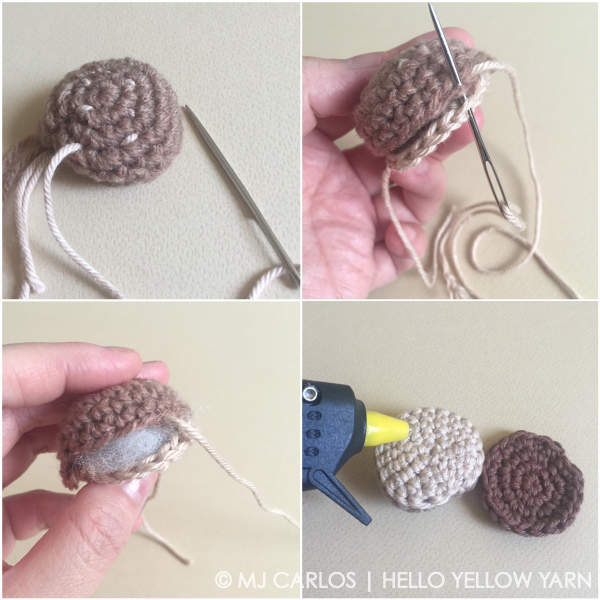
- Embroider sesame seeds on top bun using cream coloured yarn. Secure ends with a tight knot.
- Whipstitch one underside of bun to top bun – stitching front loops to back loops.
- Fill with stuffing halfway through stitching. Do not over stuff. Continue to stitch shut. Do not weave in ends yet. Repeat steps 2 & 3 for bottom bun. Weave in and hide yarn ends for the bottom bun only.
- Flip bottom bun so the underside is showing. Glue patty followed by cheese on the underside using hot glue gun.
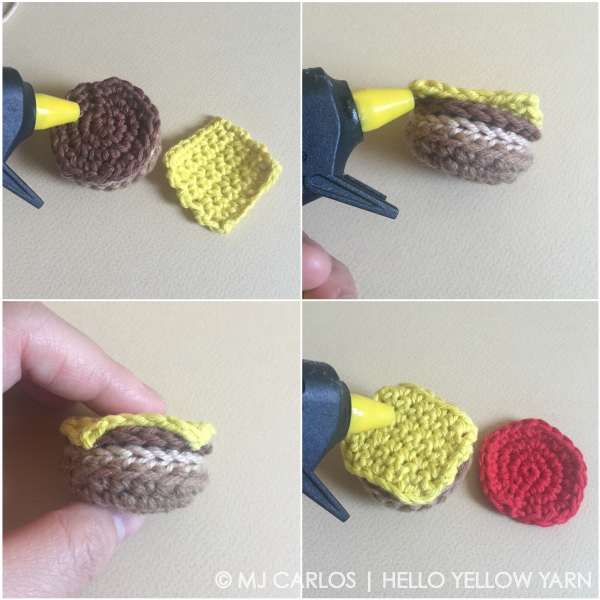
- Glue the corners of the cheese down to make it appear the cheese has melted.
- Glue tomato on top of cheese then glue top bun onto tomato.
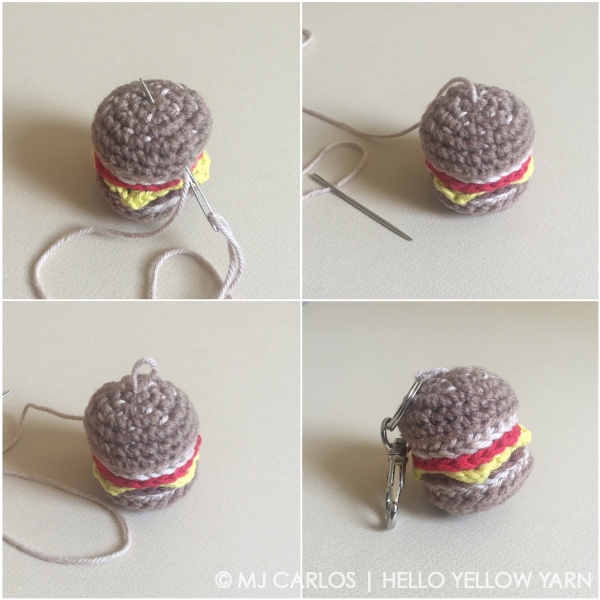
- With the cream coloured yarn end from the top bun, create a loop on top of the bun – insert yarn in needle and weave into the bun, and push out onto the top of the bun, in the centre. Insert the needle back into the centre and create a small loop. Weave the yarn in and out of the bun several times to secure it. Cut yarn.
- Finally, insert the loop into the keychain/keyring.
You can skip steps 7 & 8 if you don’t want to create a loop on top for the keychain. Instead, just attach the keychain directly onto one of the stitches on top of the bun.