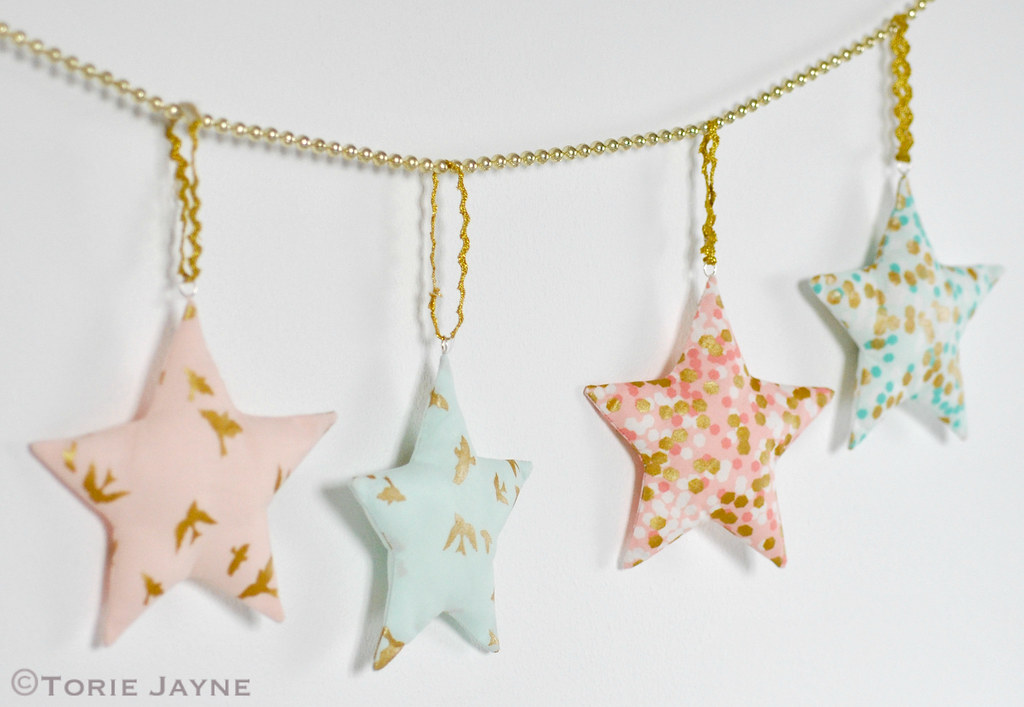
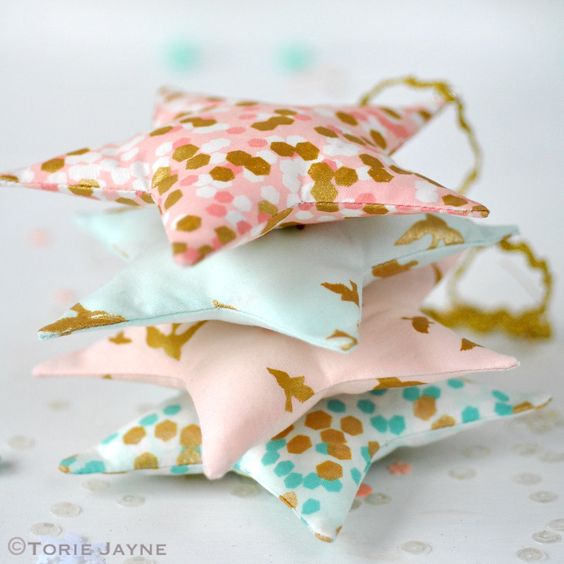
Fabric Star Tutorial & Pattern
Create your own unique fabric star with this sewing pattern. Whether you're a beginner or an experienced sewer, this pattern provides step-by-step instructions to help you craft a beautiful fabric star. Choose your favorite fabric and get ready to bring a touch of handmade charm to your home decor. This pattern is versatile and can be customized to match your personal style and color preferences. Sewing your own fabric star is a fun and rewarding project that will add a special touch to any room. Whether you're looking to add a festive touch to your holiday decorations or simply want to add a handmade touch to your home, this fabric star sewing pattern is the perfect choice. Get ready to show off your sewing skills and create a beautiful fabric star that will be the envy of all who see it.
You will need...
brambleberry ridge metallic fabrics
all purpose sewing thread
polyester toy filling
jump rings
Star Sewing Pattern
How-to step by step.
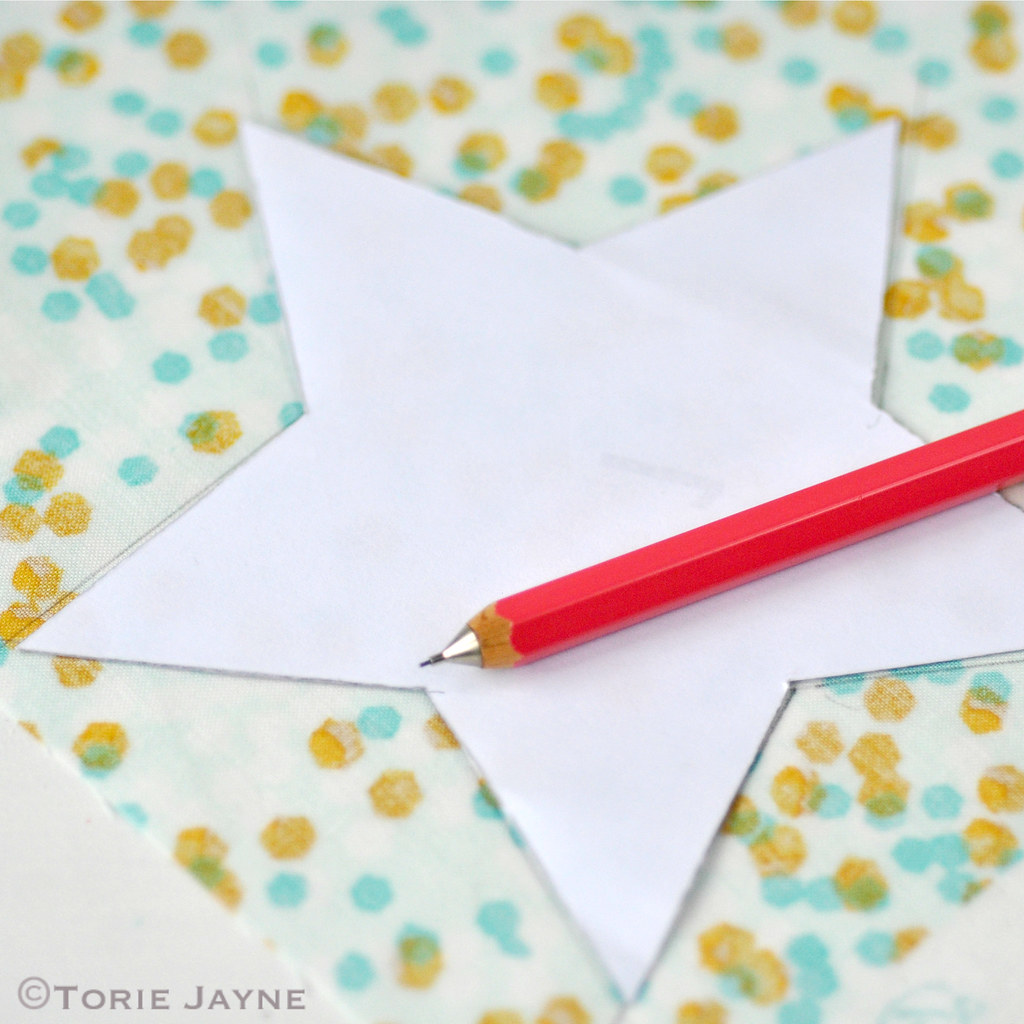
Step 1
Start by downloading and printing off the star template and tracing it on to the back of the fabric twice. Cut out leaving a 5mm seam allowance.
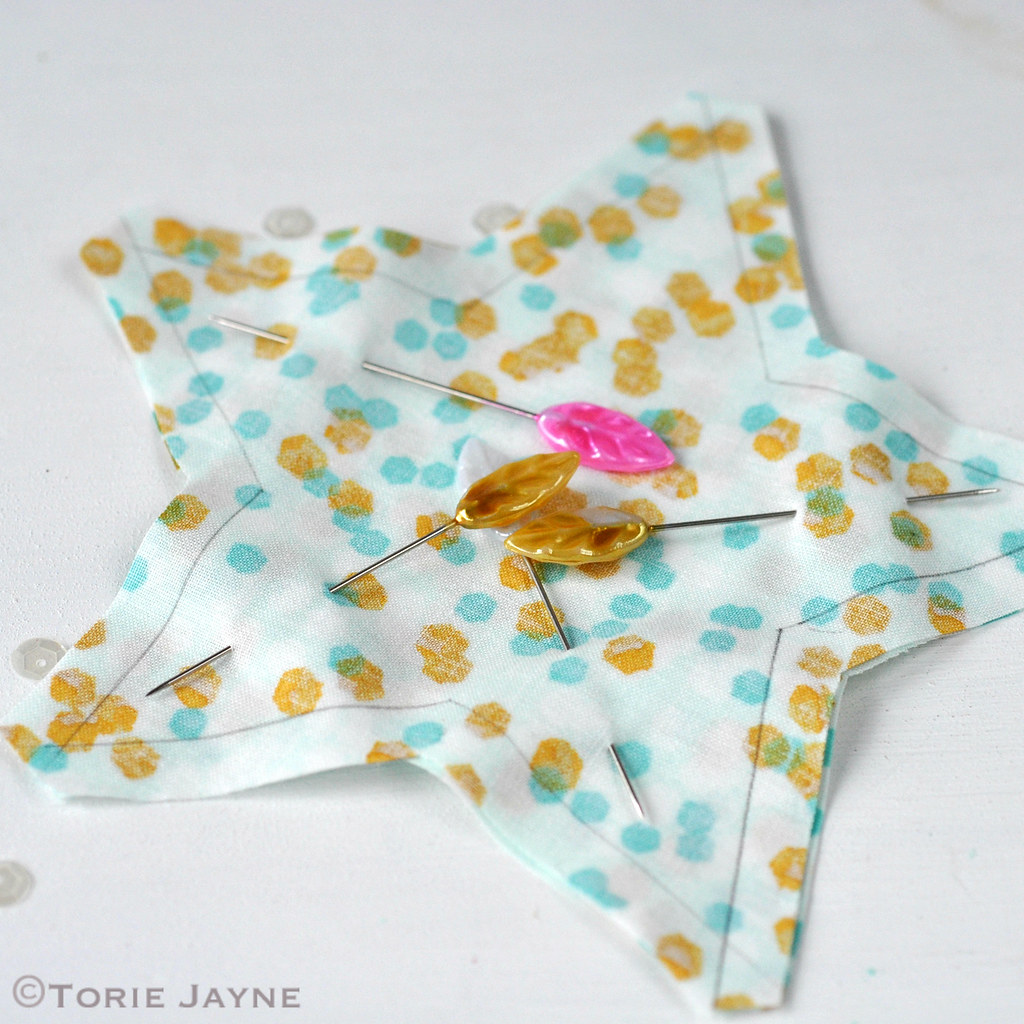
Step 2
Place cut out stars right sides together and pin to secure.
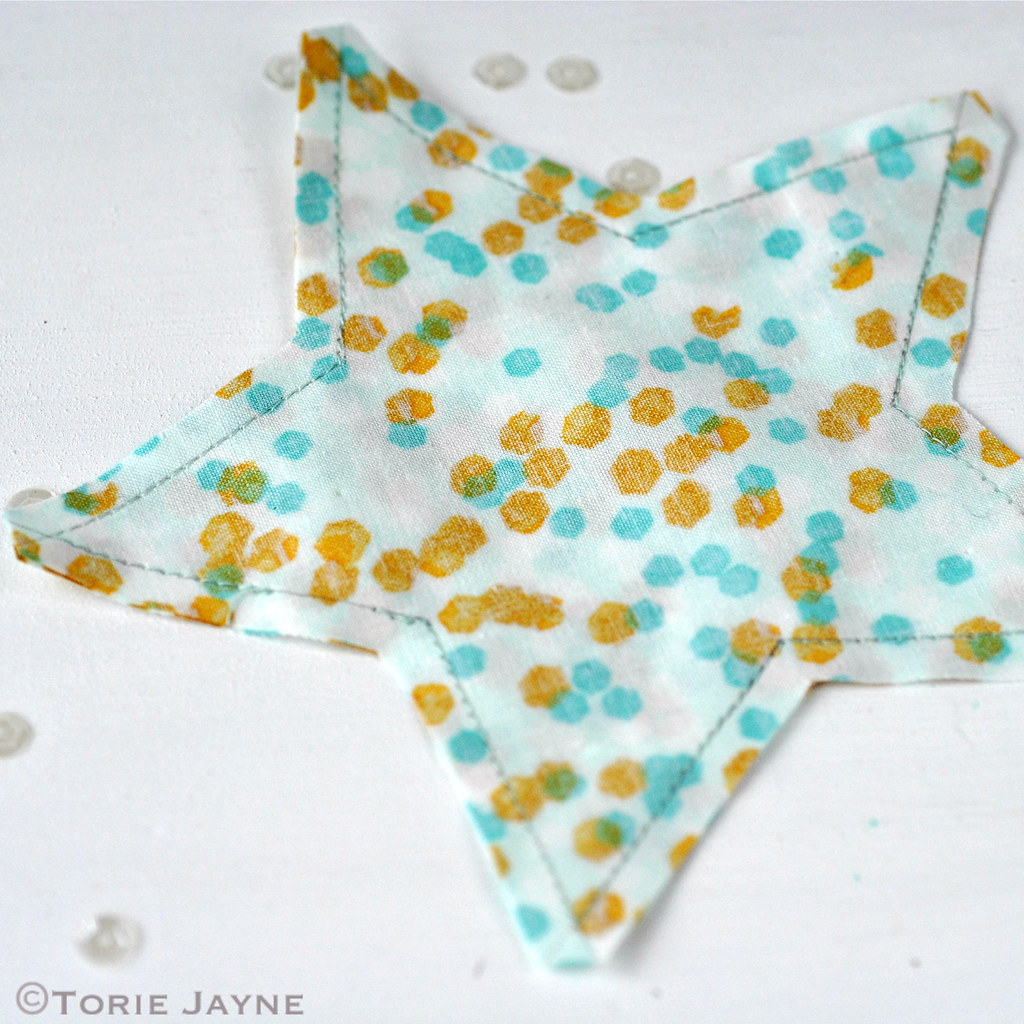
Step 3
Starting mid way down one star point, using a straight stitch, sew along your pencil line, stopping 2cm before you get to where you started.
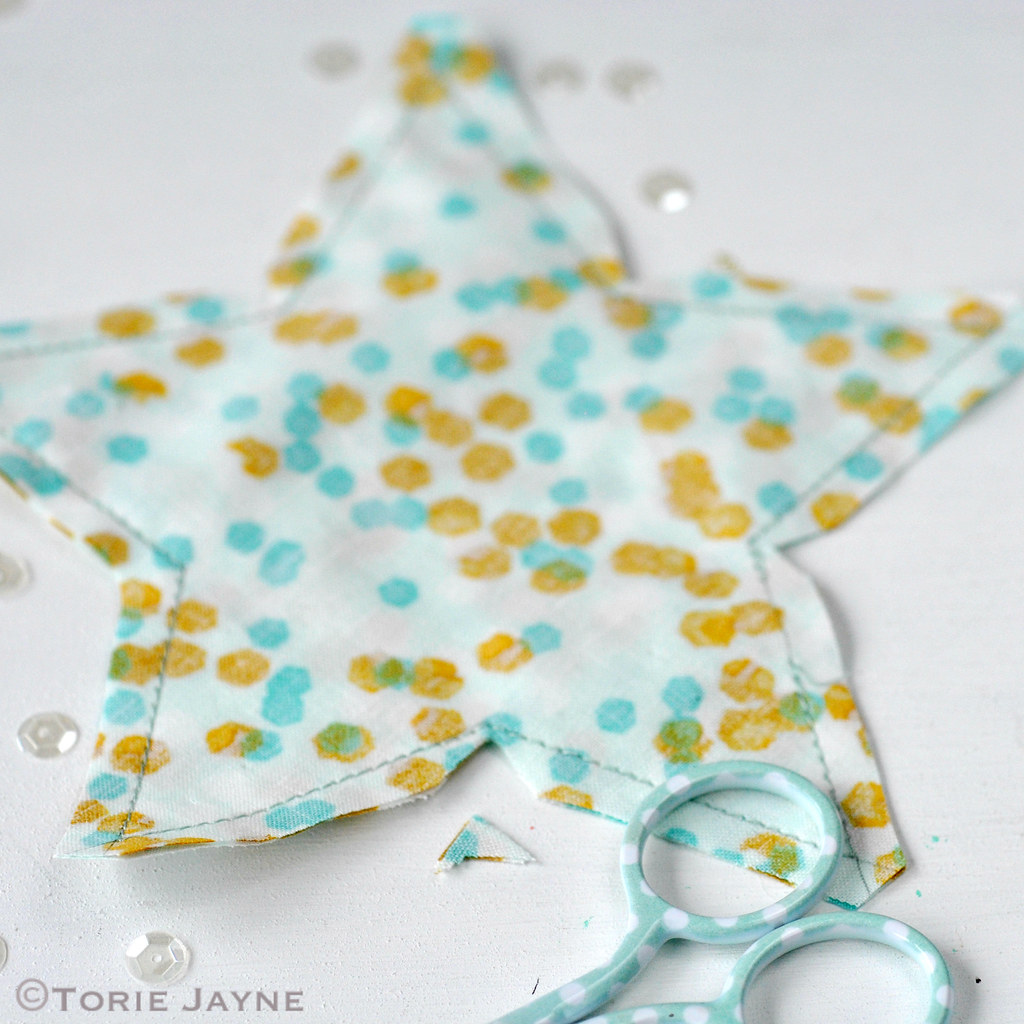
Step 4
Clip a small triangle out of the seam allowance at each junction
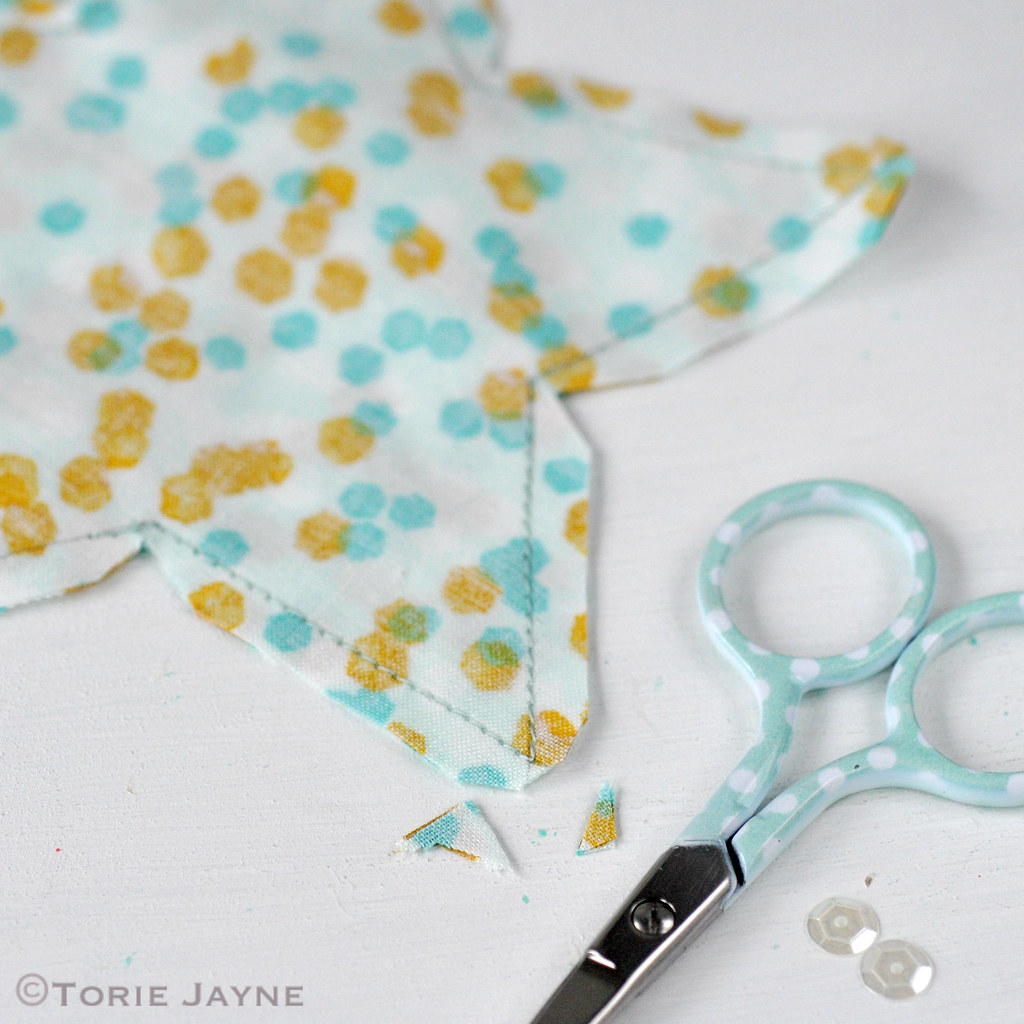
Step 5
Clip points off the top of the stars
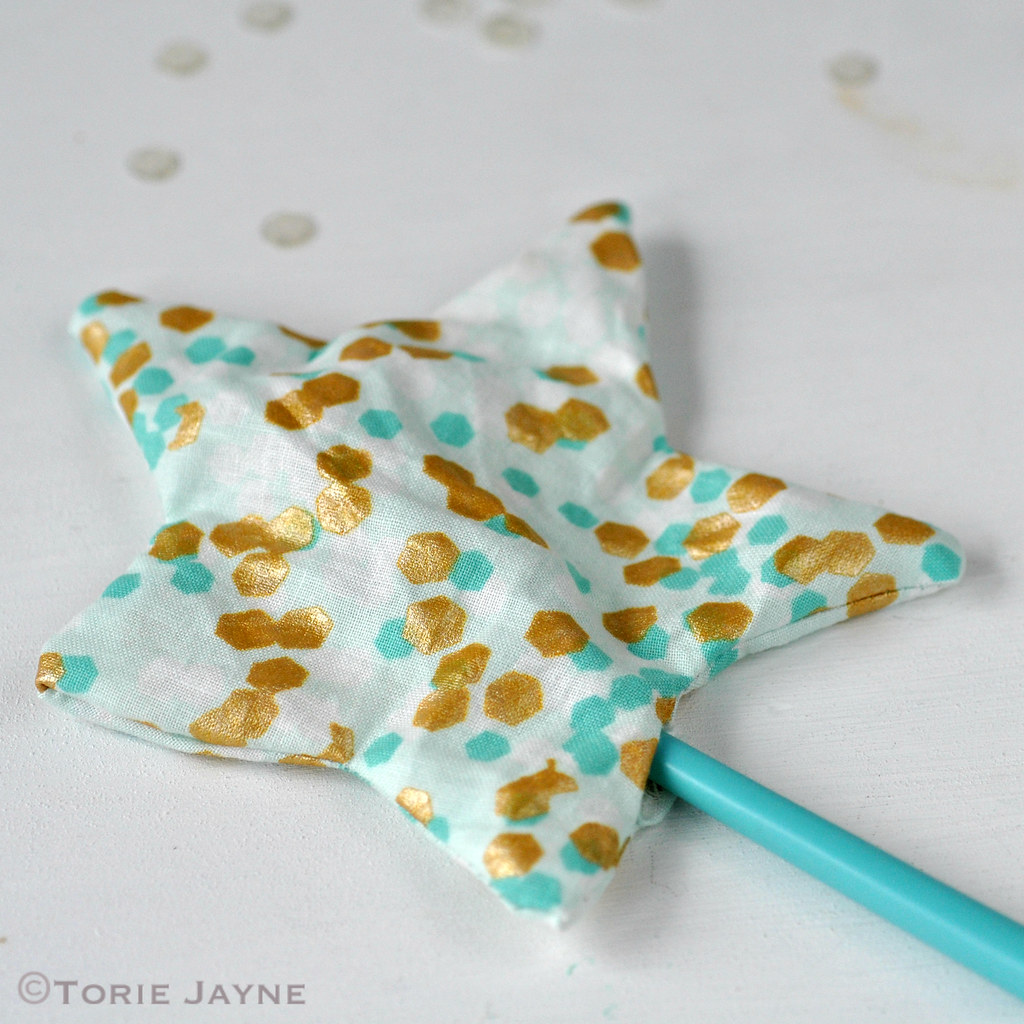
Step 6
Turn star right side out, and using a chopstick push star point out
Step 7
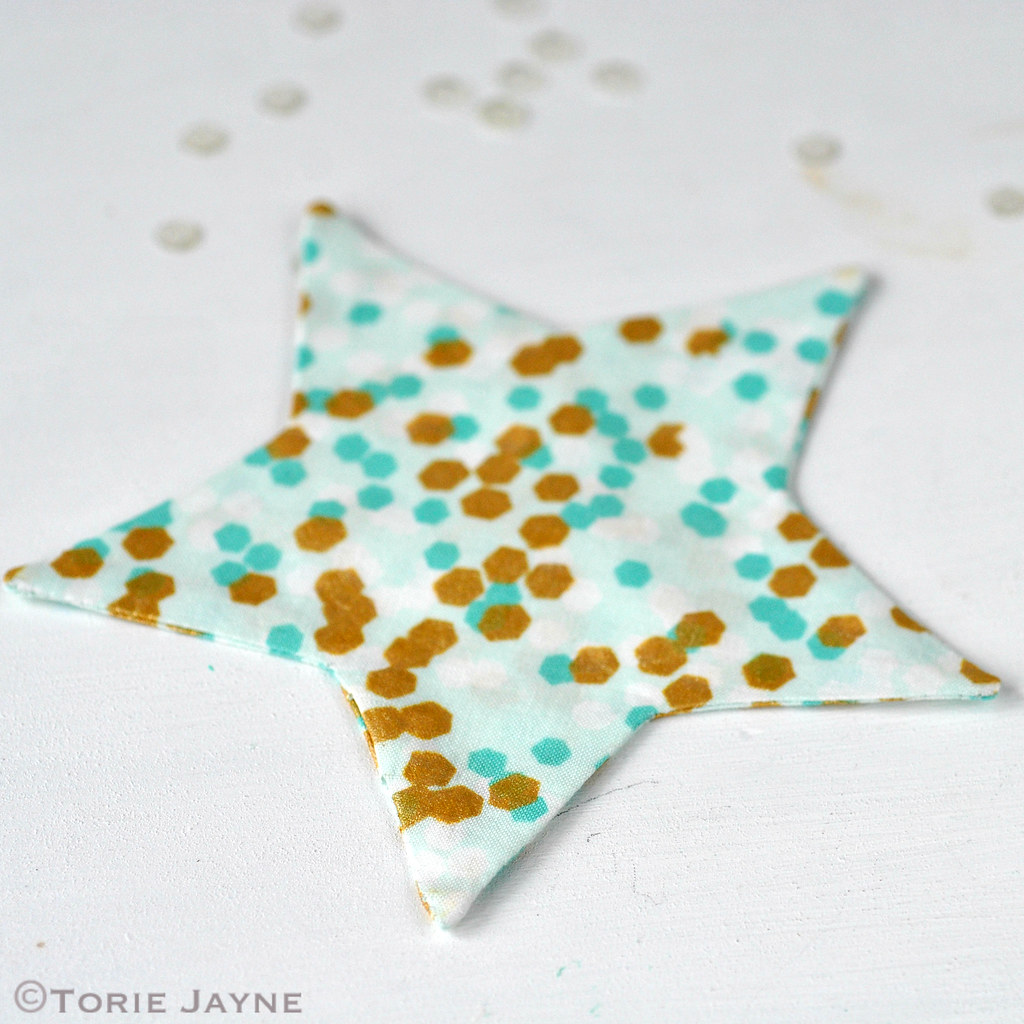
Press star flat, ensuring to press seam allowance in on the opening making it easy to stitch together later
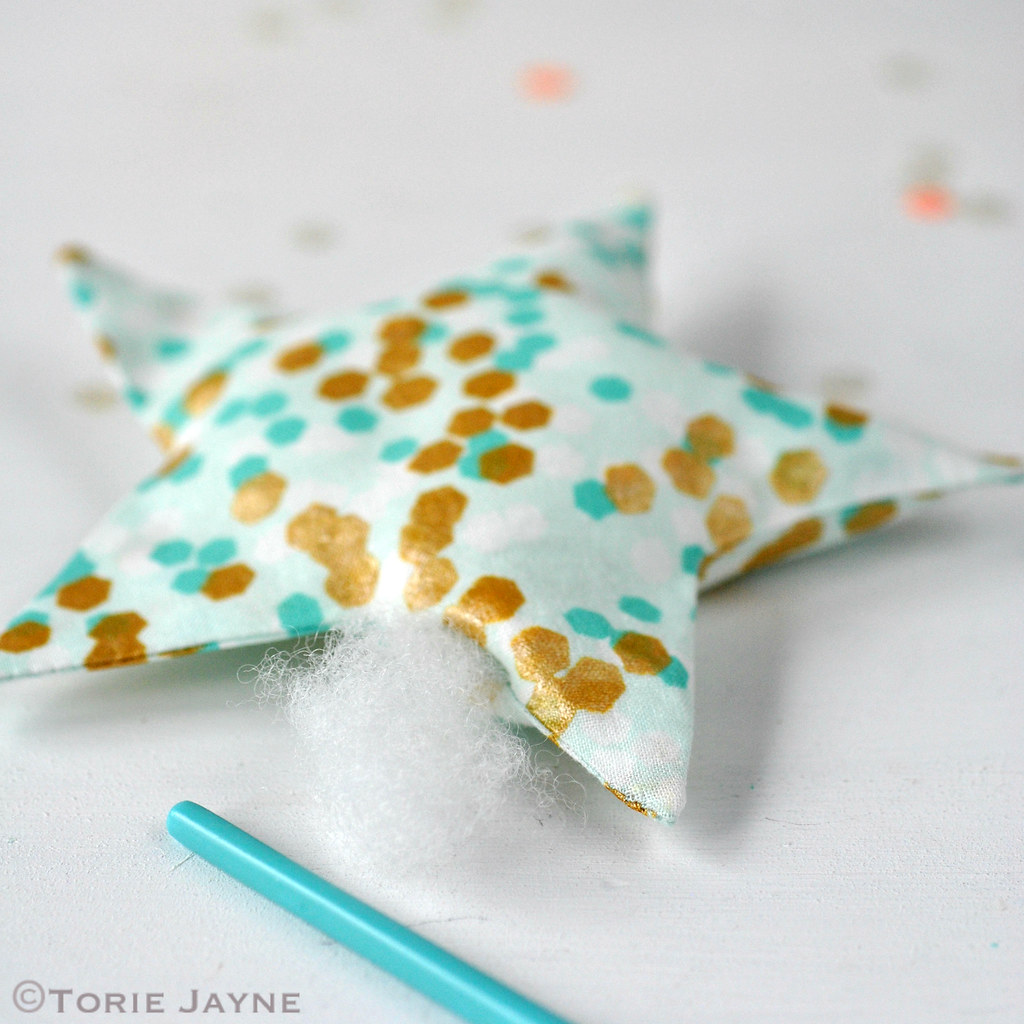
Step 8
Stuff star with toy filler, using a chopstick to get stuffing into the star points
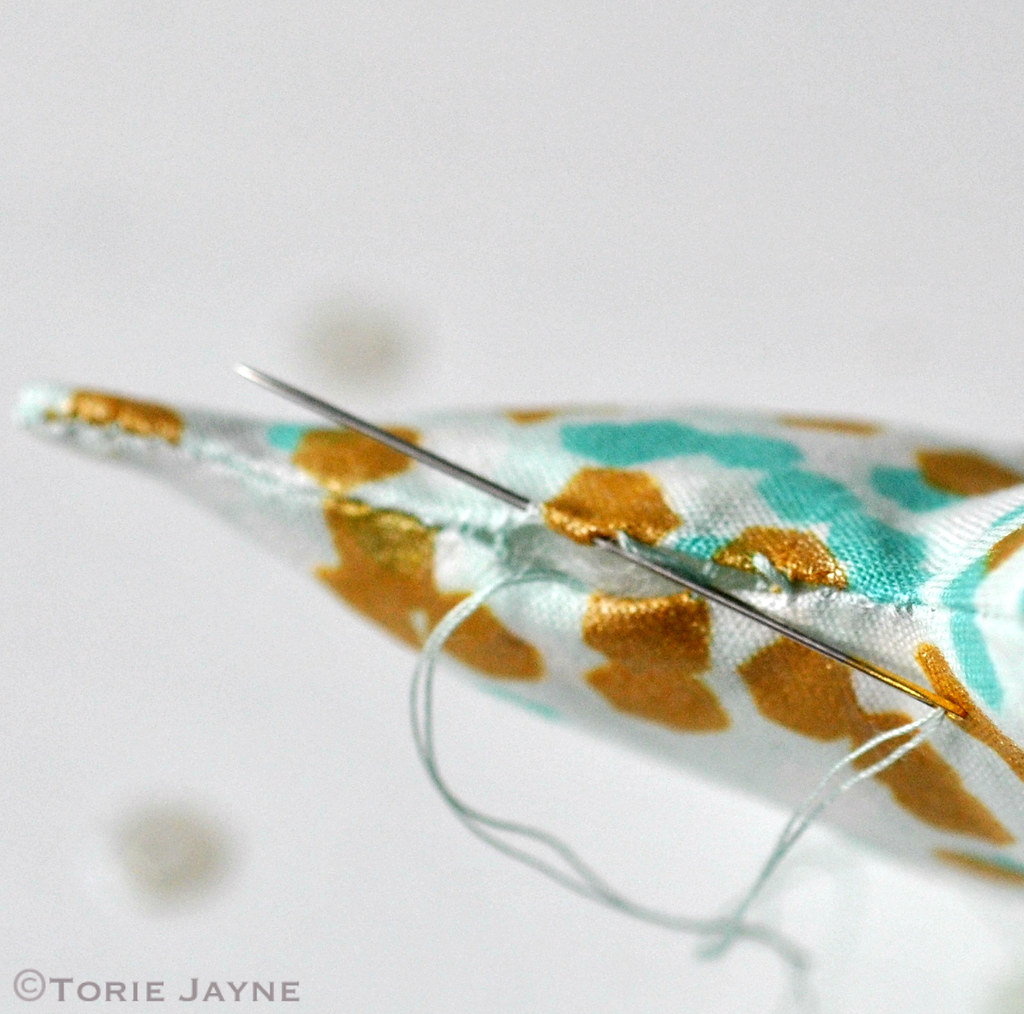
Step 9
Slip stitch opening close
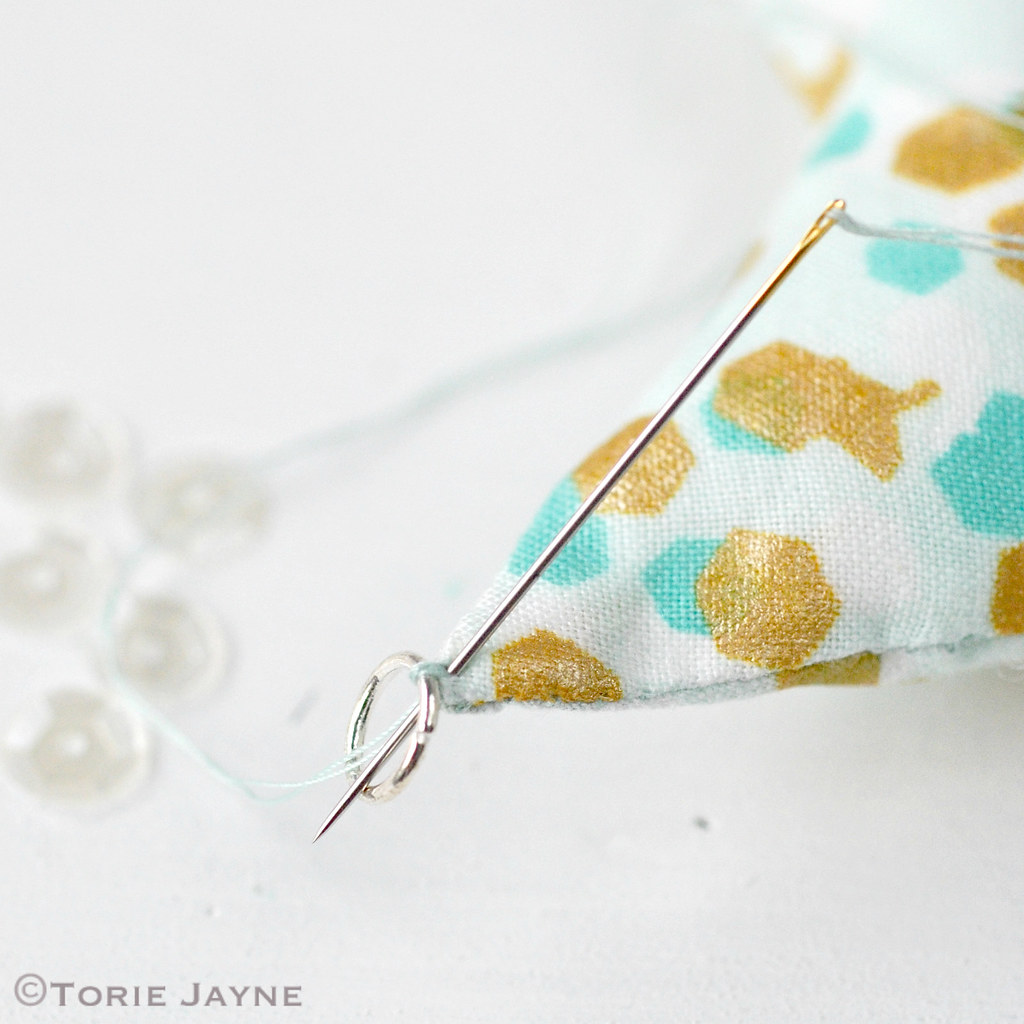
Step 10
Hand stitch jump ring to one of the star points
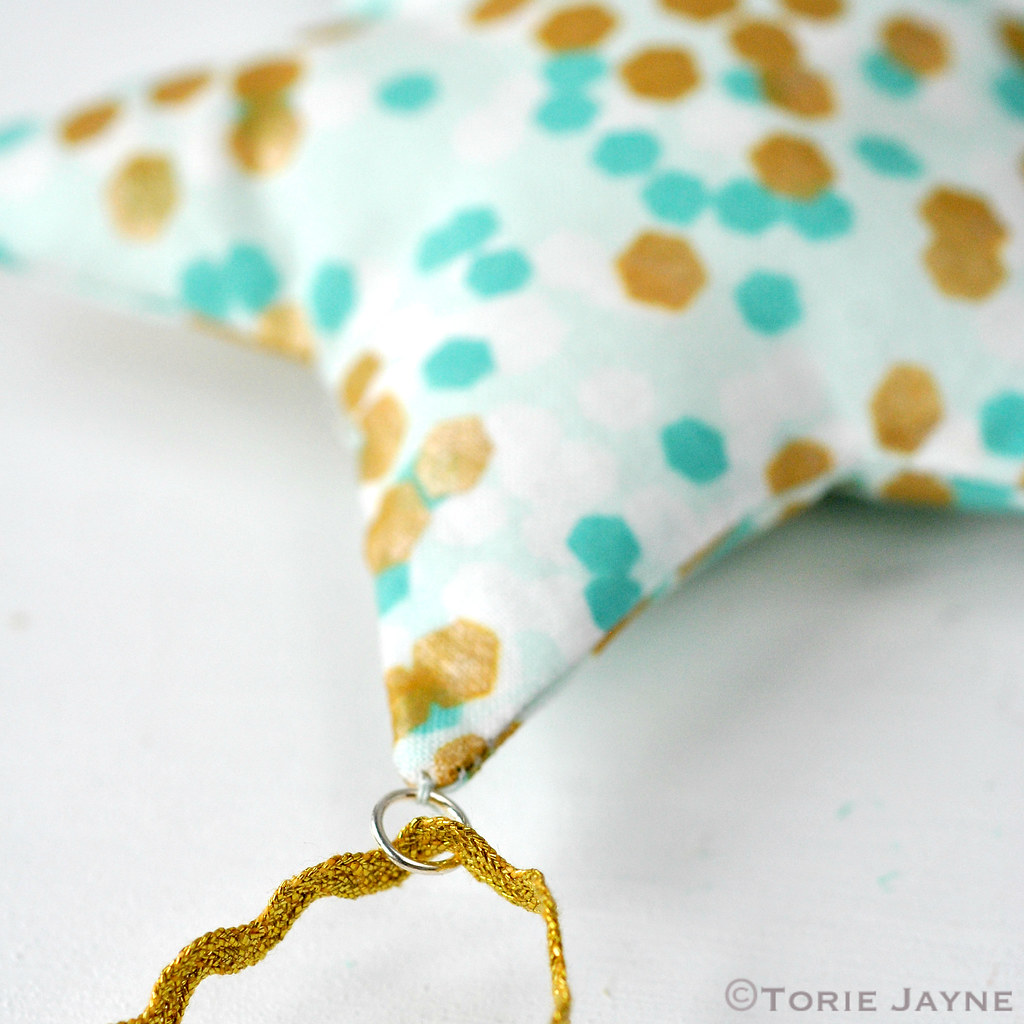
Step 11
Thread ribbon or trim through jump ring and tie or stitch ends together.