How to Make a Buffalo Check Wooden Easter Bunny
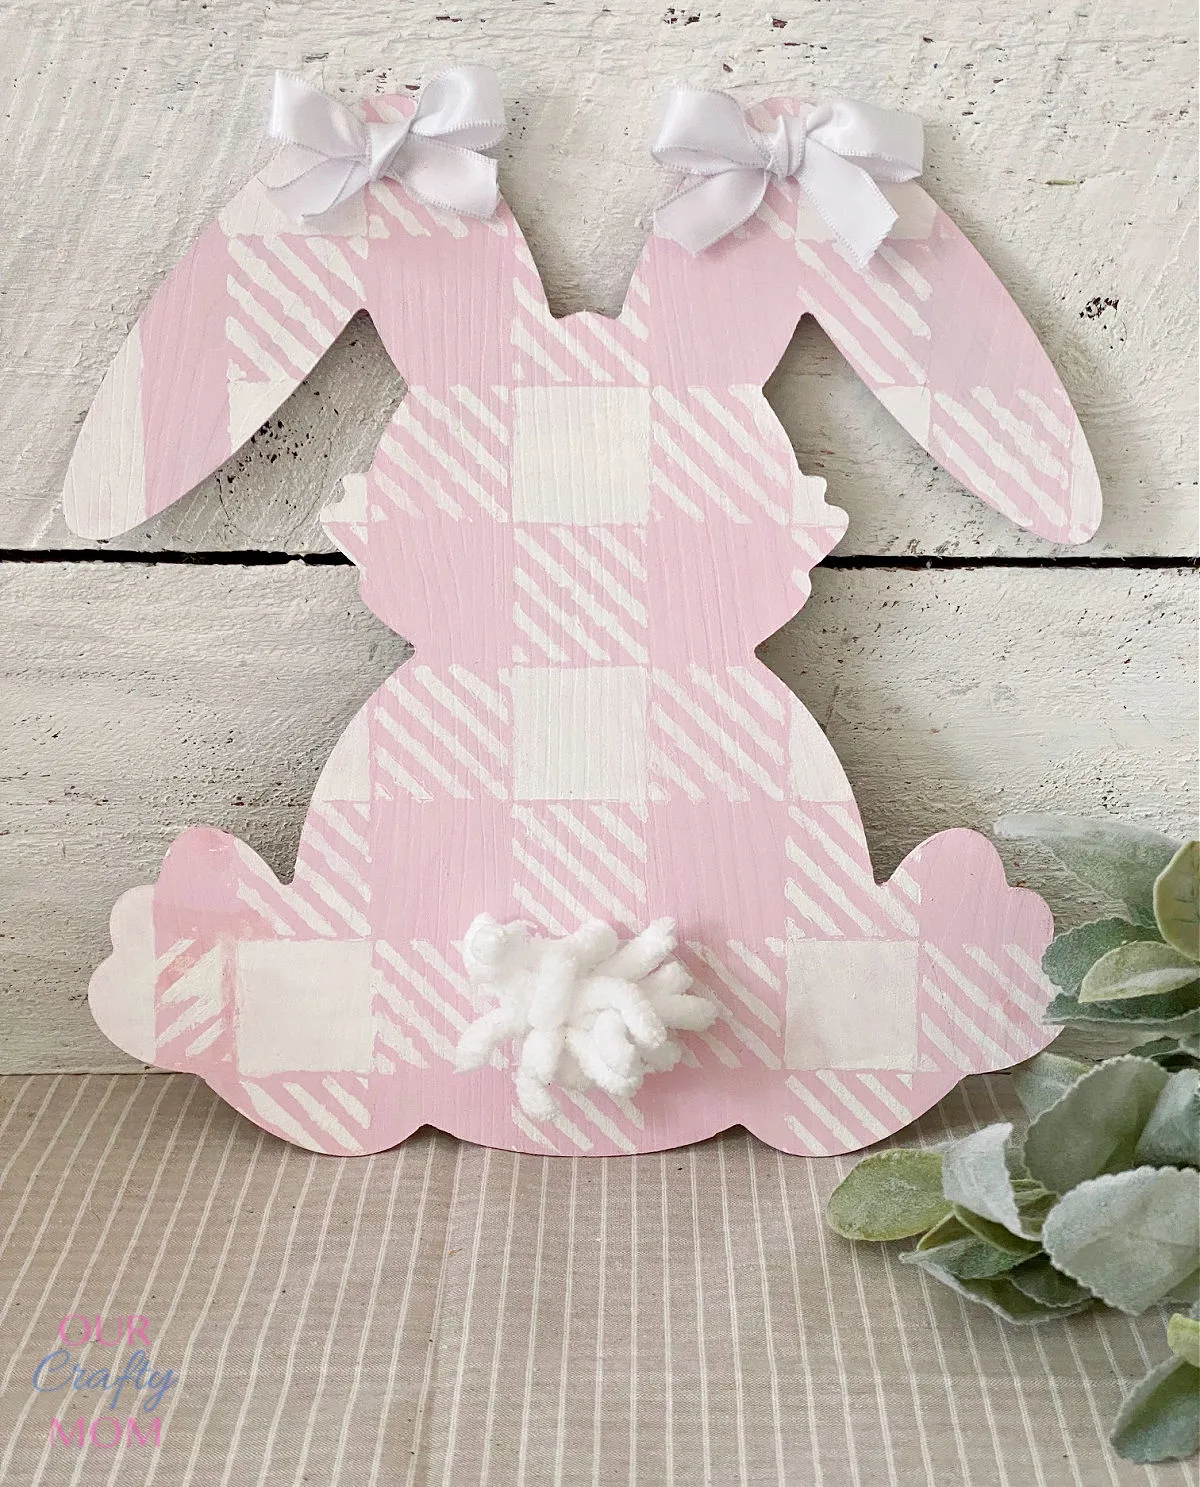
Imagine a charming wooden Easter bunny adorned with a classic buffalo check pattern. This delightful decoration combines the rustic feel of wood with the timeless appeal of the buffalo check design, creating a unique and eye-catching piece for your Easter decor. The buffalo check pattern adds a touch of farmhouse style to the traditional Easter bunny motif, making it a perfect addition to any home looking to add a bit of rustic charm to their holiday decorations. Whether placed on a mantel, shelf, or tabletop, this bunny is sure to bring a touch of Easter cheer to any room. The combination of the wooden material and the buffalo check pattern gives this bunny a cozy and inviting look that will complement a range of decor styles. Add this charming bunny to your Easter decorations this year for a fun and festive twist on a classic holiday symbol.
Materials needed:
- Wooden Bunny – Dollar Tree
- White Chalk Paint
- White Loop Yarn
- Buffalo Check Stencil
- Foam Brushes
- White Wired Ribbon
- Cordless Hot Glue Gun
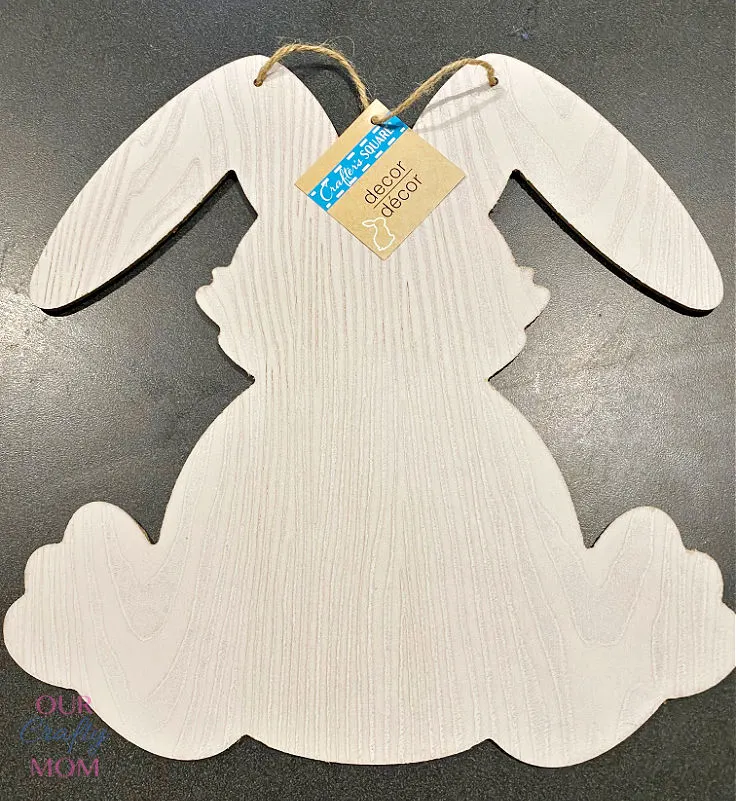
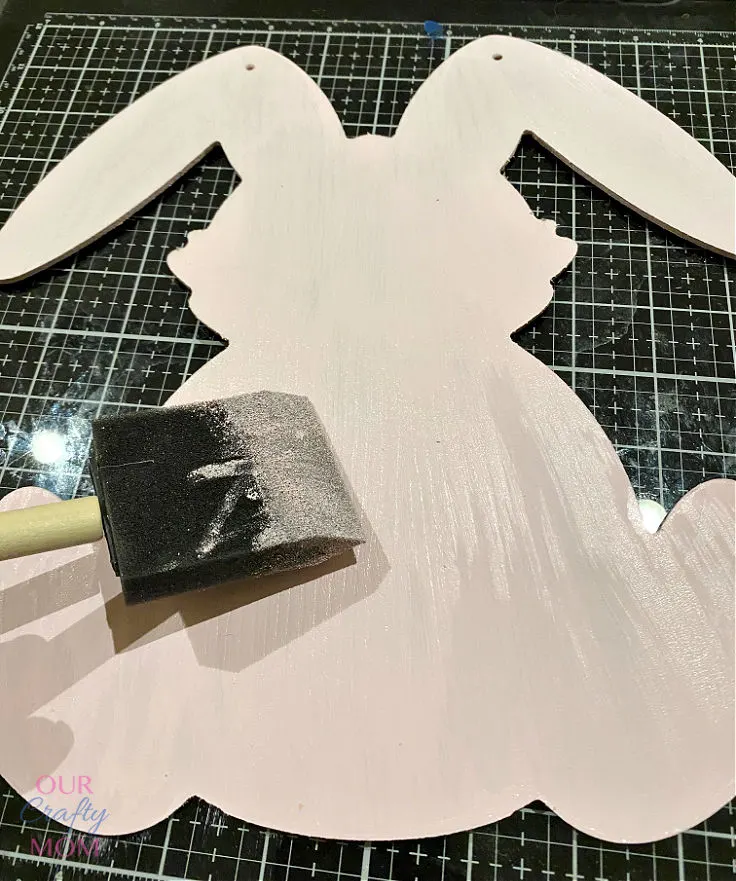
Step 1. Paint the Bunny
Start by painting your wooden bunny white. This will be the base color with pink being an accent color for the buffalo check.
Step 2. Secure the Stencil
Place your stencil on the wooden bunny so it is even all around. It doesn’t have to be perfect.
I noticed I missed a spot, but I believe there are no mistakes in crafting.
If there is a noticeable difference, you can place the stencil back in that place and dab a little bit of paint to fix it.
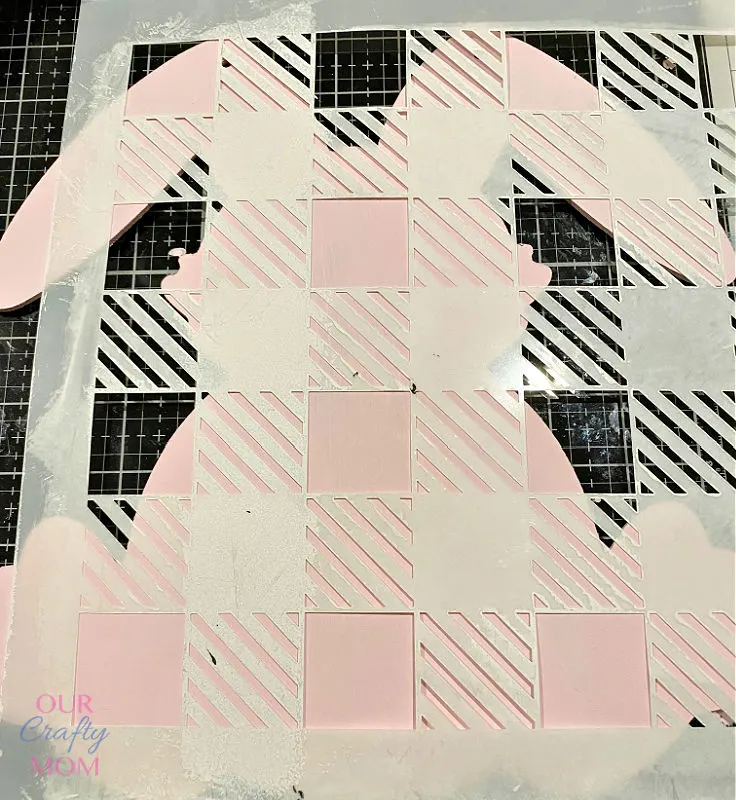
You can use tape to hold the stencil down, but I just held it in place.
Some stencils have a sticky back which makes them so easy to paint.
Step 3. Tips for Painting Buffalo Check
Whenever stenciling, I always say less is more.
Pour your paint on a paper plate and use a stencil brush or foam brush to lightly dab the paint onto the stencil.
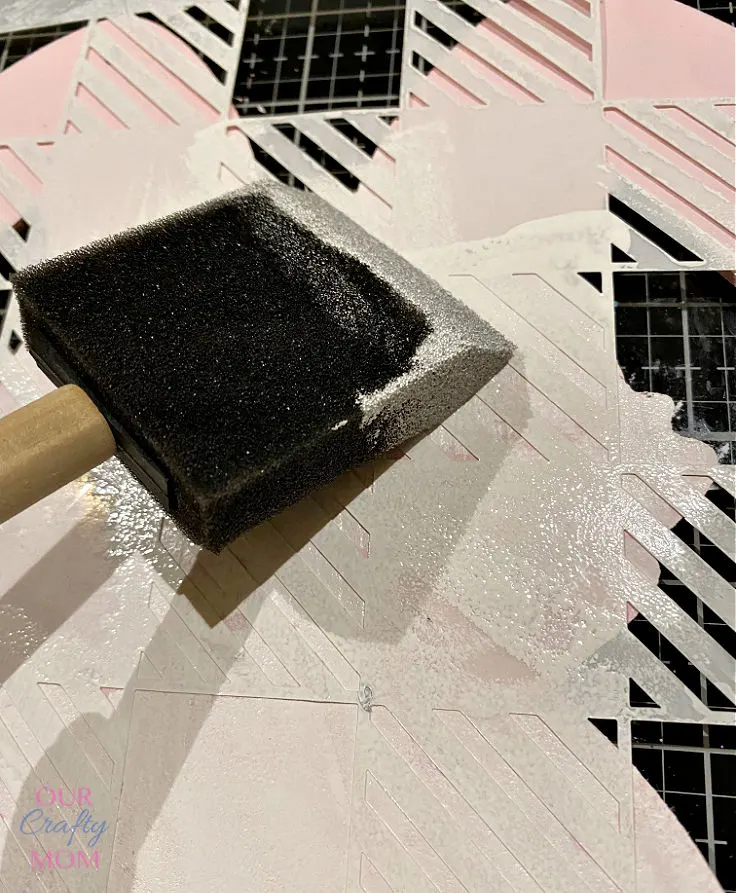
I used pink paint for this bunny, but you can use whatever color you want.
Classic black buffalo check would look great too!
It’s always easier to go back and add more paint than it is to try to remove it.
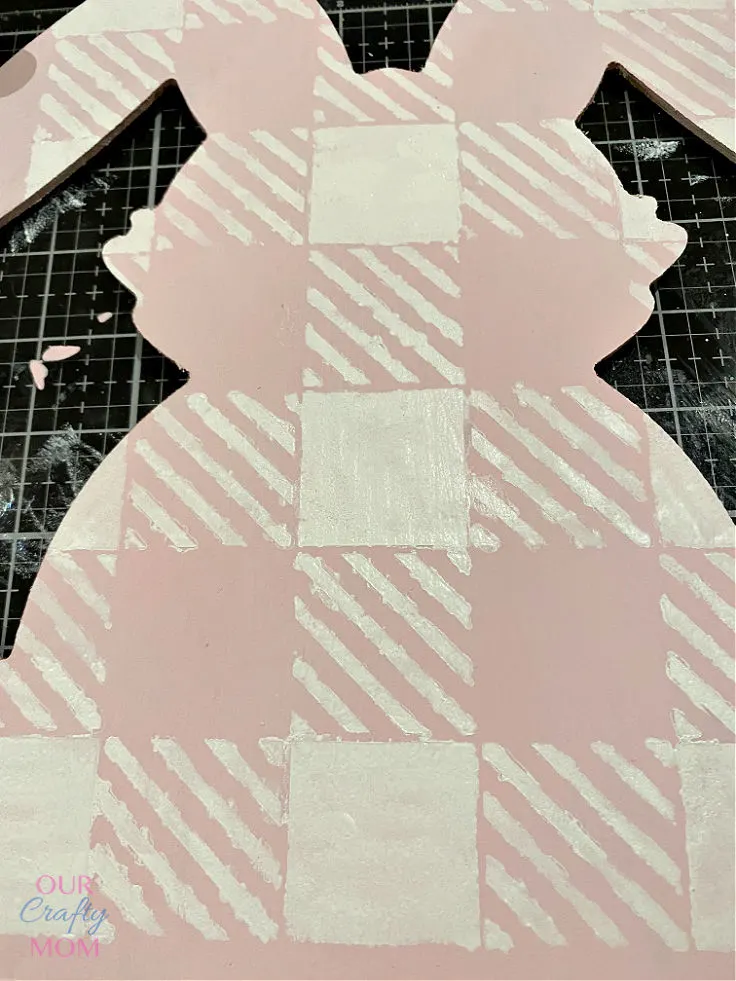
Step 4. Remove the Stencil
Carefully remove the stencil so you don’t mess up any of the wet paint.
A quick tip: use wet q-tips to remove any paint that has bled.
You can also use them to add little touch-ups to your craft projects.
I keep a little jar full of these on my craft table.
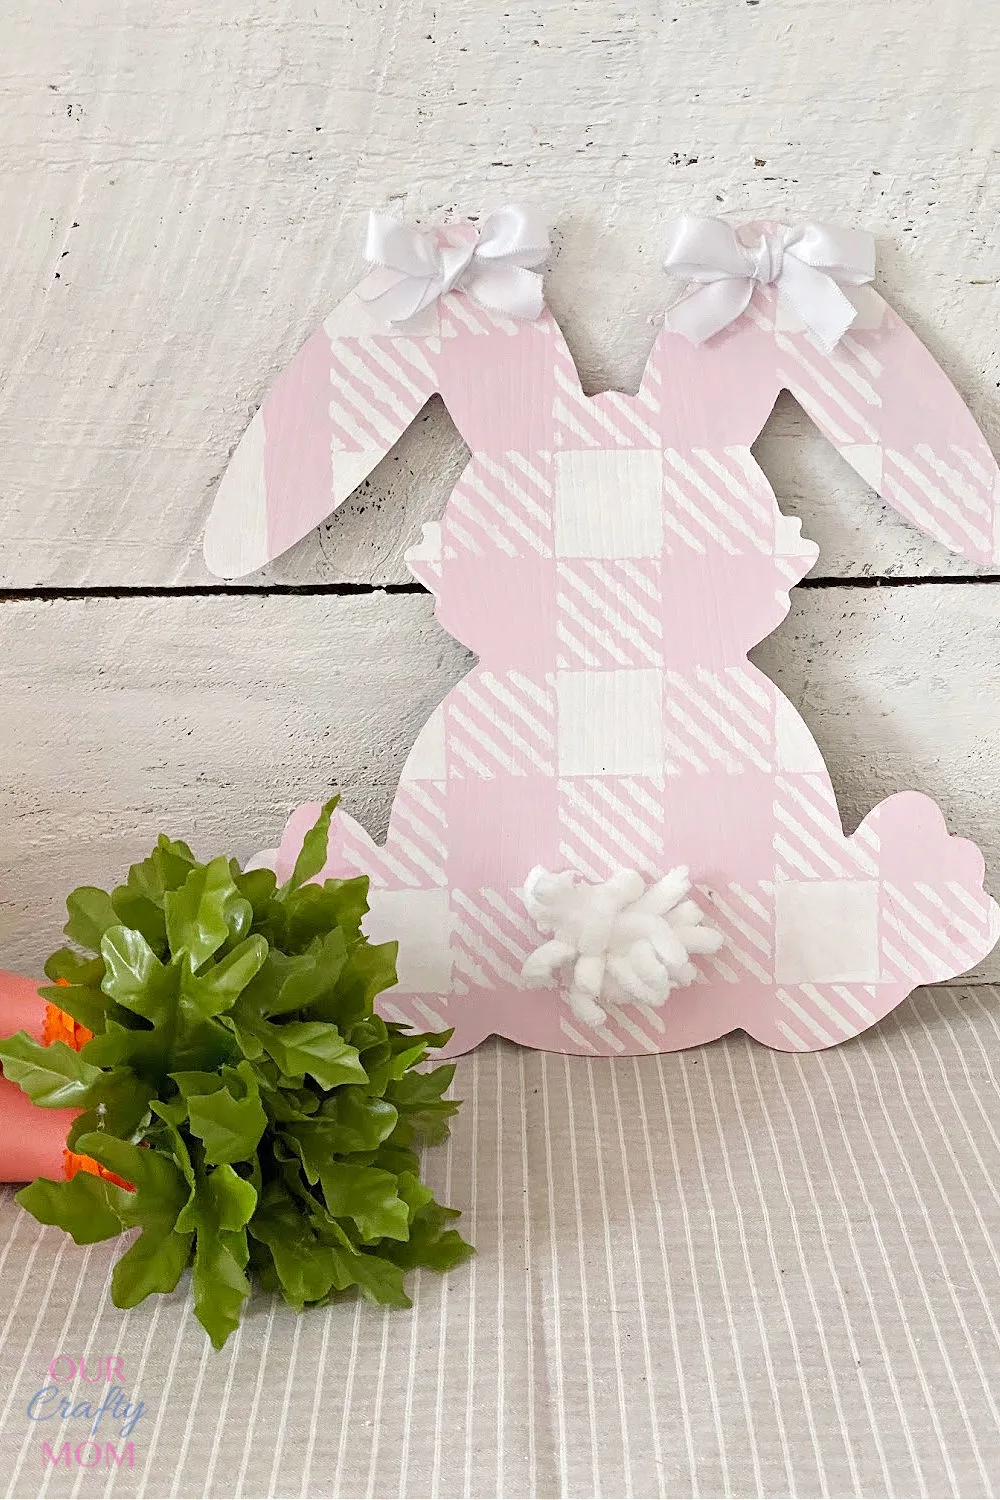
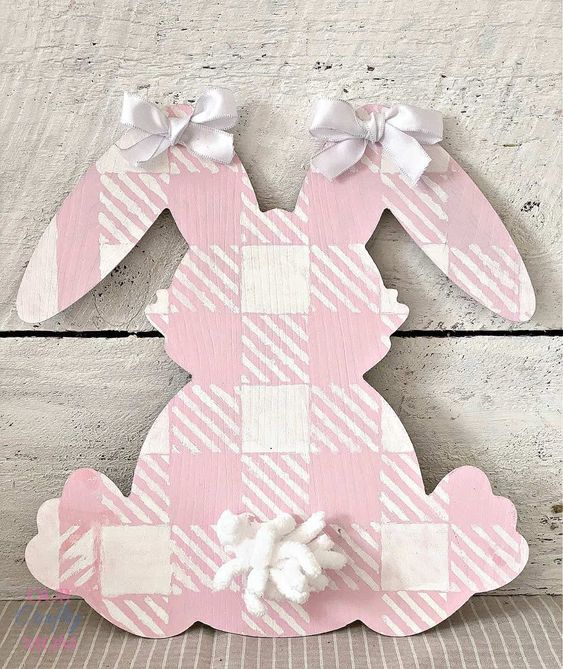
Step 5. Decorate Bunny With Embellishments
Use whatever embellishments you like. I chose to keep it simple so the buffalo check would be the star of the show.
A couple of bows add a sweet touch to the ears.
Of course, I had to add loop yarn for the tail to officially turn this into a bunny butt!
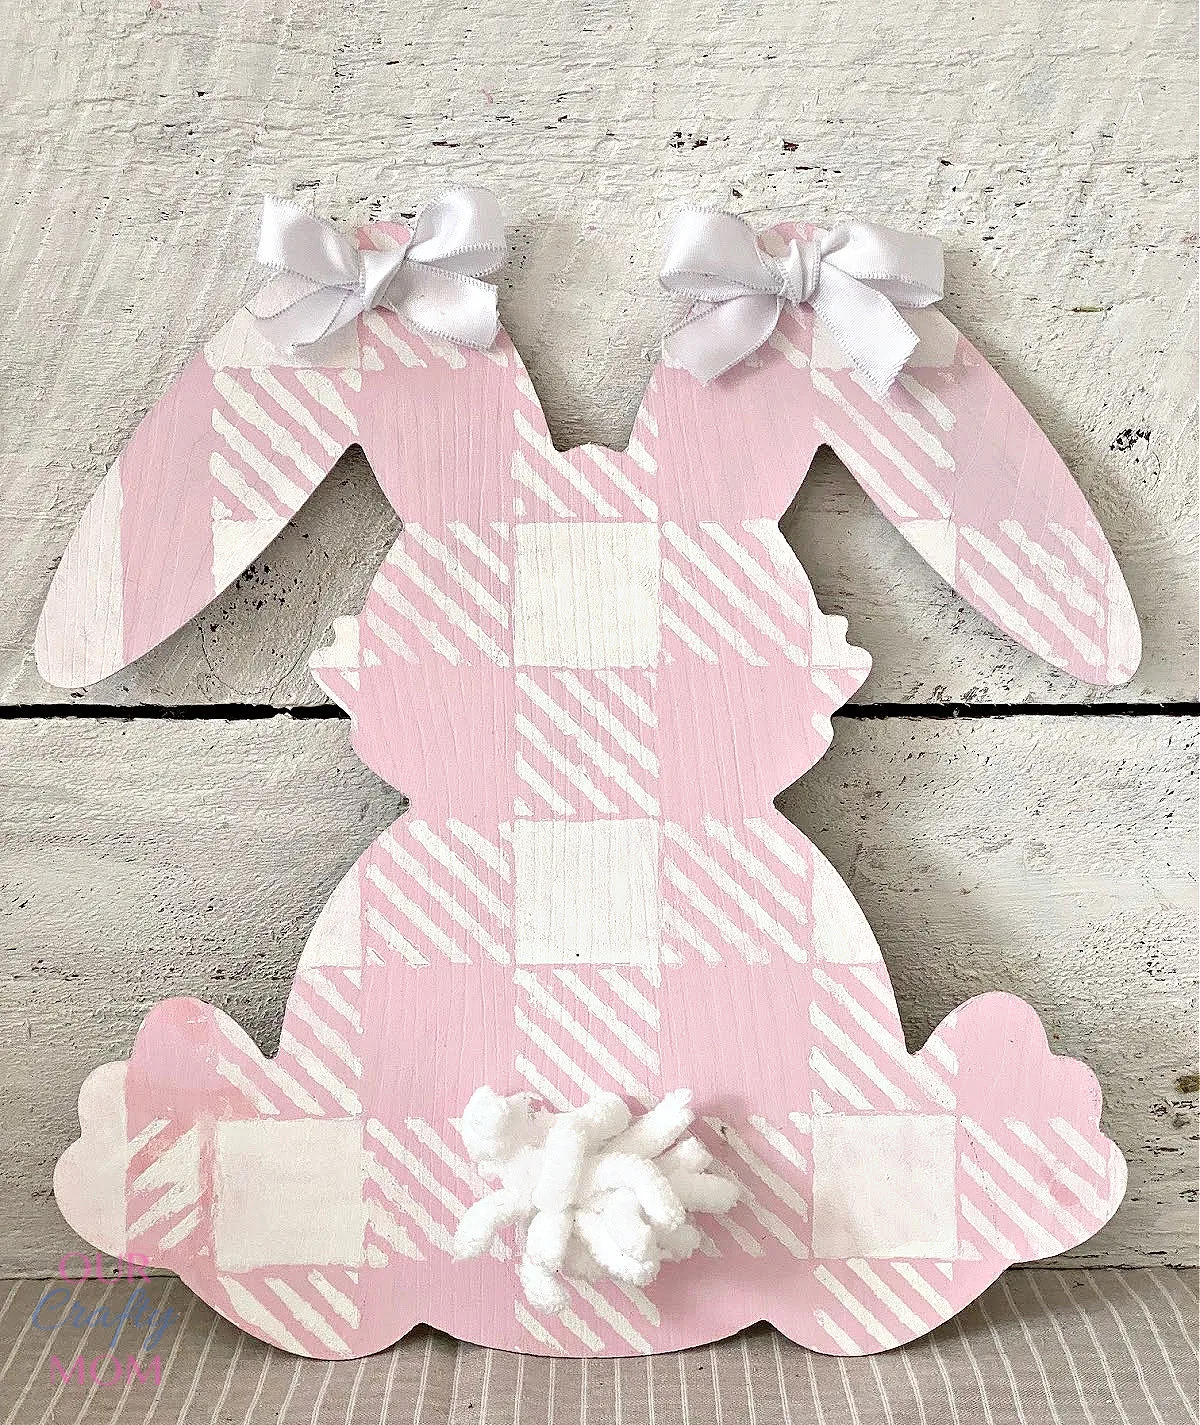
Decorate with your adorable wooden Easter bunny…
Your buffalo check wooden Easter bunny is now ready to hop into your Easter decor!
You can add a piece of twine, ribbon, or even a wood bead hanger if you want to hang your bunny.
Or stand it up on a mantel, side table, or buffet. To give the bunny extra dimension, hang it on a wood sign or old pallet.
This would be just adorable in a kid’s room or nursery too.