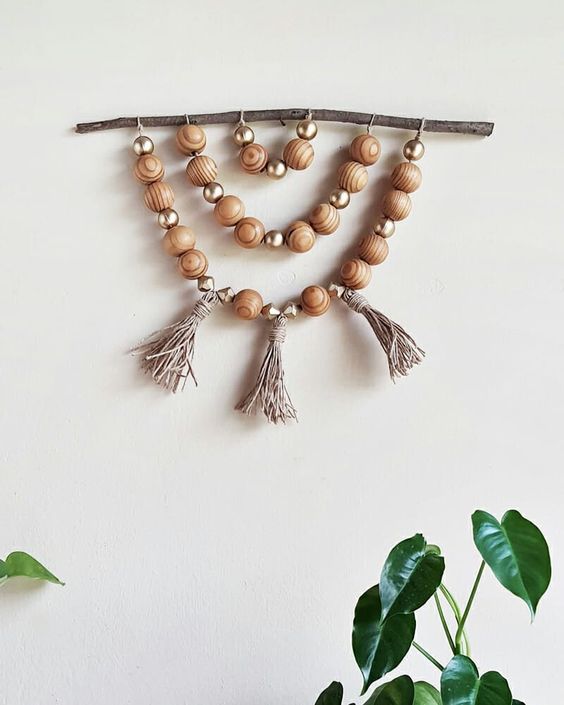
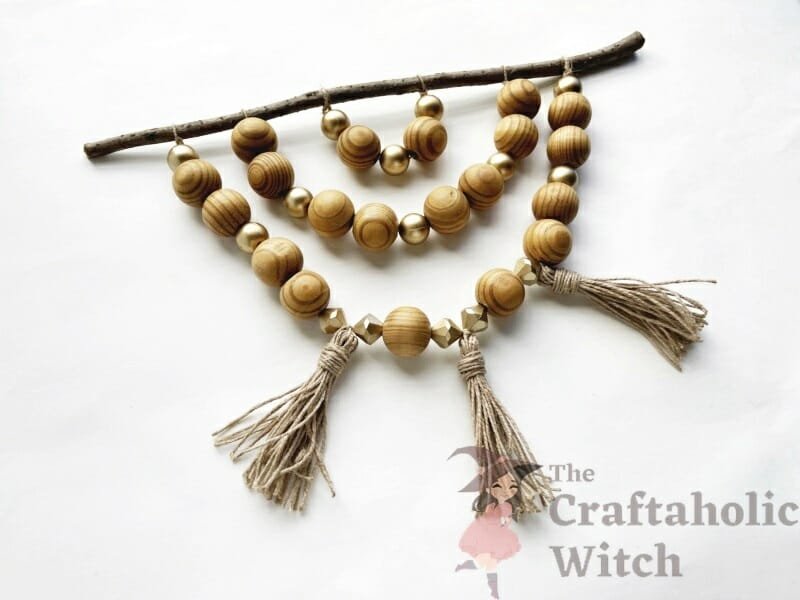
How to Make Wooden Bead Garland with Tassel
Enhance your home decor with this exquisite wooden bead garland featuring a charming tassel detail. Crafted from high-quality wood, each bead is carefully strung together to create a beautiful and unique piece that will add a touch of elegance to any room. The tassel adds a playful element to the garland, making it a versatile accessory that can be displayed on a mantel, shelf, or draped over a mirror. Whether you hang it on a wall, drape it over a vase, or use it as a table centerpiece, this wooden bead garland with tassel is sure to be a conversation starter. Add a touch of rustic charm to your home with this stylish and versatile decor piece that will bring a cozy and welcoming vibe to any space.
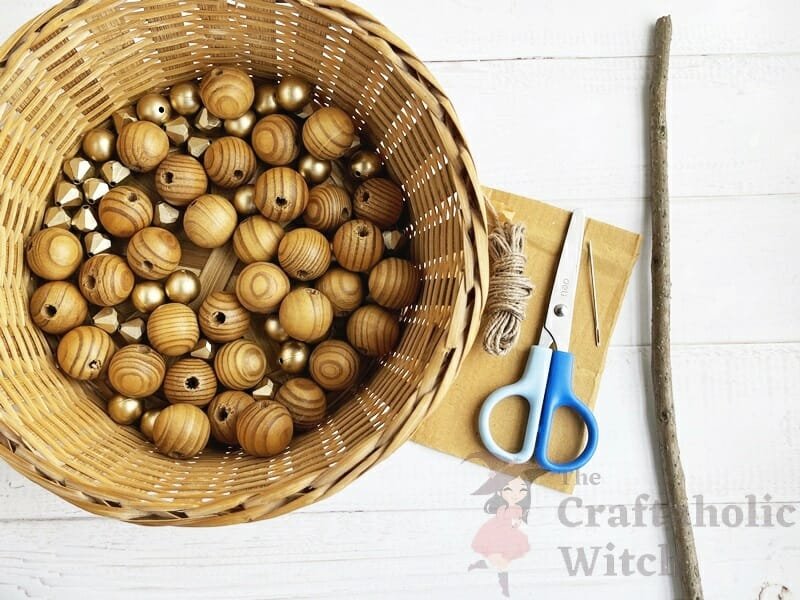
List of Supplies
Tools
- A pair of scissors
- Tapestry needle
- A piece of cardboard
Materials
- Dry twig or stick
- Twine
- Wooden beads
- Different types and colored beads
Step by Step Instructions
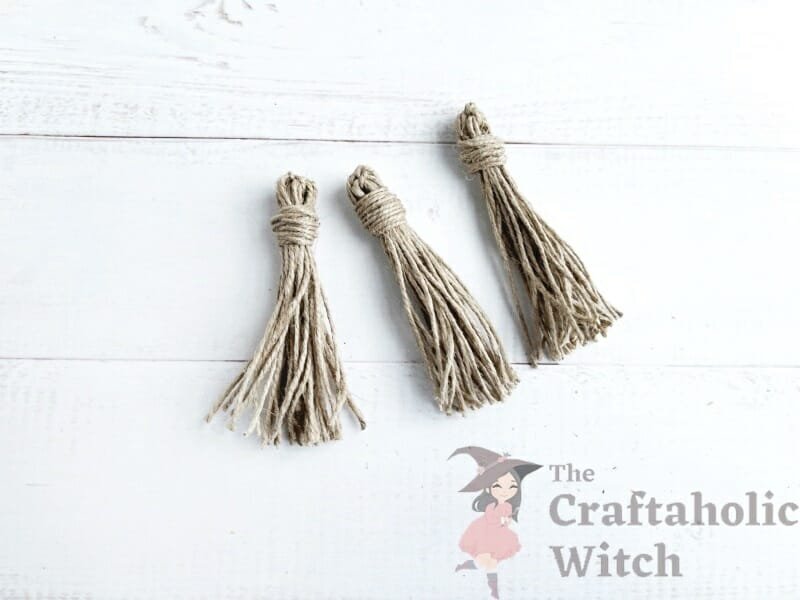
Step 1: Making Twine Tassels
Follow our DIY Tassel Tutorial to make the tassels using twine. We made 3 twine tassels for the wooden bead garland.
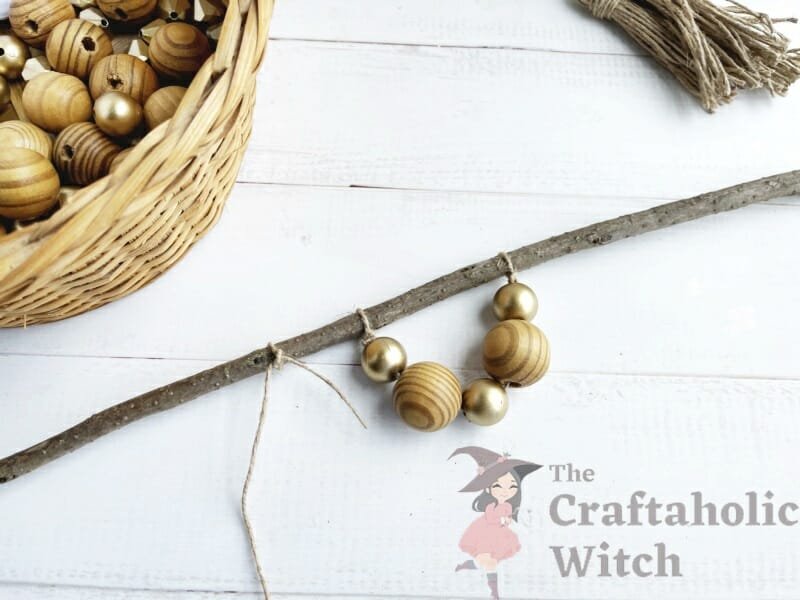
Step 2: Preparing String for the First Layer
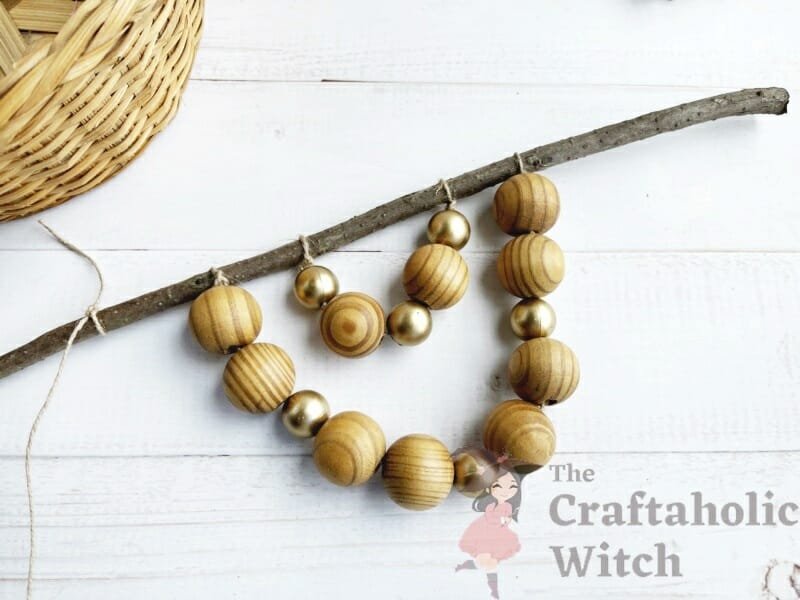
Select a dry and sturdy stick for the wooden bead garland. Measure and determine the number and size of each layer. We’re starting with the smallest layer, around the middle of the stick. Cut out a piece of twine and tie a knot around the stick, slightly aside from the middle.
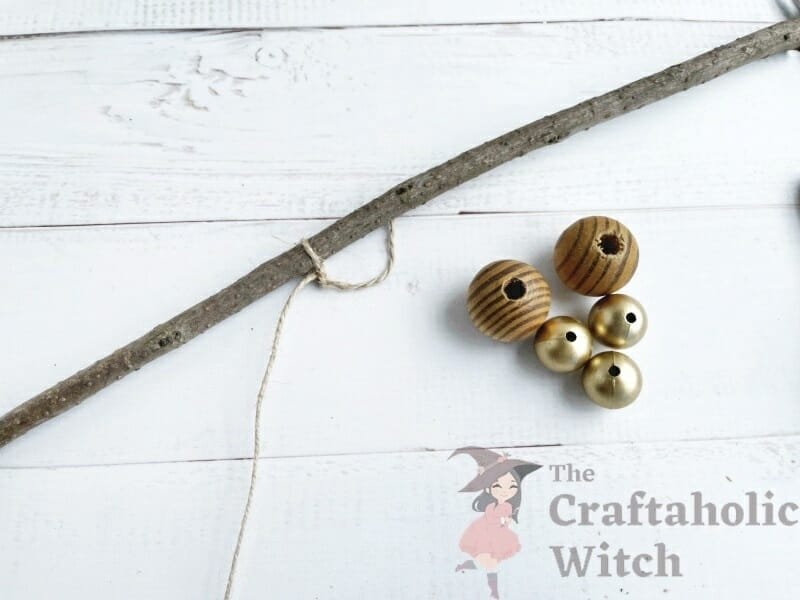
Step 3: Beading the First layer
Insert beads into the tied string, through its open end. We have added 5 beads (2 wooden beads mixed with small golden beads).
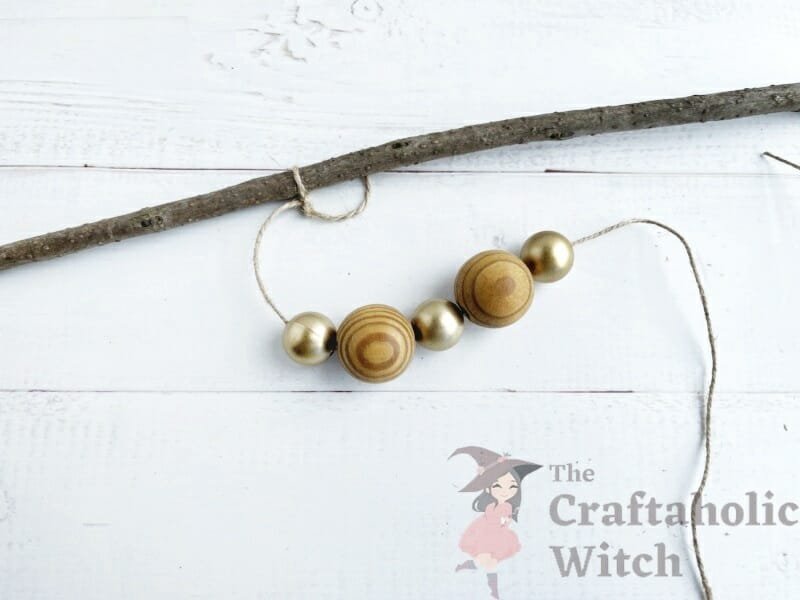
Step 4: Measuring the First layer
Check if the first layer looks nice with the number of beads inserted into the string.
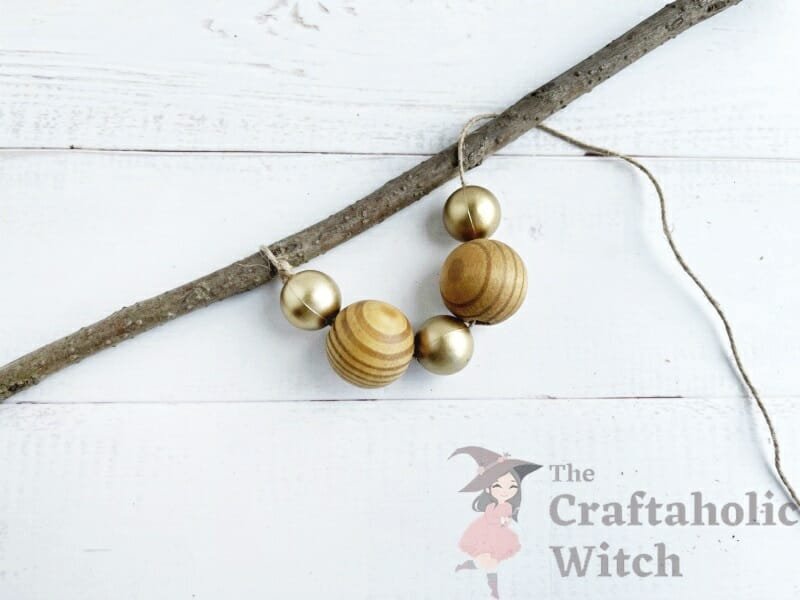
Step 5: Closing the First Layer
Happy with the first bead layer? Tie the open end around the stick by leaving a small gap from the other end of the beading.
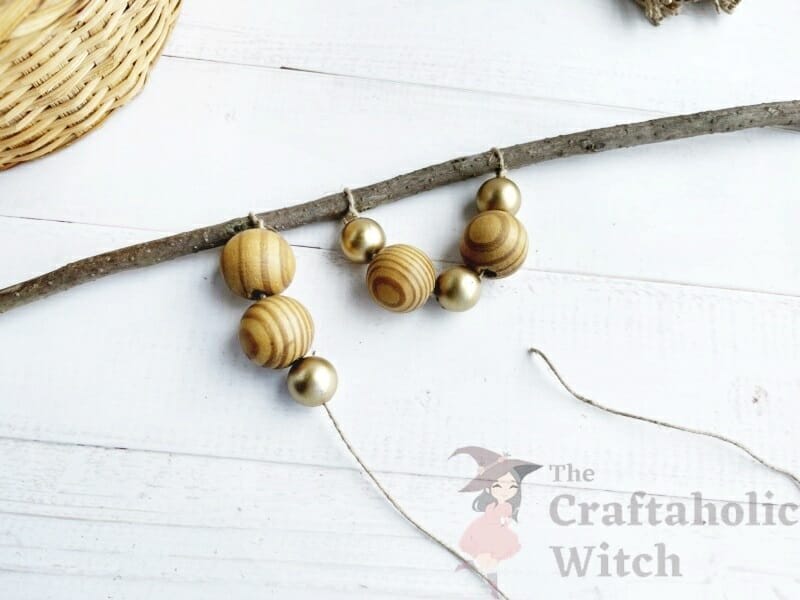
Step 6: Start the Second (Next) Layer
Leave a small gap from the first layer and then tie a string for the second layer. Mix and match different beads along with the wooden beads to give the garland a nice look
Step 7: Closing the Second Layer
Add beads into the second layer and check if the layer looks nice with the first layer. The gap between the first and second layers should be nice and even on all sides.
Step 8: Starting the Next (Third) layer
Similarly, keep a small gap and start the next layer. After adding a couple of beads, attach a tapestry needle to the string and grab the twine tassels.
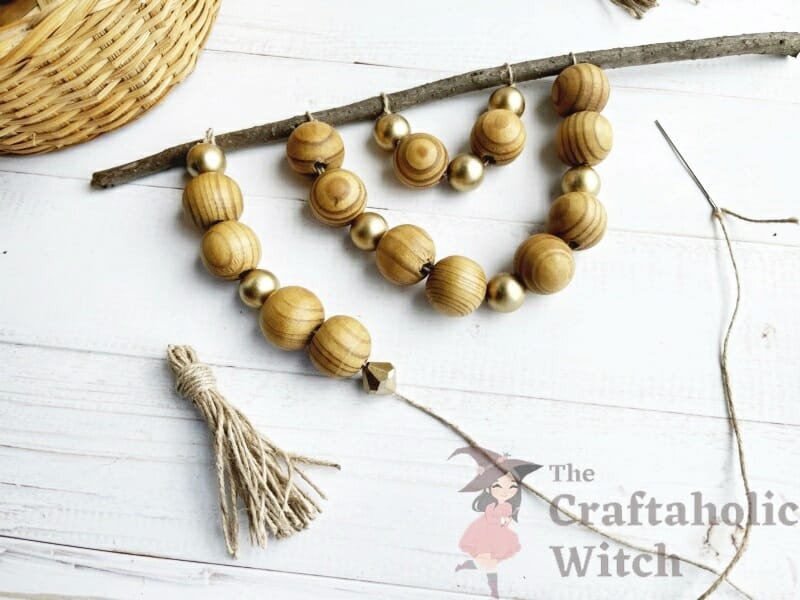
Step 9: Attaching the Tassels
Attach a tassel into the beaded string (the third string). Push the tassel all the way adjacent to the last bead.
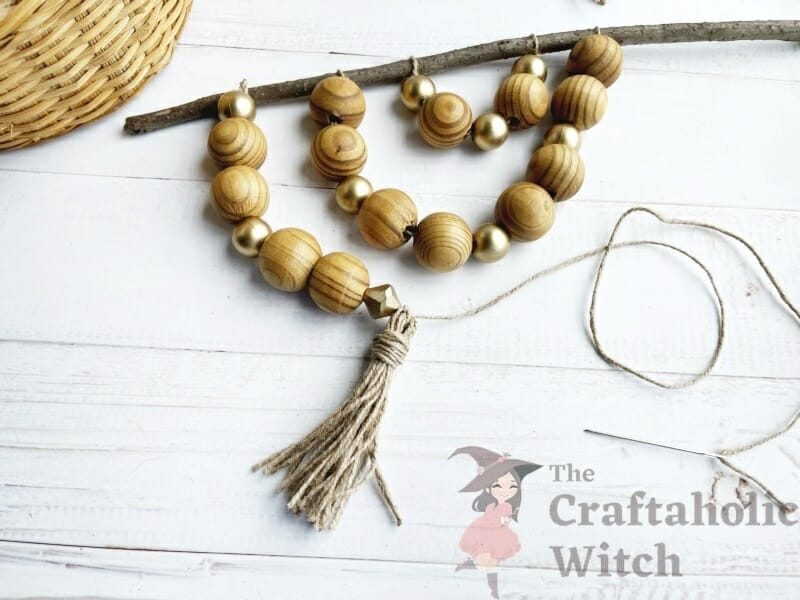
Step 10: Completing the Third Layer
After adding the first tassel, add a few more beads, and then add the second tassel. We have added a total of 3 tassels with some beads between them. Check if the length of the third layer looks nice with the 2 other layers.
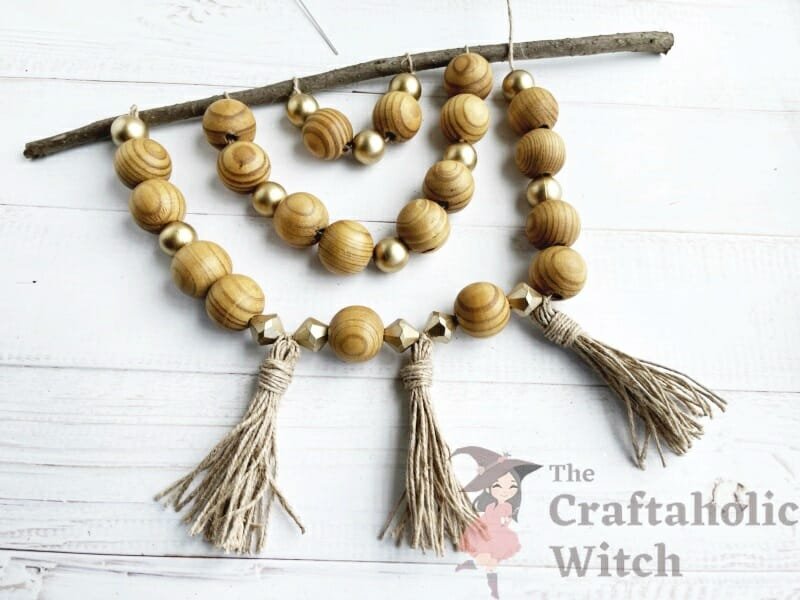
Step 11: Completing the Wooden Bead Garland
happy with the third layer’s beading? Tie the open end around the stick tightly. Tie 2 tight knots to give it a secured finishing.
Tips for Beginners on Making Beaded Garland Decor
If you’re a beginner in beading or home decor crafting, here are some tips you can follow.
- Make sure to select a sturdy and dry stick for the garland, as wooden beads are heavy.
- Mix and match 1 or 2 different colored and types of beads along with the wooden beads.
- Use beads with big holes, so that they can be beaded into a twine easily.
- Use a tapestry needle if you have difficulty adding the beads to the string.
- After tying the strings with the stick, there should be a small length remaining. Insert that small amount of string through the beads adjacent to it.
- If you’re not confident about the tied strings or if the beads are heavy, you can apply hot glue to the tied knots for extra security.