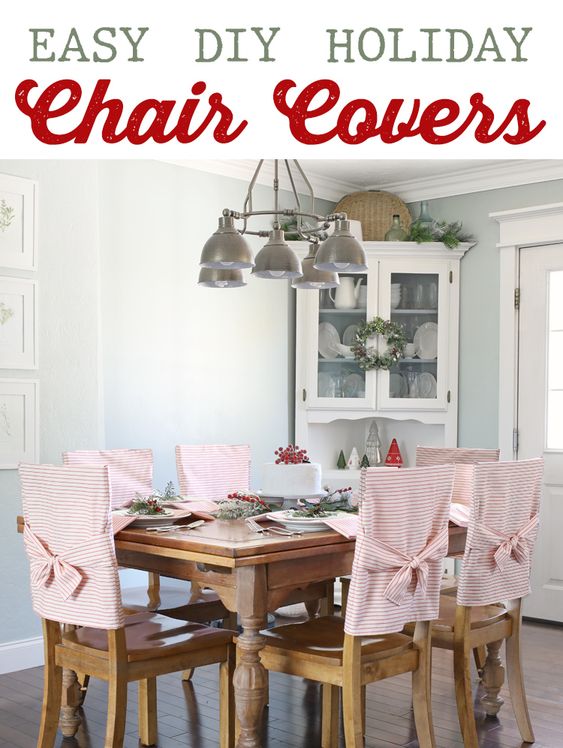
Easy DIY Chair Back Covers
Are you tired of the same old look of your chairs? Do you want to add a touch of elegance and style to your dining area or living room? Look no further! DIY chair back covers are the perfect solution to give your chairs a fresh new look without breaking the bank. With just a few simple materials and a little bit of creativity, you can transform your chairs into stunning pieces of furniture. Whether you prefer a sleek and modern design or a more rustic and cozy feel, there are endless possibilities when it comes to DIY chair back covers. Not only are these covers easy to make, but they also offer a budget-friendly alternative to buying new chairs. By repurposing your existing chairs and adding a stylish cover, you can achieve a whole new look without spending a fortune. So why wait? Grab your sewing kit, unleash your creativity, and transform your chairs into statement pieces that will impress your guests and make you fall in love with your space all over again.
Materials Needed
- Waverly Inspirations Fabric
- Coordinating Thread
- Sewing Machine
- Fabric Scissors or Rotary Cutter
- Measuring Tape
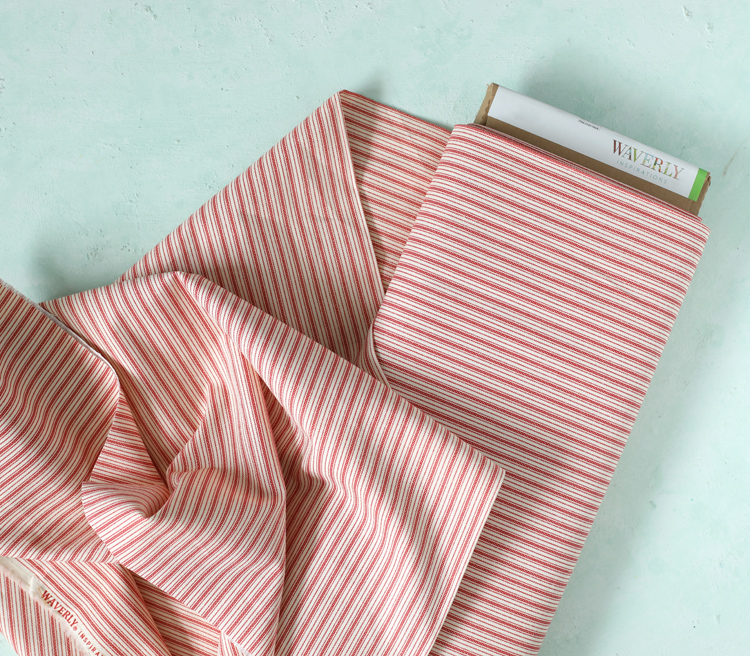
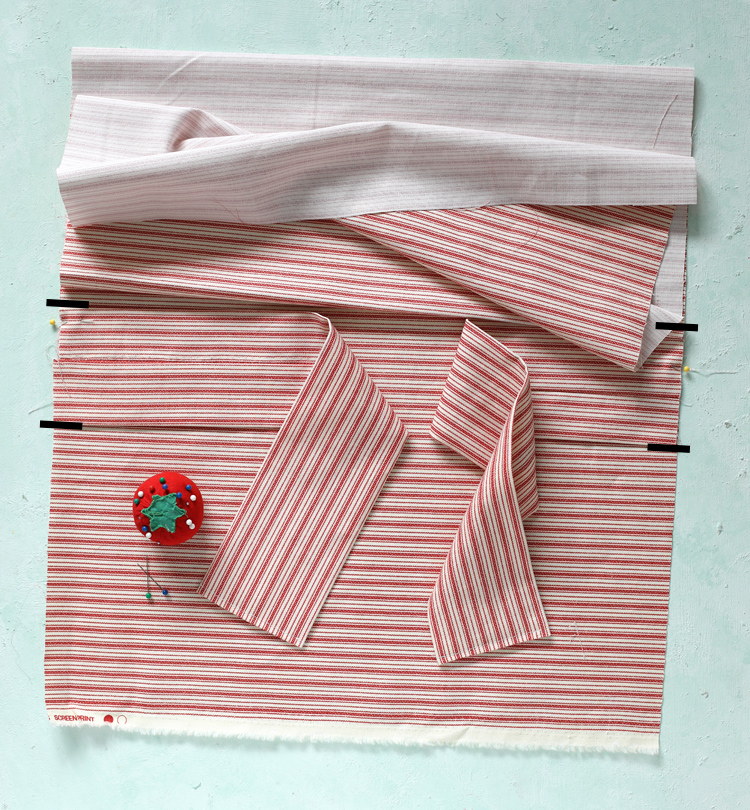
I chose red and white ticking stripe fabric, but there were other great options that would be so cute for the holidays. You can see everything available at Walmart.com. Each chair cover takes right around 1/2 yard of fabric, depending on the size of your chair. Definitely measure before buying fabric though!
Instructions
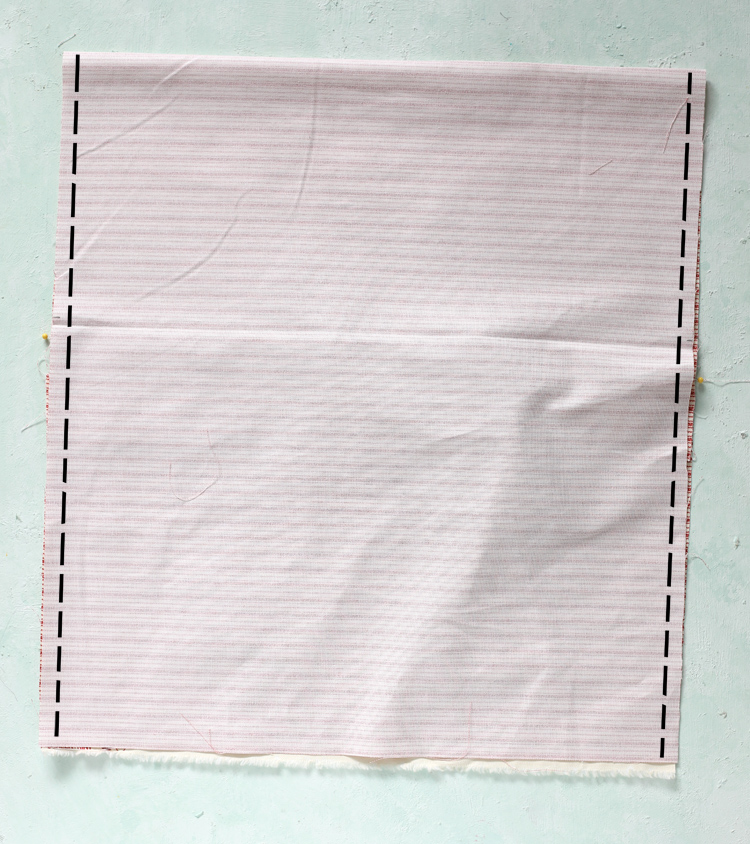
Step 1: Measure the width of the top edge of your chair back. Then measure the length from the top edge of the chair down to however long you would like your cover to be, anywhere above the seat that you’d like. Lastly, measure the thickness of the top edge of your chair.
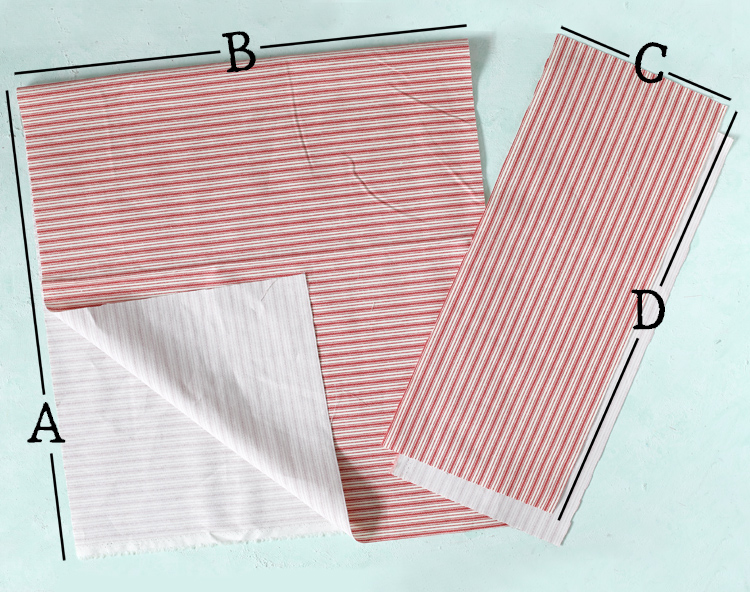
Step 2: For each chair cover, you will cut three rectangles.
- Main Cover Piece
[A] WIDTH: chair width + 1 inch for hemming
[B] HEIGHT: chair length x 2 + chair thickness + 2 inches for hemming - Decorative Knot
Cut two 7 x 18 inch rectangles (measurements [C] and [D] in the photo). These can be any size or width you like, as long as the two pieces are long enough to reach across the chair back and tie together. If you make the rectangle double the length, you’d have enough to tie a bow instead of just a knot, which would also be cute. You could also substitute decorative ribbon for a whole different look.
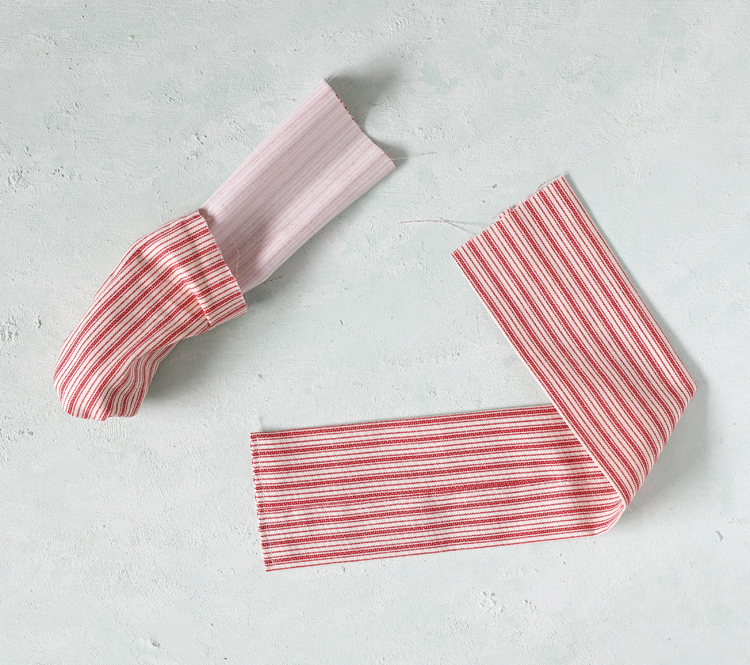
Step 3: Fold the two knot pieces in half longways with right sides together. Sew along the open edge. Flip right side out. Press. Fold one end under and sew closed.
Step 4: Flip the main cover piece so that right sides are together. Sandwich each knot piece inside the cover, lining up the unfinished edge of the knot with the outside edge of the cover. Pin in place.
Sew down both sides of the cover to create a pocket with one open end.
Step 5: Hem the bottom edge of the chair cover by rolling the fabric over 1/2 inch, then 1/2 inch again, pressing and sewing. Then press the entire chair cover, especially along all of the sewn seams.

Step 6: Slip the chair cover over the back of your chair and tie a pretty knot or bow.
