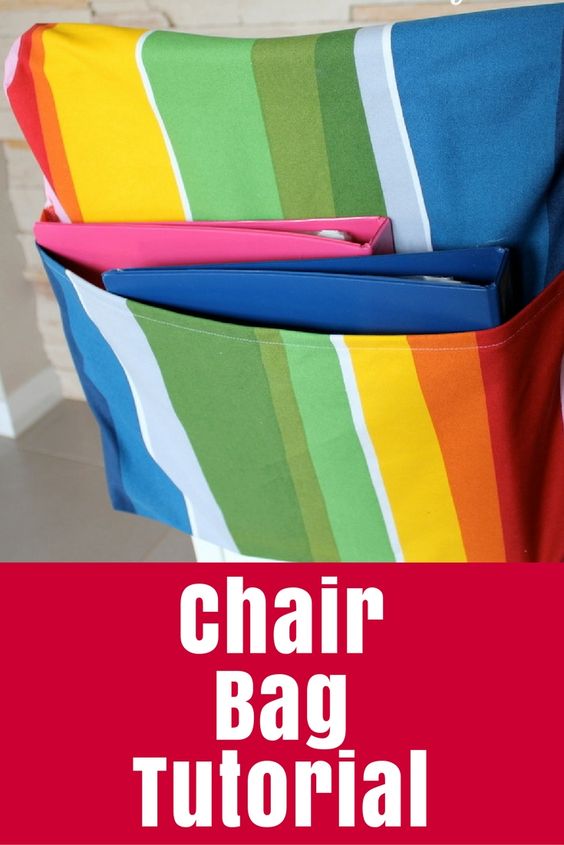
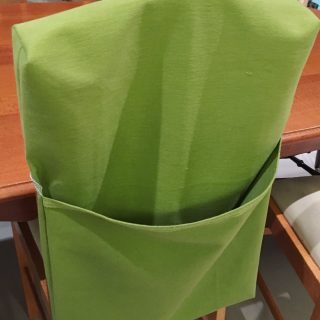
Simple Chair Bag
Discover the latest sewing pattern for creating your very own chair bag! This unique design allows you to customize the size, fabric, and style to perfectly match your home decor. Whether you're looking to add a pop of color to your living room or need a convenient storage solution for your office chair, this sewing pattern has you covered. With step-by-step instructions and helpful tips, you'll be able to sew up a stylish and functional chair bag in no time. This sewing pattern is perfect for beginners and experienced sewers alike, offering a creative way to update your furniture without breaking the bank. From choosing the perfect fabric to adding embellishments like pockets or trim, the possibilities are endless with this chair bag pattern. So grab your sewing machine and get ready to transform your chairs into stylish statement pieces with this easy-to-follow pattern.
What You Need:
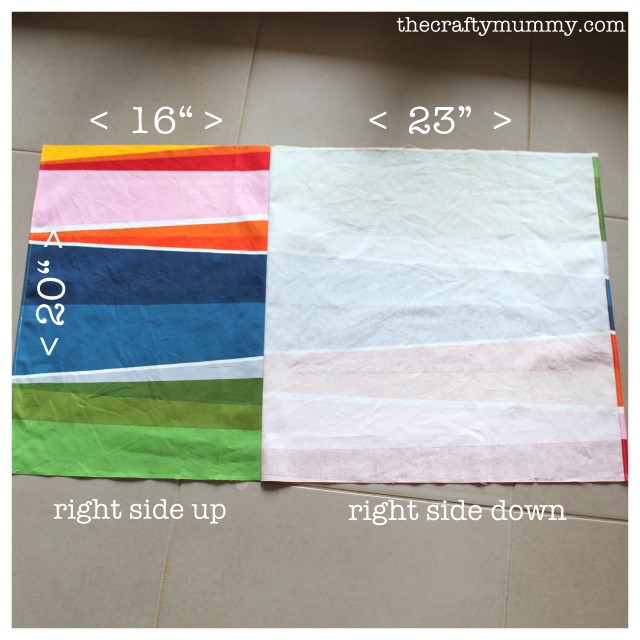
- fabric – if it will hold heavy books, I’d go for heavier weight fabric, 20″ x 40″ or 51cm x 102cm
- (Note: all my measurements were trial and error so they could be out a cm or two here and there)
- the usual sewing supplies – sewing machine, pins, thread, iron, etc.
- I’d recommend a denim needle if you are sewing heavier fabric
Step 1:
Start with cutting your fabric to 20″ x 40″ (51cm x 102cm). Then cut it across the width at 16.5″ (42cm) so you have two pieces. Turn one piece over and join them back together. You should have a right side and a wrong together as you pin them to sew. I sewed a seam of about 1/4″ (5mm), then trimmed it with my pinking shears, but you could also overlock it or zig zag to stop fraying.
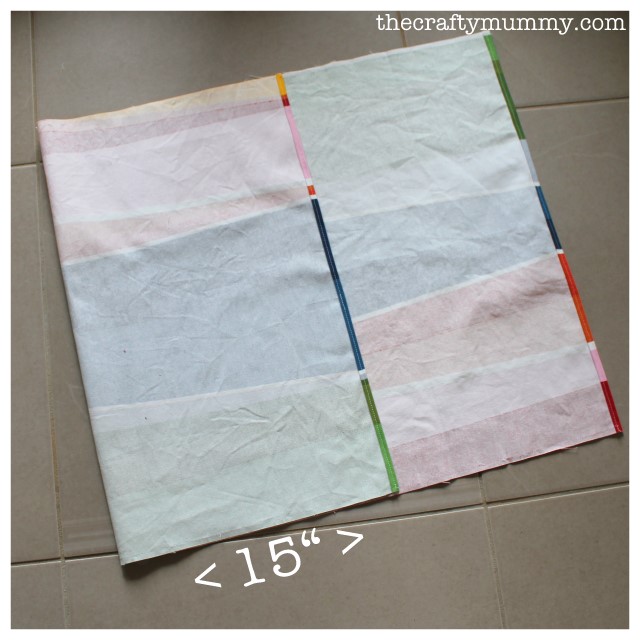
Step 2:
Fold and stitch a small hem at each end to finish those edges. It should now look something like mine below:
Step 3:
Lay it on the floor like mine with the shorter piece to the left and right side up. Take the left hand edge and fold it over about 15 ” (38 cm). Pin it in place. This will be the pocket for books.
Step 4:
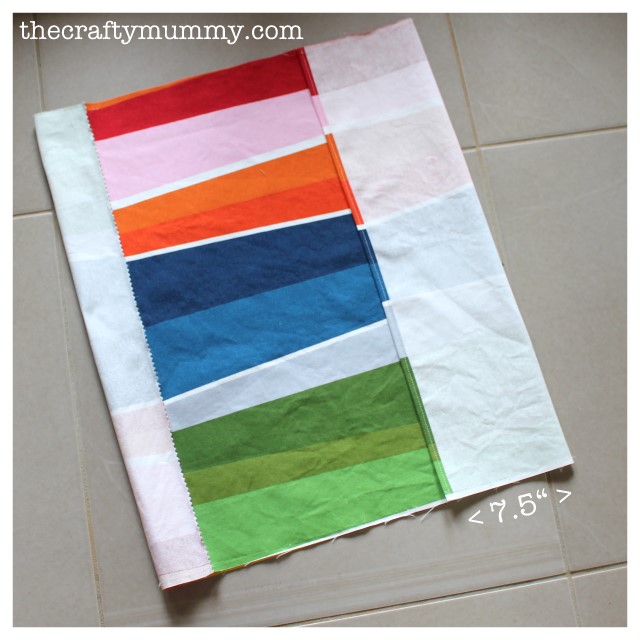
Turn the whole thing over so the right hand piece is right side up. Take the right hand edge and fold it over about 7.5″ (20cm). Pin it in place. This will be the pocket that goes over the top of the chair. The two hemmed ends should now be almost on top of each other. Don’t overlap them though – I learnt that by trial and error too!
Step 5:
Stitch down each side to hold your two pockets in place. Then trim the edges with pinking shears or zig zag the edges to stop fraying.
Step 6:
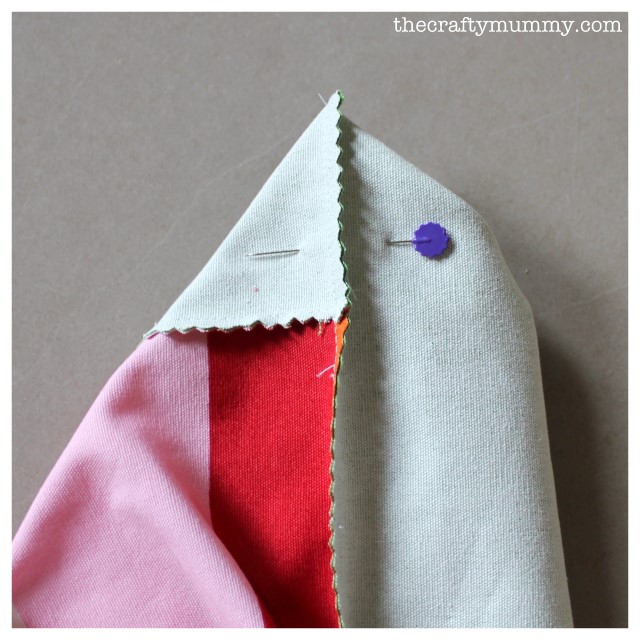
The next step is to box the corners so that they are a little wider to fit over your chair and accommodate your books. There are a few different ways to do this but this way works for me. I’m creating a “box” about 1″ (2.5cm) wide.
While your pockets are still inside out (so don’t turn them through yet) do this at each corner: Pull the seam apart and press it flat again to form a little triangle. The seam line should run up the middle of your triangle like in the picture above. Pin it flat then stitch across the “base” of the triangle about 1/2″ (1.25cm) down from the point. Look at the next picture to see what I mean:
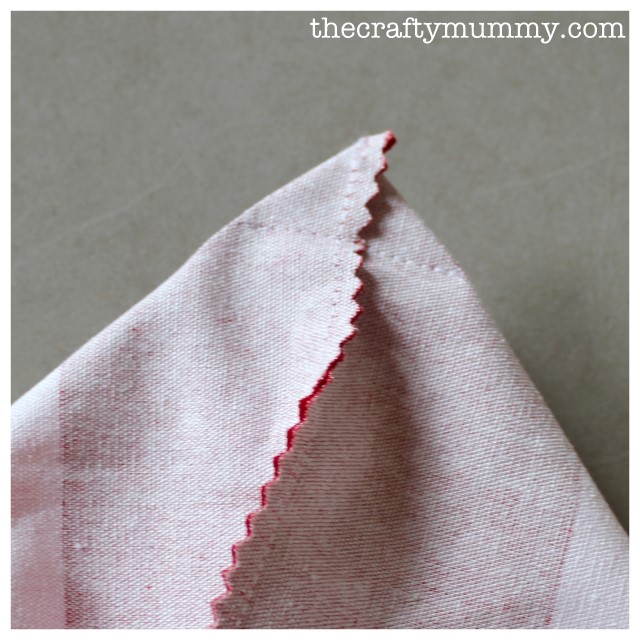
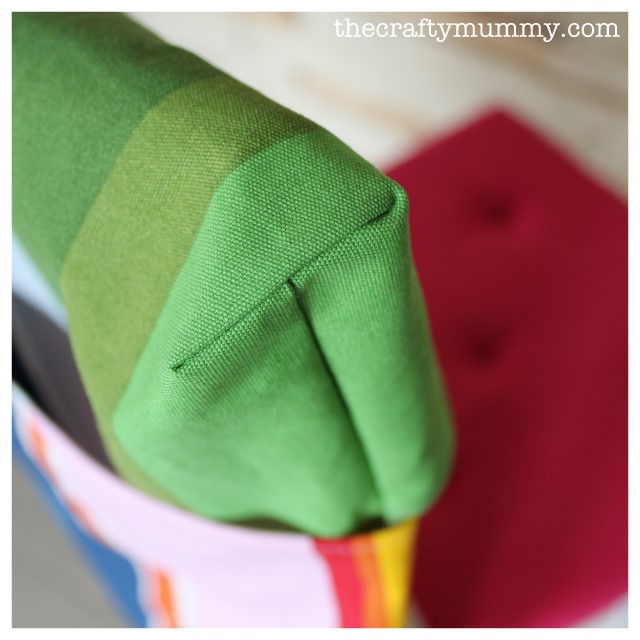
Do that on each of the corners then turn the two pockets through. They should look like this on the outside:
Done!