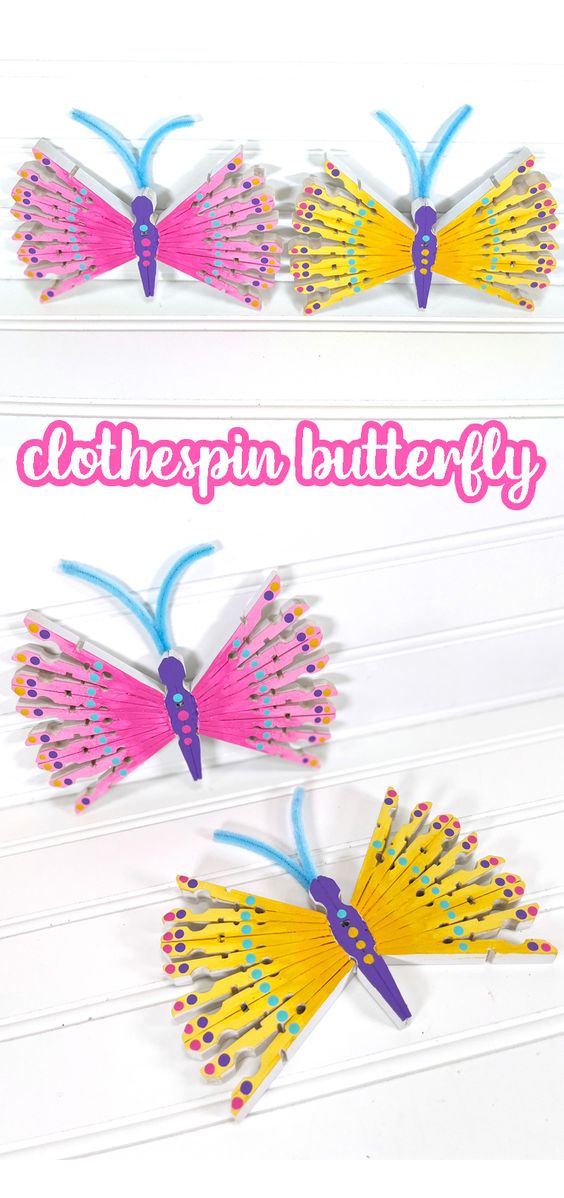
Clothespin Butterfly
The Clothespin Butterfly is a delightful and whimsical craft that is perfect for both children and adults alike. With just a few simple materials, you can create a beautiful and colorful butterfly that will bring a touch of nature into your home. This craft is not only fun to make, but it also serves as a wonderful way to add a touch of charm to any space. This project is easy and fun to make and it can be completed in no time. This project is a great addition to your handmade projects. It will definitely put a smile on your face once completed.
What you need
- Wooden spring-style clothespins
- Acrylic Paint or a kid-friendly alternative. Used in this tutorial: white, light and medium pink, pastel and regular yellow, blue, and purple
- Chenille stem
- Glue gun and sticks (adults only)- if dry time isn’t a problem for you, you can use white glue, tacky glue (better hold until set) or wood glue (strongest).
- Paintbrush
- Scissors
How to Make a Clothespin Butterfly
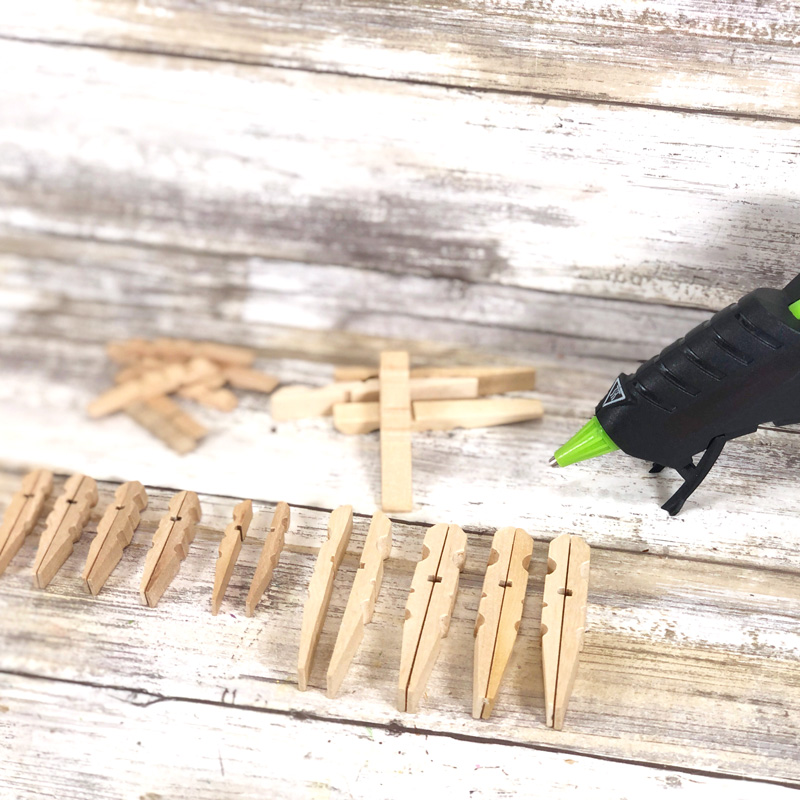
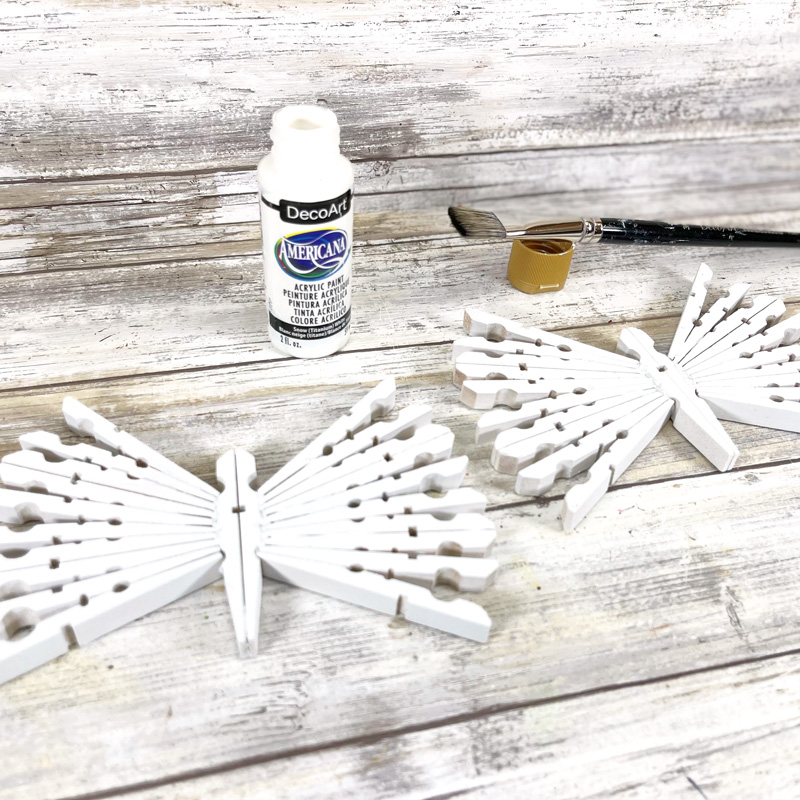
1. Gather all supplies. Full size wooden clothespins can be found in the laundry section of the dollar store or on Amazon. Remove the metal spring from 11 full size wooden clothespins for each of your clothespin butterflies.
For each Butterfly, glue together the flat sides of five full clothespins (10 halves). Leave the other six clothespins (12 halves) as separate pieces.
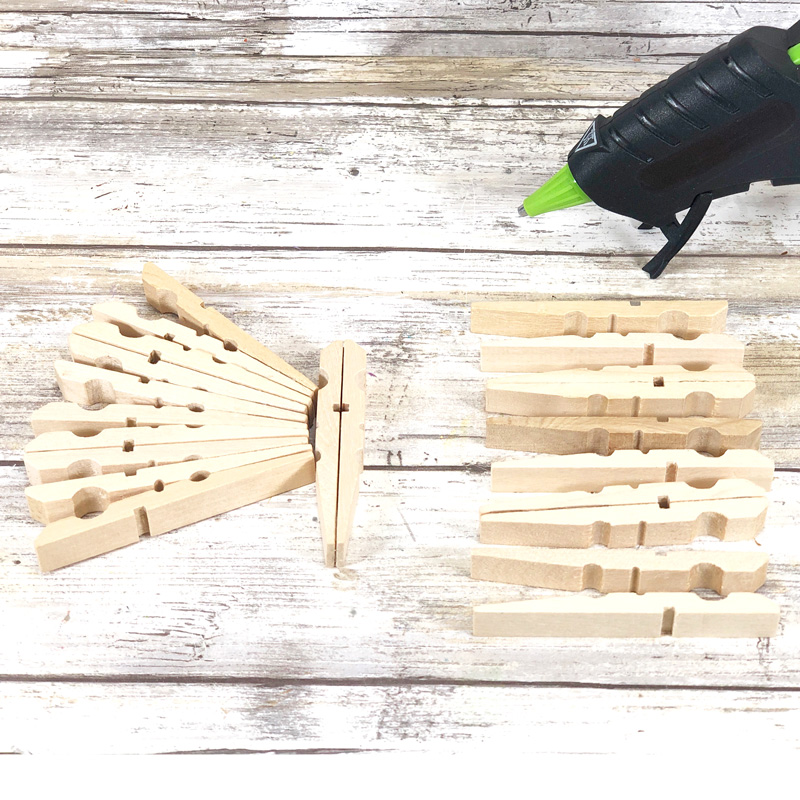
2. Use one of the glued-together clothespin sets for the body. Line up each wing in the following order on your work surface: half, half (angled sides facing), full, half, half (angled sides facing), full, half, half (angled sides facing). Glue the wings together evenly at the base. You’re creating a mirror image of the first side for the left.
You’ll see that you can glue the pointed angled portion of the clothespin (which will face the butterfly body) flat against each other. Allow it to fully set before attempting to move a wing.
Glue the wings to the right and left side of the clothespin butterfly body. You’ll want to hold the first wing in place until the glue completely sets, and only then glue on the second wing. For the first, you can move the body towards the wing to glue it in place before your first wing has really set (as long as the body has.)
The wings look fabulous glued between the two notches where the spring of the clothespin used to fit. It should more or less fit there, so that he wider top of the clothespin looks almost like a head.
3. Paint your butterfly – and have fun, get creative with it! You can do it however you’d like, but I’ll share the specific process created here.
Paint the front and all sides of your clothespin butterfly with white paint to “prime” it.
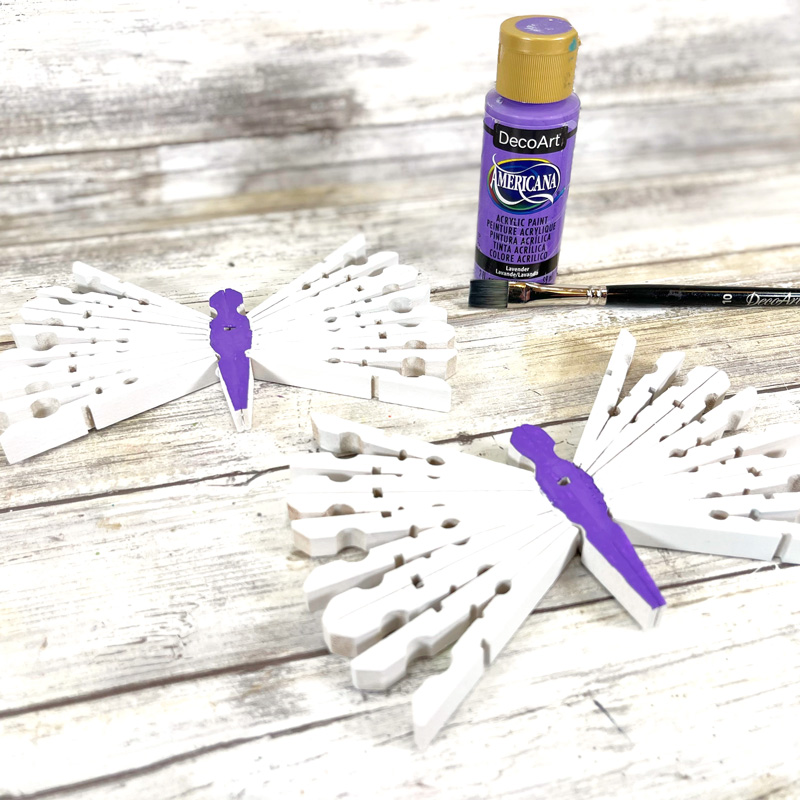
4. When your base layer is dry, paint the body purple.
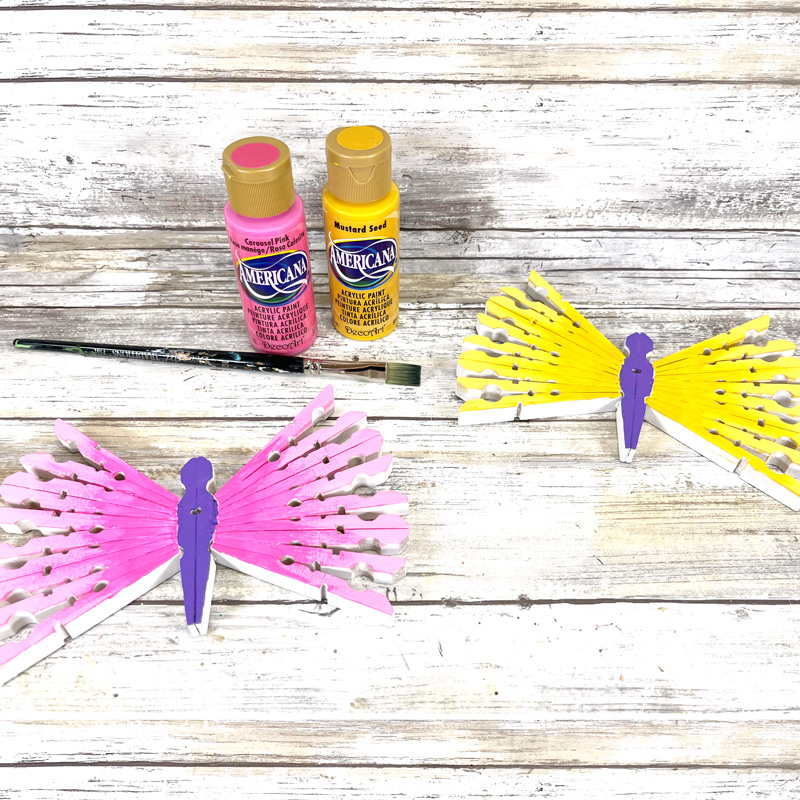
To create some shading: Apply the lightest shade of pink or yellow acrylic craft paint to the Butterfly wings with a paintbrush. Allow it to dry.
Paint the inner wing, close to where it meets the body, with the darker shades of pink and yellow acrylic craft paint, feathering the edges in to blend the colors. You can also do this while the light color is still wet if you have patience to blend a little more.
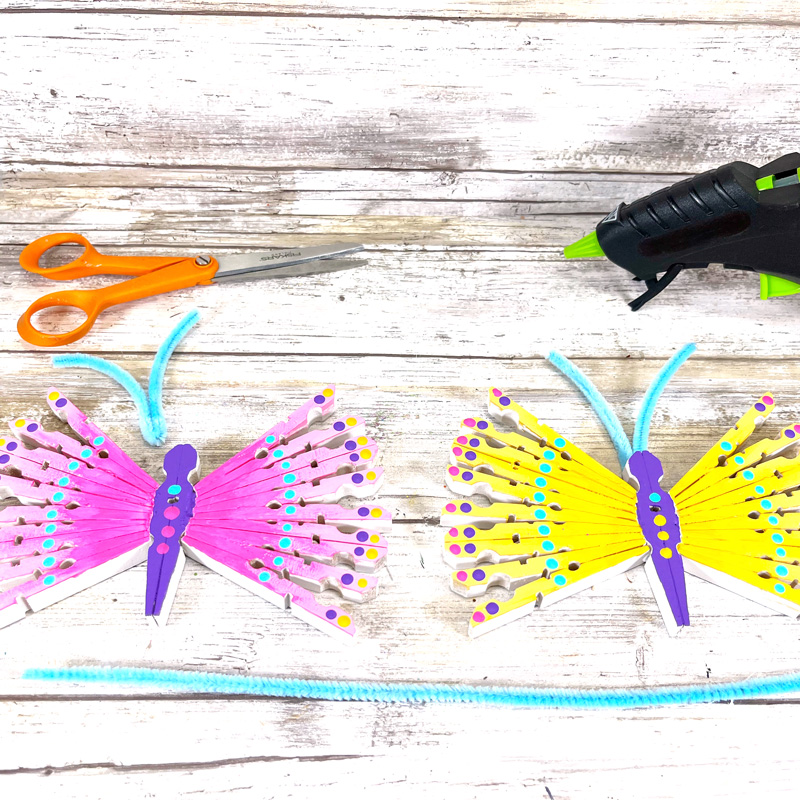
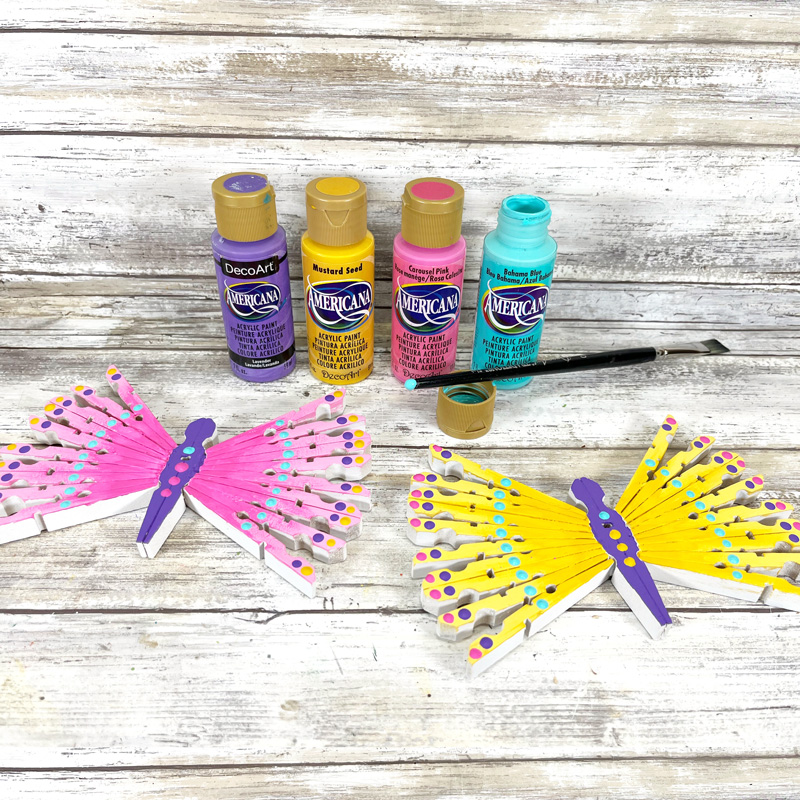
5. Decorate your clothespin butterflies! To add polka dots using paint, take the paints in in blue, and the darker shade of pink and yellow acrylic craft paint. Dip the end of a paint brush in paint and dot the surface.
6. Cut a 12” (standard) chenille craft stem in half using scissors, and then bend it in half. Glue it to the top back of your butterfly as antennae. A hot glue gun will really come in handy here.