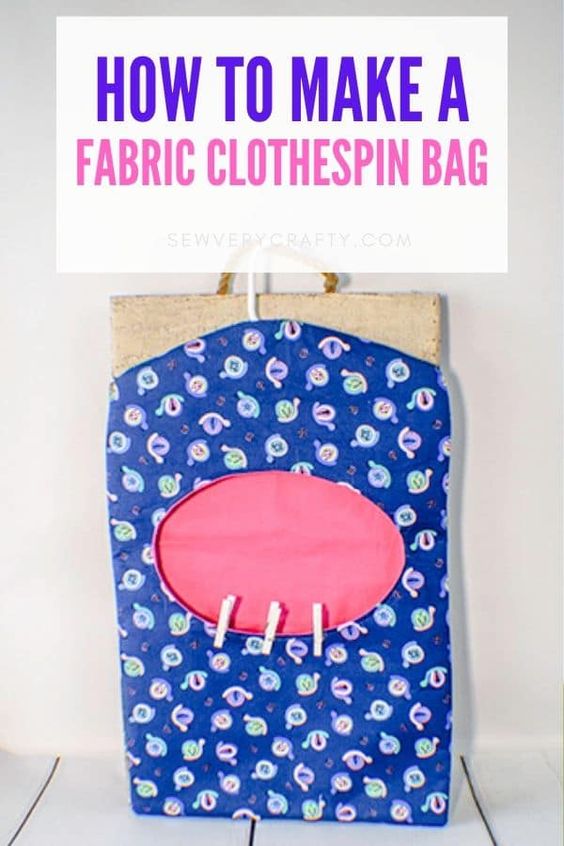
How to Make a Clothespin Bag
Looking for a new sewing project that is both practical and stylish? Look no further than the clothespin bag sewing pattern! This pattern is perfect for those who love to hang their laundry out to dry and want a convenient way to store their clothespins. With this pattern, you can create a unique and personalized clothespin bag that will add a touch of charm to your laundry routine. This pattern provides you with the opportunity to showcase your sewing skills while creating a functional and beautiful accessory for your laundry area. Whether you prefer a classic design or want to experiment with different fabrics and embellishments, this pattern allows you to unleash your creativity and make a clothespin bag that reflects your personal style. So, grab your sewing machine and get ready to embark on a fun and rewarding sewing adventure with the clothespin bag sewing pattern!
What you will Need: How to Make a Clothespin Bag
- Oval Pattern
- 1/2 yd outer fabric and lining fabric
- 1/2 yd Pellon 808 or similar interfacing (optional)
- 1 child’s hanger
- Pattern Paper (Optional)
- Standard sewing supplies
Step 1: Create your Pattern
You can create your pattern directly onto your fabric or use pattern making paper. I decided to use the paper I use for drawing patterns because my fabric was so dark. The paper I use for drawing patterns is actually the paper they use in Doctor’s offices to cover the table you sit on. It works perfect. To draw this pattern simple place your child’s hanger on your fabric. Trace around the hanger about 1″ away and then straight down the sides to a length of about 17″.
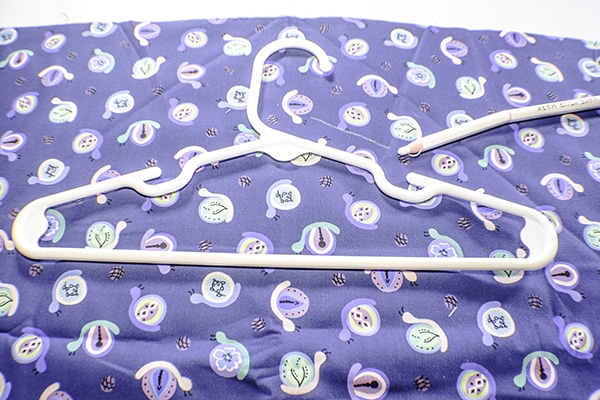
Trace around your hanger
Step 2: cut your fabrics
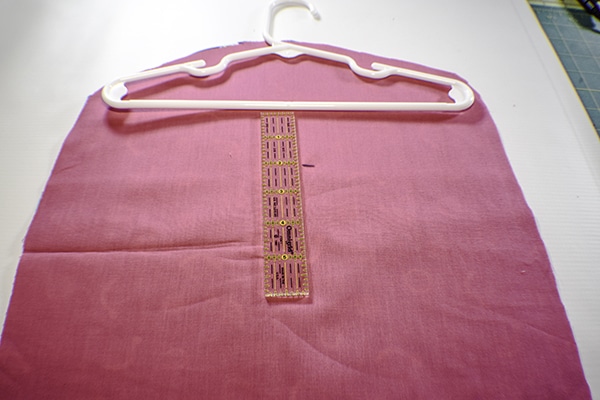
Cut 2 of your pattern from the outer pieces and two from your lining pieces and interfacing.
Step 3: fuse the interfacing
If you are not using fusible vinyl, outdoor fabric, or a coated fabric you may want to use interfacing. If you do, fuse interfacing to the two outer pieces only,
Step 4: Add the oval
Place one outer piece and one lining piece right sides together and pin. Measure down 2″ from the bottom of the hanger and draw a circle or oval. Stitch around the oval through both layers. Cut a hole about 1/2″ inside the oval. Clip around the curves. Push the fabric through the hole so that the fabrics are right sides out and press. Top stitch around the oval.
Measure down 2 inches
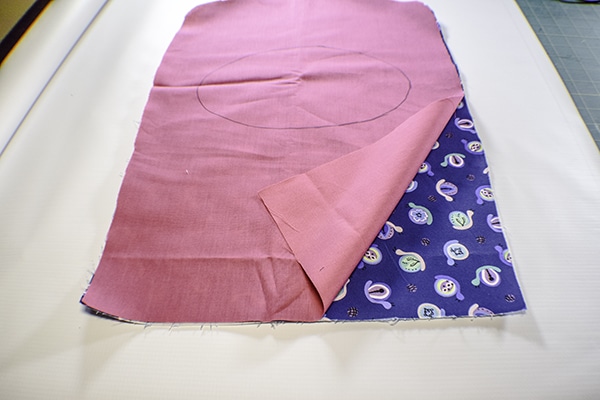
Draw the circle on the wrong side
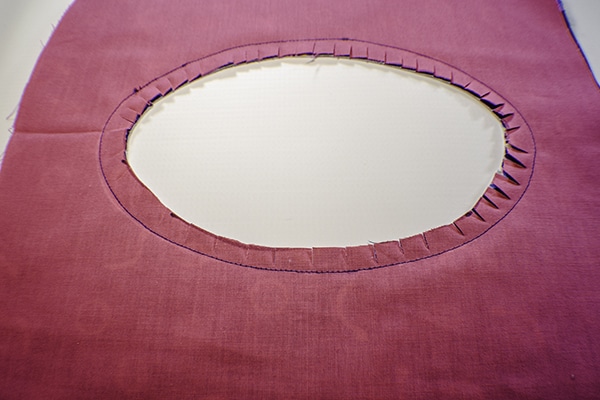
Clip the curves
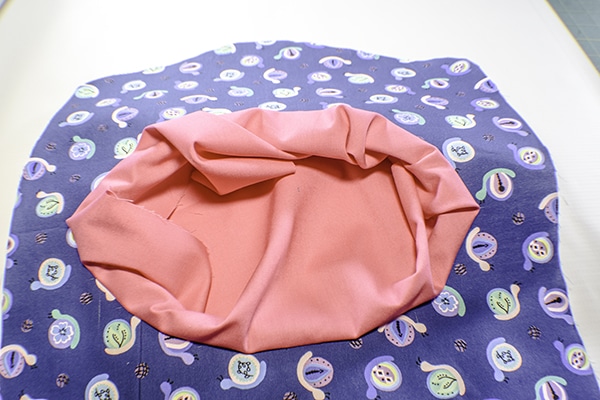
Turn the bag

Press
Step 5: add the lining back
Take the second lining piece and place it right sides up on your work surface. Place the pieces with the hole on top. Stitch the two lining pieces together leaving a hole at the top for the hanger.
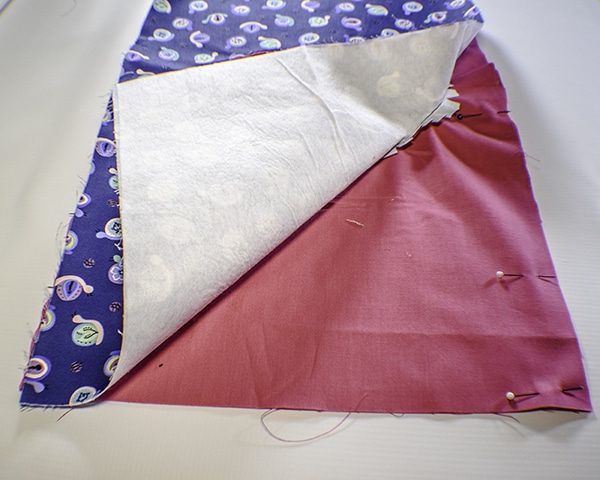
Add the back lining
Step 6: Add the outer back
Place the second outer piece right sides together and stitch all the way around leaving the hole at the top for the hanger and an opening at the bottom for turning. Turn the bag right sides out and press.
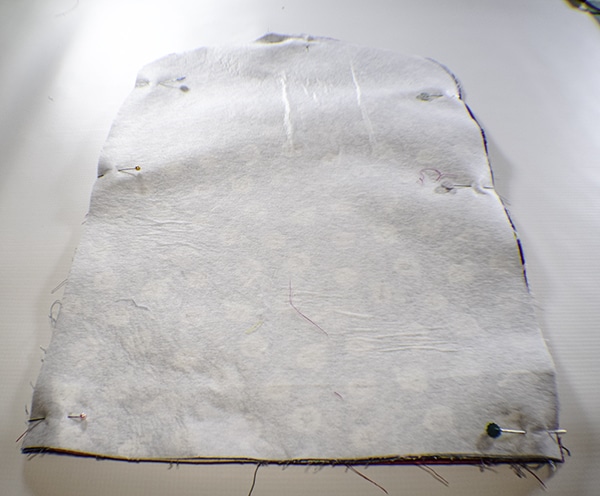
Add the back
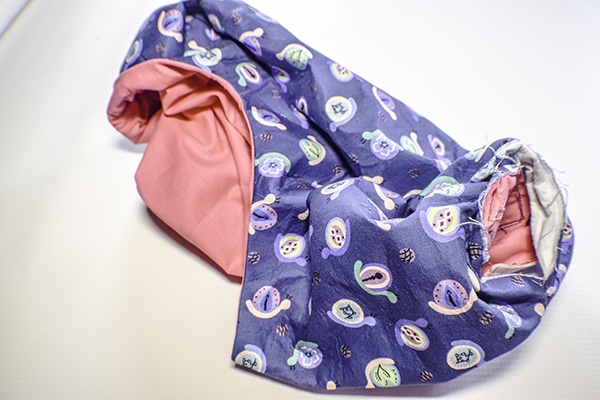
Turn right sides out
Step 7: Finish the bag
Close the opening at the bottom using ladder stitch. If you are unfamiliar with ladder stitch check out the video below. Stitch the lining and outer fabric together at the top hole also using ladder stitch. Insert the hanger through the oval and through the top hole and you have finished your clothespin bag.
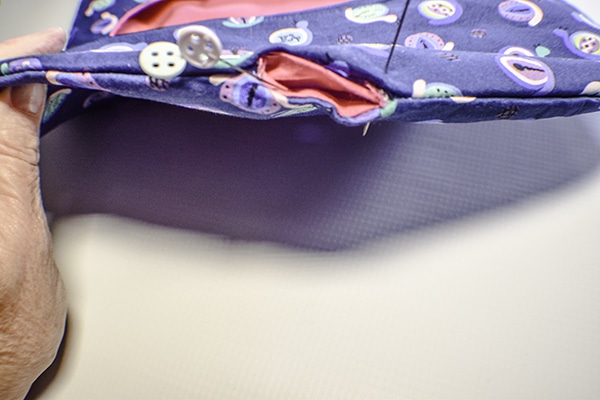
Stitch the top
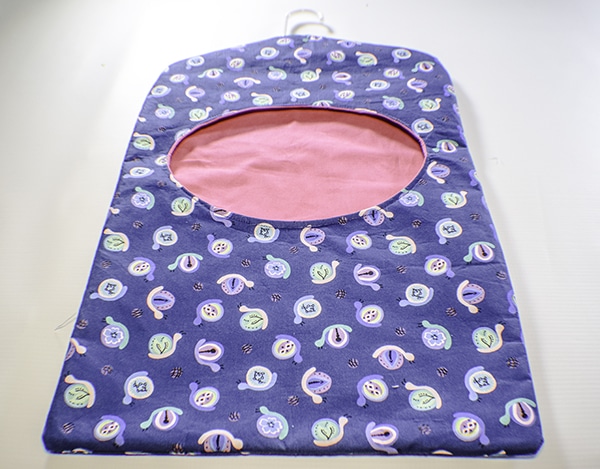
Finished bag