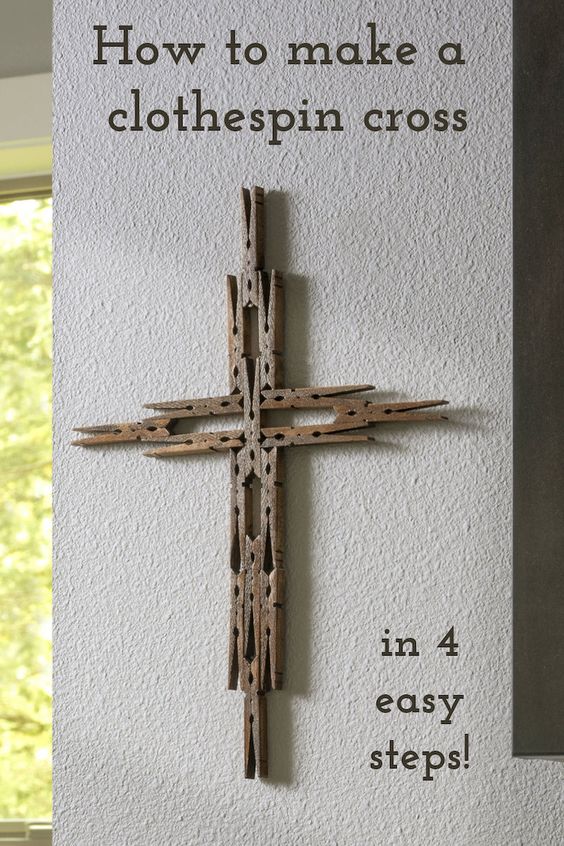
Make a Clothespin Cross
This charming craft project is sure to bring a smile to your face. With just a few simple materials, you can create a beautiful clothespin cross that will add a touch of elegance to any room. The end result will be a delightful clothespin cross that can be displayed on a wall, shelf, or even used as a unique bookmark. This project is not only fun and easy, but it also makes for a wonderful gift for friends and family. This project can also be given as a gift to friends and loved ones.
Skills Required: None. Even if you’ve never crafted in your life, you’ll be able to make a cross out of clothespins. You’ll be pulling clothespins apart, staining them, and then gluing back together. I promise it’s easy!
Gather These Supplies
- Clothespins – 16
- Mod Podge Gloss
- Acrylic paint or stain
- Paintbrush
- Craft glue
- Small nail
- Hammer
Break Apart the Clothespins

Start making your clothespin cross by removing the “hardware” from 16 clothespins. You’re going to do this by twisting out the top piece, and the bottom piece and clip will be left behind.
Then you will simply remove the metal clip from the bottom piece. You will not use the clip, just the two wood pieces left behind.
Glue the Clothespins
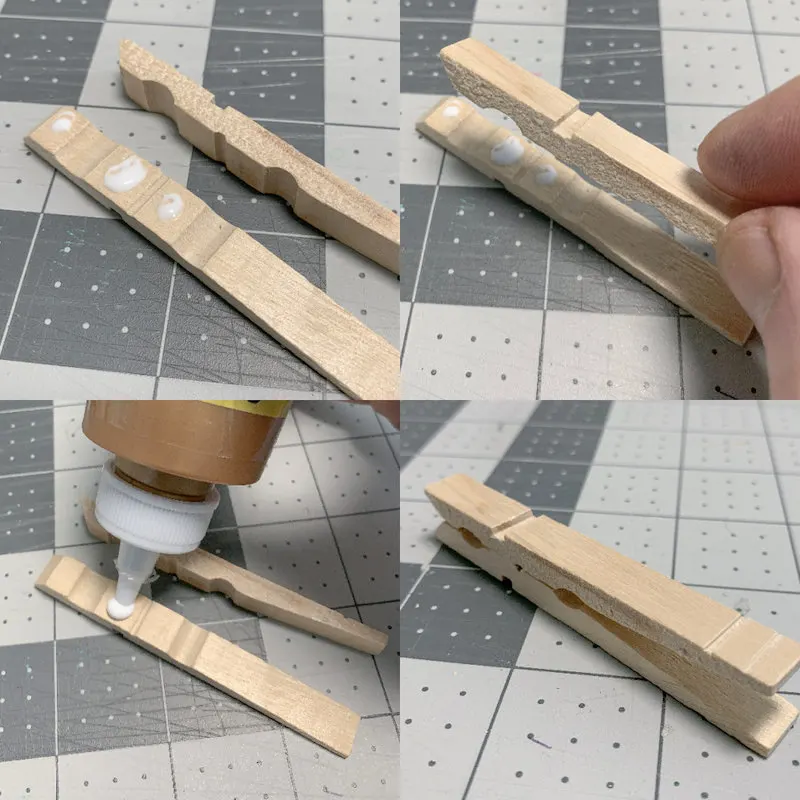
You’re going to use three drops of glue to attach the sixteen clothespins together. You can see that I’m placing glue in three areas, and then sandwiching the clip together. I’ve basically re-assembled the pin, but without the metal clip.
Do this with all your clothespins and let dry.
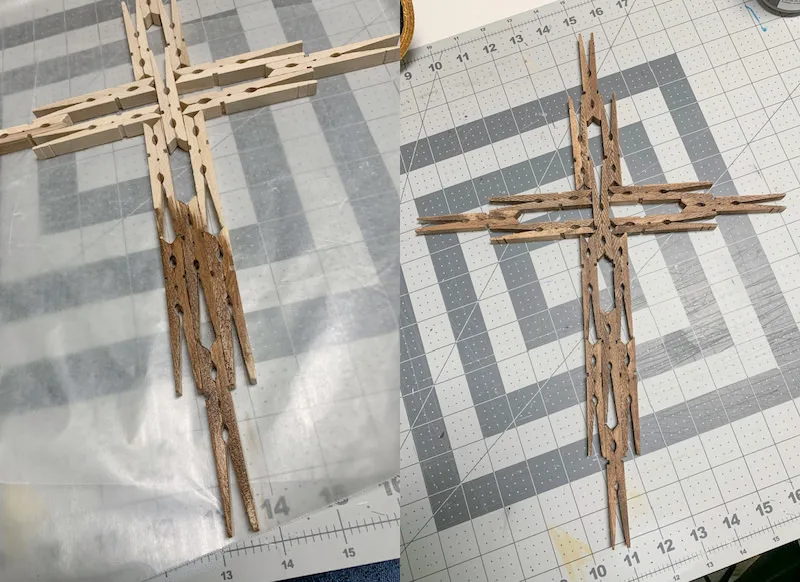
Assemble the Clothespin Cross
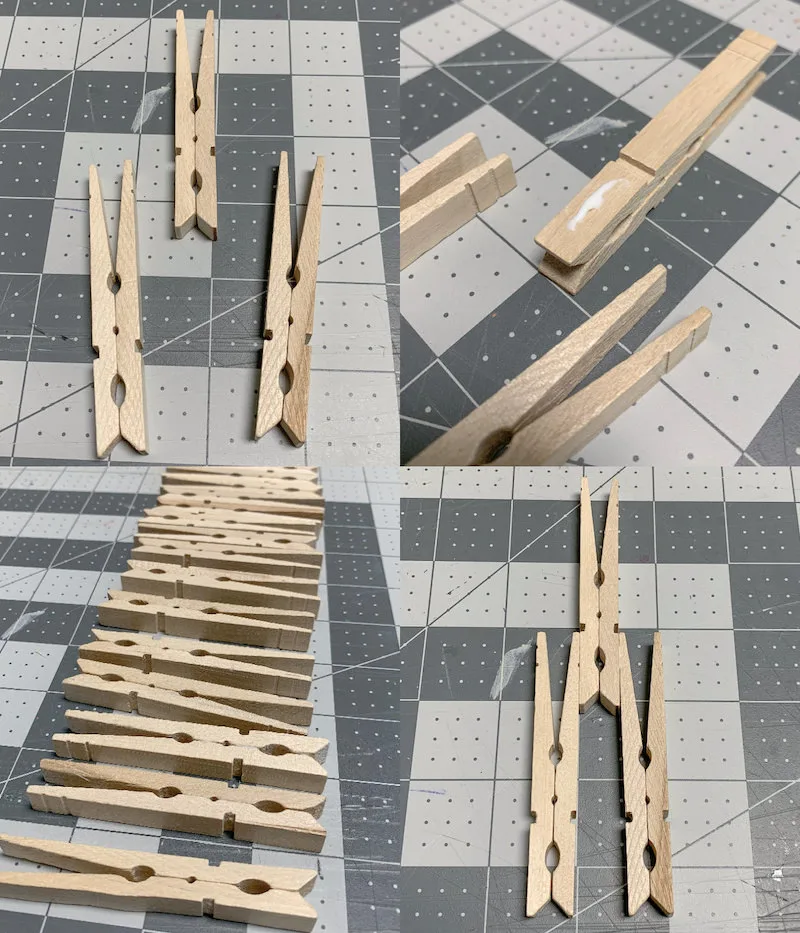
Now you can begin to assemble the cross shape. You’re going to lay out the pins in a cross configuration.
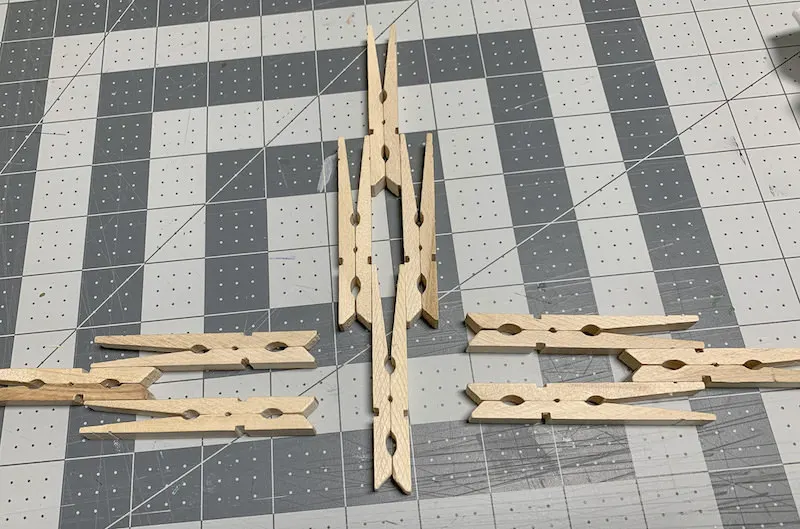
I’ve actually put together a diagram below so that you can see where all the pins go. Lay your cross out in this formation below:
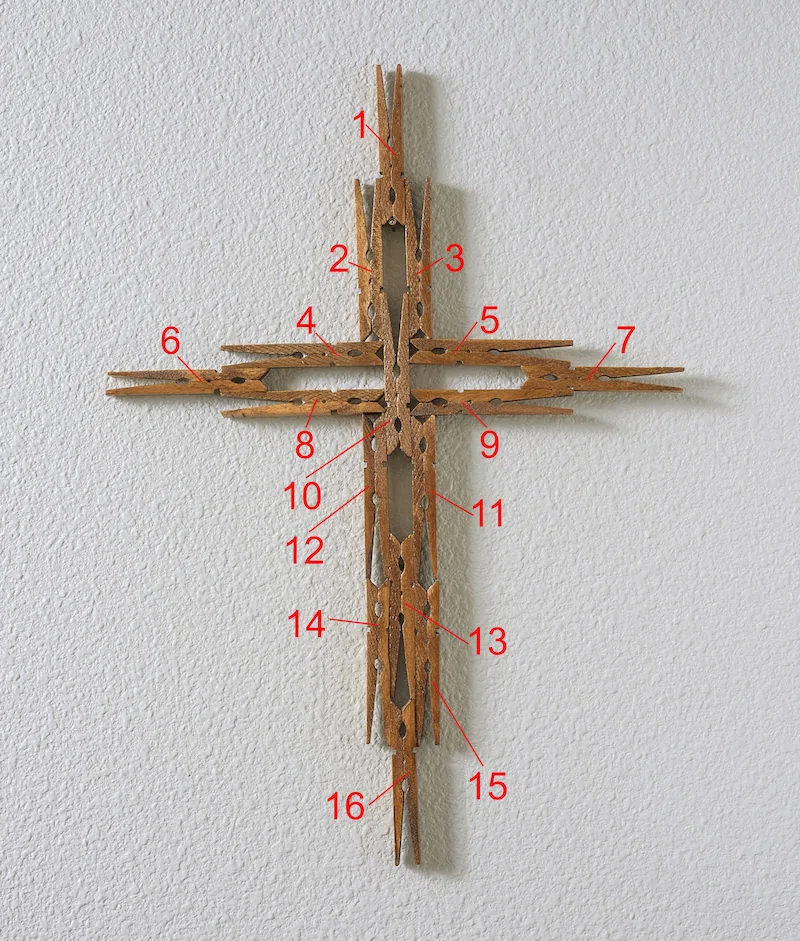
Glue all the clothespins together in a cross formation and let dry. You’re almost done.
Stain and Seal
The last step will be to stain and seal the cross. I put brown acrylic paint in a small container and added a bit of water to create a stain. Stir and then apply to the cross with a paintbrush until the whole project is covered.
Let dry and then repeat on the other side. Use a smaller brush to get into the smaller areas if necessary.
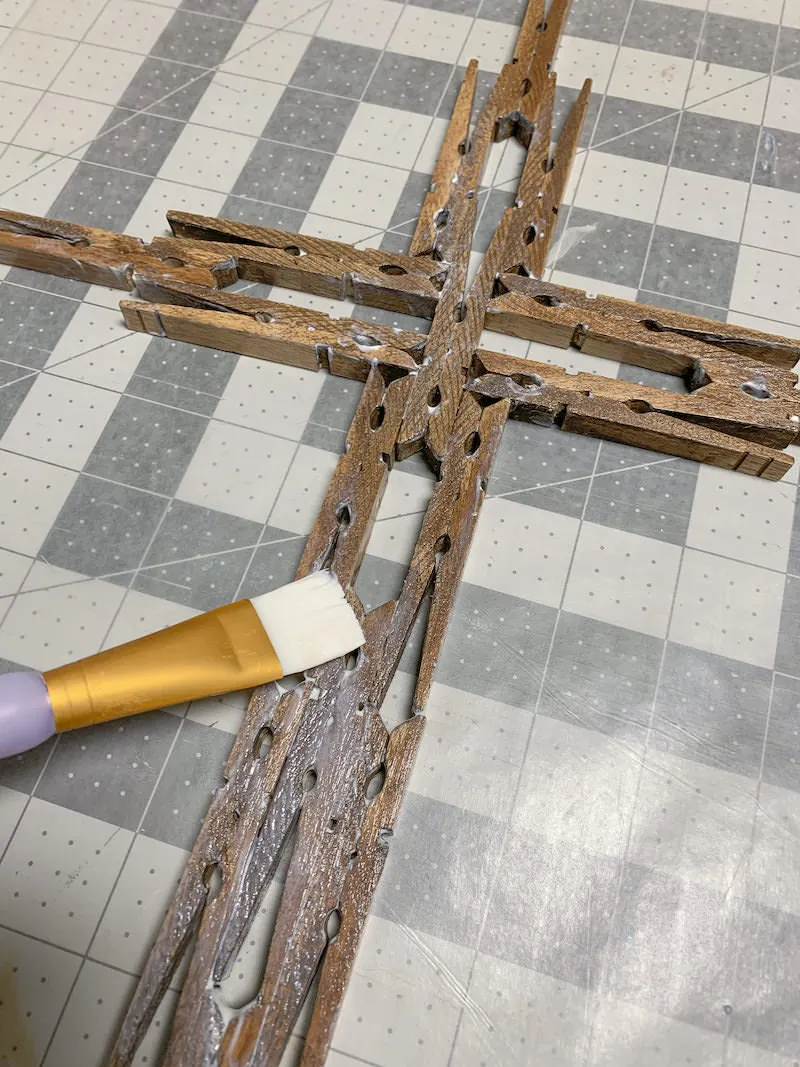
To finish your cross, give the entire thing a coat of Mod Podge to seal. I used glossy so that my clothespin cross would have a delightful shine when hanging. You can use any formula you like depending on the look you are going for!
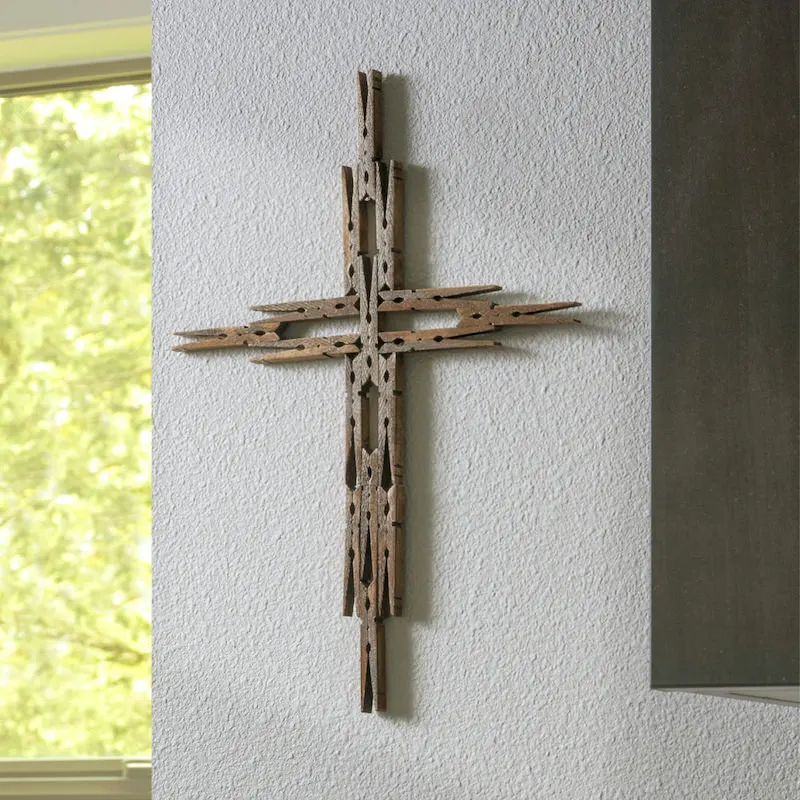
Once your clothespin cross is dry, you can hang it on the wall with a small finishing nail. It’s very lightweight! And you can’t see the nail when it’s hanging.