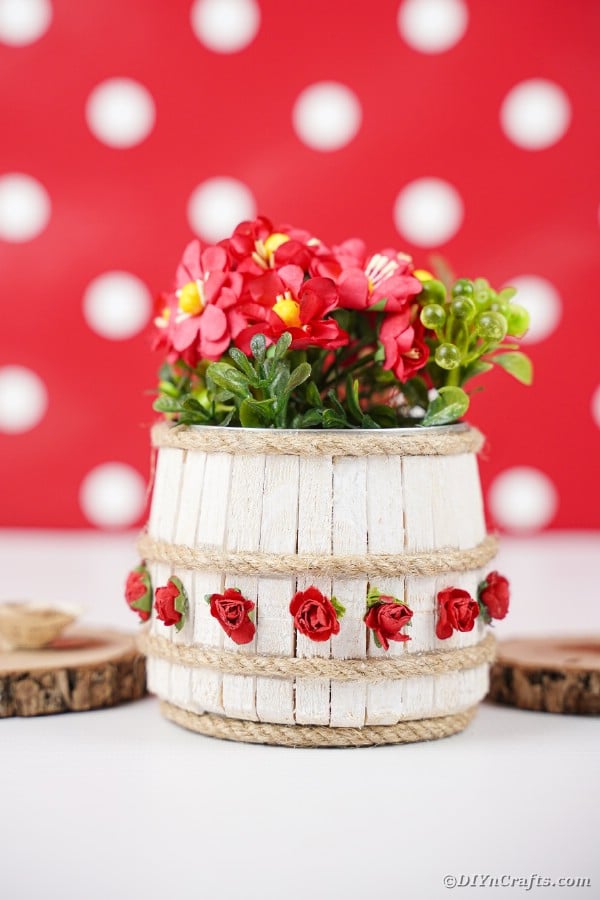
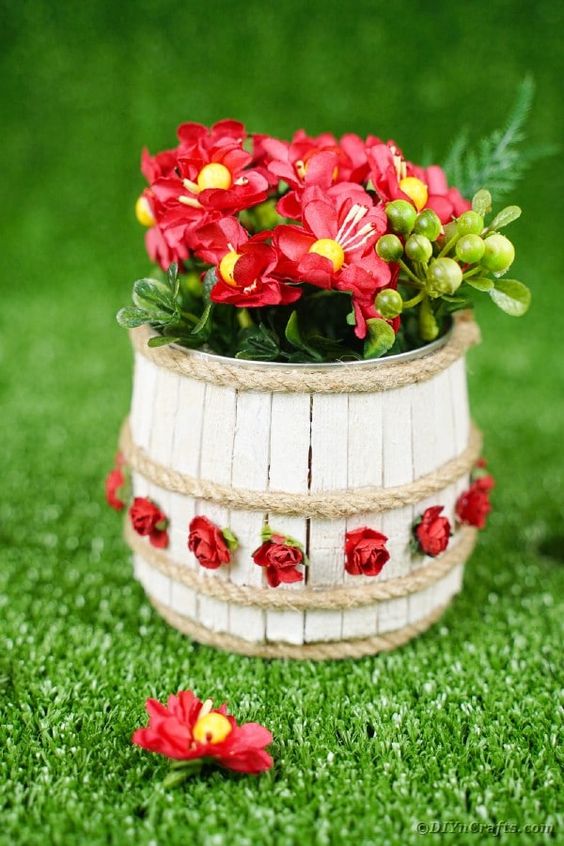
Decorative Clothespin Tin Can Planter or Organizer
Transform a simple tin can into a stylish and functional piece with this DIY project. By repurposing a tin can and some decorative clothespins, you can create a unique planter or organizer that adds a touch of charm to any space. The clothespins can be painted or decorated to match your personal style, making this project customizable and fun to create. Whether you use it to hold small plants or to organize office supplies, this upcycled tin can will surely be a conversation starter in your home. The versatility of this tin can planter or organizer allows you to get creative with how you use it - whether it's displaying fresh herbs in the kitchen or storing pens and pencils on your desk. With just a few simple materials and a bit of creativity, you can turn an ordinary tin can into a functional and eye-catching piece that reflects your personal style.
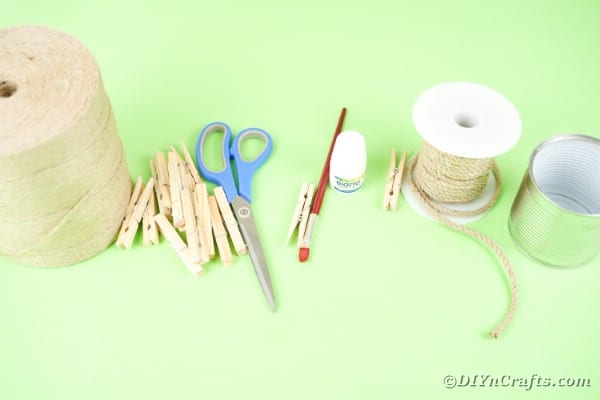
Supplies Needed
- Tin can
- Clothespins
- Rope
- Twine
- Craft paint
- Paintbrush
- Scissors
- Hot glue gun
- Glue sticks or glue rope
How to Make a Clothespin Tin Can Planter or Organizer
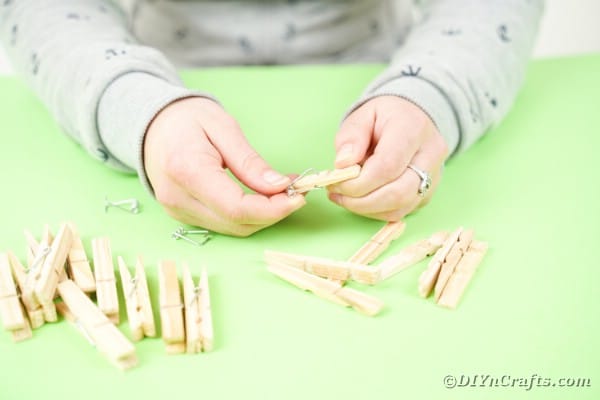
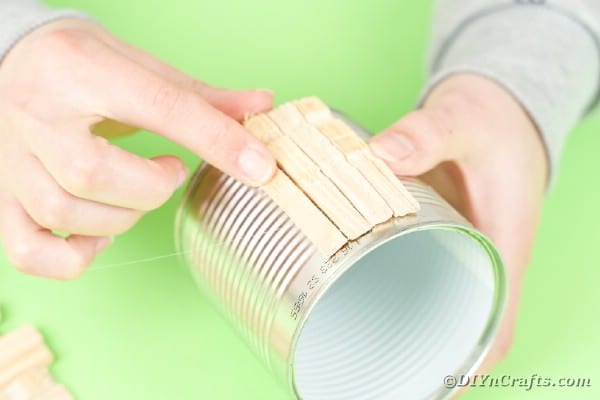
Start by separating the clothespins so they are two pieces, and setting the wire clip aside.
Now, you will glue the pieces onto your tin can going around it gluing them vertically until the can is completely covered.
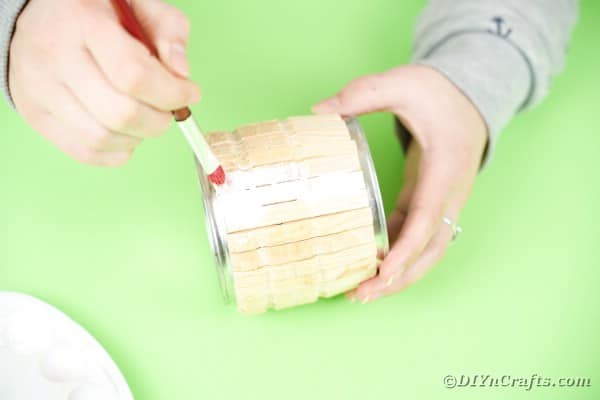
Once the clothespins are in place, you will paint them your desired color. I used white.
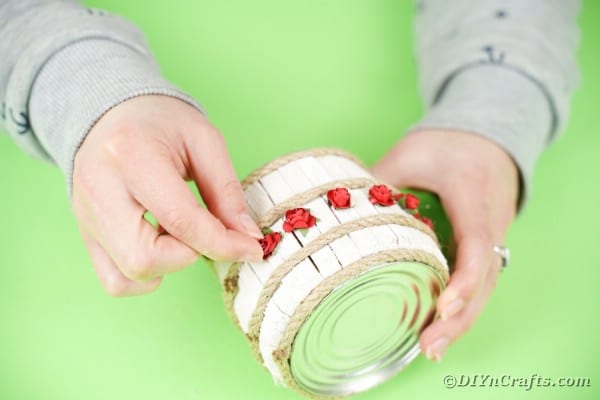
Next, you add the details that make it look more like a barrel. This is where I added a strip of rustic twine or rope around the top edge, bottom edge, and then two pieces around the center of the can.

Add embellishments between the two center strips of rope. I glued on miniature red flowers.
Now your can is done and ready to fill with pens, pencils, markers, or flowers.