Pipe Cleaner Easter Eggs
Easter is just around the corner, and what better way to celebrate than by making some adorable pipe cleaner Easter eggs? These colorful and fun crafts are perfect for kids and adults alike. All you need are some pipe cleaners in various colors, and you're ready to get started. These pipe cleaner Easter eggs are not only great for decoration, but they can also be used as fun accessories. Attach a string or ribbon to the top of the egg, and you have a cute Easter ornament to hang on your tree or around the house. You can even make smaller versions and turn them into earrings or keychains. The possibilities are endless!
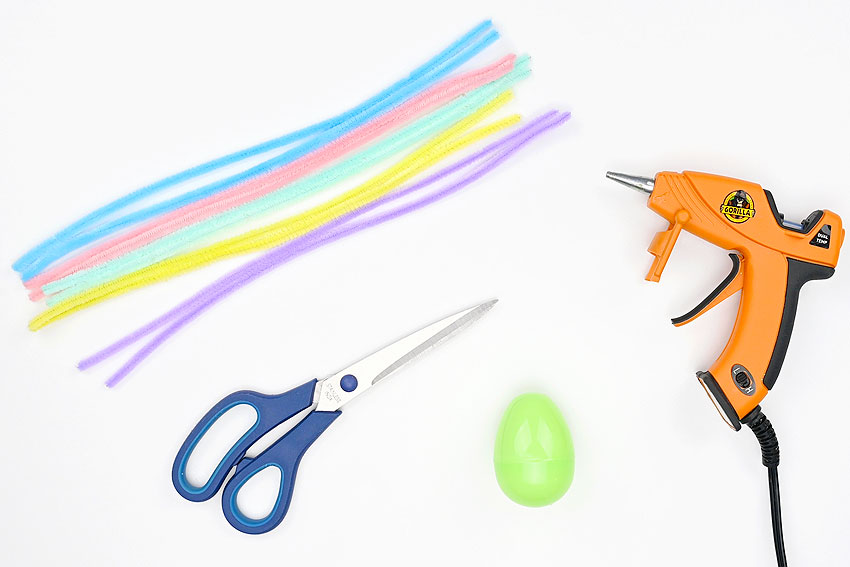
Materials:
- Plastic Easter egg
- Pastel pipe cleaners
Equipment:
- Glue gun
- Scissors
Instructions:
Step 1: Find what you need
- Gather your supplies and materials.
Step 2: Glue a pipe cleaner to the plastic egg
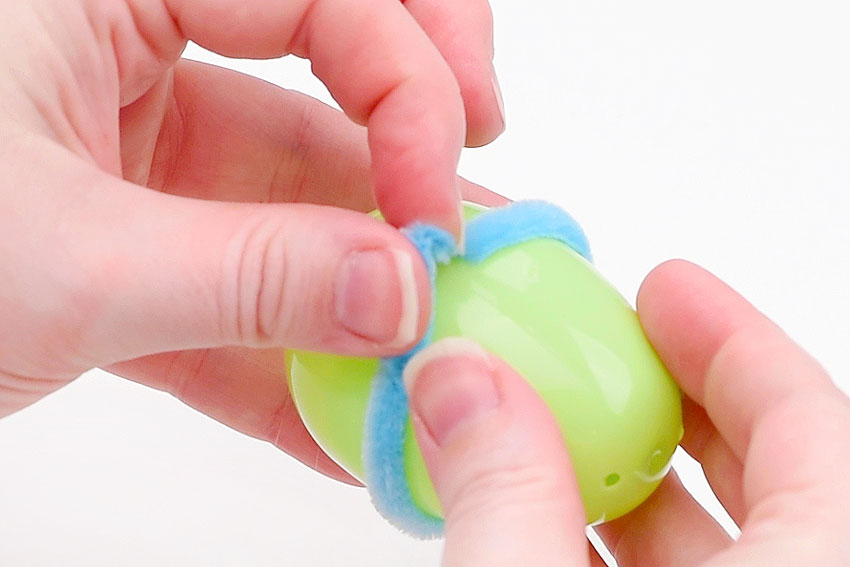
- Add a dot of hot glue to the back of the plastic Easter egg, just above the seam.We highly recommend using a low temperature glue gun for this craft.
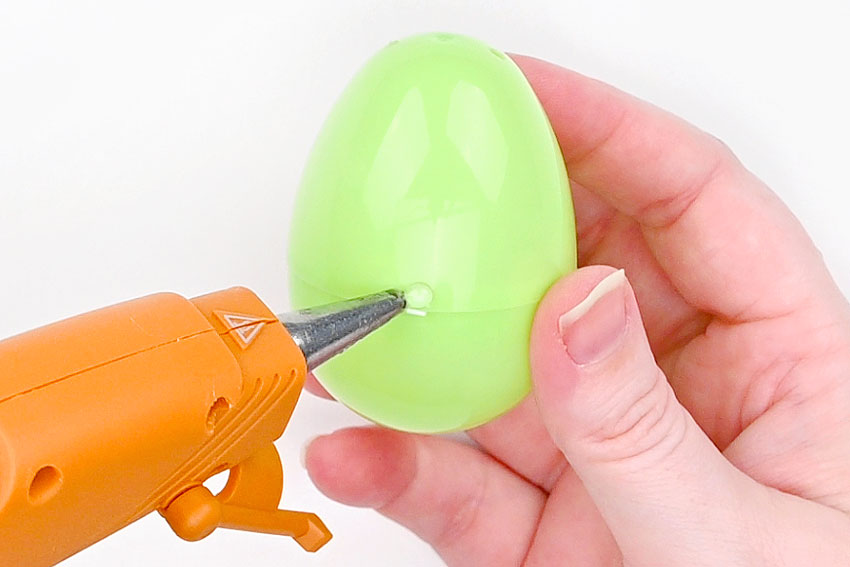
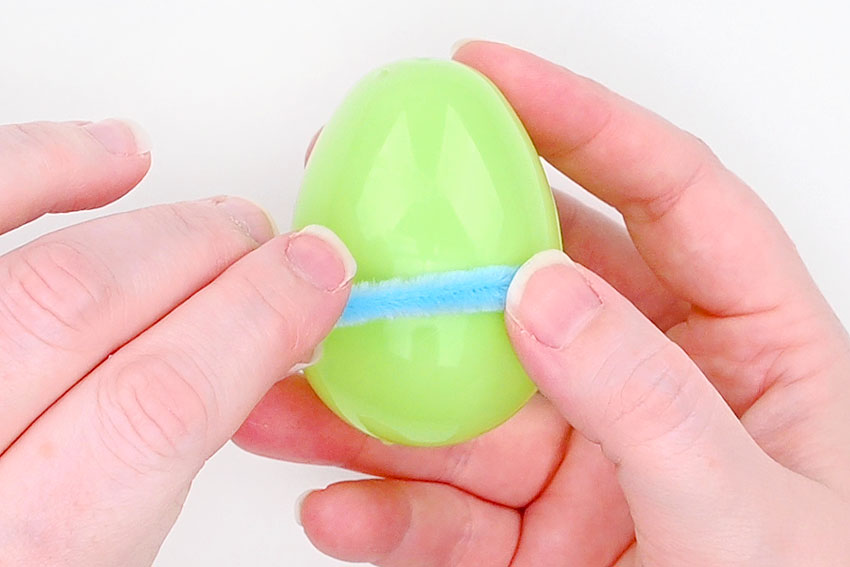
Place the end of a pipe cleaner into the glue. Place the pipe cleaner so that it goes just over the seam of the egg.Hold the pipe cleaner in place until it stays by itself.
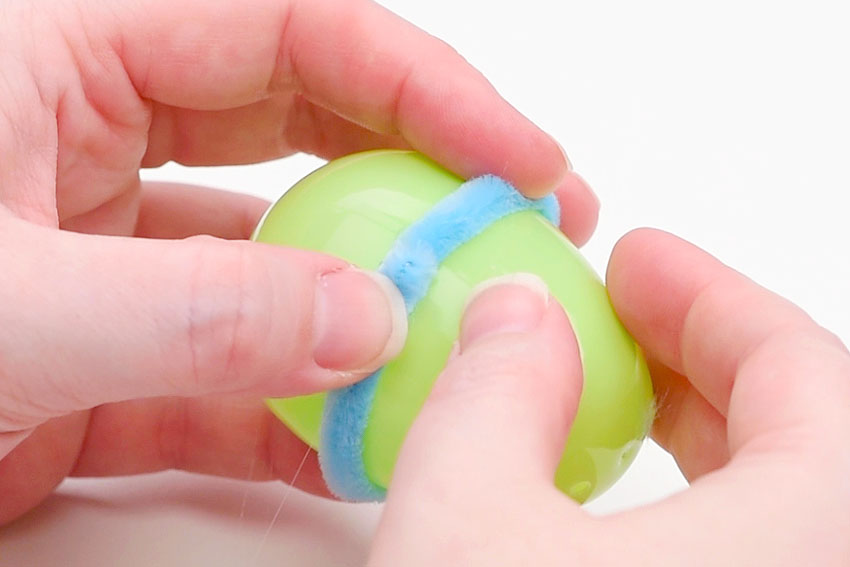
Add another dot of hot glue about 1 inch away from the previous dot.
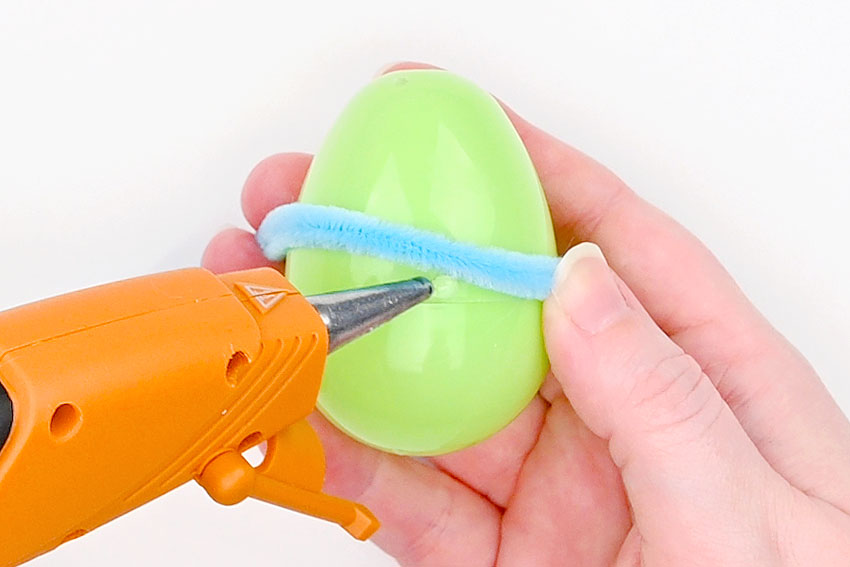
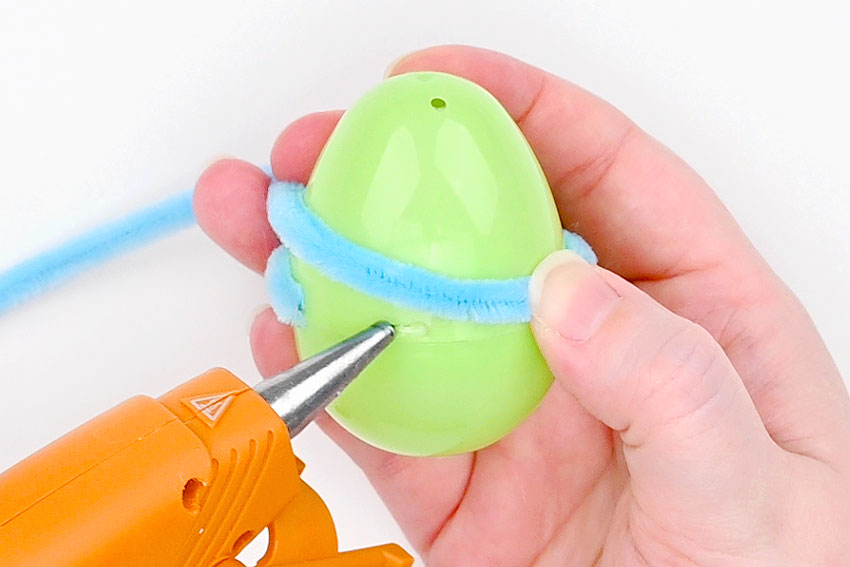
Push the pipe cleaner into the glue. Hold it in place again.Continue wrapping and gluing the pipe cleaner around the egg. After the first couple dots of glue the pipe cleaner should stay in place more easily.Repeat until you get about 1 inch away from where you started.
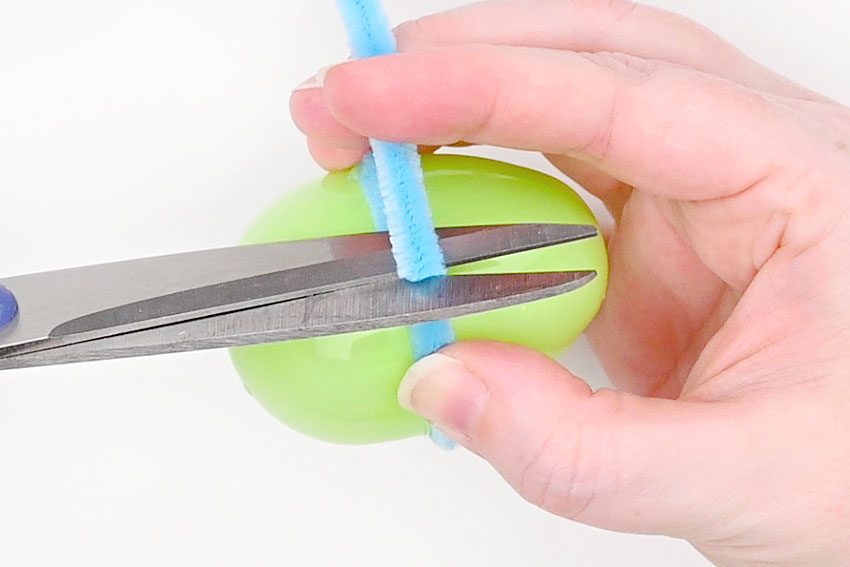
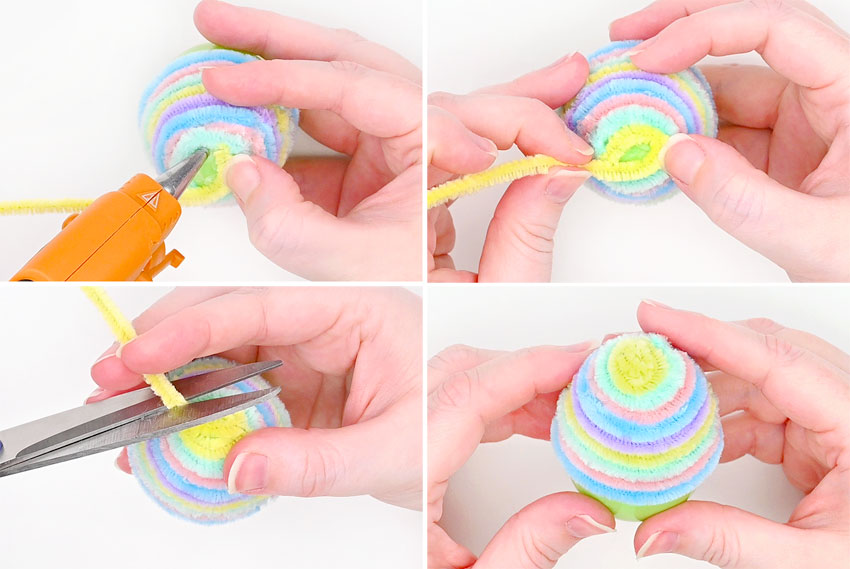
Step 3: Cut the pipe cleaner and fold down the edge
- Cut the pipe cleaner so that it overlaps the start by about 1/4 inch.
Fold the loose end of the pipe cleaner down so that the sharp end is underneath.
Glue the folded end of the pipe cleaner down next to the starting point. Again, hold in place until it stays on its own.(This folding over step is optional, but it covers all the sharp ends of the pipe cleaners, so you can grab the egg without worrying about getting scratched.)
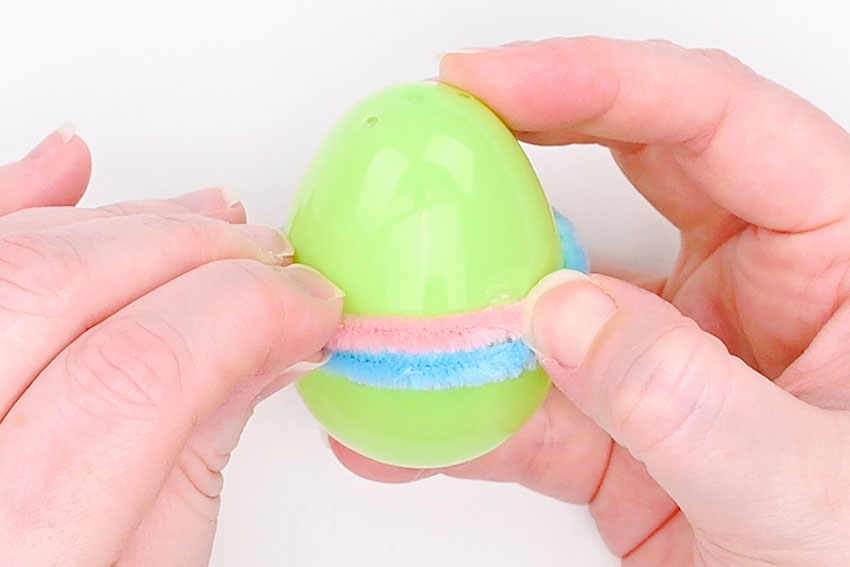
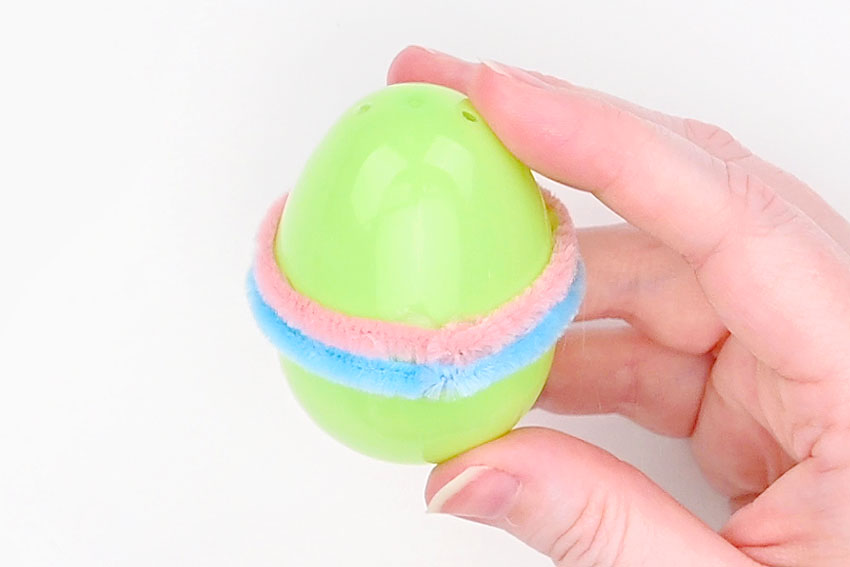
Step 3: Attach more pipe cleaners to one half of the egg
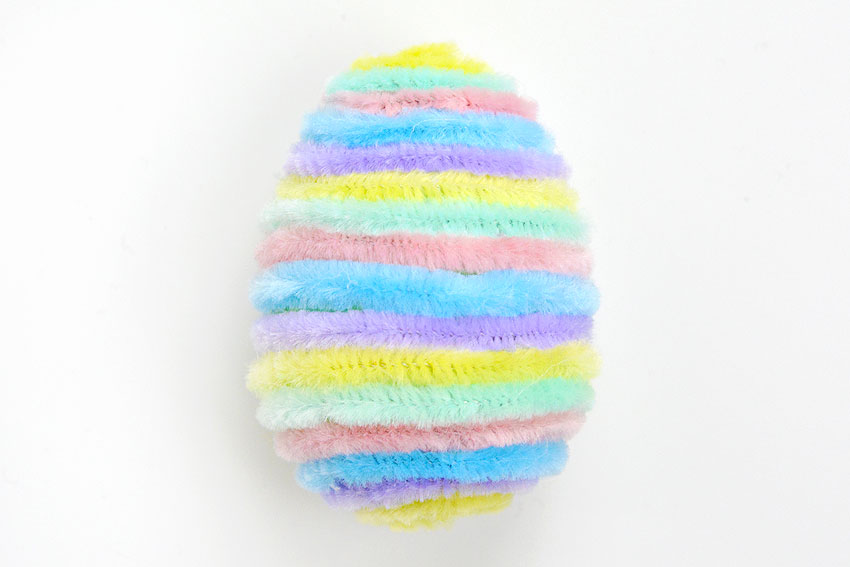
- At the same starting place, glue a second colour of pipe cleaner directly above the last.Place the pipe cleaners snugly together. This will give you the fuzziest look, and will hide the plastic egg underneath.
Repeat the wrapping and gluing process, again folding under the end before gluing it down.
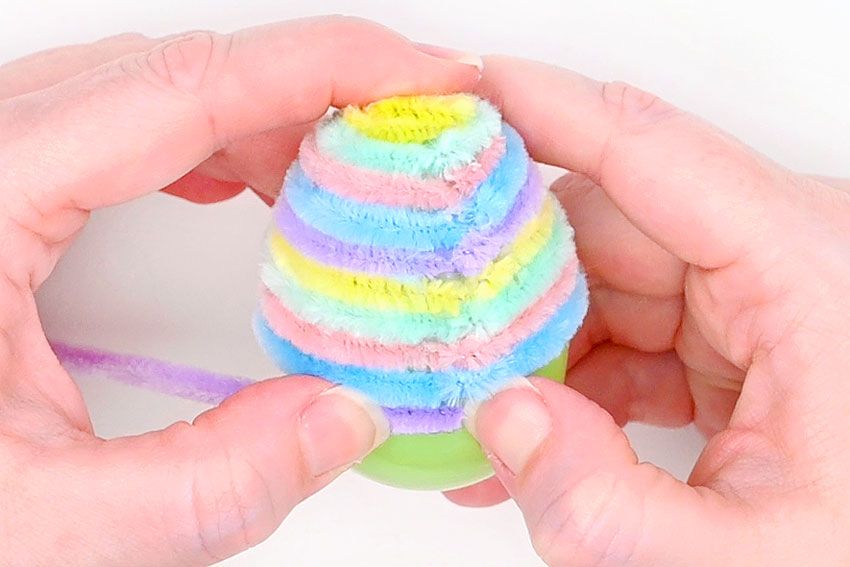
Continue, making a pattern of different colours of pipe cleaner (we did blue, pink, green, yellow, purple) until you reach the top of the egg.As you get towards the top you can re-use the extra pipe cleaner that you cut from the first line of that colour.
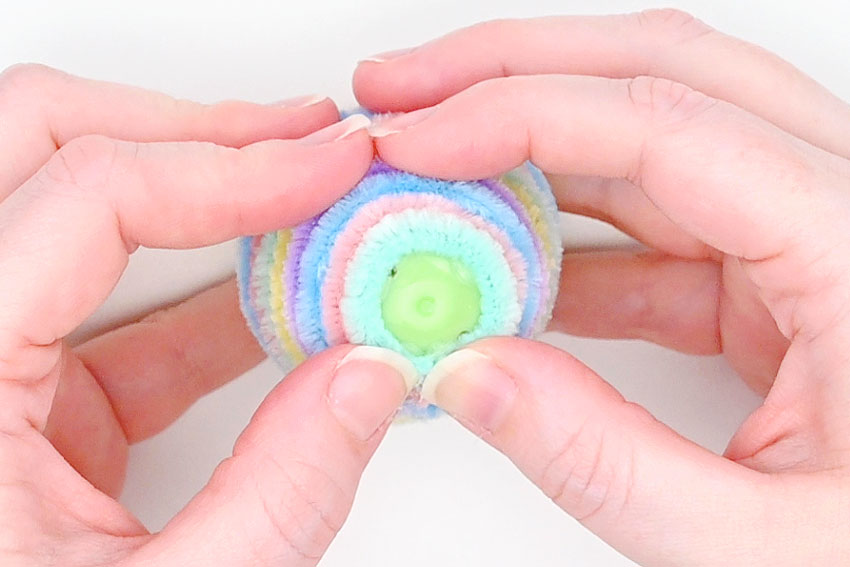
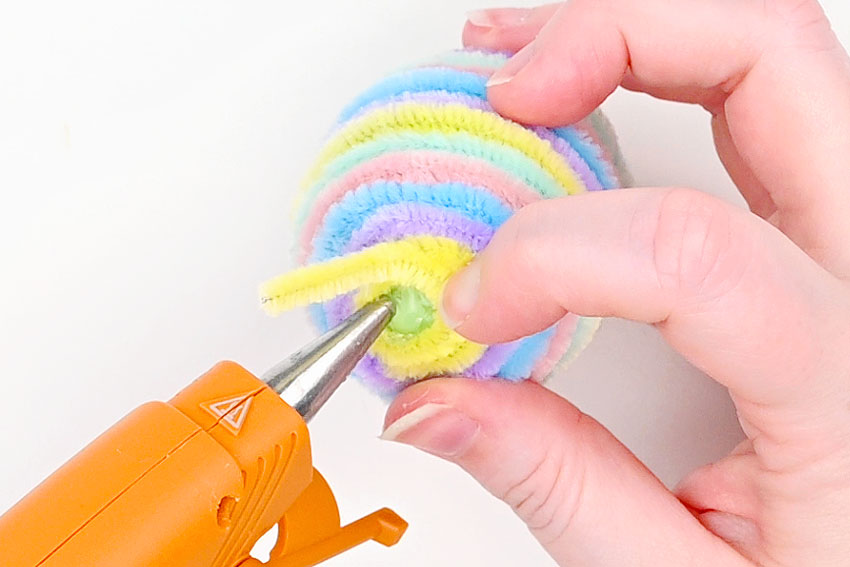
Cover the top of the plastic egg with hot glue. Push the pipe cleaner down into place beside the previous colour.Wind the pipe cleaner towards the top center and cut it when you get close to the middle, leaving enough extra to fill in the empty space.Bend the pipe cleaner so that it spirals nicely into the top center of the egg.
Step 4: Add pipe cleaners to the other half of the egg
- Once you've finished the top of the egg, go back down to the middle.Continue the colour pattern, adding the next pipe cleaner as close as you can to the seam without gluing the egg shut.
Work your way down the egg, following the same pattern and process as you did for the top half.The bottom of the egg is larger than the top, but you can still fill the whole section with glue and spiral the pipe cleaner around and into place.
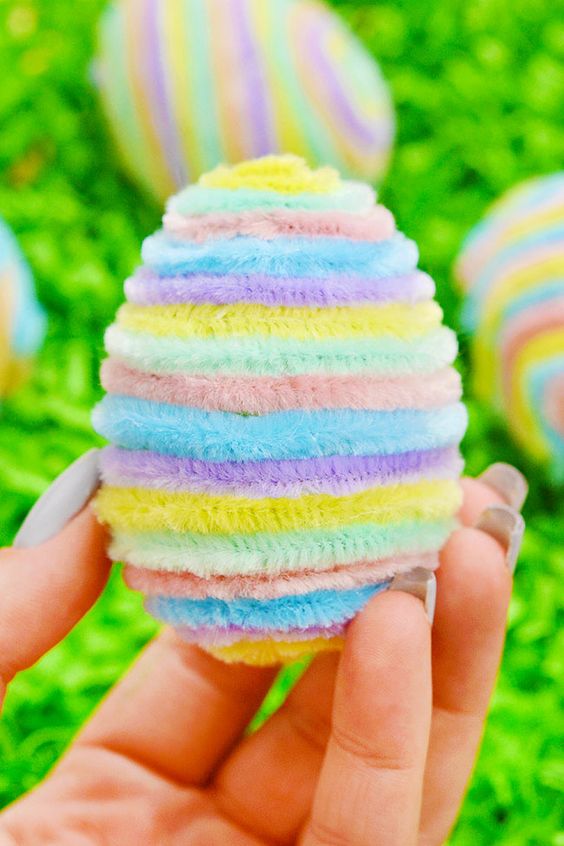
Your pipe cleaner Easter egg is complete!