Fleece Scarf - Sewing Pattern
Create your very own cozy fleece scarf with this easy-to-follow sewing pattern. Whether you're a beginner or an experienced seamstress, this pattern will guide you through the steps to make a stylish and warm accessory for the colder months. Choose your favorite fleece fabric in a color or pattern that suits your style, and get ready to create a one-of-a-kind scarf that you can wear or gift to a loved one. With clear instructions and detailed diagrams, you'll be able to whip up this scarf in no time and show off your sewing skills. This sewing pattern for a fleece scarf is a great way to personalize your winter wardrobe and add a touch of handmade charm to your outfits. You can customize the length and width of the scarf to suit your preferences, making it the perfect accessory for any outfit. Whether you prefer a classic solid color or a fun printed fleece, this pattern allows you to get creative and make a scarf that is uniquely yours. So grab your sewing machine, pick out your favorite fleece fabric, and get ready to stitch up a cozy scarf that will keep you warm and stylish all season long.
Material Required
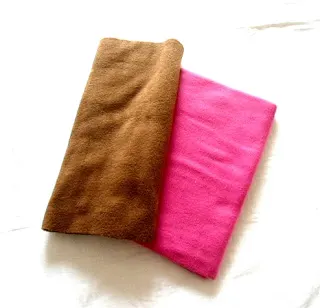
Take the two contrasting colors of fleece required for the scarf.
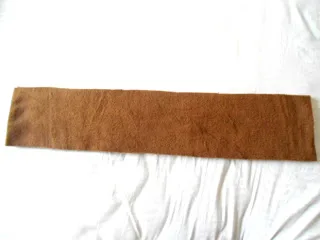
Cut two pieces, 40-inches long and 6.5-inches wide from the main fleece fabric (to make the scarf in adult size, take the length as 62-inches and width as 9-inches).
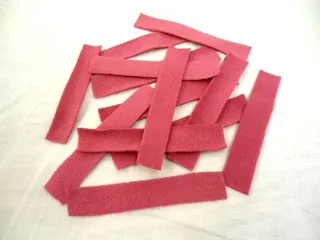
Now we need twelve pieces, 6.5-inches long ( 9 inches long if making an adult size) and 1-inch wide from the contrasting fleece fabric (this is for the stripes at the edge of the scarf).
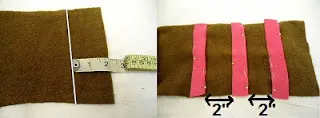
Take one of the main scarf pieces and mark a line 2-inches from the lower edge as shown above. Take one of the fleece pieces for the stripe, align it along the drawn line and pin. Pin two more pieces at the 2-inch gap from each other as shown above. Repeat the steps on the other shorter edge of the same piece. Repeat the same steps to pinstripes on the second piece for the scarf.

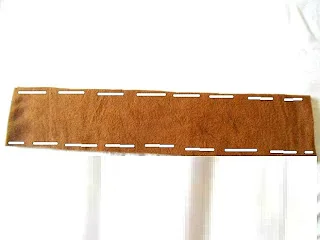
Sew the stripes on to the scarf pieces.
Now layer the two main scarf pieces with the right sides together and aligning the edges. The line marked shows where to sew it shut.
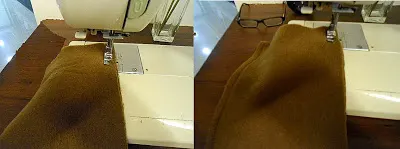
Sew along the two longer sides, leaving a 1/4-inch seam.
Now let’s gather the two shorter edges of the scarf to finish it.
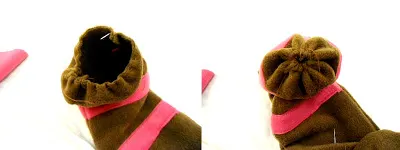
Take a needle and thread and sew a loose running stitch around the shorter edge of the scarf. Pull the thread gently on both sides to gather and close it. Secure the gathering by tying a few knots with both the ends of the thread. Now we need to add the pompom at the ends of the scarf. For that, we require two pieces of fleece, 12-inches long and 5-inches wide.

Take one piece and fold it in half lengthwise, aligning the edges as shown above.
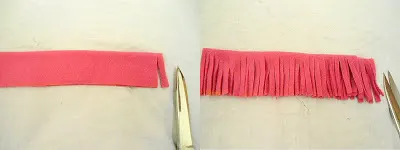
Now cut fringes at the raw edge, taking care not to cut through the fold. Keep the width of the fringe as thin as possible.
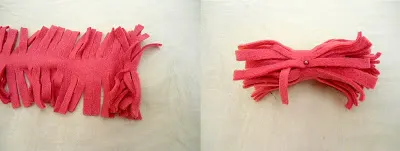
Unfold it and start rolling tightly from one of the shorter edges. Put a pin through the center of the pompom to secure it. Take a needle and thread and run it through the center of the pompom, in and out a few times. Finally, wrap the thread around the center a few times and secure by a few knots.
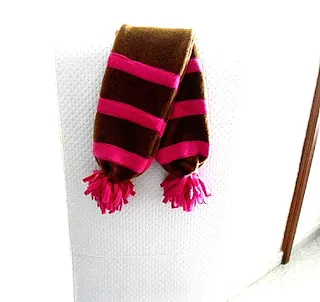
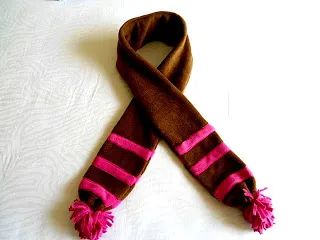
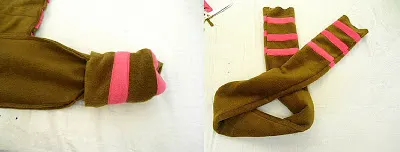
Attach the pompoms at the ends of the scarf using a needle and thread. Fluff up the pompoms and your scarf is ready to wear!