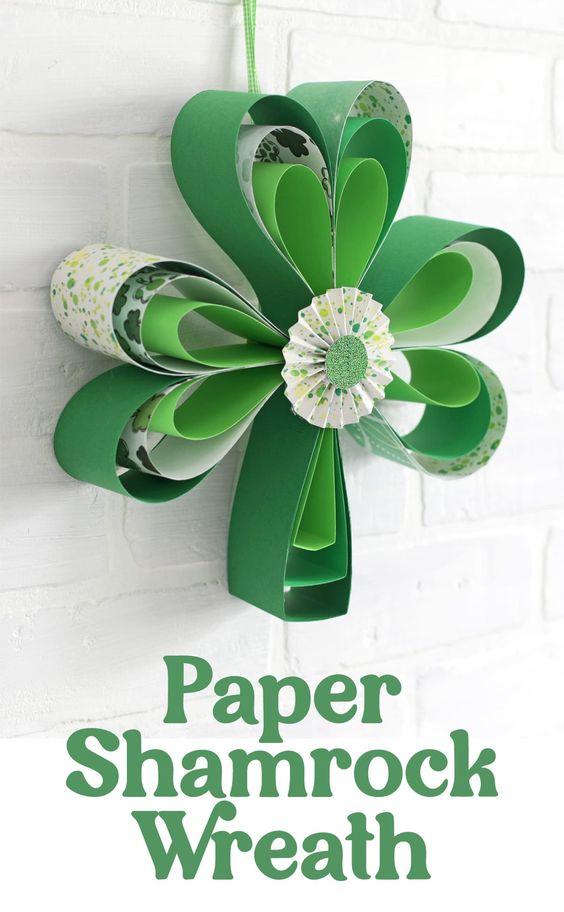
Paper Shamrock Wreath
Create a beautiful wreath made out of paper shamrocks to add a festive touch to your home decor. Start by cutting out several shamrock shapes from green construction paper. You can use a template or freehand the shapes for a more organic look. Once you have enough shamrocks, glue them onto a circular base, such as a cardboard ring or foam wreath form. Arrange the shamrocks in a layered pattern, overlapping them slightly to create depth and dimension. Add a ribbon or bow for a finishing touch, and hang your paper shamrock wreath on your front door or wall to bring a touch of luck to your space. If you're feeling extra creative, try incorporating other elements like faux flowers, ribbon streamers, or even a leprechaun figurine for a whimsical twist. Personalize your wreath to match your existing decor or create a standalone statement piece that will impress all your guests. Let your imagination run wild and have fun crafting your very own paper shamrock wreath!
Materials Needed
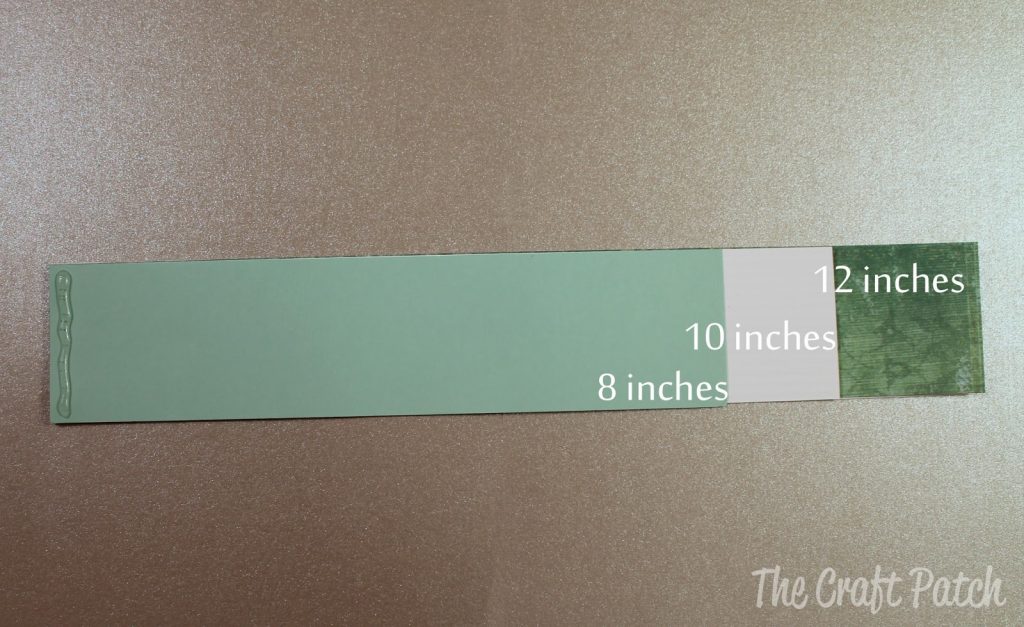
- Scrap Paper. Double-sided looks best. Or you can glue two pieces together to make double sided paper. You will need:
- 7- 12×2″ strips of paper
- 7- 10×2″ strips of paper
- 7- 8×2″ strips of paper
- Ribbon for Hanging
- Extra scraps of paper for center decoration and back pieces
- Hot Glue
Instructions
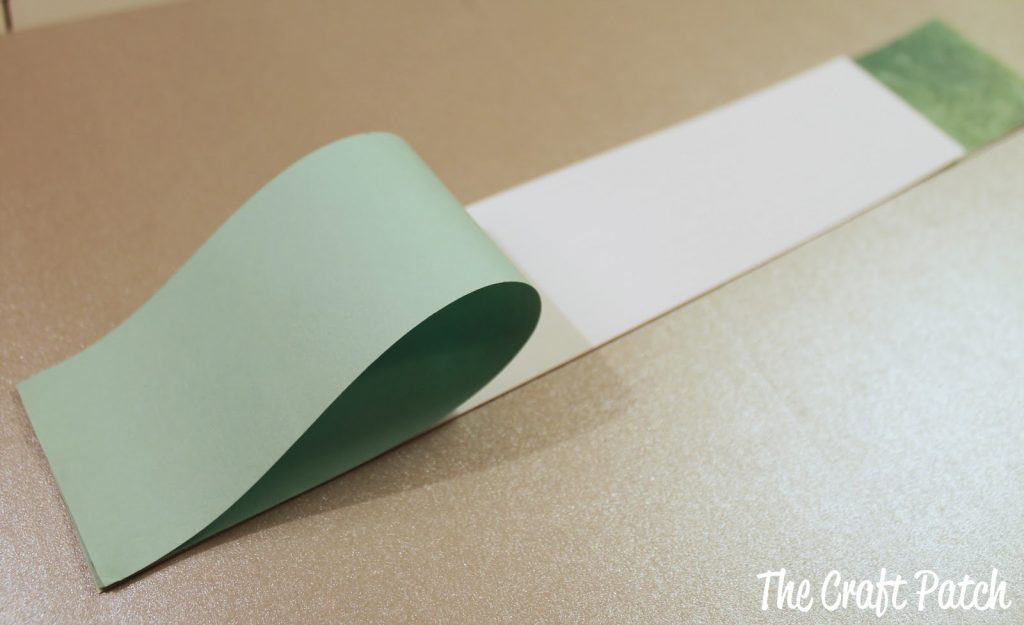
STEP 1: Stack one of each size of paper together and glue them together on one end.
STEP 2: Loop the shortest piece over and glue the edge down.
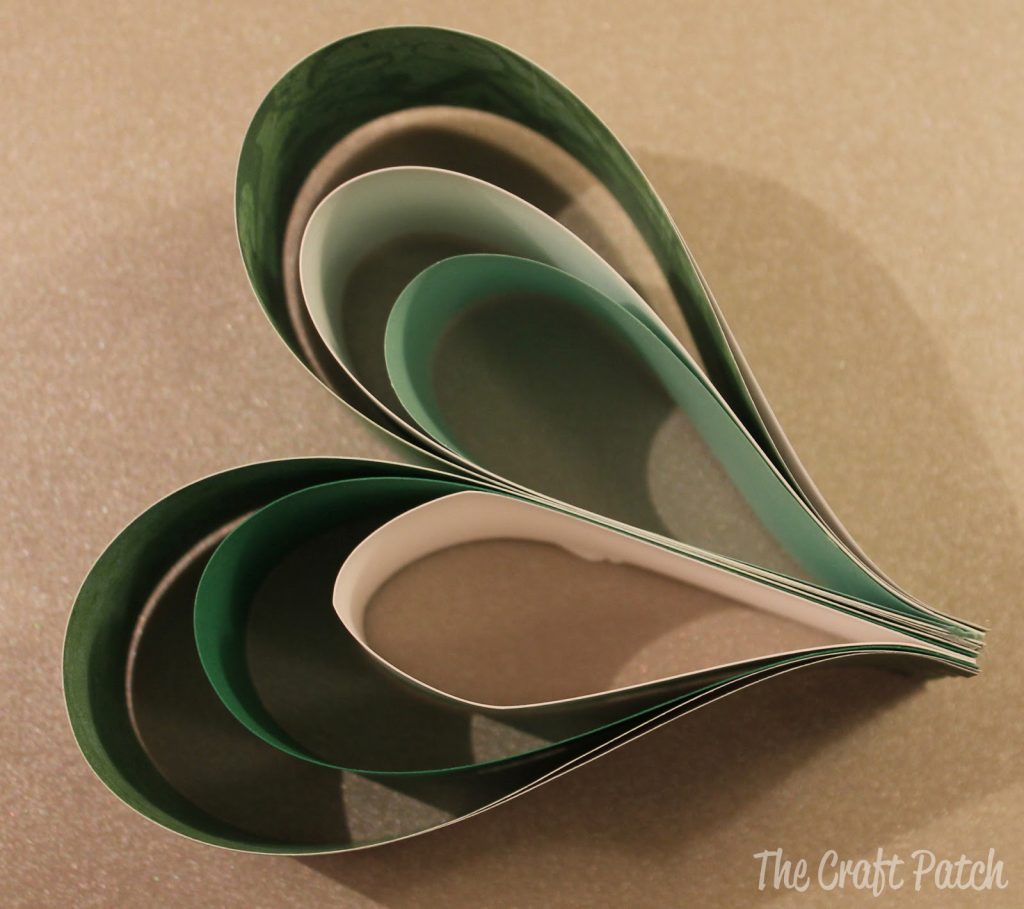
STEP 3: Repeat with the other two pieces until you have a teardrop shape.
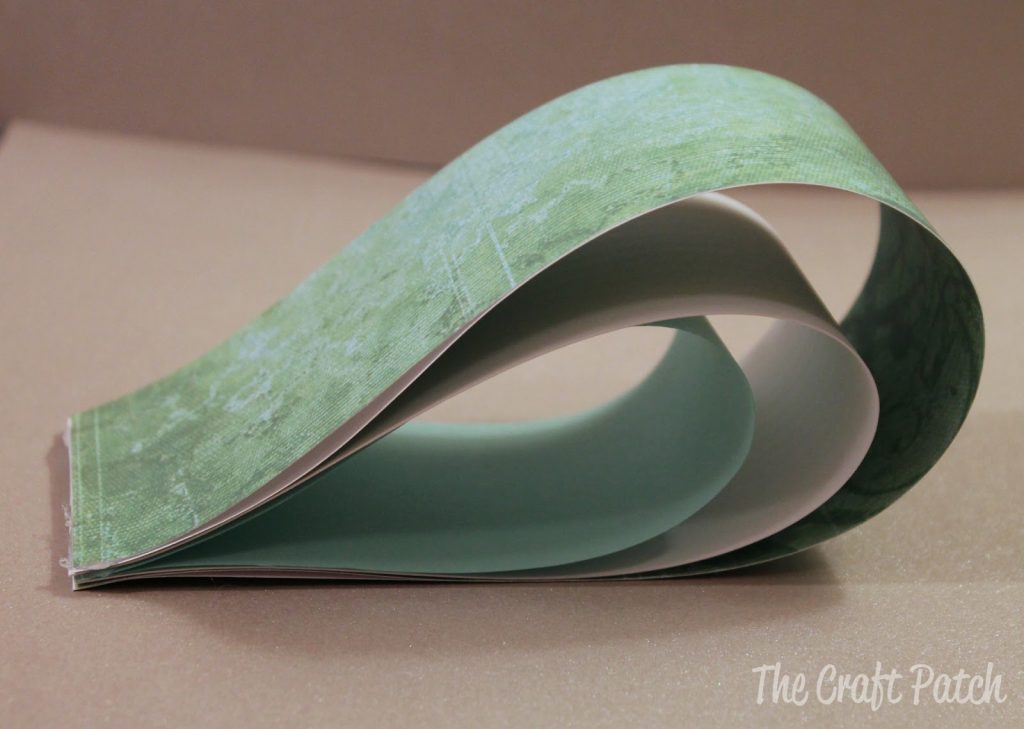
STEP 4: Repeat steps 2 and 3 until you have made six tear drops. Group in twos and glue the ends together to form a heart shape.
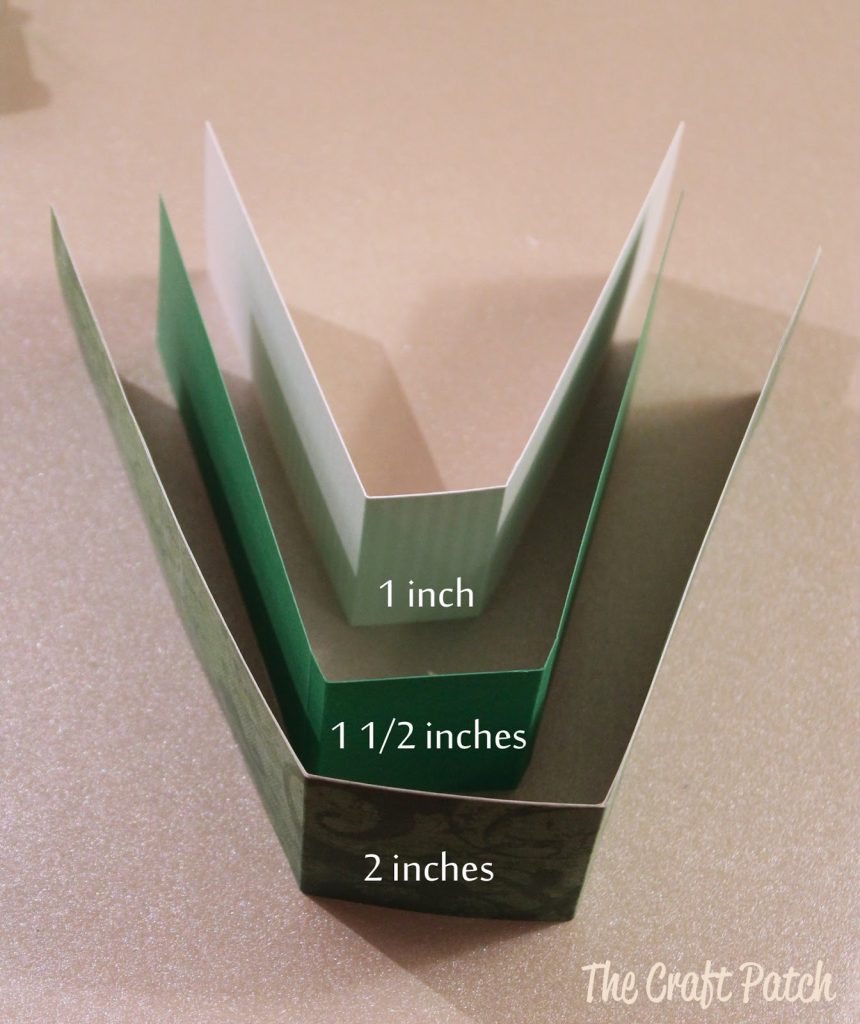
STEP 5: To make the stem, you will be making two fold marks on each of the three strips you have left.
For the 12″ strip, make a fold mark 5 inches from the left edge and 5 inches from the right edge, so that there are 2 inches between the two fold lines and the section between the folds is centered.
For the 10″ strip, make one fold mark 4.25″ from the left edge and 4.25″ from the right edge, so that there are 1 1/2 inches between the two fold lines and the section between the folds is centered.
For the 8″ strip, make one fold mark 3.5″ from the left edge and 3.5″ from the right edge, so that there is 1 inch between the fold lines and the section between them is centered.
Whew! Did that make any sense? I have my doubts… but maybe this picture will help you know what I mean:
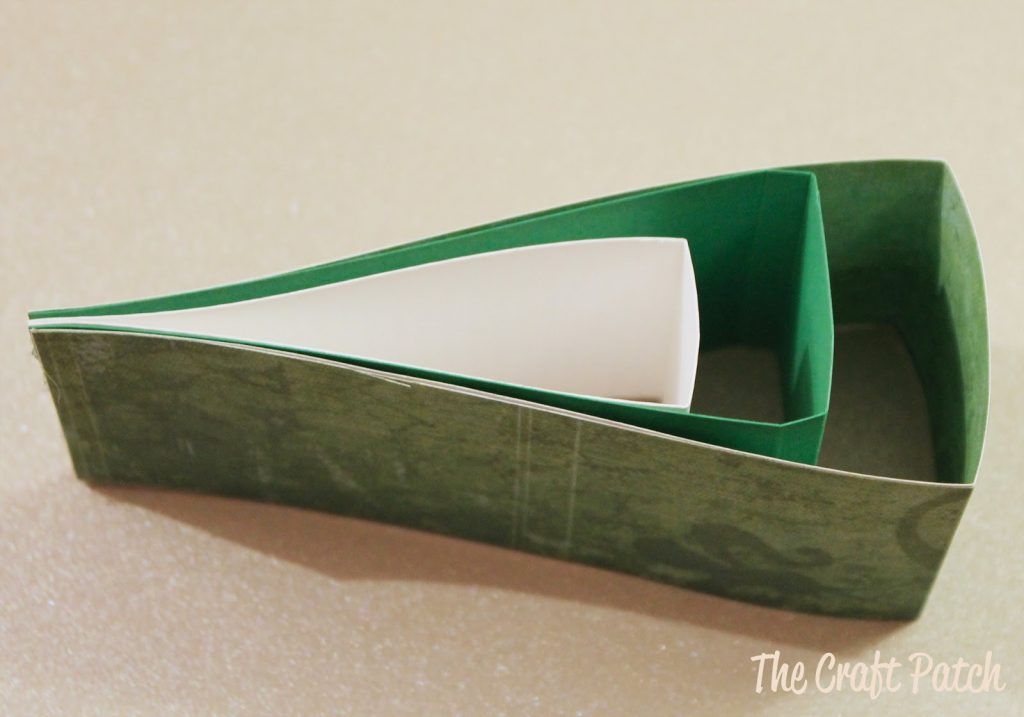
STEP 6: Line up the ends and glue them all together, like this:
STEP 7: Now assemble your shamrock. I cut out a small cardstock circle so I would have something to glue all those points to. Then I added a little accordion fold medallion in the front center. It’s cute and it hides the part where it’s glued together.
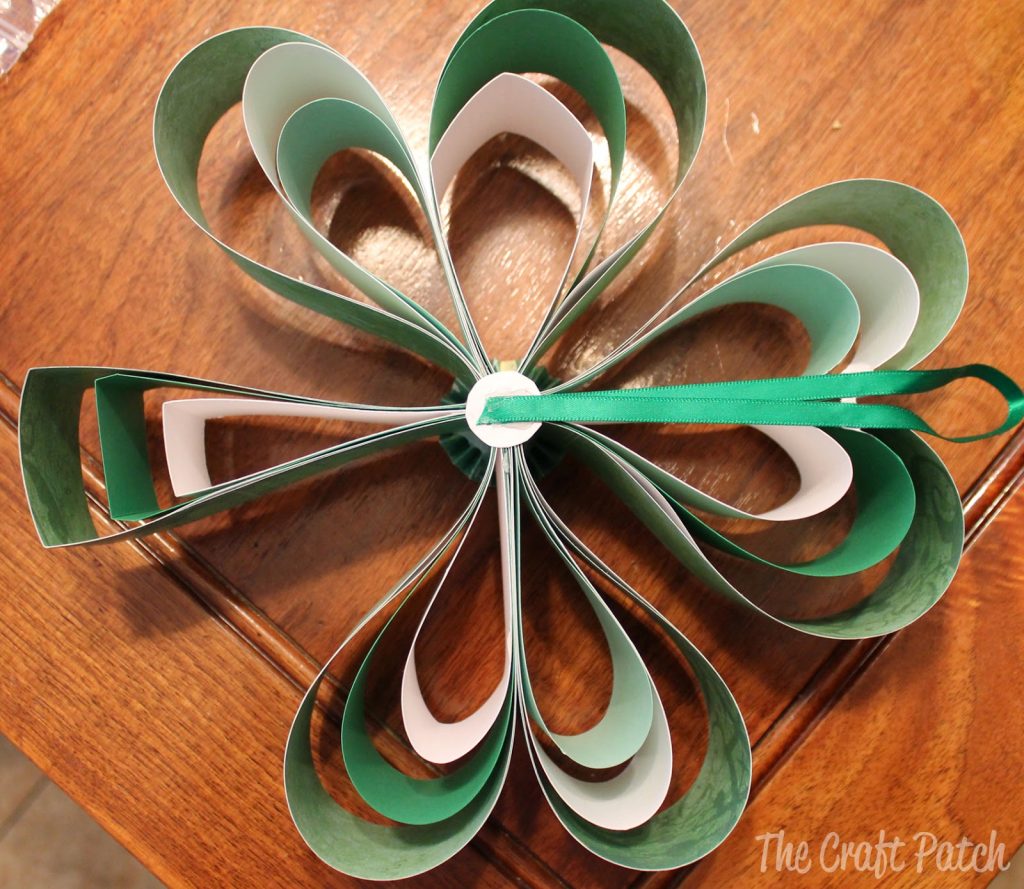
STEP 8: Glue on a ribbon loop to the back center circle so you can hang the wreath. The loop needs to be long enough to stick out above the top of the shamrock.
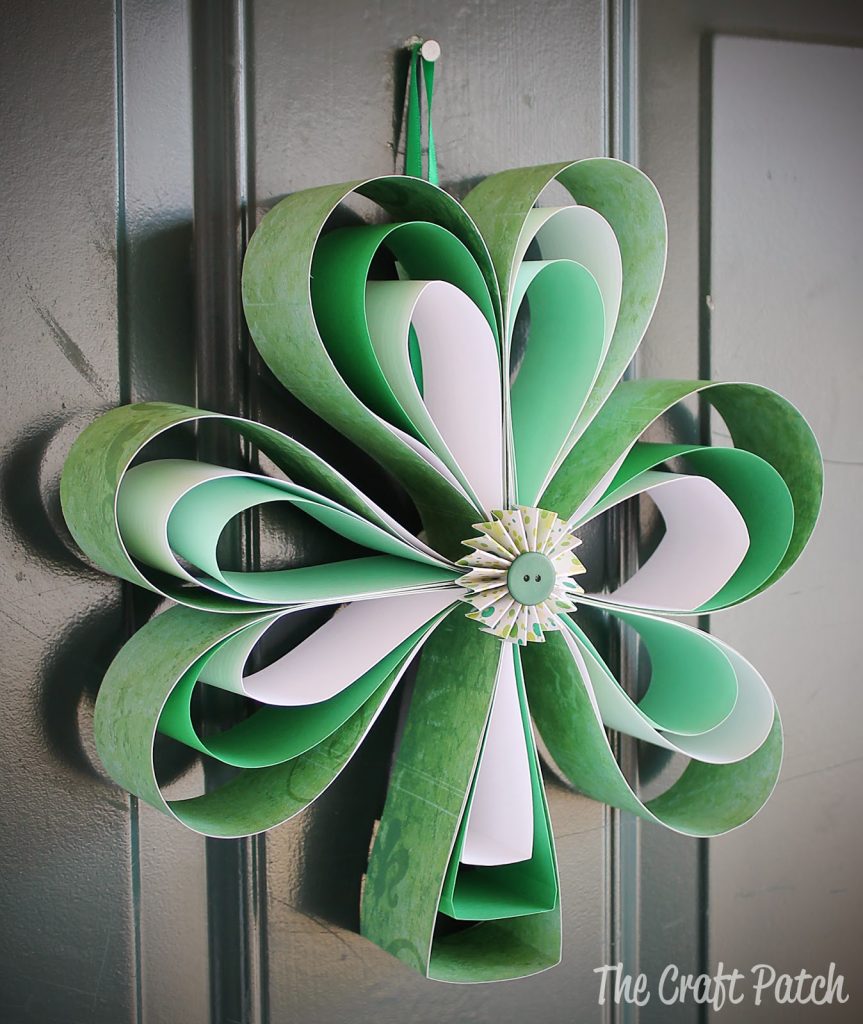
And there you have it, folks. The finished size is about 12 inches across. I’m pretty happy with how it turned out and it’s fun to feel festive without spending money… plus I was able to use up some of my paper stash!