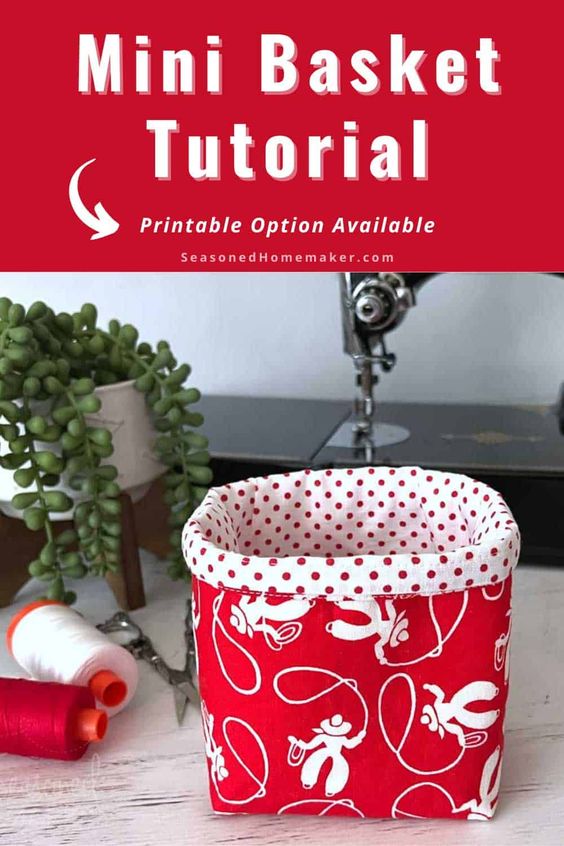
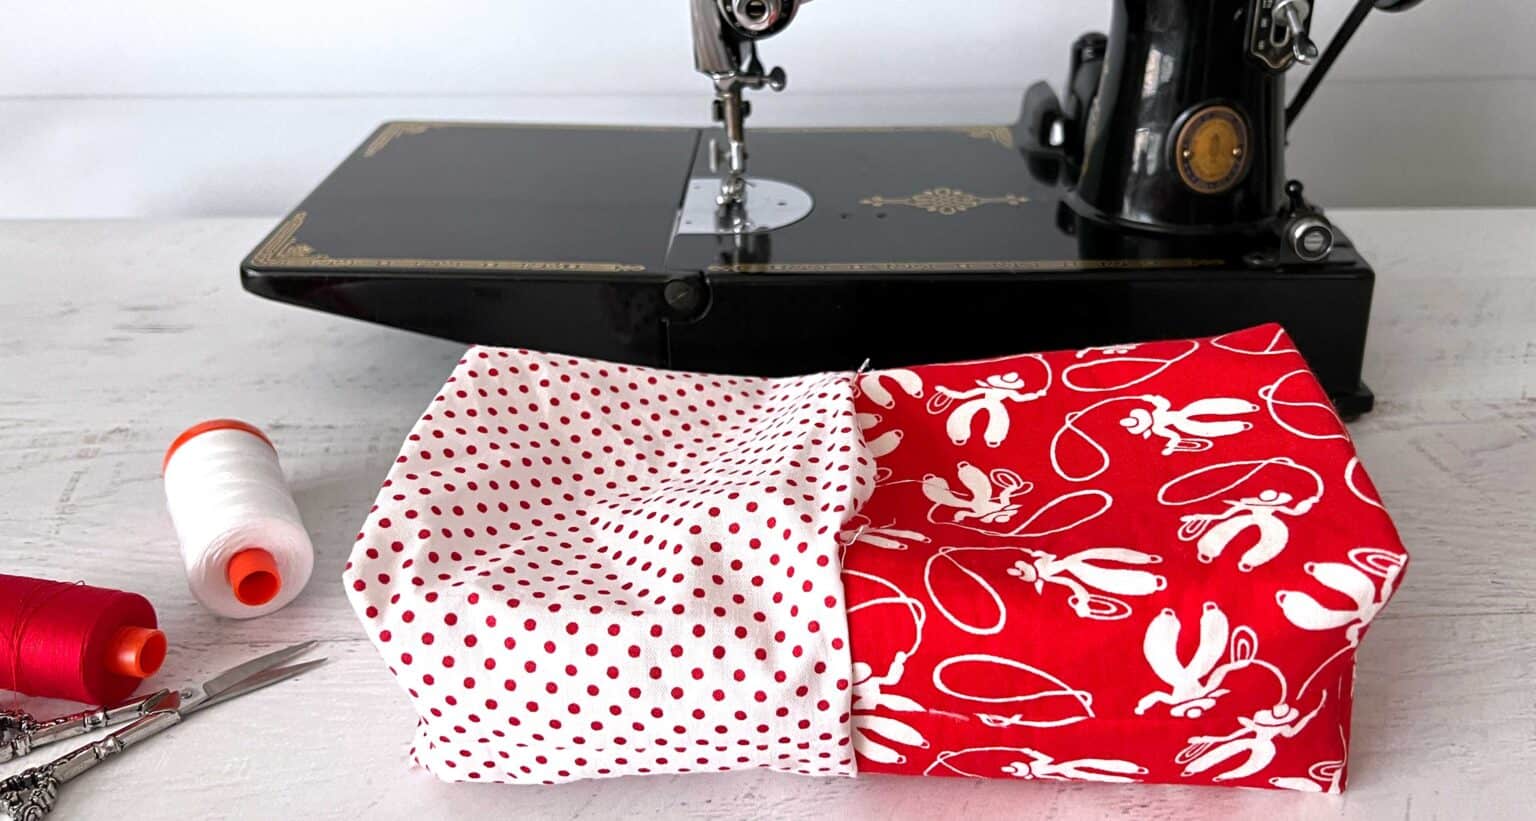
Mini Fabric Basket Tutorial
Looking for a unique and stylish way to organize your space? Look no further than the Mini Fabric Basket! This adorable and functional accessory is perfect for storing small items like keys, jewelry, or even office supplies. Made from high-quality fabric, the basket is not only durable but also adds a touch of charm to any room. The Mini Fabric Basket is a must-have for those who appreciate both practicality and aesthetics. Its compact size makes it ideal for tight spaces, such as a desk or a bedside table. The basket features a sturdy construction that ensures it can hold its shape even when filled with heavier items. With its vibrant colors and patterns, it adds a pop of personality to any decor style. Whether you use it to keep your crafting supplies organized or as a cute catch-all for odds and ends, the Mini Fabric Basket is sure to become a beloved addition to your home.
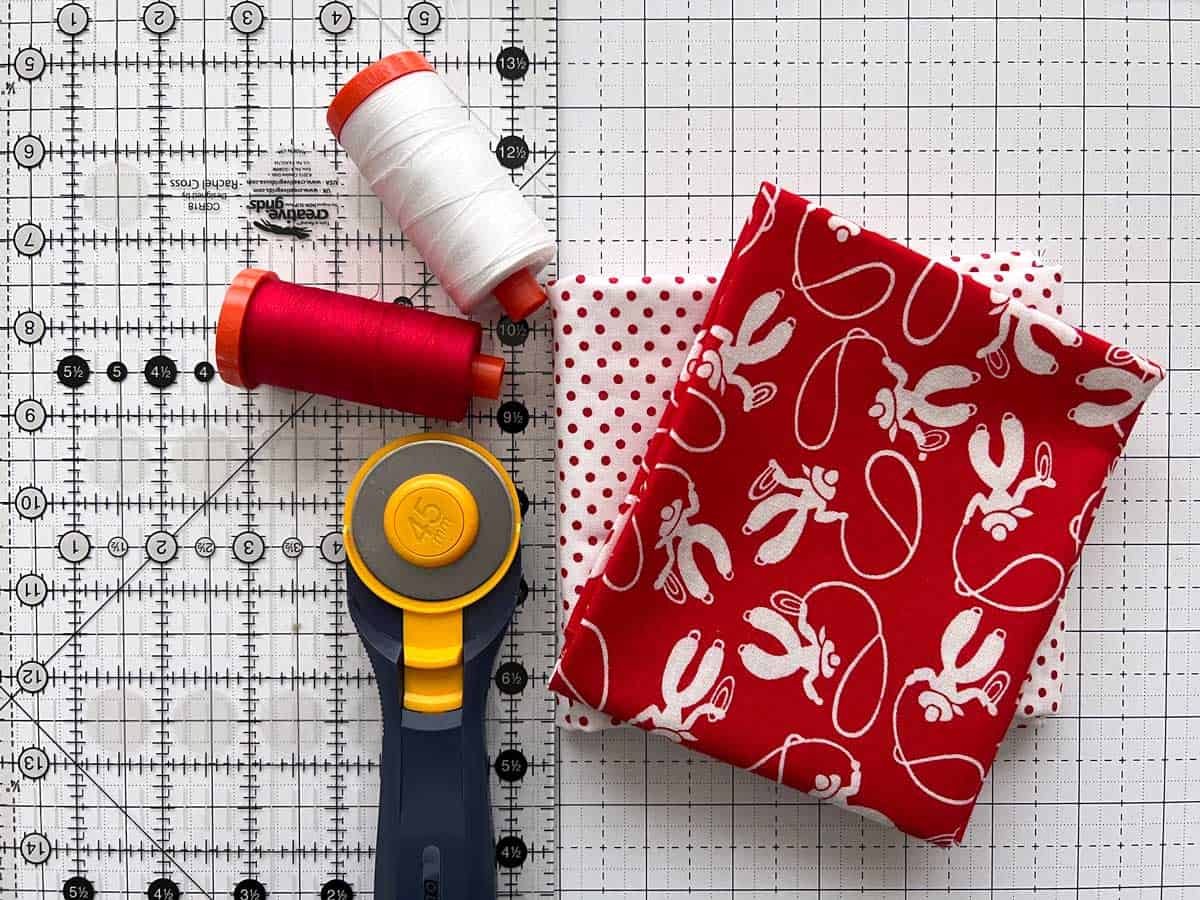
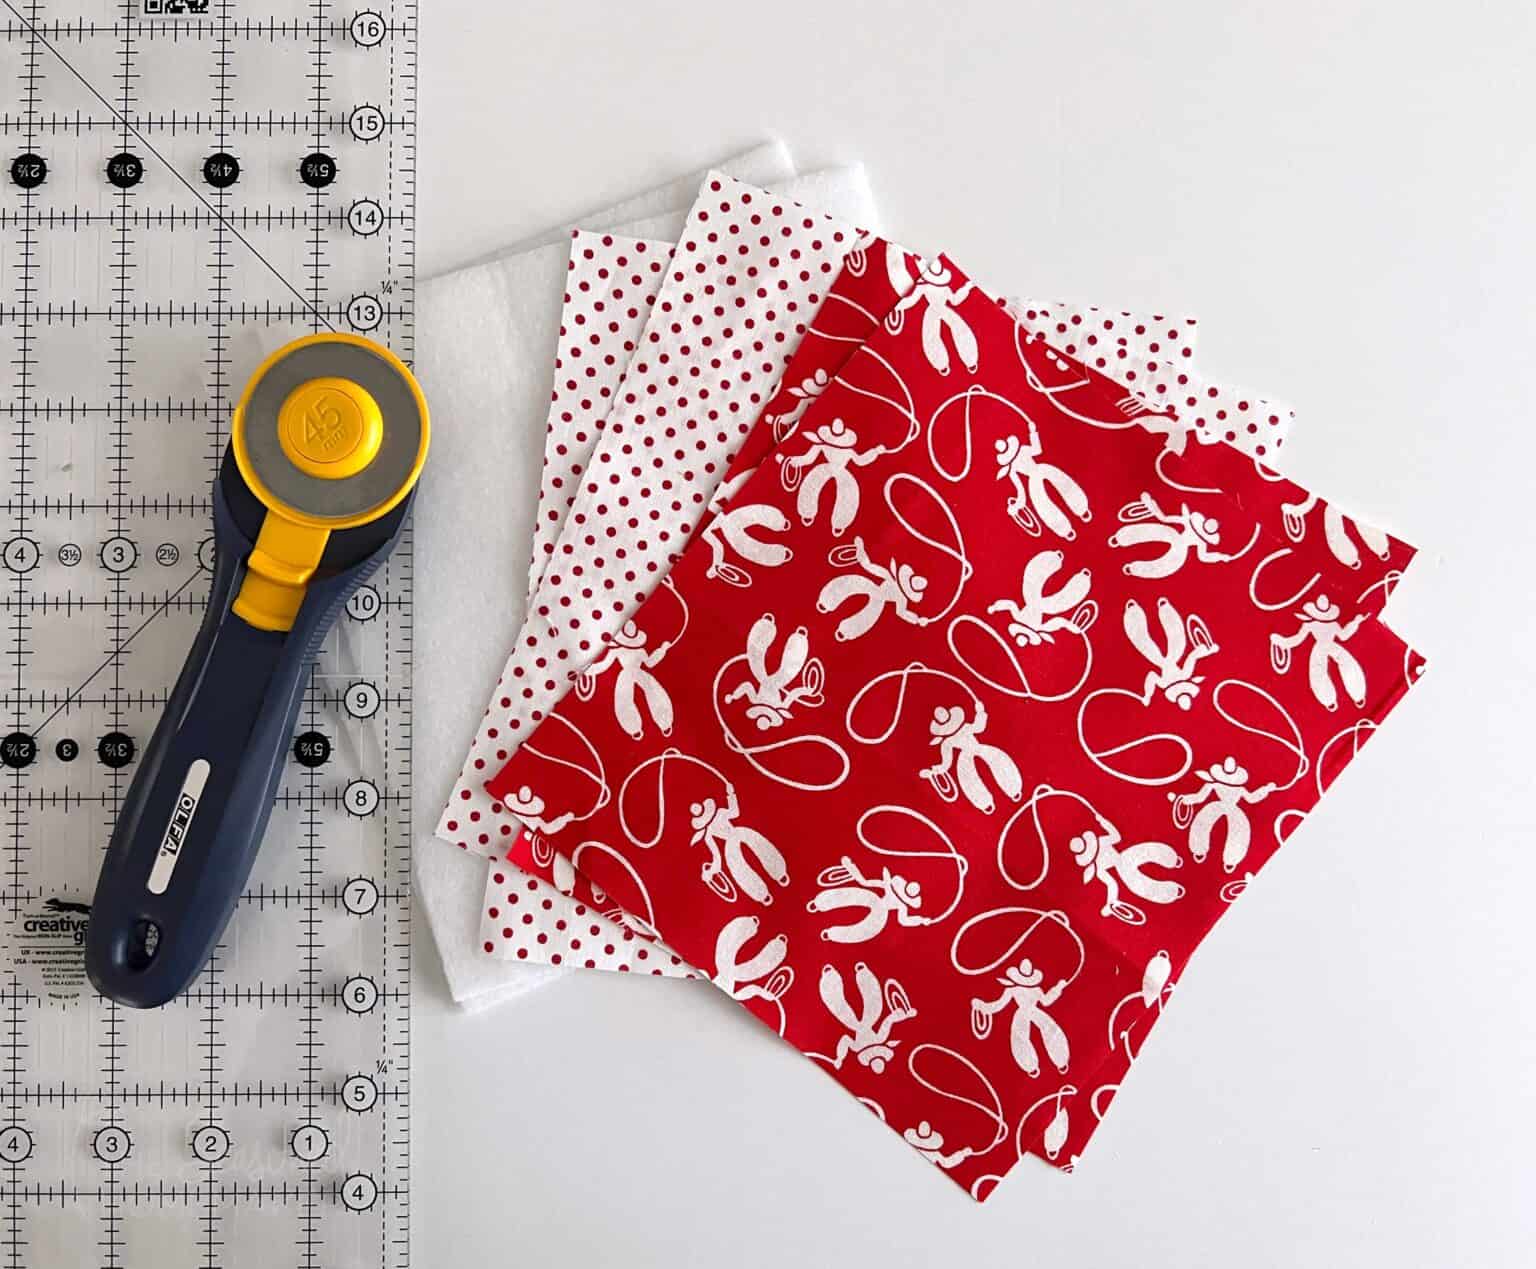
Materials and Supplies:
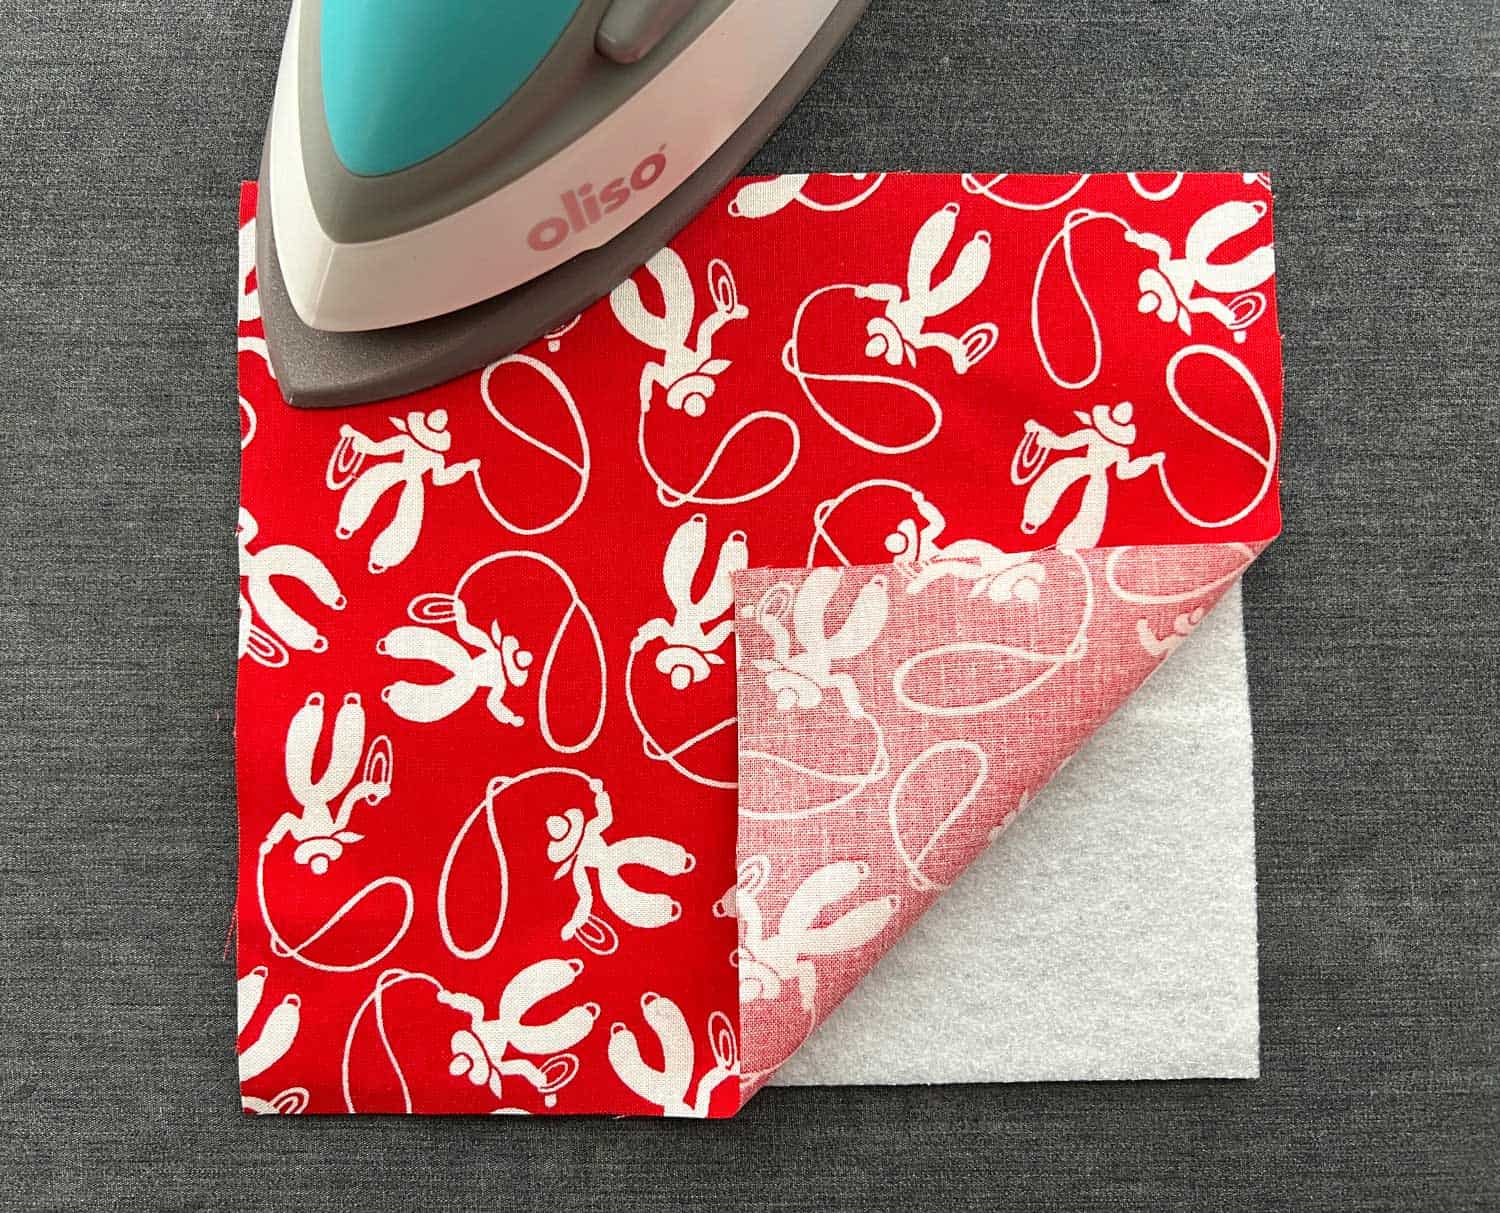
I used a product called Fusible Fleece for the interfacing because it helps the basket stand upright best. It also allows you to a little quilting if desired. However, most interfacings will work on this project, including flexible foam.
- (1) Fat Quarter in printed fabric
- (1) Fat Quarter coordinated (solid) fabric
- Fusible Fleece (Interfacing)
- Schmetz Universal Needle
- Pins or Wonder Clips
- Aurifil 50 wt. Cotton Thread
- Sewing Machine
- Rotary Cutter
- Acrylic Ruler
- Self-Healing Rotary Cutting Mat
- Walking Foot (optional, but highly recommended)
- Iron & Ironing Board
- A Mini Iron is perfect for this project!
- Knitting Needle or Chopstick (for turning)
Step 1: Cutting out the pieces
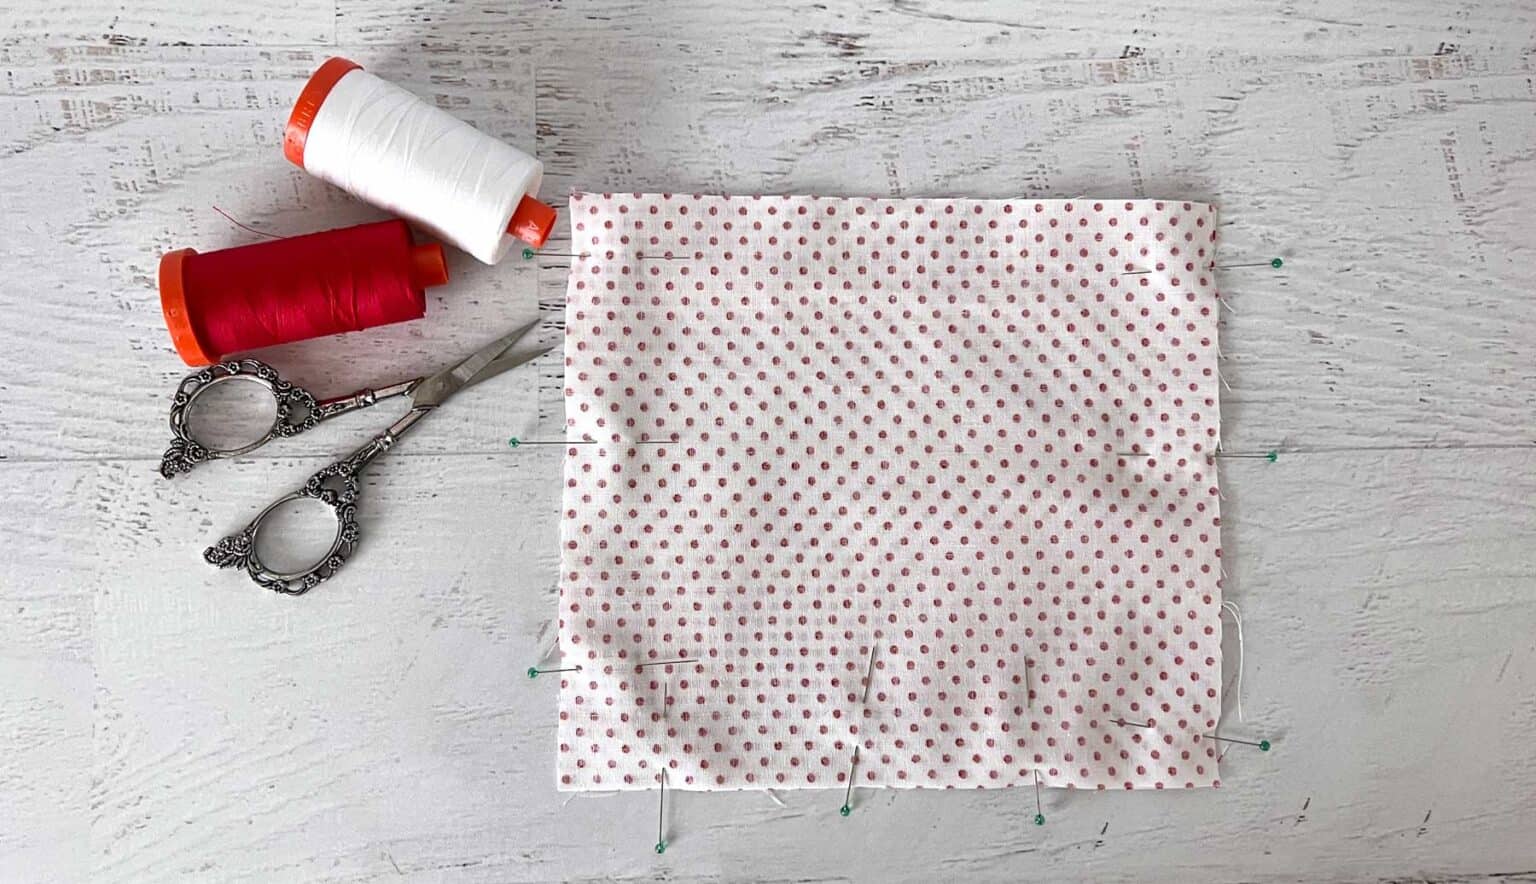
- Cut (2) 7.5″ x 6.75″ piece of printed fabric (Outer Fabric)
- Cut (2) 7.5″ x 6.75″ piece of coordinating fabric (Lining Fabric)
- Cut (2) 7.25″ x 6.5″ piece of fusible fleece
Step 2: Fuse the Fleece
- Place the fusible side (the shiny side!) of the fusible fleece on the wrong side of the printed fabric. It will be slightly smaller so make sure it’s evenly placed on the fabric.
- Fuse to the fabric with a dry iron. Do not iron back and forth because this stretches the fabric. Instead, press the iron up and down. This also will help avoid any of the fabric and fleece shifting.
Step 3: Sewing Pieces Together
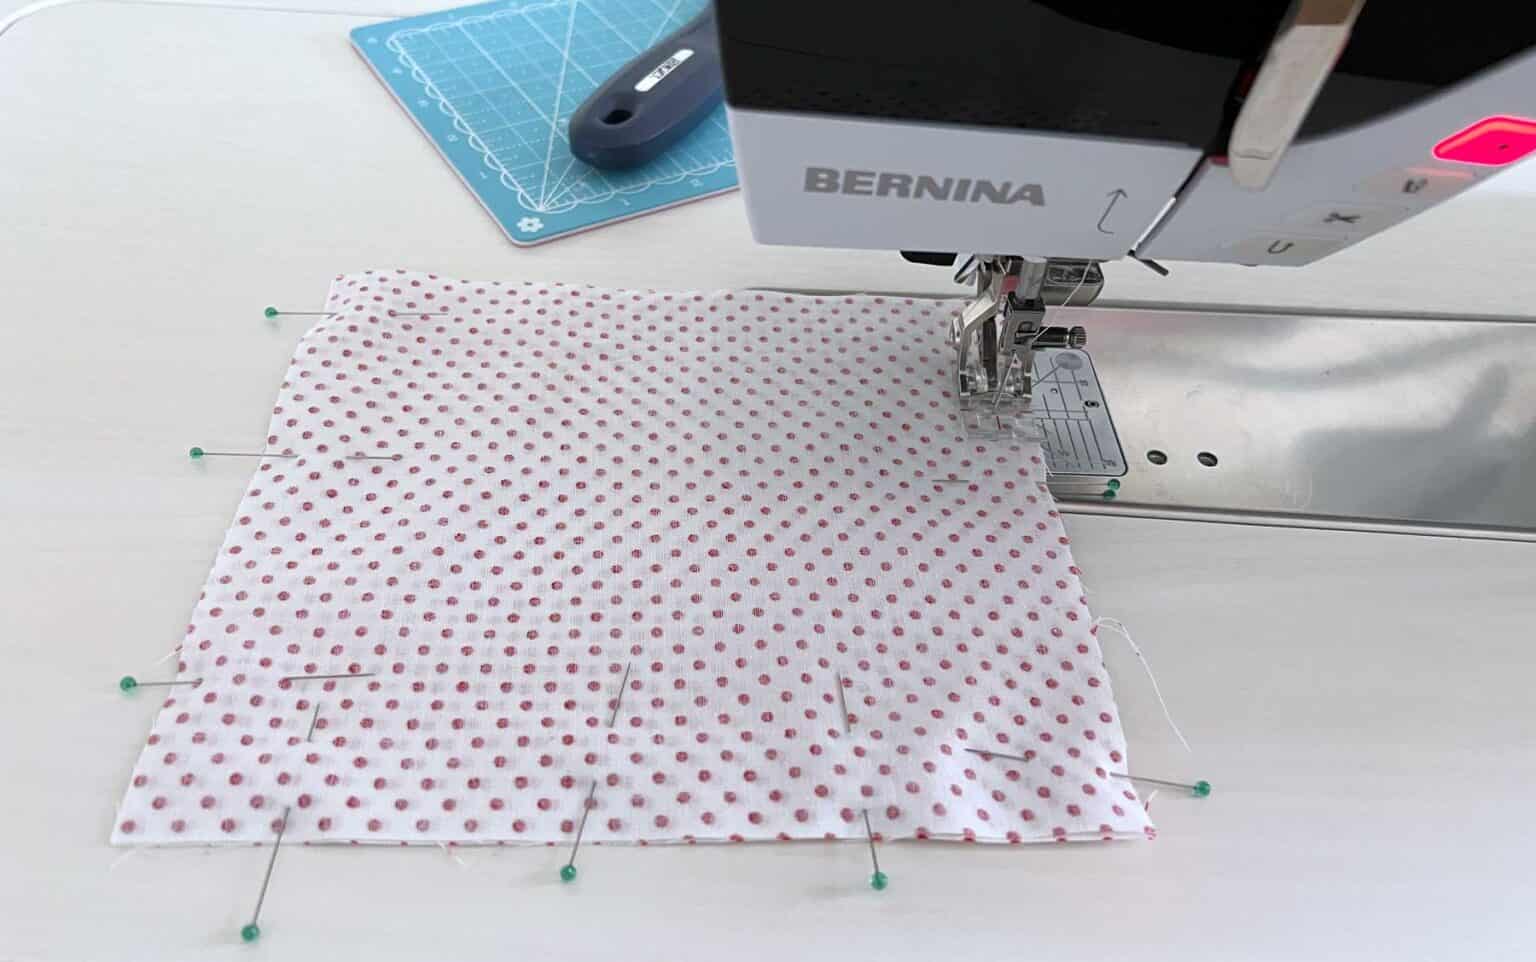
- Place the (2) Exterior fabric pieces right sides together and pin along both side seams and across bottom edge. Leave open at the top. Note: If the Outer Fabric has a directional design, make sure you mark the top and bottom.
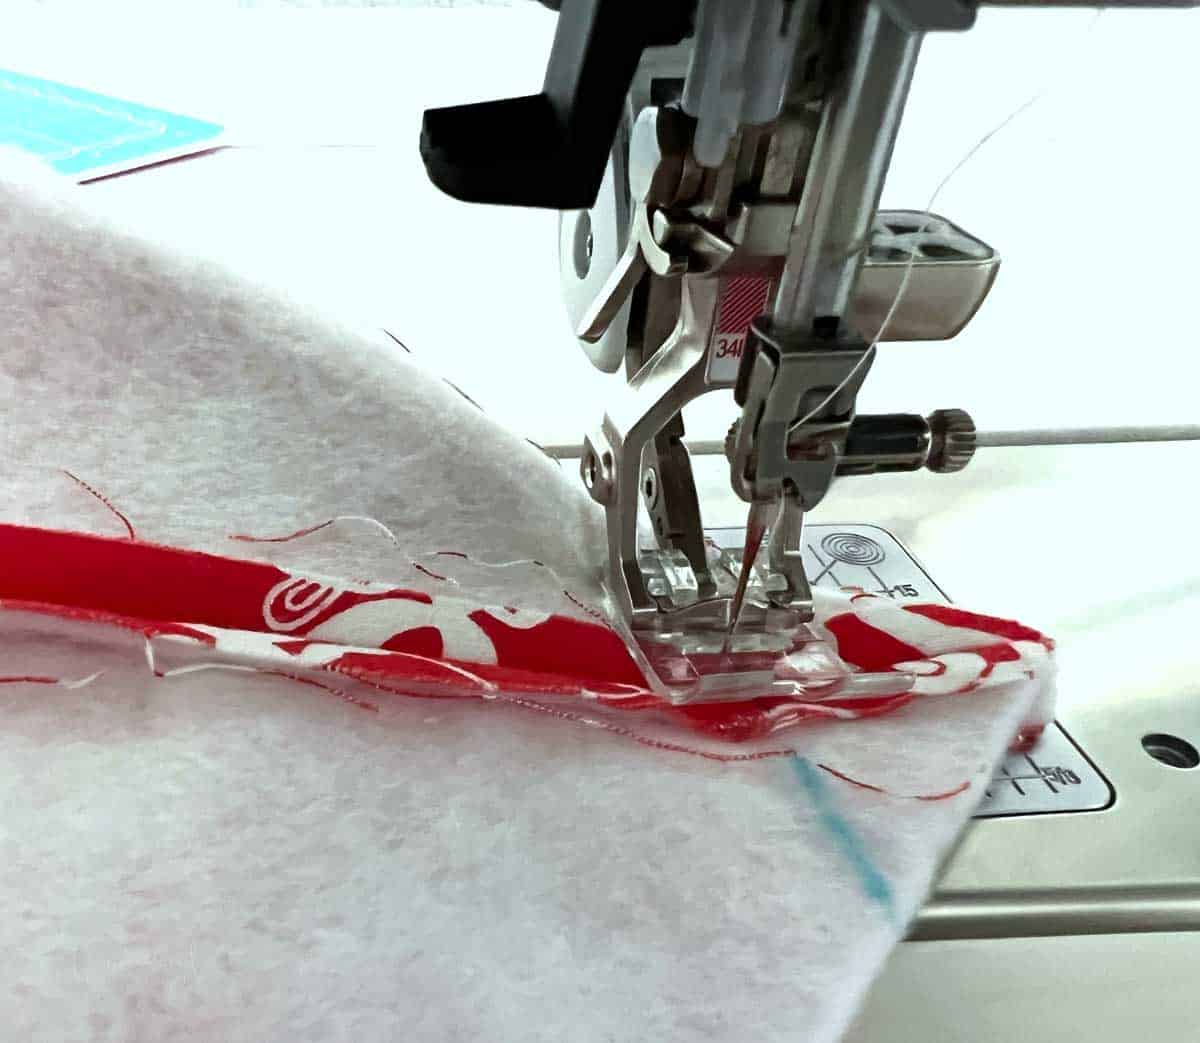
- Using a 3/8″ seam allowance, stitch down the shorter side, pivot, stitch across the bottom edge, pivot, and stitch up the other side. Do not sew across the top edge.
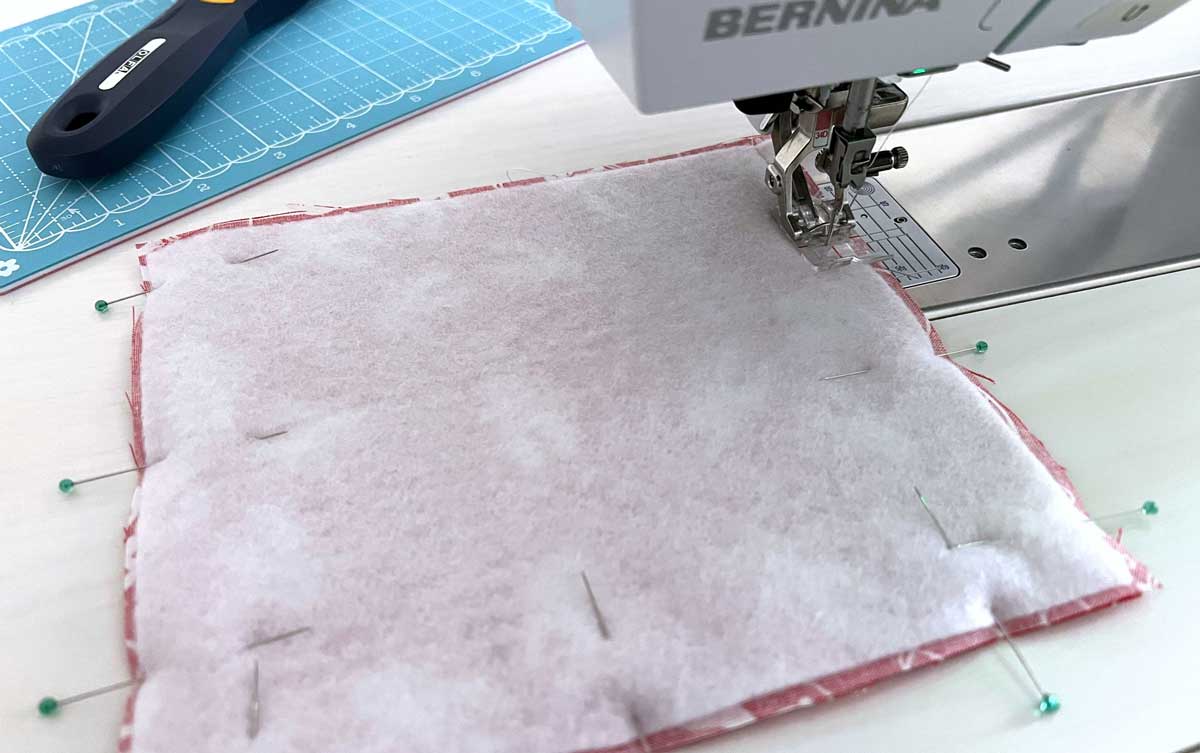
Note: The seam allowance should barely include the fusible fleece. If more is caught in the seam, be sure to trim down.
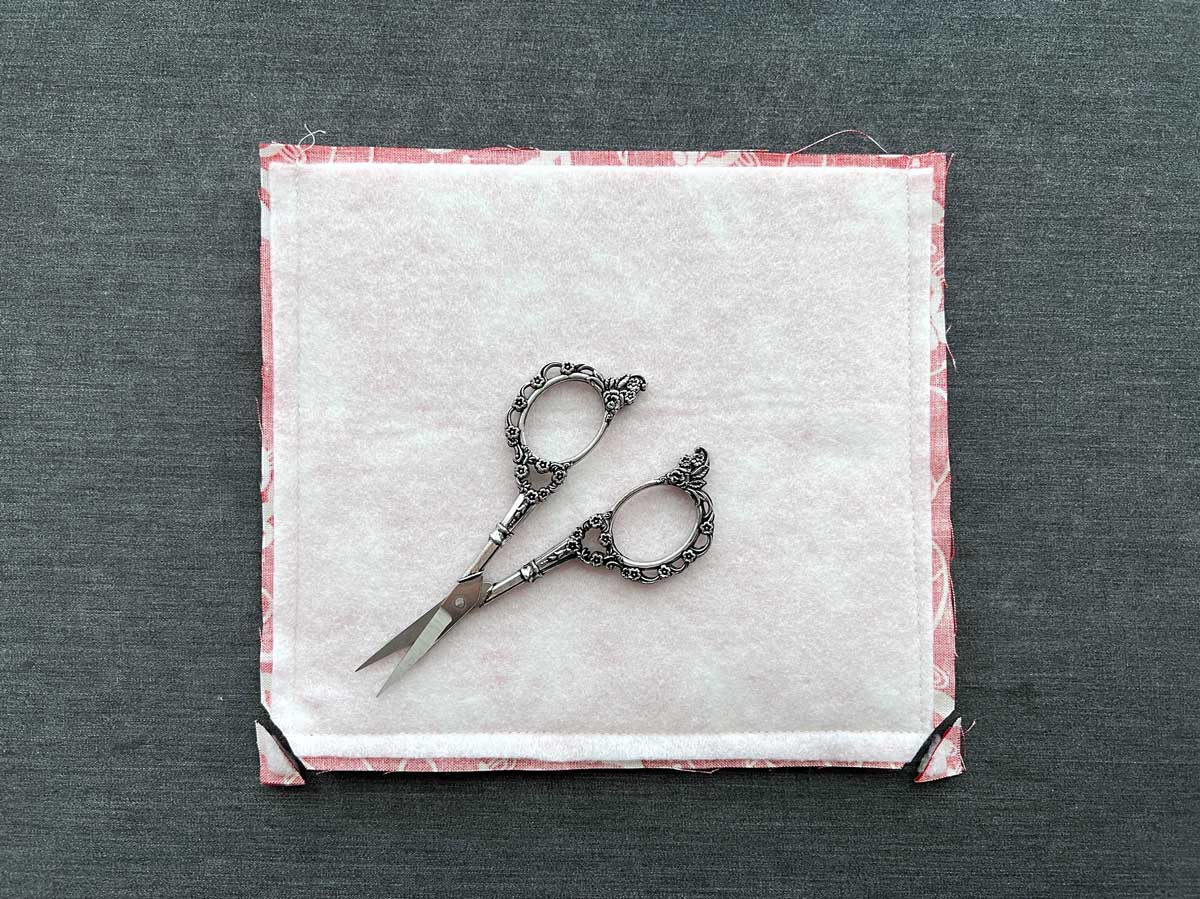
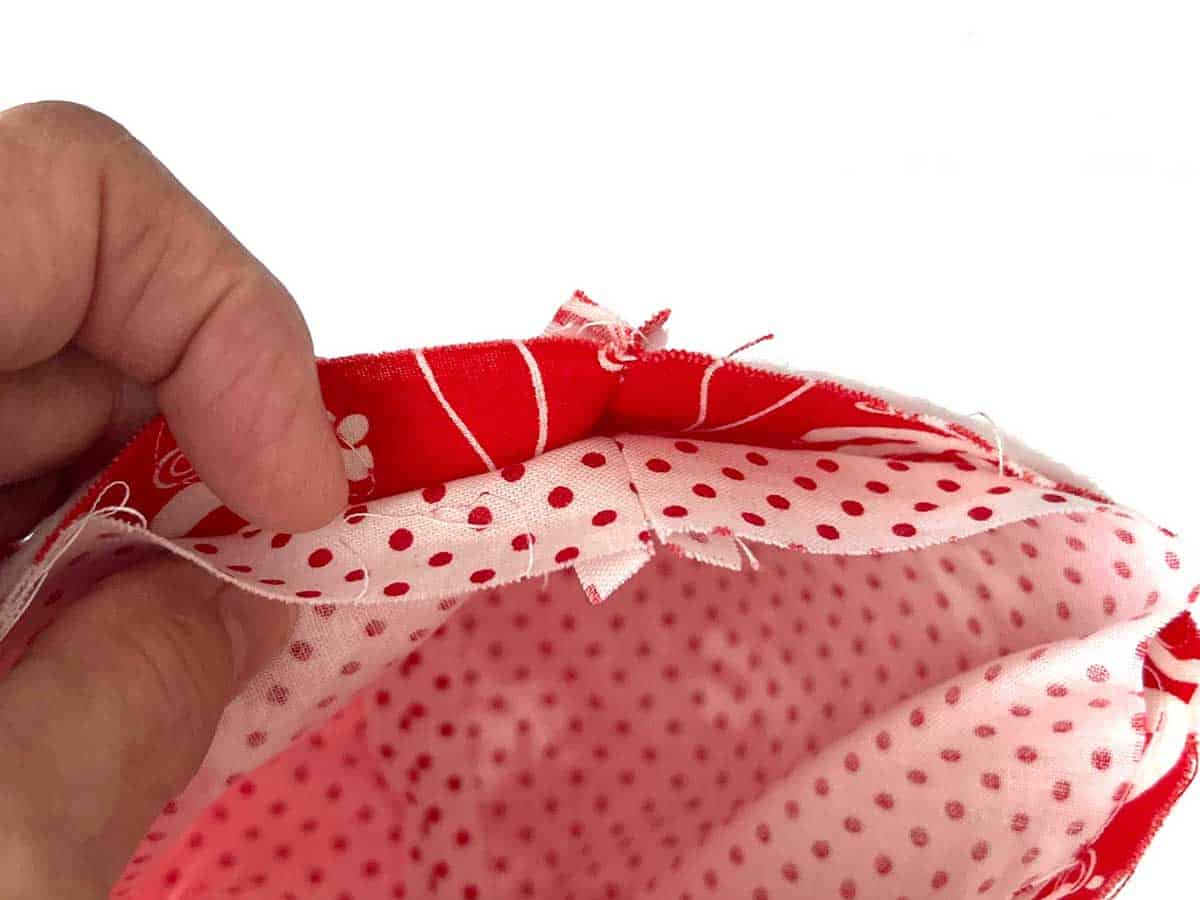
- When finished stitching, clip the two bottom corners.
- Press the seams open. Note: A mini iron is perfect for pressing this project.
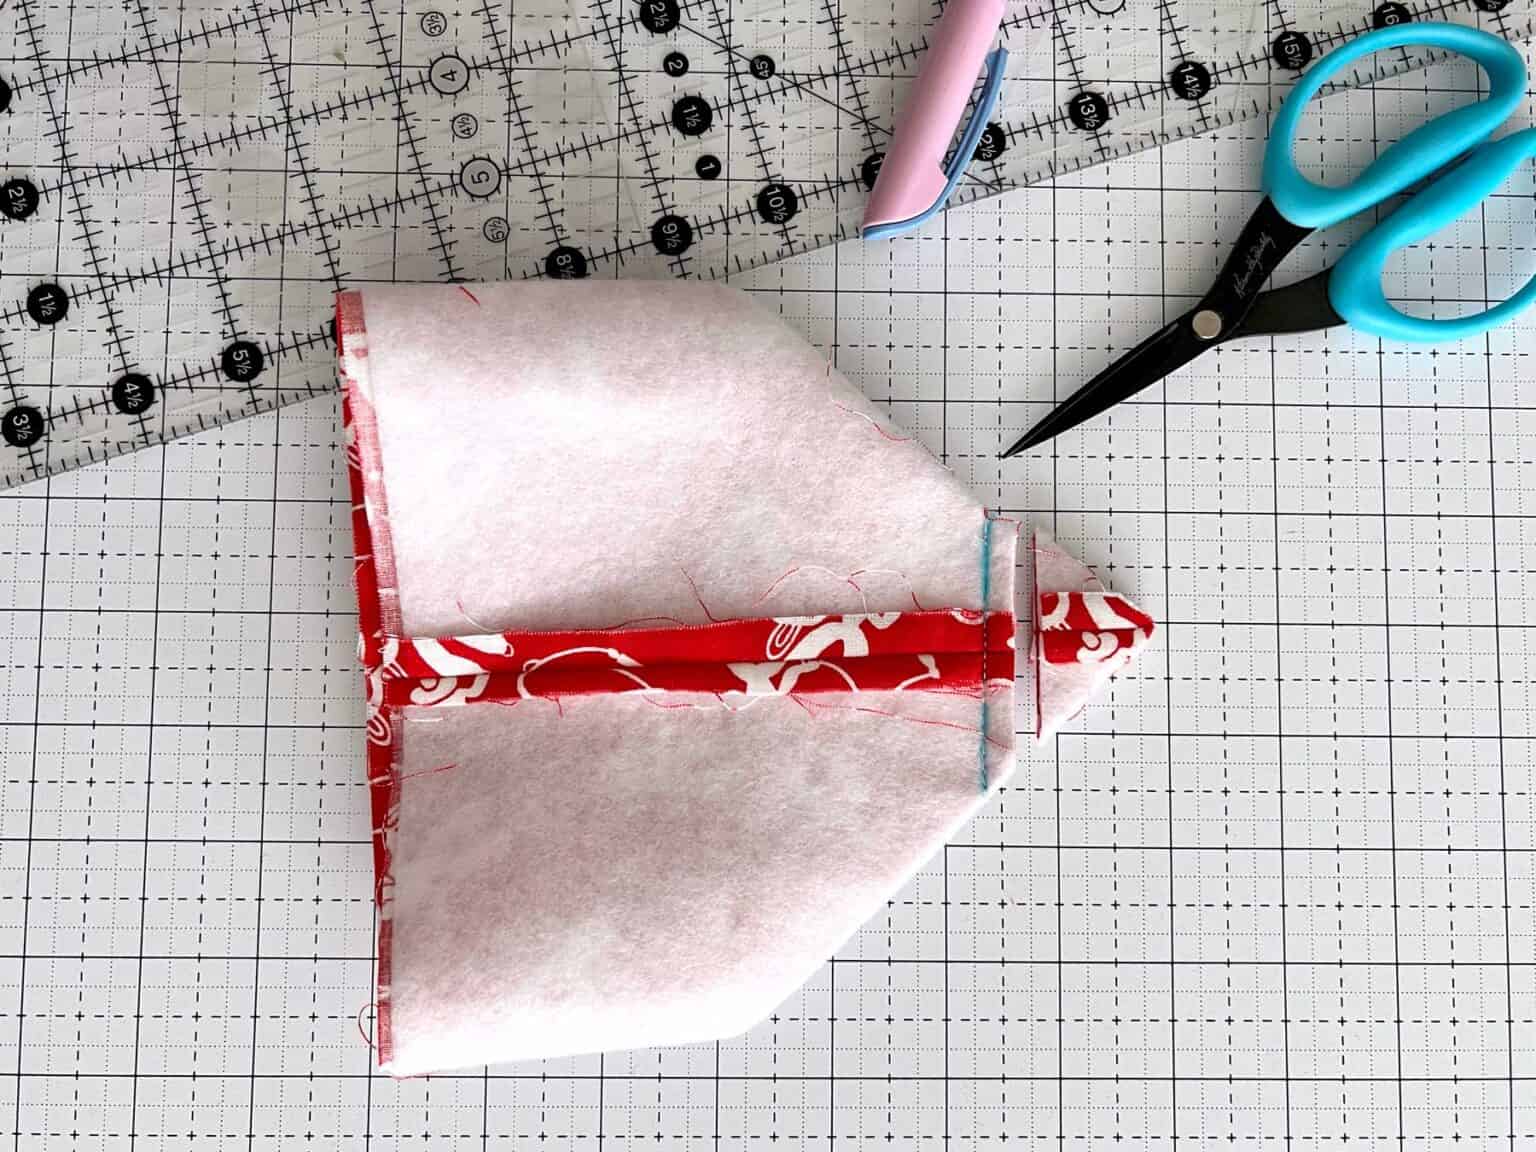
Step 4: Making the Boxed Corners
In order for the Mini Fabric Basket to have a flat bottom you will need to create a pleat in the bottom corners.
- On both bottom corners fold to create a triangle in the corner, matching up the side seam with the bottom seam. This will line up perfectly and feel like a nested seam. Turn inside out to make sure seam is lined up.
- Press if desired.
- Pin where the two seams meet.
Note: Lining this up will affect the appearance of your basket. You want to make sure this seam point is precise.
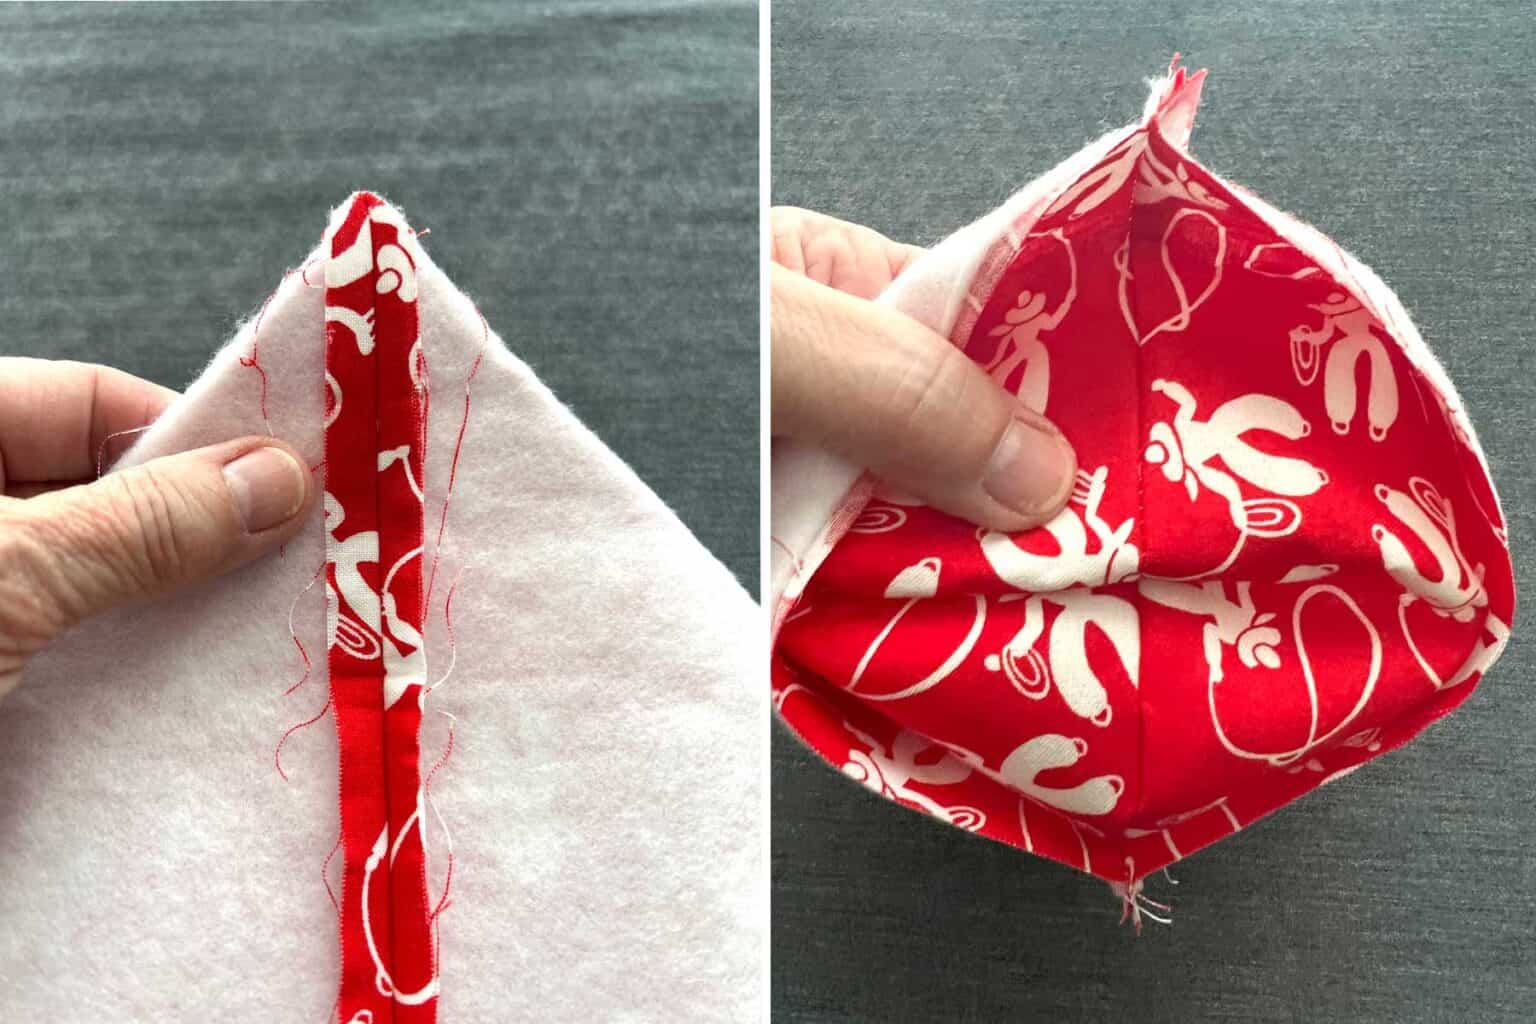
- Make sure the Exterior seams line up on both sides and pin in the corner;.
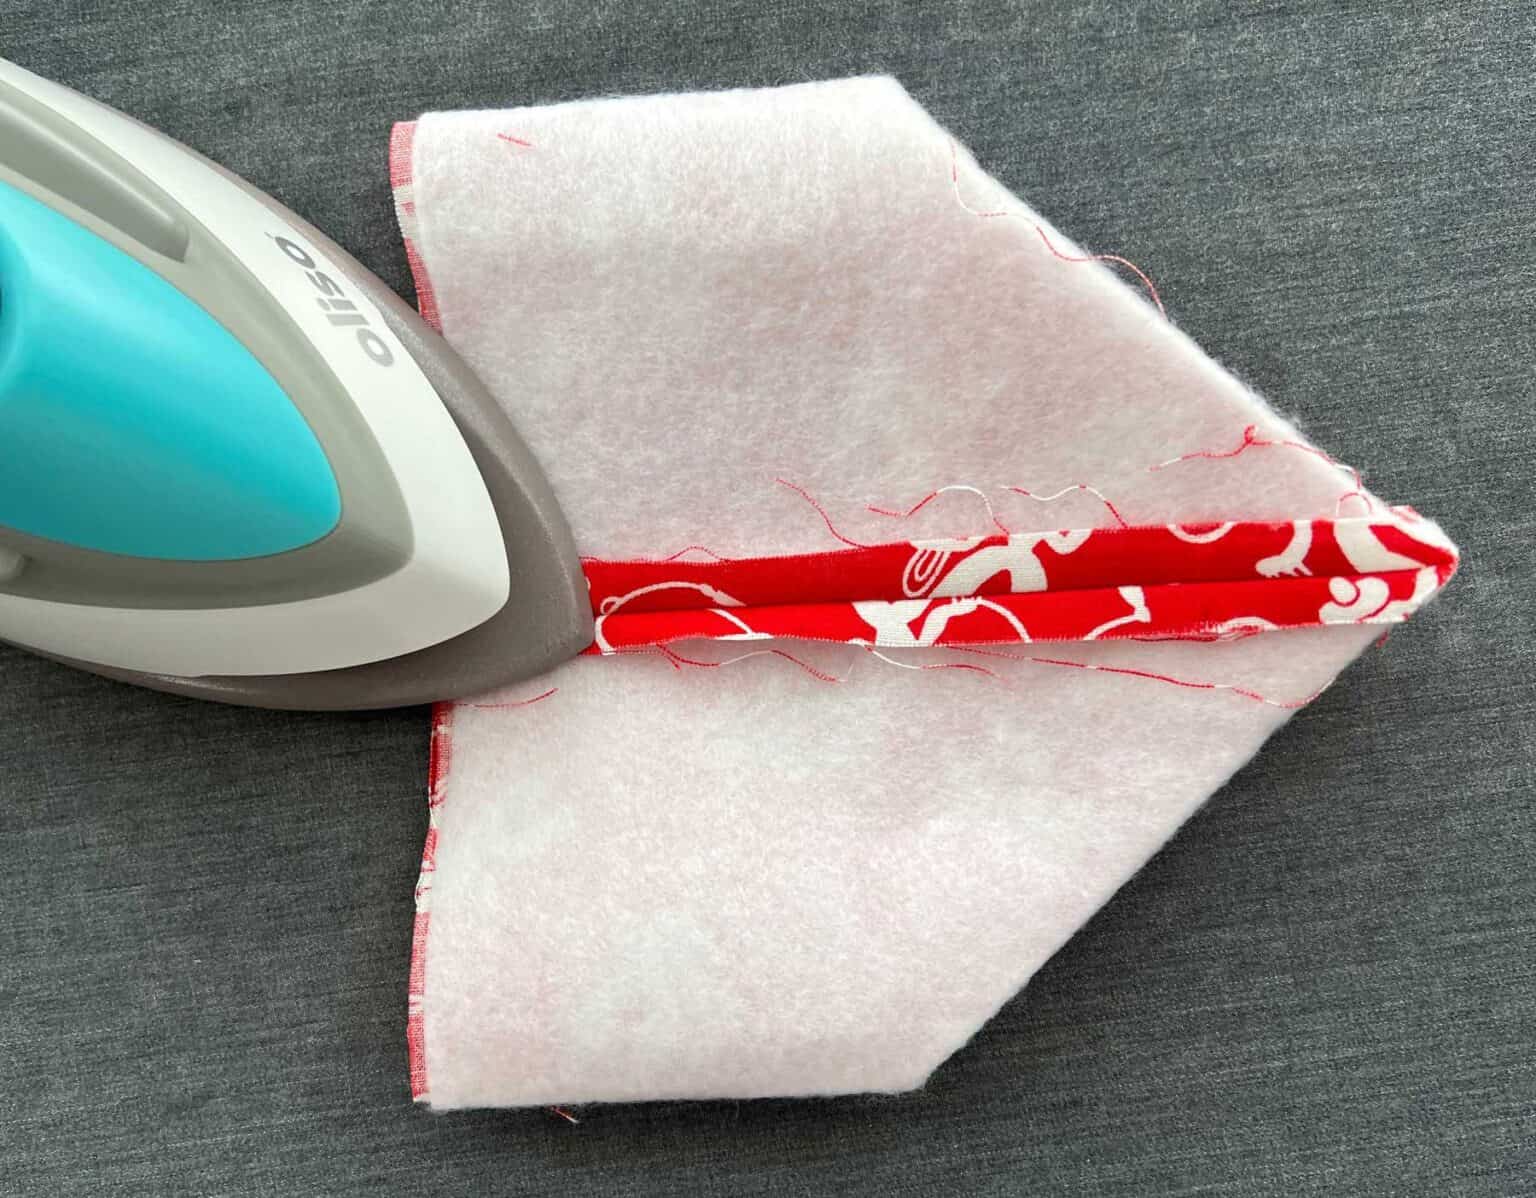
- With your water erasable pen, measure 1.5″ in from the corner point and with your water erasable pen, draw a stitching line across the seam. Repeat on opposite side.
- Stitch across marked line on both sides of basket to create two pleats.
- Trim away the fabric triangle, leaving a 1/4” seam allowance. Be sure to remove the markings if using a light colored fabric.
- Turn basket right side out and make sure all of the seams line up. Push points out with something like a chopstick.

Step 5: Make the Lining
Note: The lining fabric does not need interfacing.
- Repeat Steps 3-4 to make the lining.
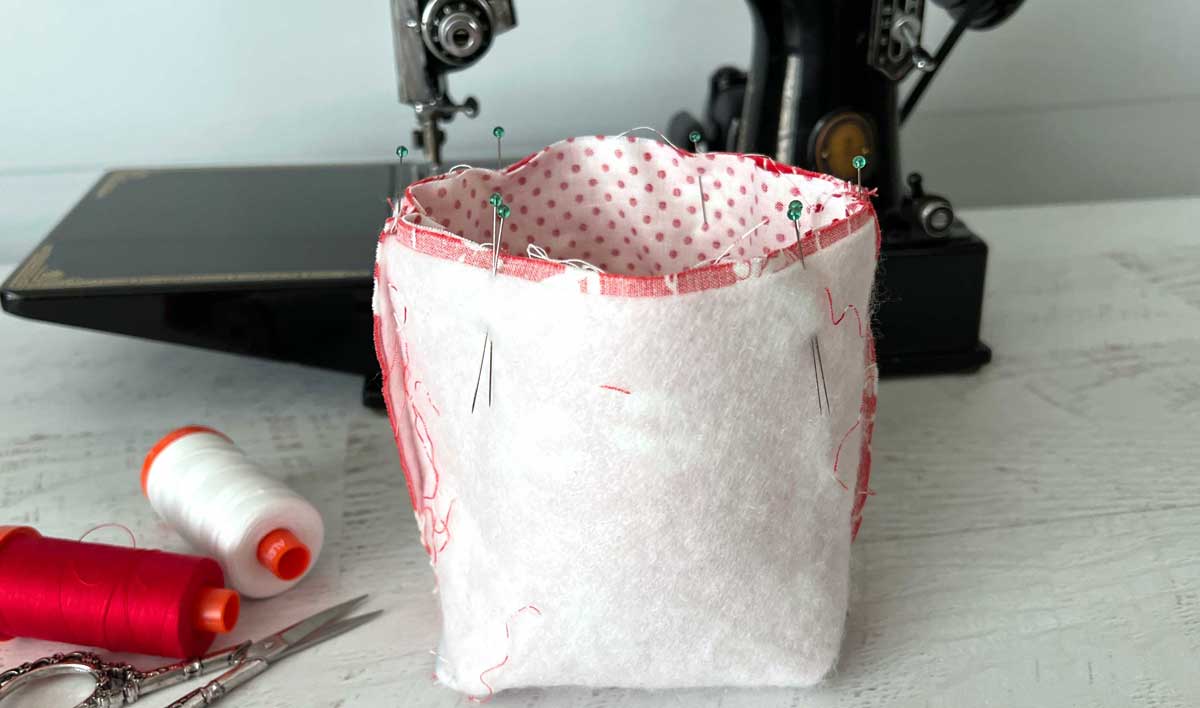
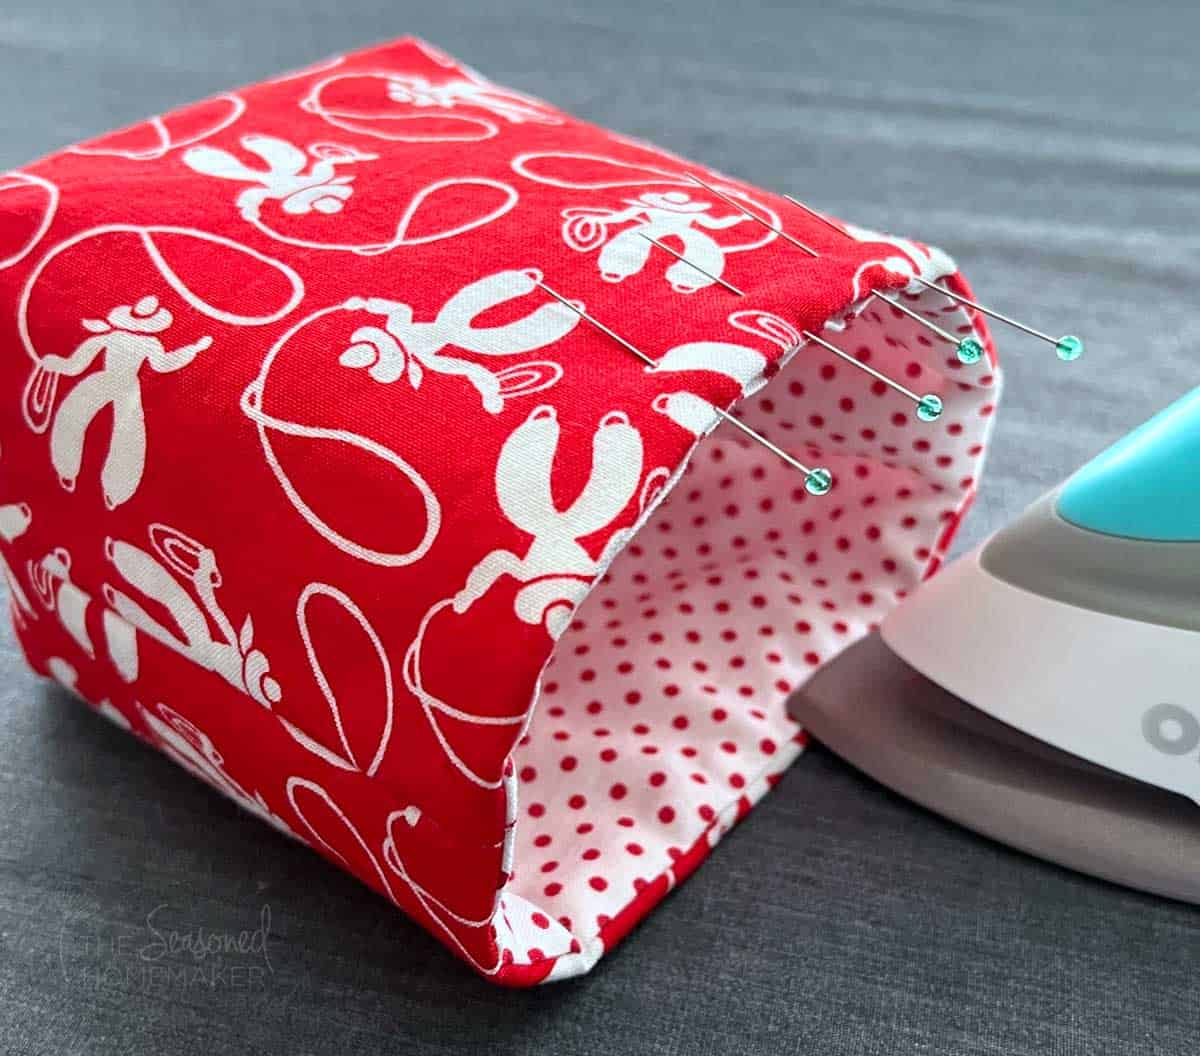
Step 6: Assembling the Mini Basket
Note: Exterior should be wrong side out and Lining should be right side out.
- With right sides together, place the Lining inside the Exterior basket Be sure to line up the two side seams.
- Pin around the raw edge at the top. Leave a 2.5″- 3″ opening in the center, between the seams.
Pro Tip: Use double pins to mark the two sides of the opening.
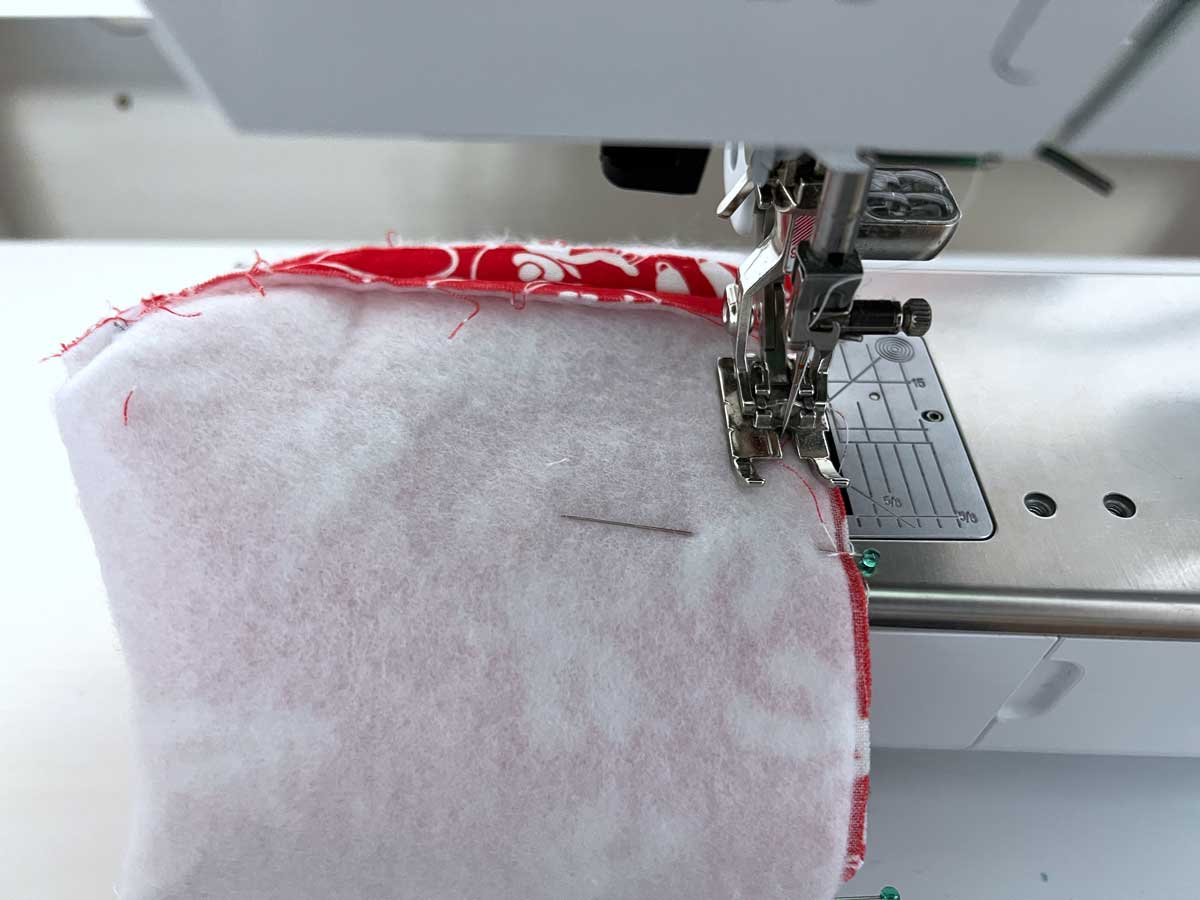
- Using a 1/4″ seam allowance, begin stitching on one side of the opening, along the top edge. Be sure to backstitch at the beginning and end.
Pro Tip: Use the free arm on the sewing machine here.
- Carefully pull the Basket Exterior through the opening. Use something like a chopstick to push the points out on the Mini Basket Exterior and Interior.
- Press corners flat.
Step 7: Finishing the Mini Basket
- When all of the lining has been pulled through, push it into the basket, matching up the bottom edges.
- Press along the top edge making sure to fold in the seam allowance along the opening. Pin in place.
- Using a 1/8″ seam allowance, topstitch along the top edge of the Mini Fabric Basket. This will also close the opening. Pro Tip: Use a Topstitch or Edge Stitch Foot for perfect topstitching.
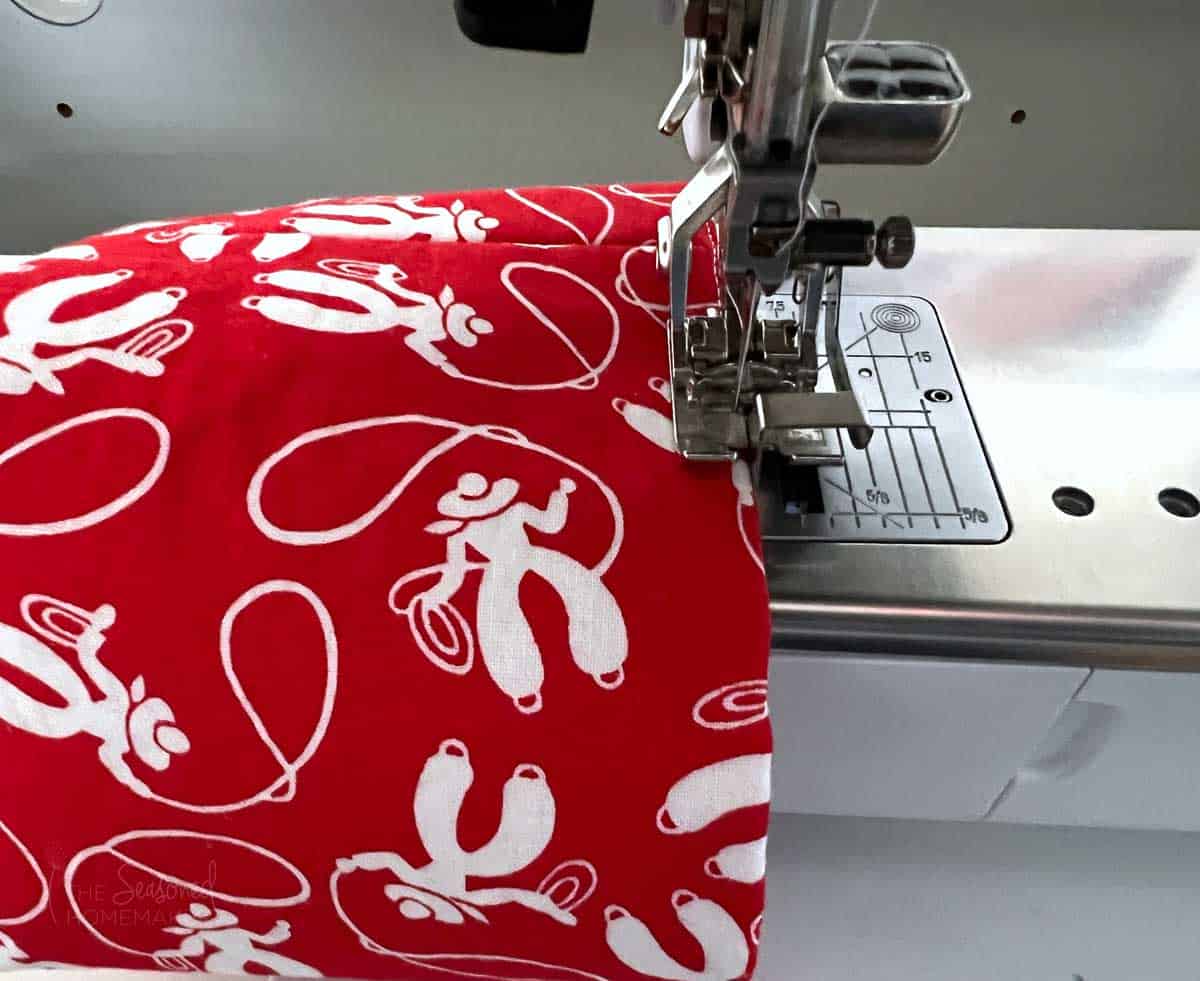
- If desired, topstitch 1/2″ – 5/8″ down from the top edge. This can be either decorative or used as a fold line.
That’s all there is to it. Now grab a few of those orphan fat quarters and make several more mini baskets.