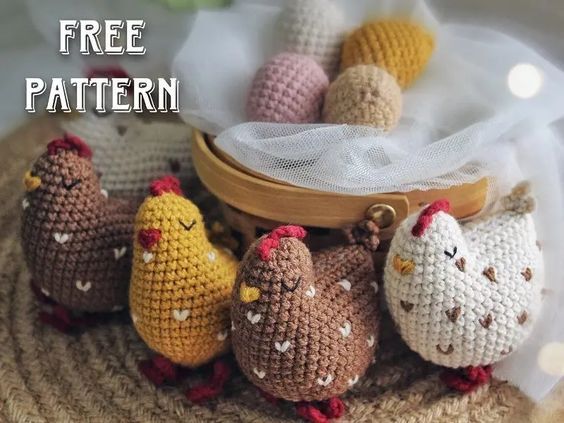
Crochet Easter Chicken Amigurumi
Create your very own adorable Easter chick using the art of crochet with this fun and festive Amigurumi pattern. This project is perfect for beginners and experienced crocheters alike, as it combines basic stitches with shaping techniques to bring this cute little chicken to life. Choose your favorite yarn colors to customize your chick's look, from traditional yellow to pastel shades for a more whimsical touch. This Crochet Easter Chicken Amigurumi is a great way to add a handmade touch to your Easter decorations or to give as a thoughtful gift to friends and family. The finished chick can be displayed on a shelf, used as a keychain, or even incorporated into a festive Easter wreath. Get creative with different embellishments like tiny bows, flower crowns, or even a mini Easter basket for your chick to hold. Let your imagination run wild as you crochet this charming Easter project!
You will need:
- YarnArt Jeans yarn (55% cotton, 45% acrylic; 50 g/160 m)
- 1.75 mm crochet hook
- Black embroidery floss
- Needle and scissors
- Stitch marker
- Fiberfill
Free crochet chicken with eggs pattern
Abbreviations:
R – row
ch – chain
sl st – slip stitch
sc – single crochet
inc – increase (2 sc in one stitch)
dec – decrease (2 sc together)
[…] – number of stitches you should have at the end of the row
(…) – repeat whatever is between the brackets the given number of times
Body and head (one piece)
Start to crochet in any color:
R 1: 6 sc in magic ring [6]
R 2: (inc) repeat 6 times [12]
R 3: (1 sc, inc) repeat 6 times [18]
R 4: 1 sc, inc, (2 sc, inc) repeat 5 times, 1 sc (24)
R 5: (3 sc, inc) repeat 6 times [30]
R 6: 2 sc, inc, (4 sc, inc) repeat 5 times, 2 sc [36]
R 7: 36 sc
R 8: (5 sc, inc) repeat 6 times [42]
R 9-16: 42 sc (8 rows)
Mark the last sc with a stitch marker.
R 17: 21 sc, connect with the loop marked with a marker using sl st.
R 18: 19 sc, dec [20]
R 19: 20 sc
R 20: dec, 16 sc, dec [18]
R 21: 18 sc
R 22: (4 sc, dec) repeat 3 times [15]
R 23: (3 sc, dec) repeat 3 times [12]
R 24: (dec) repeat 6 times [6]
Cut the yarn and fasten off.
Pull the opening closed. Weave in the thread ends inside of the piece.

We fill the toy with filler and sew the back behind the front loops, crochet the tail with the same thread according to the pattern: make 4 ch, crochet from the second ch from the hook:
3 sl st, 6 ch, 5 sl st, 4 ch, 3 sl st; sl st in the back of the toy.
Cut the yarn and fasten off. Weave in the thread ends inside of the piece.

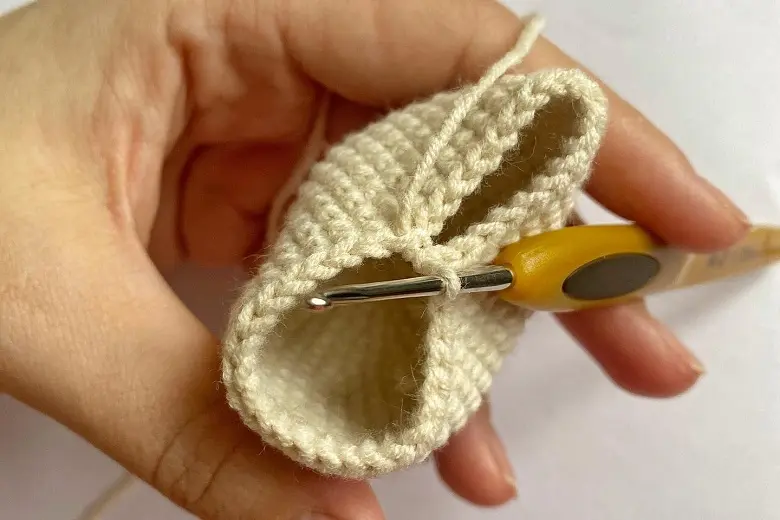
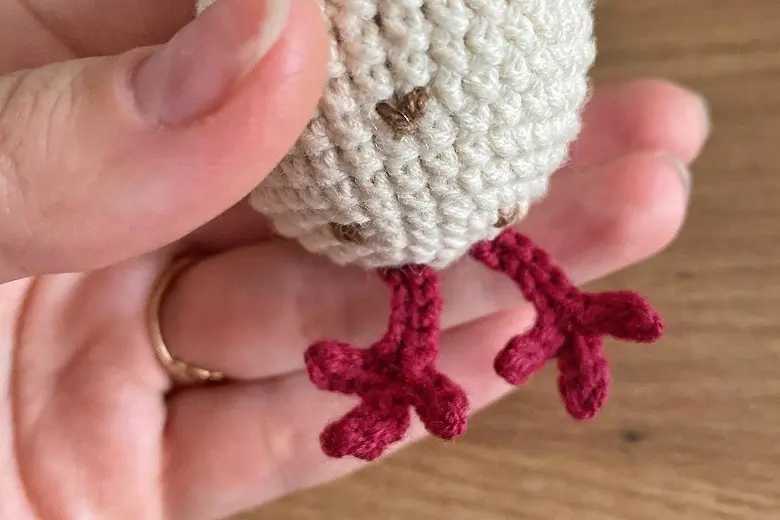
Paws (make 2)
With red yarn:
Make chain 9 ch, crochet from the second loop from the hook: 3 sl st, 4 ch, 3 sl st, 4 ch, 3 sl st, 5 sl st along the main chain. Crochet the second foot in the same way. We sew as shown in the photo.
Crest
With red yarn:
Visually distribute the crest so that it is located in the center of the chicken’s head, according to the pattern: sl st, 3 ch, sl st, 4 ch, sl st, 3 ch, sl st.
Cut the yarn and fasten off. Weave in the thread ends inside of the piece.
Embroider eyes as shown in the photos.
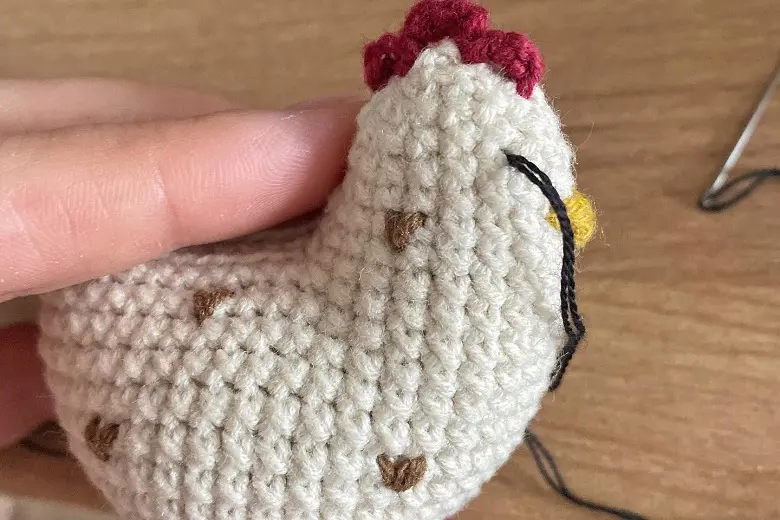
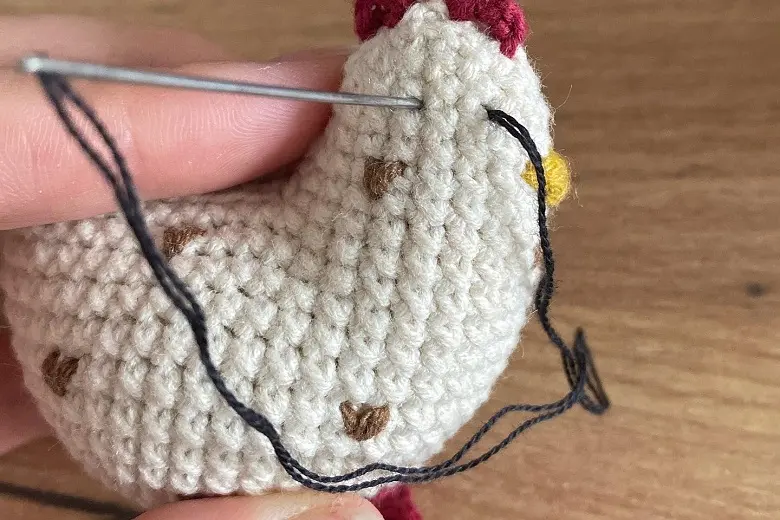
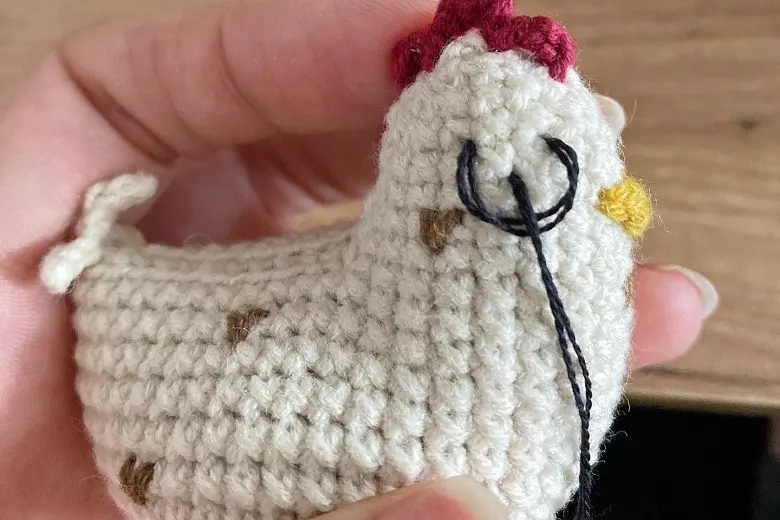
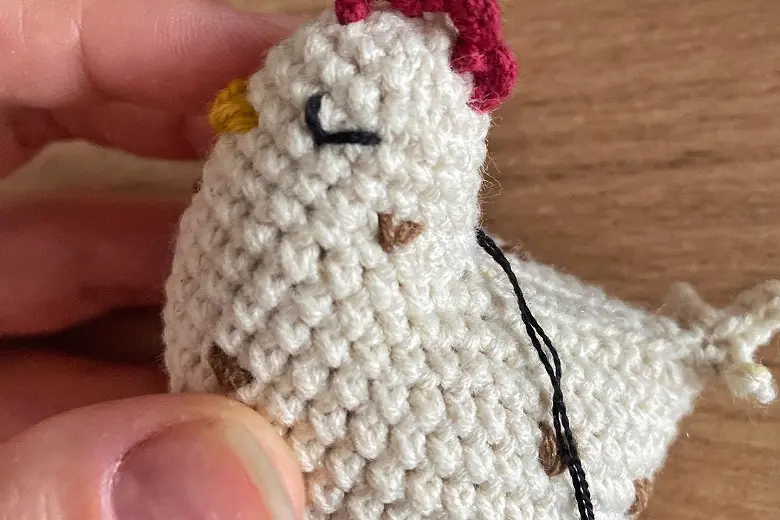
With yarn of a contrasting color, we embroider checkmarks on the body of the chicken in a chaotic manner.
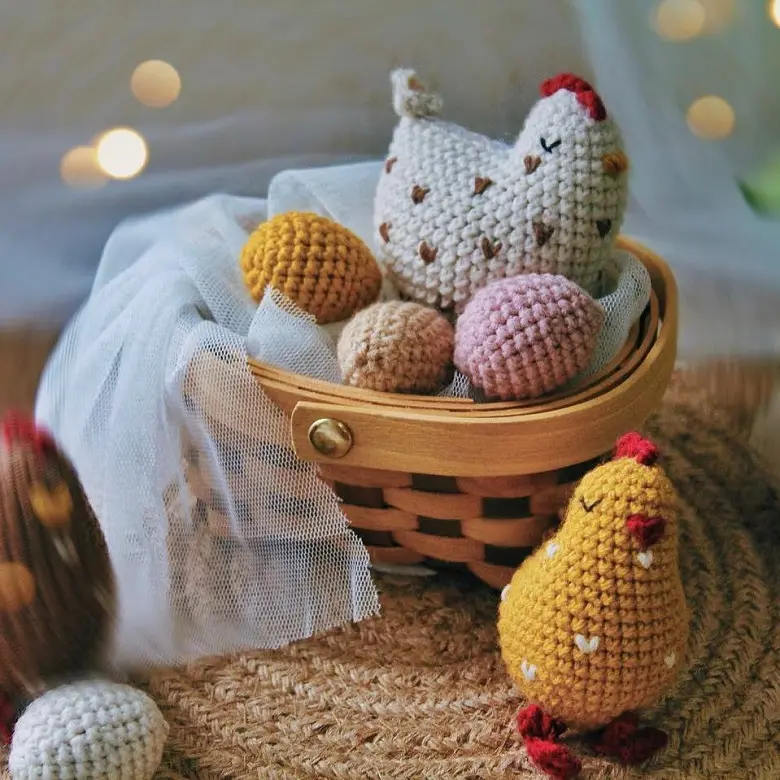
Egg
R 1: 6 sc in magic ring [6]
R 2: (inc) repeat 6 times [12]
R 3: (1 sc, inc) repeat 6 times [18]
R 4: 4 sc, inc, 8 sc, inc [20]
R 5: (9 sc, inc) repeat 2 times [22]
R 6: 22 sc
R 7: (9 sc, dec) repeat 2 times [20]
R 8: 20 sc
R 9: 4 sc, dec, 8 sc, dec, 4 sc [18]
R 10: (4 sc, dec) repeat 3 times [15]
R 11: (3 sc, dec ) repeat 3 times [12]
Stuff with fiberfill.
R 12: (2 sc, dec) repeat 3 times [9]
Pull the opening closed into the front loops using a needle. Weave in the thread ends inside of the piece.
Great patterns! Your awesome!
Thank you 😊