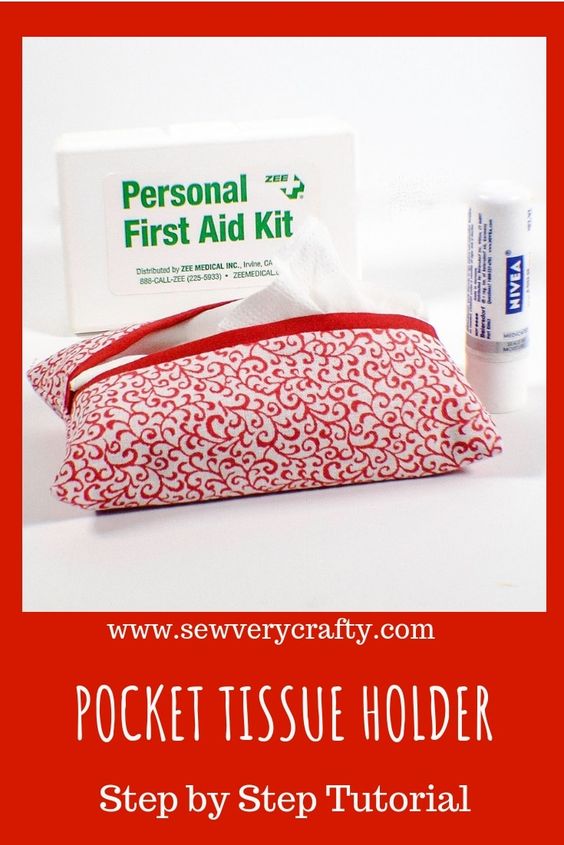
Make a Pocket Tissue Holder
Discover the perfect solution to keep your tissues organized and easily accessible with our innovative Pocket Tissue Holder sewing pattern. This pattern is designed to help you create a stylish and functional accessory that will fit perfectly in your purse, backpack, or even your pocket. No more rummaging through your bag to find a crumpled tissue! With this pattern, you can create a compact and convenient holder that will keep your tissues neat and tidy. Whether you prefer bold and vibrant patterns or subtle and elegant designs, this pattern gives you the freedom to express yourself through your sewing skills. With clear and easy-to-follow instructions, even beginners can enjoy the satisfaction of making their own functional and fashionable accessory. So why settle for plain tissue packs when you can elevate your everyday essentials with our Pocket Tissue Holder sewing pattern?
What you will Need:
- 6 1/2″ x 5 1/2″ piece of outer fabric
- 7 1/2″ x 5 1/2″ piece of lining fabric
- Iron
- Standard sewing supplies

Step 1: Make a Pocket Tissue Holder
Cut your fabrics to the designated sizes. I used some scrap fabrics that I had on hand. In my example the red and white fabric is the outer fabric and the solid red is the lining fabric. You will notice that the lining fabric is larger than the outer fabric. This is done on purpose.
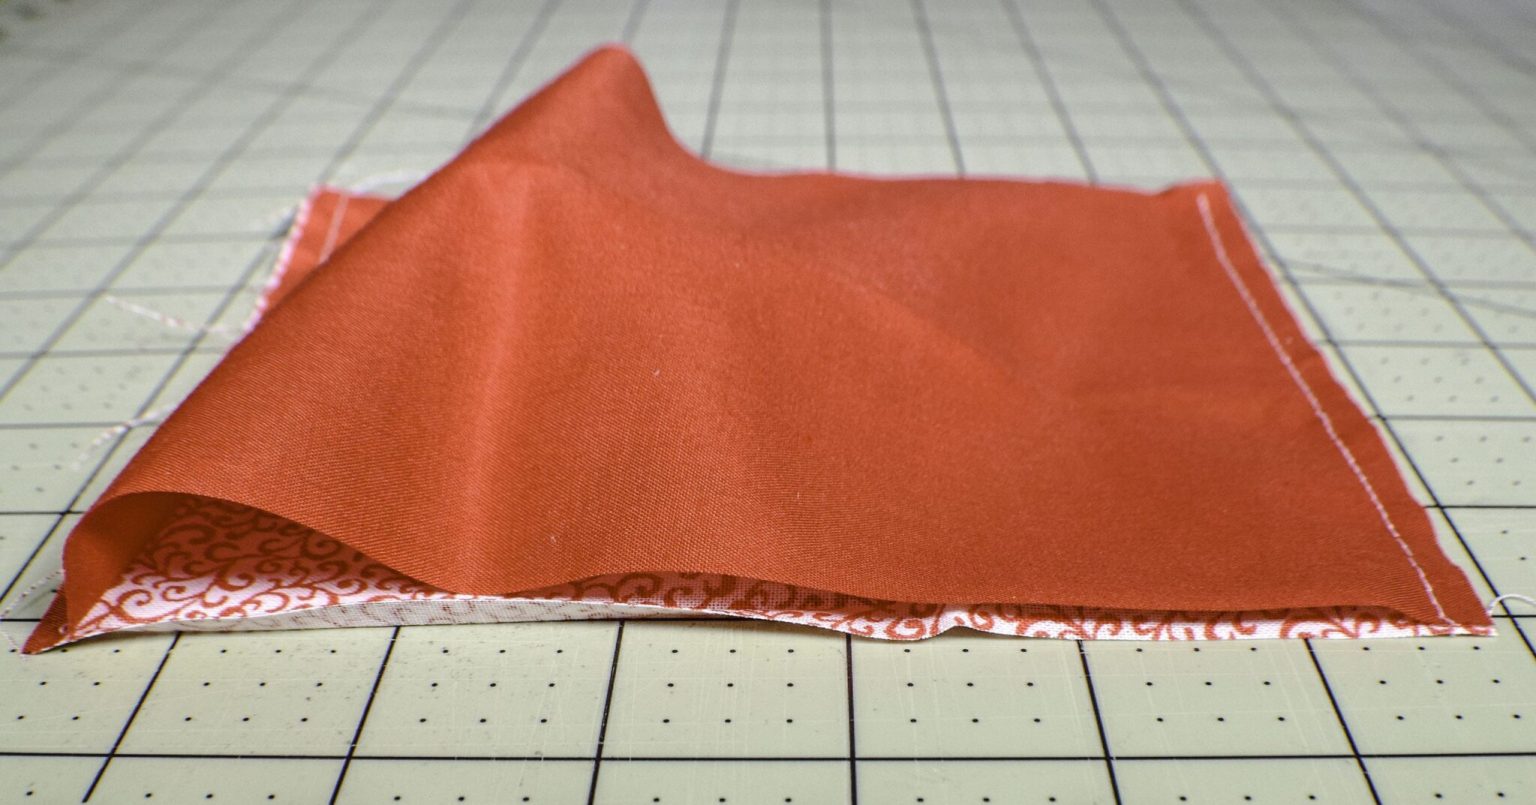
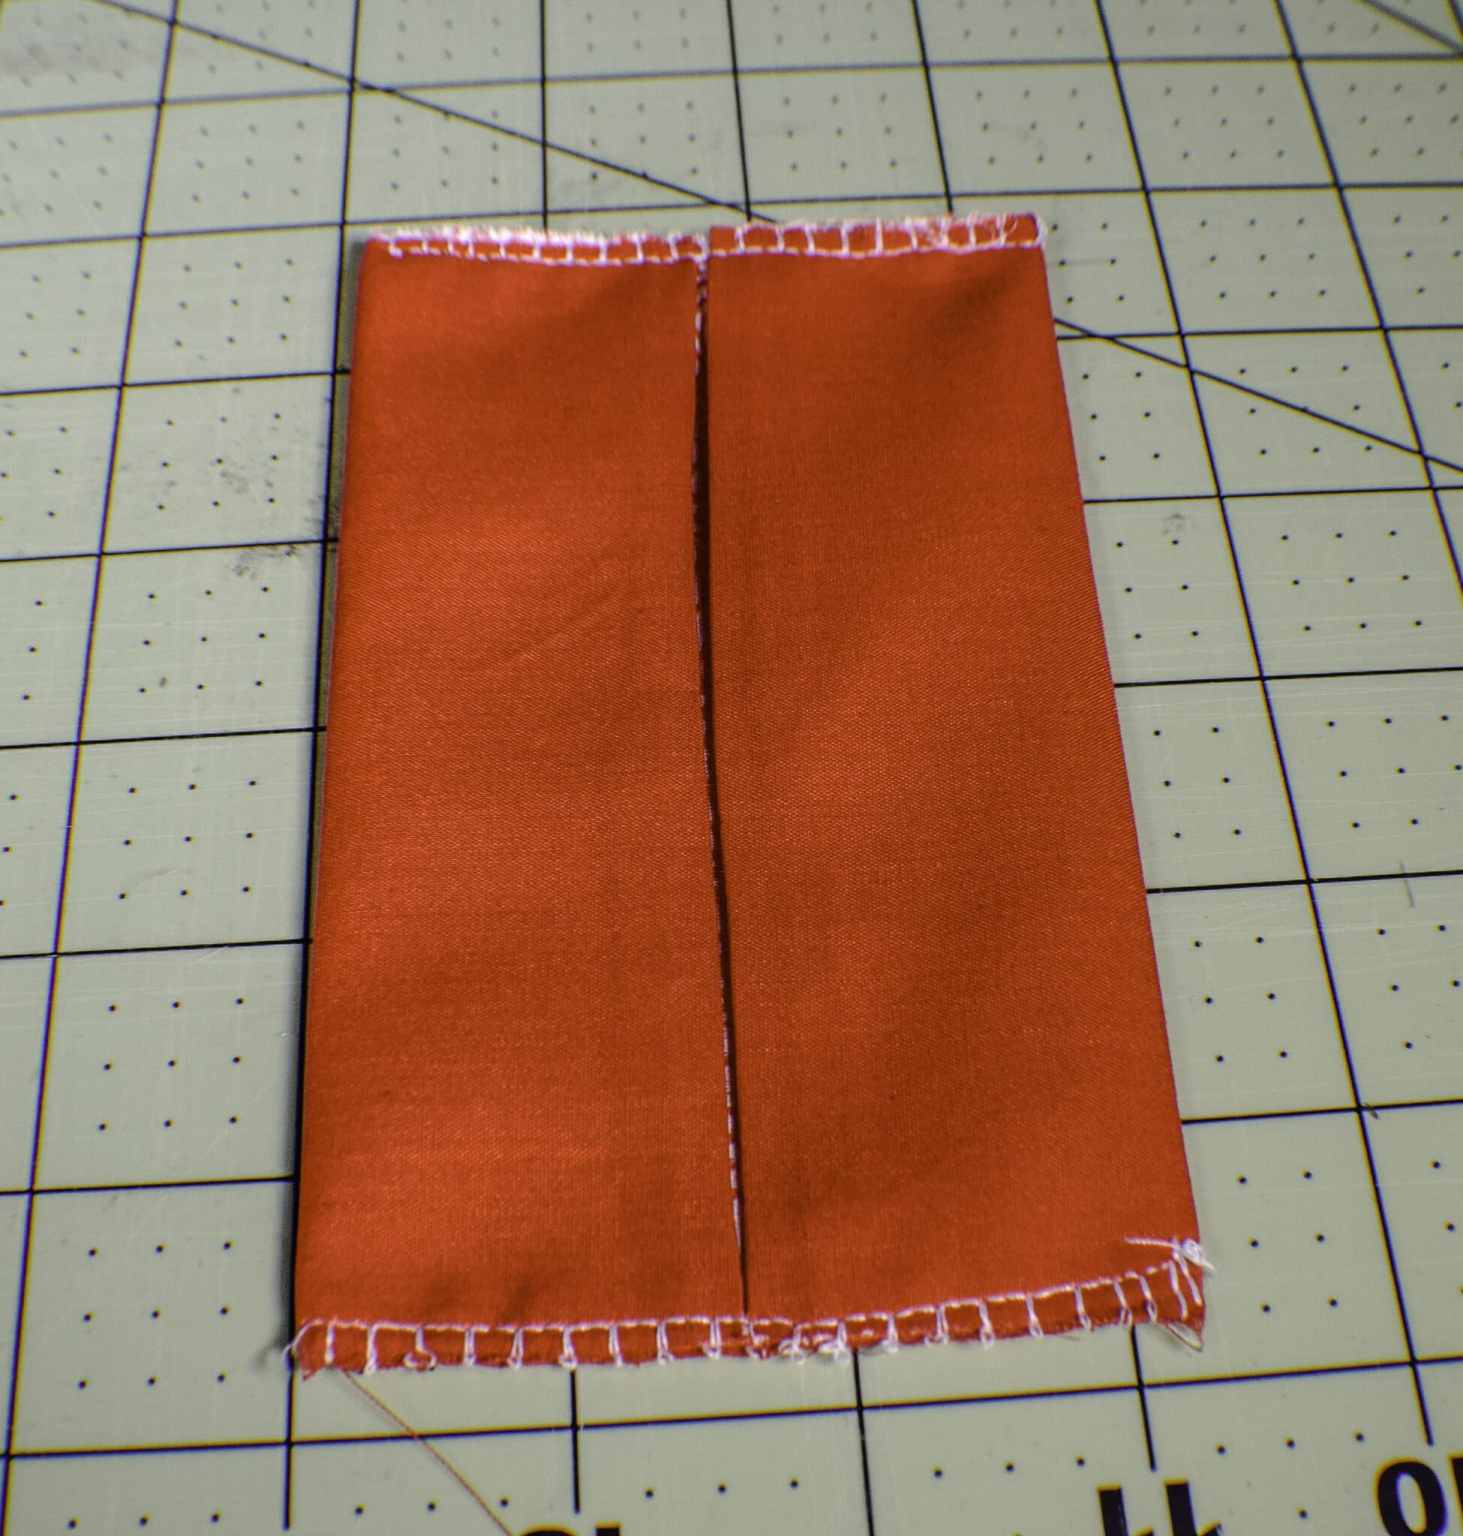
Step 2: Make a Pocket Tissue Holder
With right sides together sew the lining piece to the outer piece at the short ends using a 1/4″ seam allowance. You will notice that there will be a difference in lengths of the long sides. Don’t worry. This will make sense when you press the fabric.
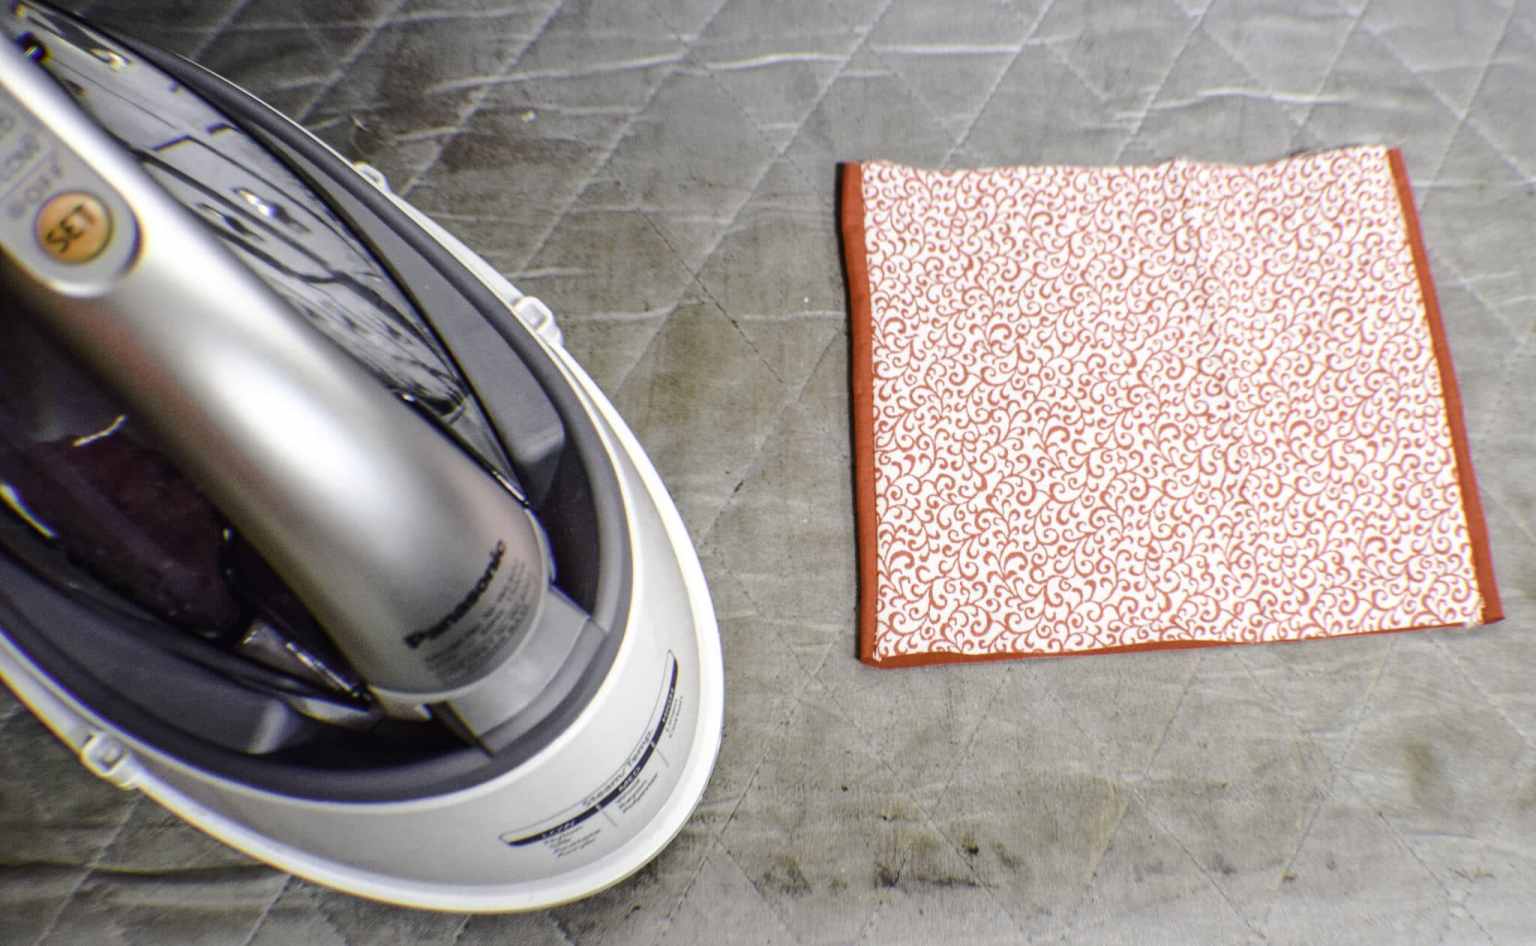
Step 3: Make a Pocket Tissue Holder
Turn the piece right sides out and press flat so that there is 1/4″ of the lining showing on each side of the outer fabric. There is a lot of pressing in this project and in all sewing projects.
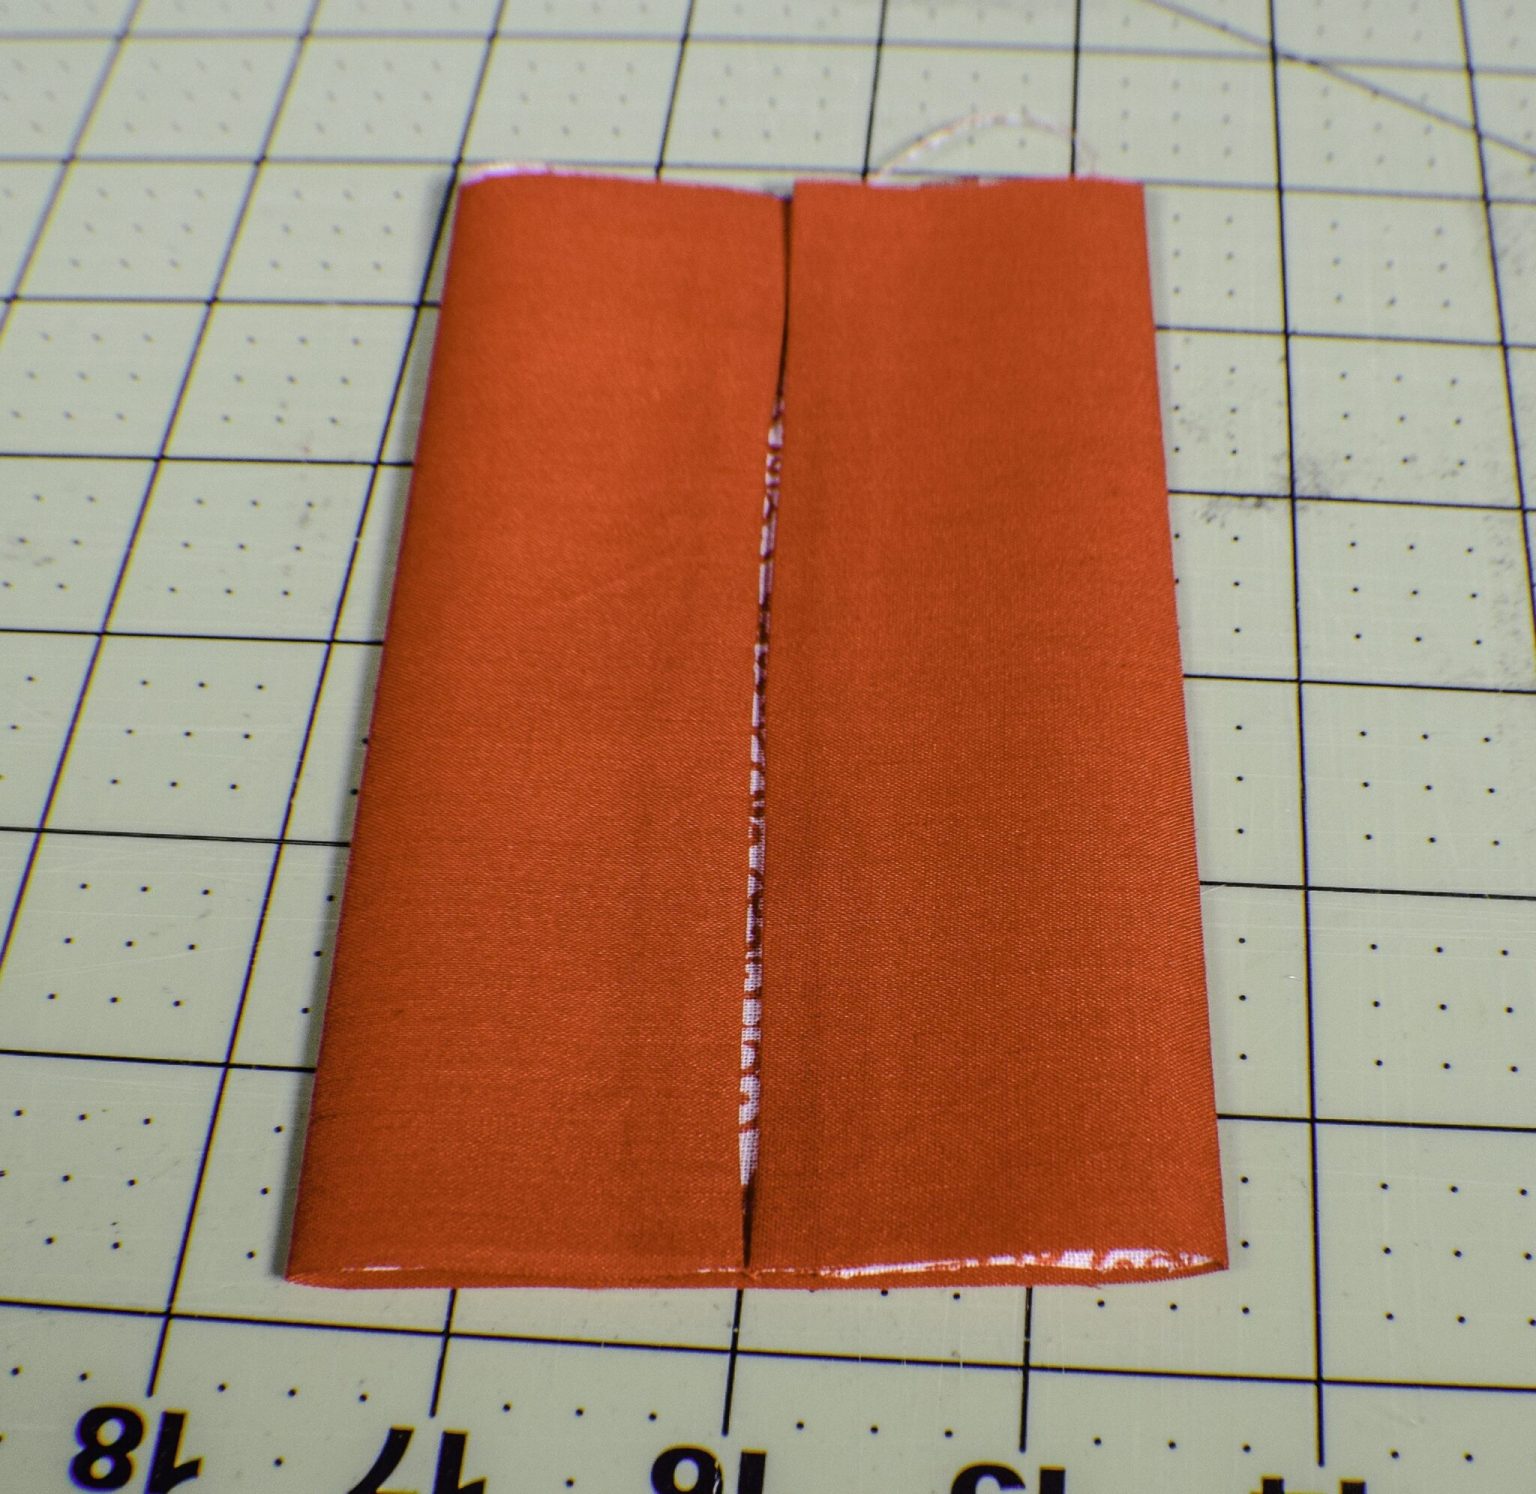
Step 4: Make a Pocket Tissue Holder
Fold the long edges so that the meet in the center of the piece and press. You should only be seeing the lining fabric at this point.
Step 5: Make a Pocket Tissue Holder
Stitch along the short ends. I used an overlock stitch on my regular sewing machine for this to protect the raw edges but you can use a straight stitch and follow it up with a zig zag or just keep it raw. It is totally up to you.
Step 6: Make a Pocket Tissue Holder
Turn the piece right sides out and put in your tissues and you have completed your pocket tissue holder.
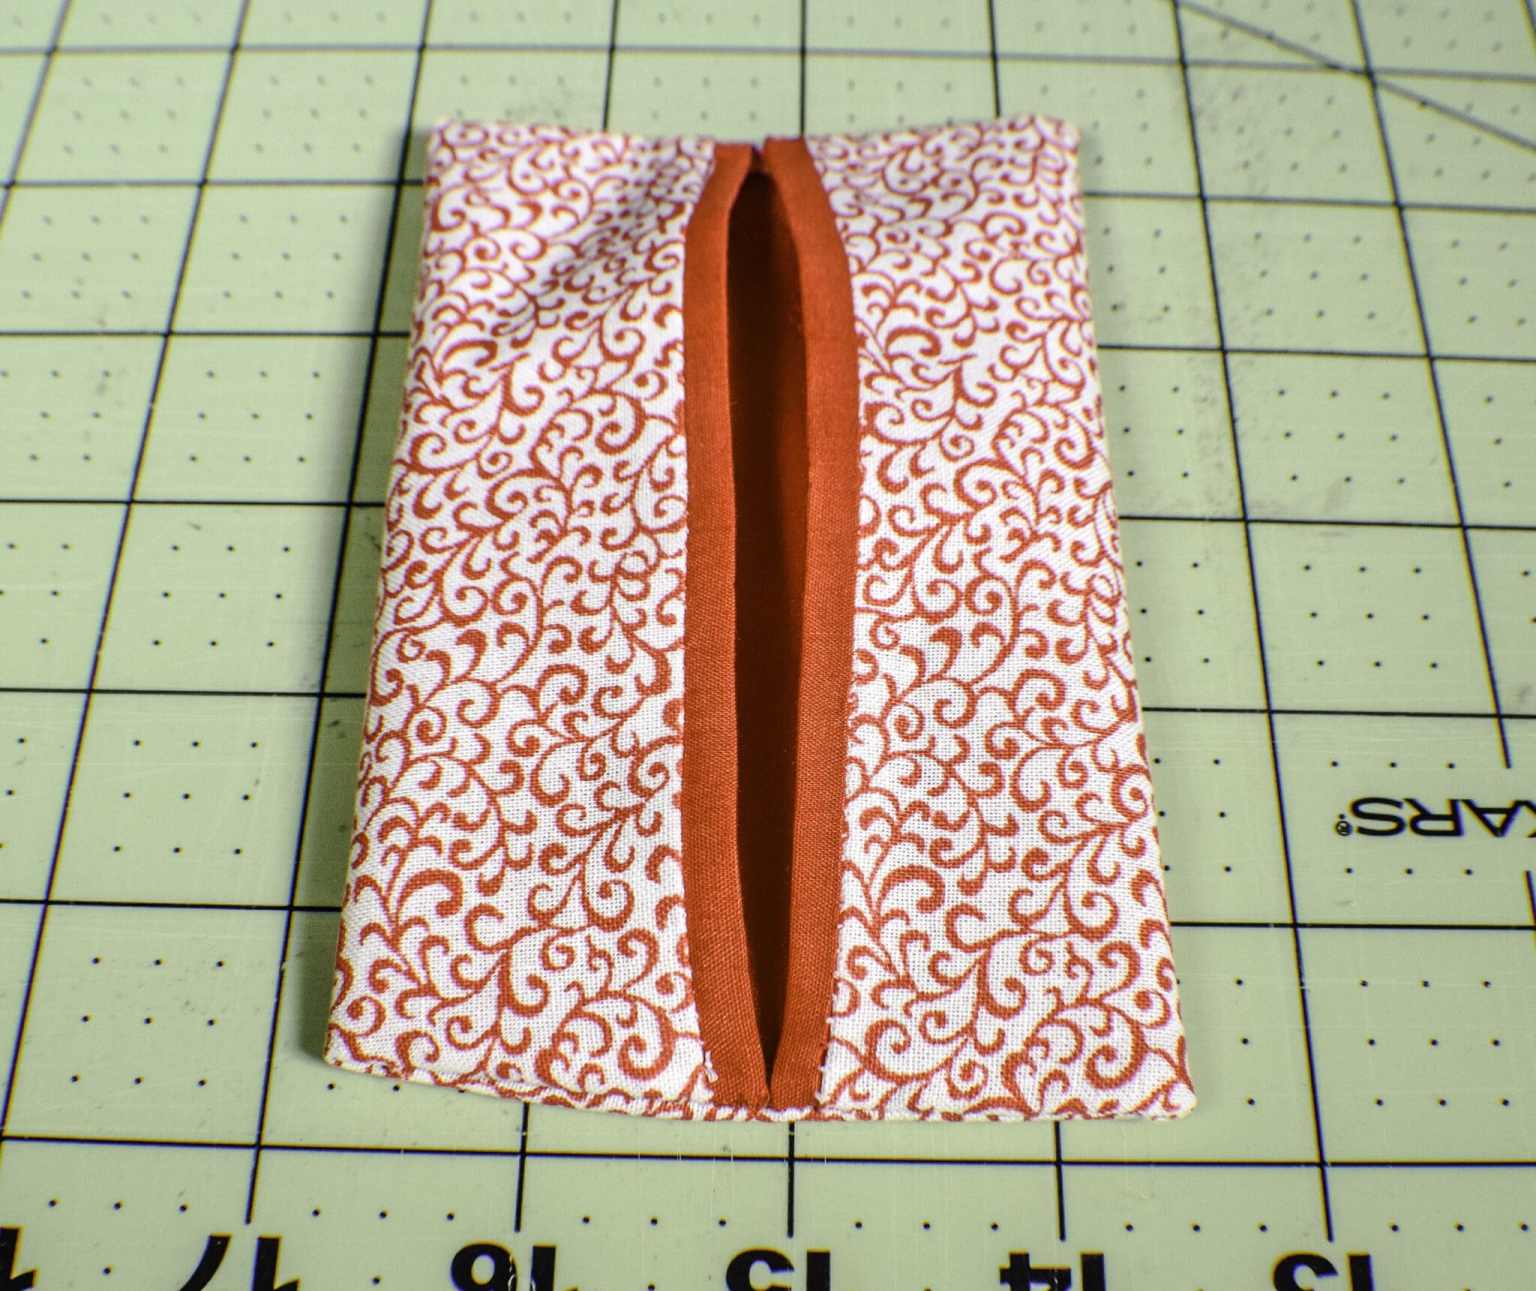
Turn right side out
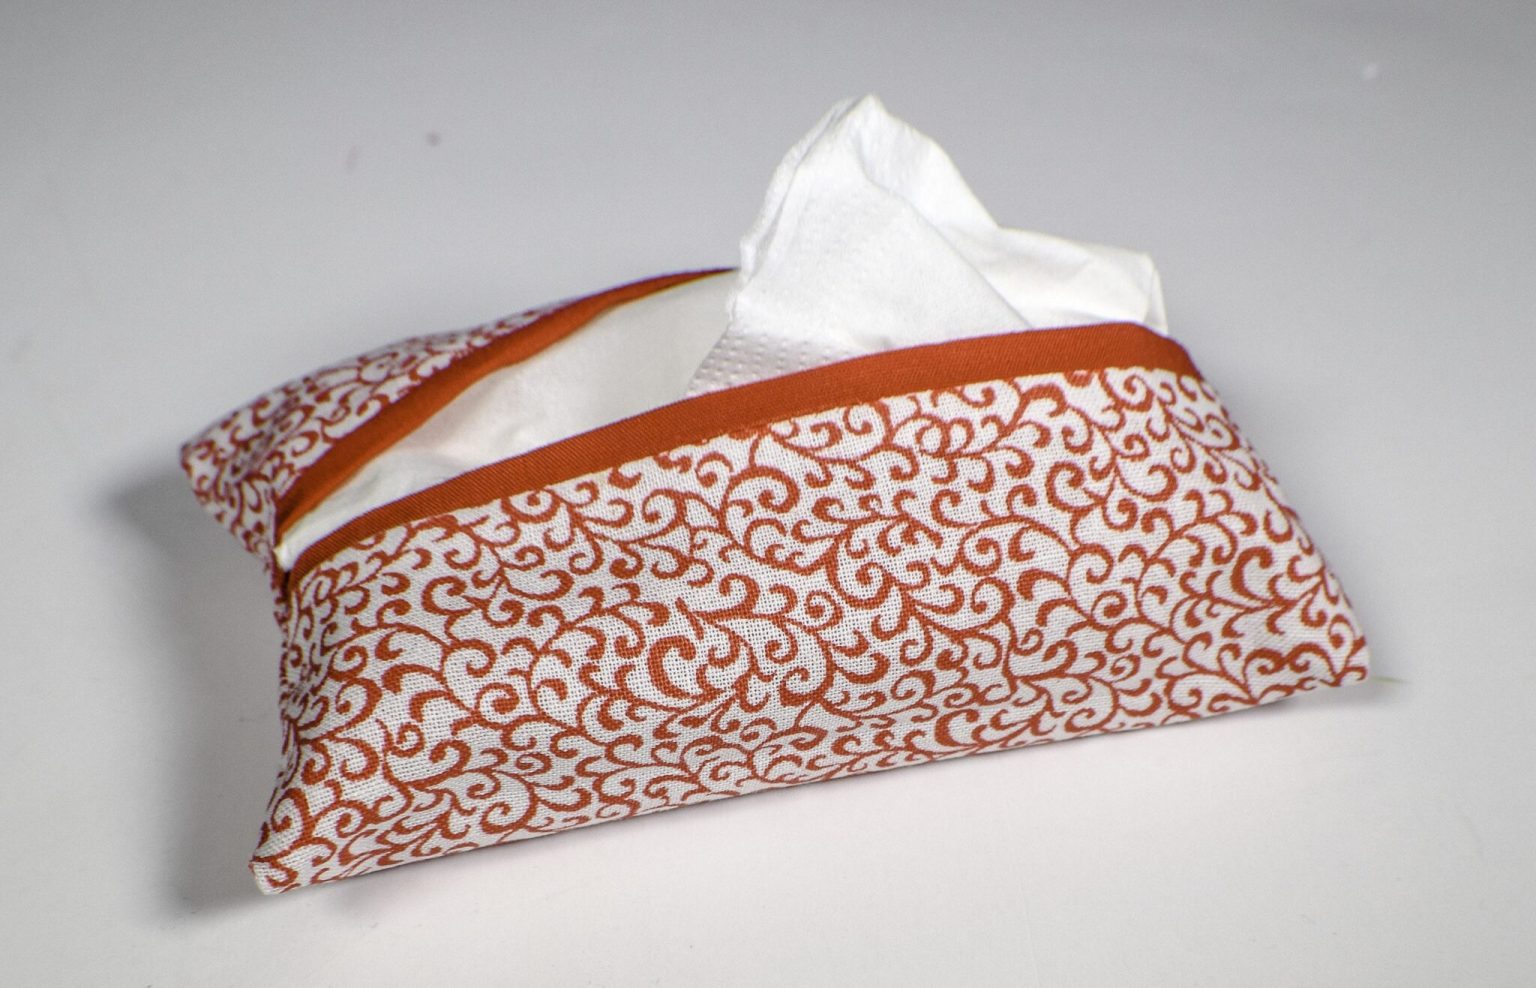
Pocket Tissue Holder