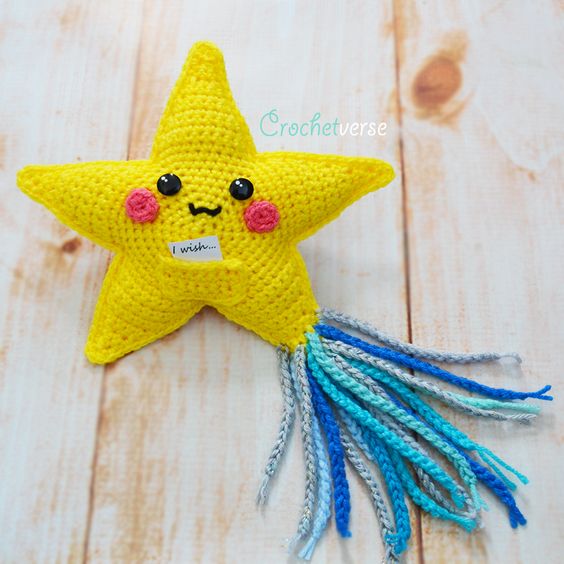
Crochet Wishing Star
Create your very own handmade Wishing Star using the art of crochet. This delightful project involves using a crochet hook and yarn to craft a beautiful star-shaped ornament that can be used as a decoration or a thoughtful gift for a loved one. By following a simple crochet pattern, you can bring this magical Wishing Star to life with your own creative touch. Whether you're a beginner or an experienced crocheter, this project is a fun and rewarding way to showcase your skills and spread some joy. Whether you hang it on your Christmas tree, display it in a nursery, or give it as a special present, the Crochet Wishing Star is sure to bring a touch of handmade magic into your life. So grab your crochet hook, pick out some yarn, and get ready to create a little piece of whimsy that will bring smiles to all who see it.
Materials:
- 75 yards bright yellow worsted weight yarn, shown is Red Heart Super Saver in Bright Yellow
- 3 yards for each chained “shooting star” strand, shown is a mix of Red Heart Super Saver in varying blues and grays with the sparkle yarn being Caron Simply Soft Party
- 1 yard black worsted weight yarn for the mouth
- 10 yards worsted weight yarn in pink for cheeks
- Size H (5.0mm) crochet hook – OR – size needed to obtain gauge
- small amount of polyfil stuffing
- (2) black flat 5/8″ buttons -OR- you may crochet the eyes if safety is a concern for a young child for which you will need small amounts of black and white yarn
- If you use buttons and the hole is small, you may need sewing thread and needle to attach (I did)
- (optional) white nail polish to paint the kawaii dots on the button eyes and toothpick to do so
- stitch marker, tapestry needle, scissors, tape measure
Gauge:
Rounds 1-9: 4″
While not extremely critical to be exact, you do NOT want holes between your stitches. I tend to be a fairly tight crocheter so it is LIKELY you will have to drop a hook size.
Finished Size:
About 10″ from star tip to star tip (not including shooting star chained fringe)
Instructions (US Terms):
Star Panel (Make 2):
Worked in a spiral, do NOT join rounds or turn rounds. Use marker to keep track of rounds.
With yellow, make a magic ring, ch 1:
(alternately, you may chain 2 and work round 1 in 2nd chain from the hook)
Rnd 1: 6 sc in the ring, pull tail tighly to close. (6)
Rnd 2: 2 sc in each st around. (12)
Rnd 3: *sc in nxt st, 2 sc in nxt st, repeat from * 5 times more. (18)
Rnd 4: *sc in nxt 2 sts, 2 sc in nxt st, repeat from * 5 times more. (24)
Rnd 5: *sc in nxt 3 sts, 2 sc in nxt st, repeat from * 5 times more. (30)
Rnd 6: *sc in nxt 4 sts, 2 sc in nxt st, repeat from * 5 times more. (36)
Rnd 7: *sc in nxt 5 sts, 2 sc in nxt st, repeat from * 5 times more. (42)
Rnd 8: *sc in nxt 6 sts, 2 sc in nxt st, repeat from * 5 times more. (48)
Rnd 9: *sc in nxt 7 sts, 2 sc in nxt st, repeat from * 5 times more, continue past end of round and make 2 sc in the nxt st. (55)
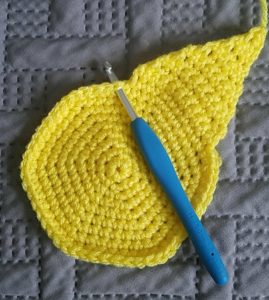
Now we switch to partial rows to create the star tips:
Row 1: sc in nxt 11 sts.
Row 2: ch 1, turn, sc in each st across. (11)
Row 3: ch 1, turn, sc decrease over 1st 2 sts, sc in nxt 7 sts, sc decrease over last 2 sts. (9)
Row 4: ch 1, turn, sc in each st across. (9)
Row 5: ch 1, turn, sc decrease over 1st 2 sts, sc in nxt 5 sts, sc decrease over last 2 sts. (7)
Row 6: ch 1, turn, sc in each st across. (7)
Row 7: ch 1, turn, sc decrease over 1st 2 sts, sc in nxt 3 sts, sc decrease over last 2 sts. (5)
Row 8: ch 1, turn, sc in each st across. (5)
Row 9: ch 1, turn, sc decrease over 1st 2 sts, sc in nxt st, sc decrease over last 2 sts. (3)
Row 10: ch 1, turn, sc in each st across. (3)
Row 11: ch 1, turn, sc decrease over 1st 2 sts, sc in nxt st. (2)
Row 12: ch 1, turn, sc decrease over the 2 sts, ch 1 more to close nicely, cut yarn. (1)
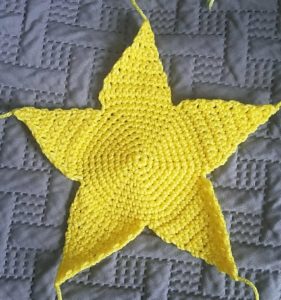
Remaining 4 Star Tips:
With the right side of the center circle facing up, rejoin the yarn in the 1st st to the left of the star tip just created and repeat rows 1-12. There will be 5 total star tips once done.
Create and Attach the Wishing Pouch to One Star Panel: (Make 1)
With yellow, chain 7:
Row 1: sc in 2nd ch from hook and in each rem chain. (6)
Rows 2-4: ch 1, turn, sc in each sc across. (6)
Edge: ch 1, sc in in the side of each row working in just a strand (not the whole stitch, it reduced edge gaps this way), make 2 sc in the 1st st on the bottom, sc in the nxt 4 sts, make 2 sc in last st on the bottom edge, sc in the side of each of the 4 rows up the second side, l st to the 1st st on the top, cut yarn leaving a long tail to seam to star panel.
Sew to Star Panel:
Choose which panel will be your front (they are the same but I always think one is better than the other lol!)
With the right side of the center circle of the star panel facing up and the right side of the edge round of the wishing pouch facing up; use the tail from the wishing pouch to sew into position spaced evenly between two star point as shown. Sew down on the right, left, and bottom edge. Do not sew the top of the pouch down or you won’t be able to get the wish inside.
I like to attach the features first because then I can knot and hide all the ends inside the amigurumi before I crochet the two panels together! Time saver!
Attach the Eyes:
- To crochet them, make a magic ring of black and work 6 sc in the ring, sl st to 1st sc made, cut yarn and leave a long tail to sew to face. You can use the white yarn and the tapestry needle to sew the “sparkles” in the eyes as shown. Layer 3 stitches for the large dot and 1-2 stitches for the small dot.
- If using button, place them as shown in the main pattern image. To create the white eye sparkles, I use the toothpick and dip just the tip into white nail polish that I have made a small pool of on a paper plate. I dab one larger dot in about the 10 o’clock position on both eyes. I then make a smaller dot just below and to the right of the larger dot, again, same for both eyes. Make sure you allow it to fully dry before sewing the eyes to the star.
Sew on the Mouth:
With the tapestry needle and black yarn, sew on the mouth in position using the main pattern photo as a reference. The shape is a small but wide soft “w”, just below and centered between the eyes.
Cheeks (Make 2):
With pink yarn, make magic ring, ch 1:
Rnd 1: 9 sc in the ring, sl st to 1st sc made, cut yarn leaving a long tail to sew to face.
Using the tail from the cheek and the photo as a placement guide, sew one cheek to either side of the face, just below and slightly to the right and left of each eye.
Join the Panels Together:
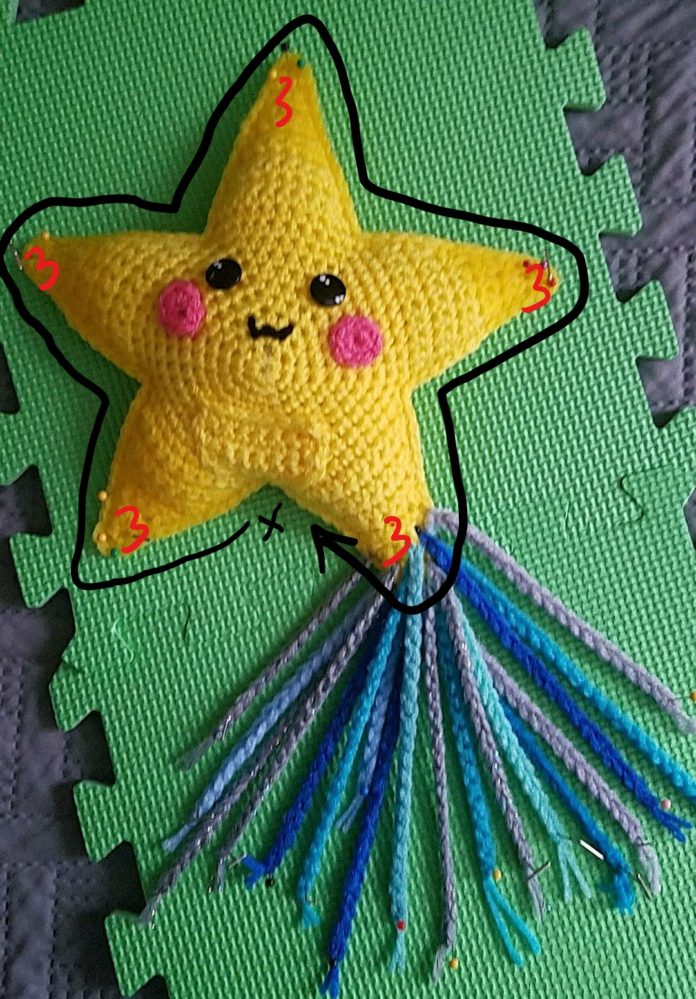
*See image below after shooting star strands for direction of join round visual.
Position the panels on top of each other, the facial features facing out and on top and the back panel evenly underneath (with the right side of the center circle of the rear panel facing outside too).
*I simply tucked all my ends in side as I worked this joining round so I didn’t have to weave them in!
Joining Round: Working through both panels at once to join them as we work, join the yellow yarn with a sl st in between any two points as shown in the photo. Matching stitch to stitch around, sc in each st and end of row entirely around the piece, work 3 sc in the same st at the tip of each star point. Just before completing the round, stuff the amigurumi, then finish the round. Sl st to the 1st sc made.
Weave in any remaining ends on the piece.
Shooting Star Strands:
1. Cut 18 strands of yarn in varying colors of blues and grays about 36″ long.
2. Insert the hook in any edge round stitch on the bottom right star tip. Fold a strand of the yarn in half and drape the looped end over the end of the hook. Using the hook, pull the strand through the stitch of the star body.
3. Treating both ends of the strand as one, chain anywhere from 17-25, then pull the end through. Pull the end tight to secure and trim ends evenly to about 1″.
4. Repeat as above for the remaining strands, covering the bottom right star tip. I doubled up one some stitches and also made a few by inserting around the posts of the stitches in the front panel of the star as well.
5. I am one of those freaks who blocks everything. The chain fringe definitely will curl on you, which is not necessarily a problem, but feel free to block this like I have. I simply dampen the entire piece in the sink and squeeze to remove excess water. I then pin (make sure they are non-rusting pins such as stainless steel) the strands taught and the star tips sharp. I place a fan towards it to dry faster. Some say you cannot block acrylic, but you most definitely can.