DIY Garden Hand-Stamped Metal Markers
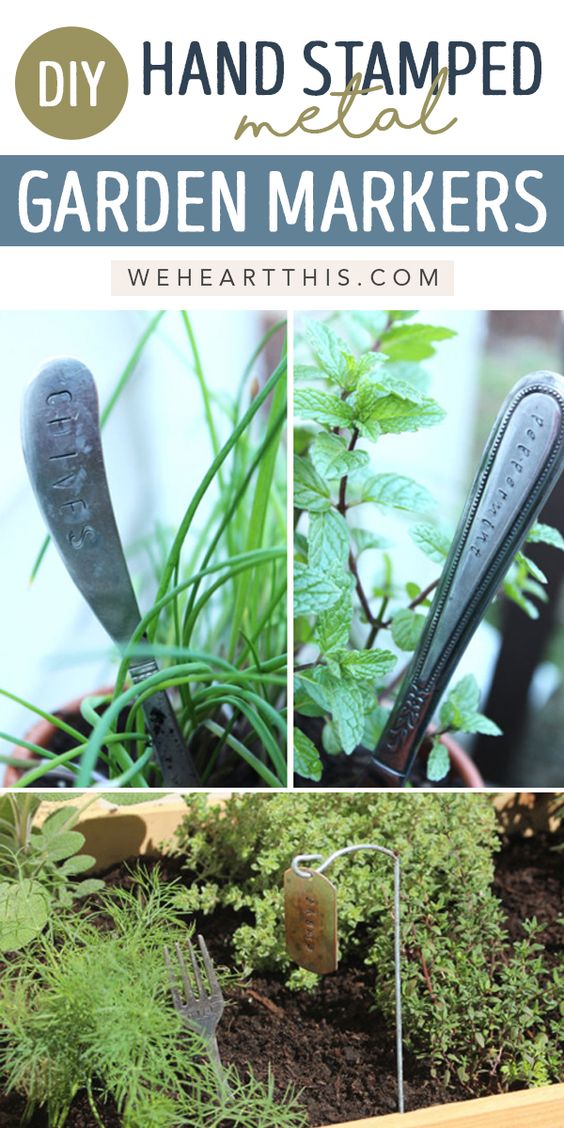
Create your own unique garden hand-stamped metal markers with this easy do-it-yourself project. Personalize your garden by making custom markers for each plant or herb. All you need are some metal tags, a hammer, and metal stamps to get started. You can get creative with different fonts and symbols to make each marker stand out. Once you have stamped all of your markers, simply place them in your garden next to your plants or herbs. This fun and simple project will not only add a personal touch to your garden, but also help you keep track of all your plants.
Warning: This is an addicting hobby!
Supplies:
• Metal Stamps – Alphabet
• Sledge Hammer
• Hammer
• Sharpie Marker
• Steel Block
• Metal Blanks or Utensils
• Patina
• Paper Towels
• Steel Wool

Frugal Tips: If you purchase a metal-stamping alphabet font from a large craft supply store, use your smartphone to pull up an online coupon to save 40-50% off the full price. Borrow a sledge hammer if you do not own one.
1. To flatten forks and spoons, I wrapped a fork or spoon in an old towel, and pounded with a sledge hammer, on the concrete sidewalk.
2. Once flat, count the letters in your desired word, and place a Sharpie dot where each letter will be stamped. This helps you stay centered and maintain a straight line. But remember, imperfections in metal-stamping only adds to the charm.

3. Next, place your utensil on the steel block, place letter stamp on your mark, and hit on the head with a hammer, while holding still, very hard, approximately 10 times.
Practice is recommended. It is loud, don’t be alarmed. Proceed with each letter.

4. Once you have finished, dab some black patina in a line on top of your word.

5. Wipe the patina away with a paper towel. The indented letters will stay black.

6. You can now buff any residual patina, or imperfections away with your steel wool.


Bonus Project: Hanging dog-tag marker
1. Take a wire metal hanger, and cut it in the middle of the bottom bar. Make a second cut 4 inches above the bend.
2. Take your pliers and bend the shorter end in an upward swirl.
3. Place hanger through the hole in the dog-tag (that you stamped yourself, of course!)
Note: After some time, the metal may oxidize, leaving an aged finish.
