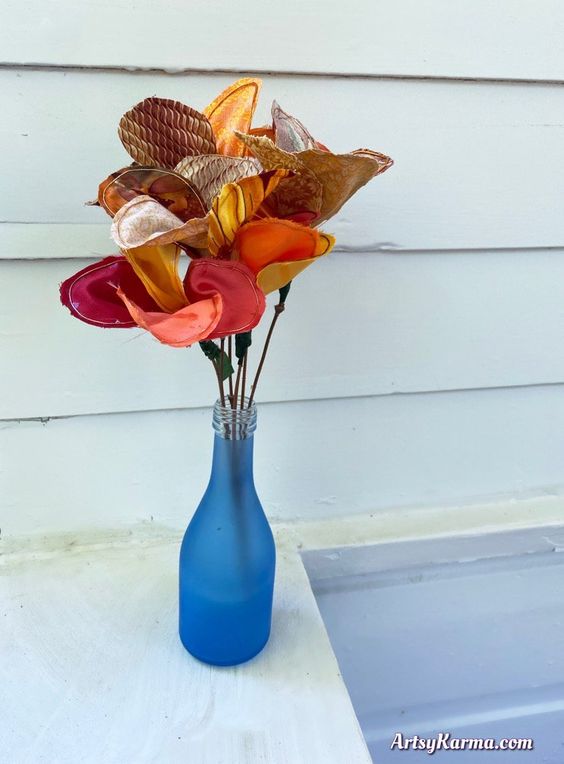
DIY Fabric Flower Bouquet
Unleash your creativity and craft a beautiful fabric flower bouquet that will last a lifetime. Choose your favorite fabrics in various colors and patterns to make each flower unique. Cut out petals, leaves, and stems from the fabric, then assemble them together to form a gorgeous bouquet. Add embellishments like beads or buttons to give your fabric flowers an extra touch of elegance. Whether you're making it for a special occasion or just to brighten up your home, this DIY project is sure to bring joy and beauty into your life. Whether you're a seasoned crafter or a beginner, this project is a fun and rewarding way to showcase your artistic talents. So gather your materials, roll up your sleeves, and get ready to make a statement with your very own handmade fabric flower bouquet.
Supplies needed to make Fabric Flowers:
- complementary colored fabric (you can make it for any time of year)
- craft wire — can sometimes get at the dollar store
- floral tape — can also get at the dollar store
- a bouquet of flowers from the dollar store
- an epoxy-type glue
Which fabric is good for making flowers?
Luckily for us, the fabric you use shouldn't matter much with how we make these flowers. This is a perfect project to be using up whatever fabric scraps you've got.
What you need to be on the lookout for in the fabric are autumn and fall patterns and colors.
I dug through my fabric bins and set aside anything that I thought might qualify:
- yellow
- brown
- red
- orange
- and every combination of those colors
To make the flowers scrappy, you'll want to collect as many different fabricpieces that go with the autumn theme as you have.
Most of my fabric is cotton, but I even found some silky polyester in the right colors and added them too.
Because you're only using a small piece of fabric per petal, you could also try burlap, lace, or anything that isn't too thick.
How to make a no-sew fabric flower
Step 1
Cut the length of your craft wire about 10-12 inches long and bend it in half. Or bend and then cut
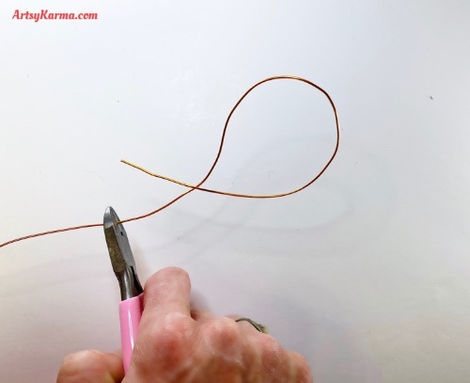
Step 2
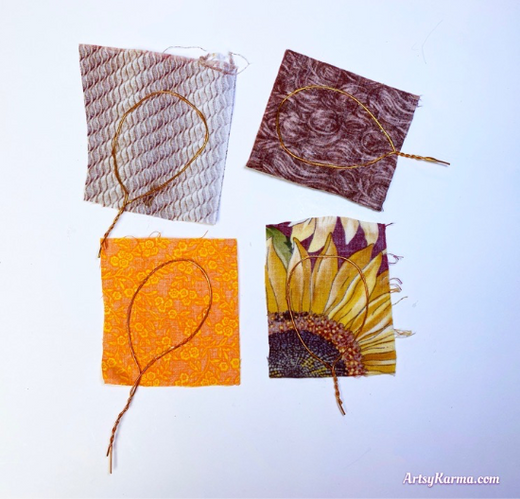
Make a teardrop shape with the wire, keeping it around three inches long by twisting the two ends together. This will be the form for the petal.
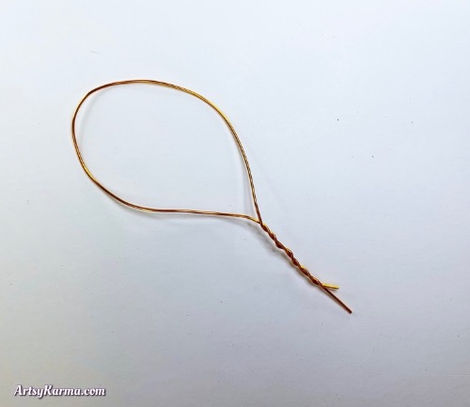
Make at least four of these for now.
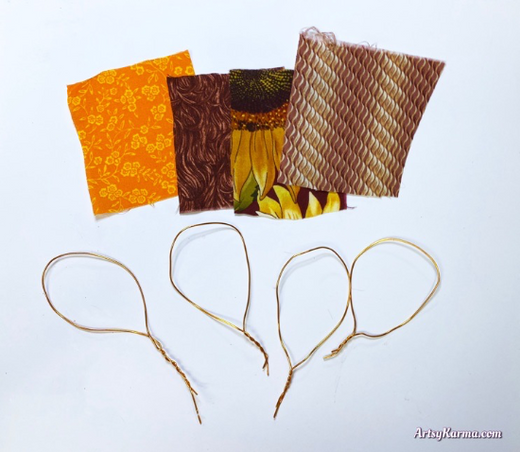
Step 3
Cut a square of fabric 3 or 4 inches on each side. You want the fabric to be able to cover the wire shapes you just made.
Step 4
Cut three more pieces of fabric using different scraps of the other colors and patterns.
After that, you should have four different fabric squares and 4 of wire petals.
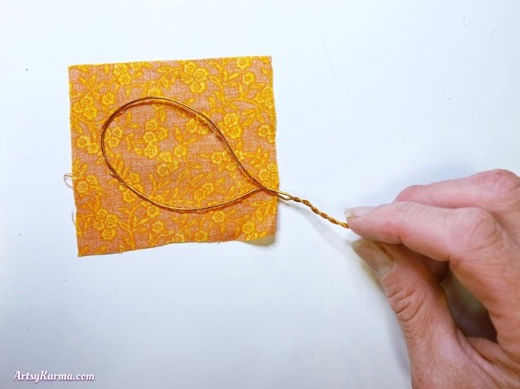
Step 5
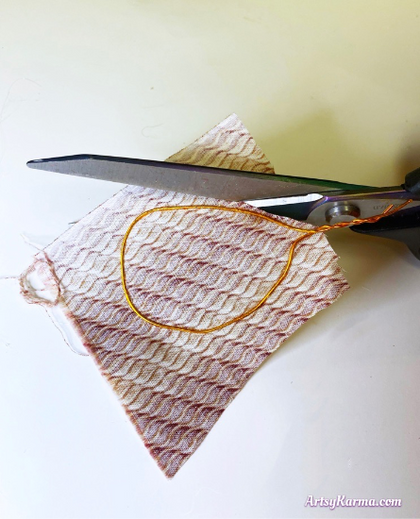
Run a line of strong epoxy-like adhesive over the entire round part of the wire petal. Make sure you don't put glue on the longer twisted part.

Step 6
Lay the glue-covered side of the wire petal onto the backside of one of the pieces of the fabric.
Step 7
Press the wire down on all sides so that the fabric adheres to the wire all around.
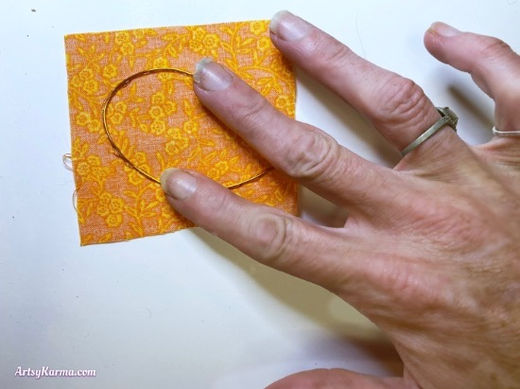
I ended up grabbing a pie slicer so that I wouldn't get glue all over my fingers:

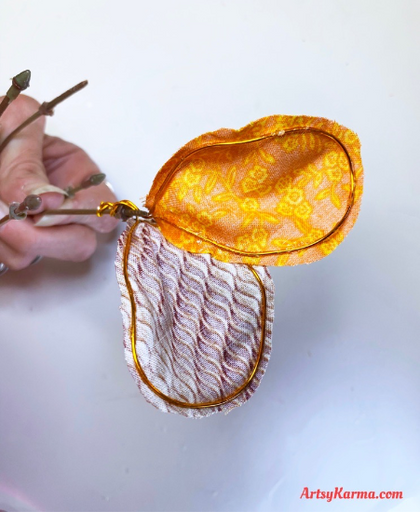
Do this to all four of your petals.
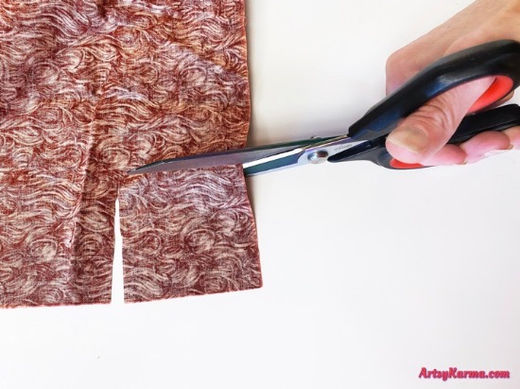
Step 8
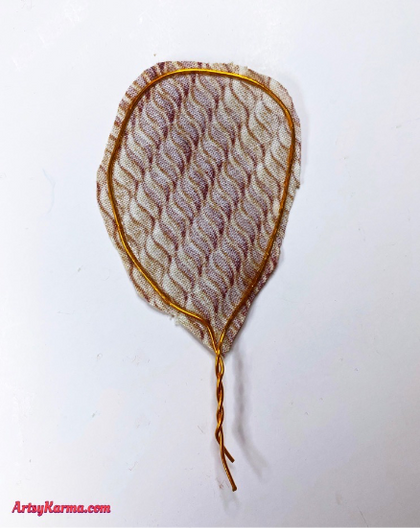
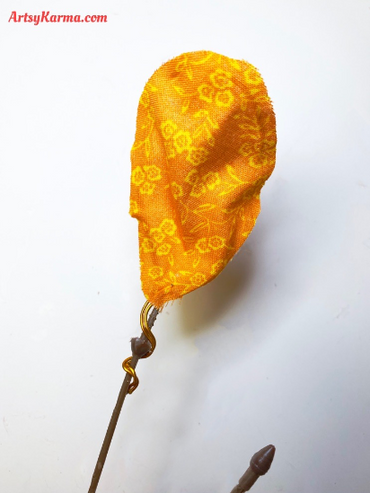
Once the glue has dried, you can start cutting around the outside of the wire.
It should end up looking like this:
Step 9
Before we start shaping and putting the flowers together, you will need to remove the flower heads from a dollar-store bouquet of flowers. Make sure you remove them all because it's the stems we're after.

Step 10
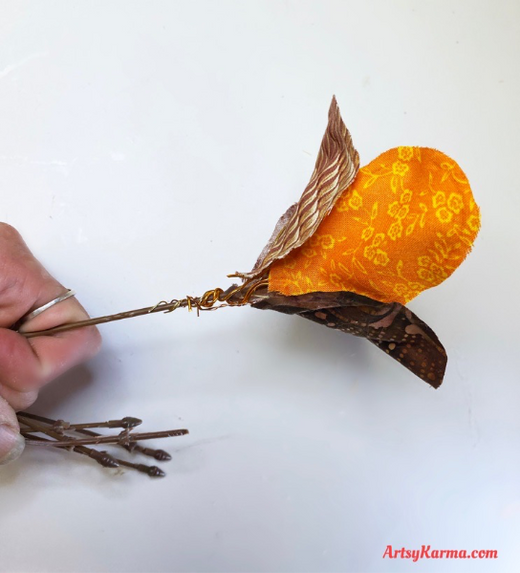
Now it's time to shape the petals a little. Start by squeezing in a little on both sides.
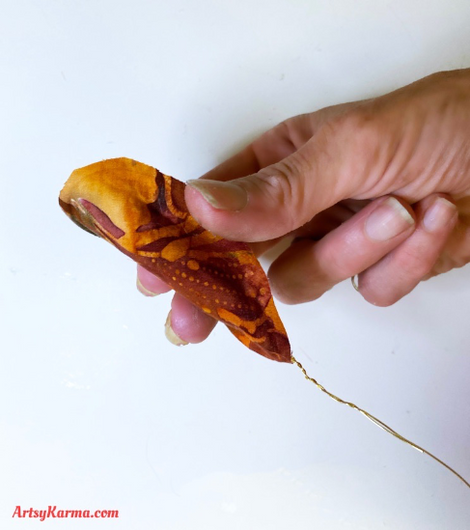
Next, you're going to bend back at the top and the bottom.

Step 11
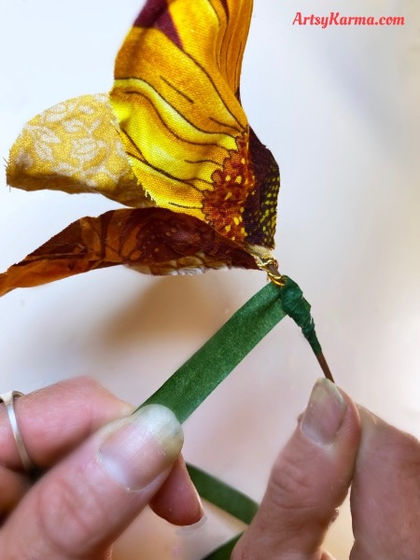
Take one of the stems from the dollar store bouquet and twist the end of the wires on the petals down and around it.
Add the other three, one at a time.
Step 12
Wrap floral tape (can also get at the dollar store) all around where the wire is showing on the stem and a little below to the top of where the flower starts. This will attach the flower to the stem.