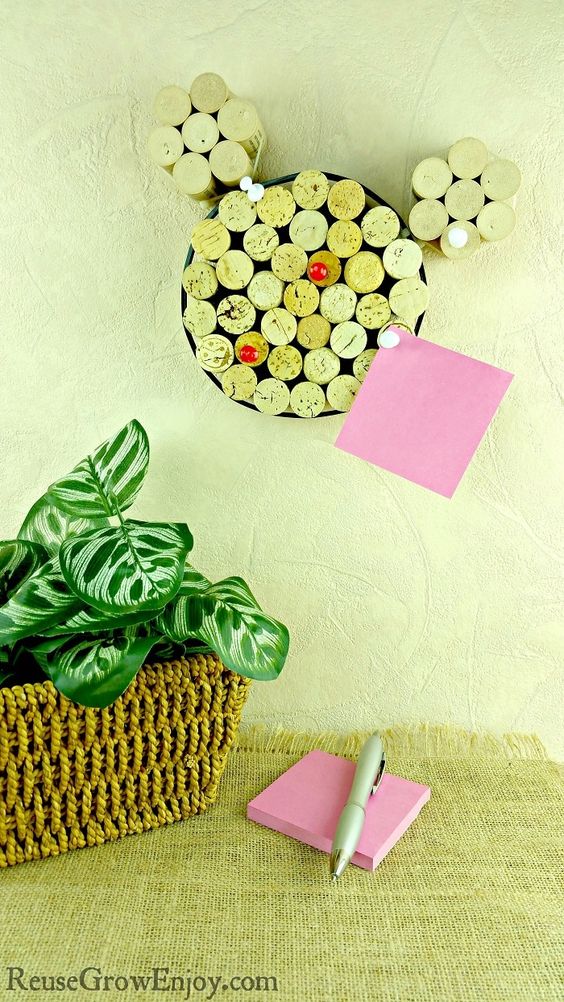
DIY Mickey Cork Board
This DIY Mickey cork board is a great way to add a touch of Disney magic to your home or office. Not only is it a practical way to stay organized, but it also serves as a cute and whimsical piece of decor. You can customize your cork board by adding other Disney-themed elements, such as Mickey Mouse stickers or mini figurines. Get creative and make it your own! This project is perfect for Disney fans of all ages and is sure to bring a smile to your face every time you use it. So gather your supplies and get started on creating your very own Mickey Mouse cork board today!
Mickey Cork Board Supplies Needed
- 42+ Corks (all about the same size)
- 1 Large Zip Tie (I used a 24″ for my 5 1/2 inch area)
- 2 Small 4″ Zip Ties
- 2 Medium 10″ Zip Ties
- Wire Cutters or Sharp Knife
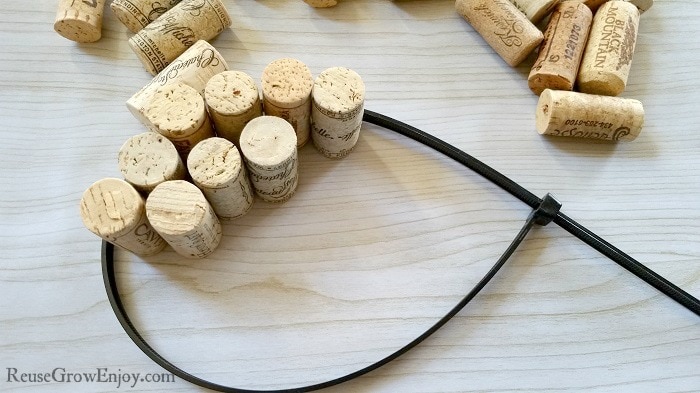
The first thing you want to do is put the end of the large zip tie through the other end. Click it down just a few times to lock it in place.
Then lay it on a flat surface. Start putting the corks in one by one so they are standing up. Keep going until you have it full.
Then start to tighten the zip tie. Before you snug it all the way, slide it up so that it is in the middle of the corks then pull it as tight as you can.
After it is tight, you may find there are spaces with a little wiggle room. If you have that, wedge another cork down in that gap. You want to have everything so snug that it stays in place.
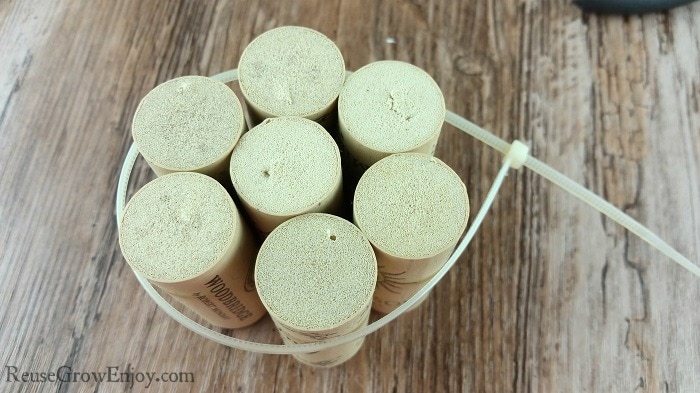
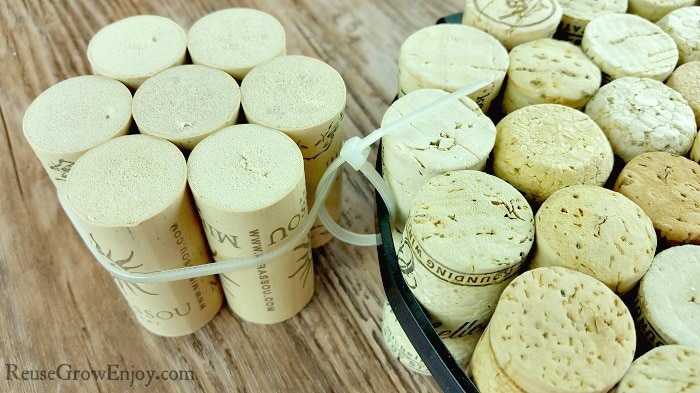
Next, you want to use the medium size zip tie to do the same thing. You will only need about 7 corks for the ears (unless you are making a larger one).
You will need to make two of the medium size ones. These will be to form your Mickey’s ears.
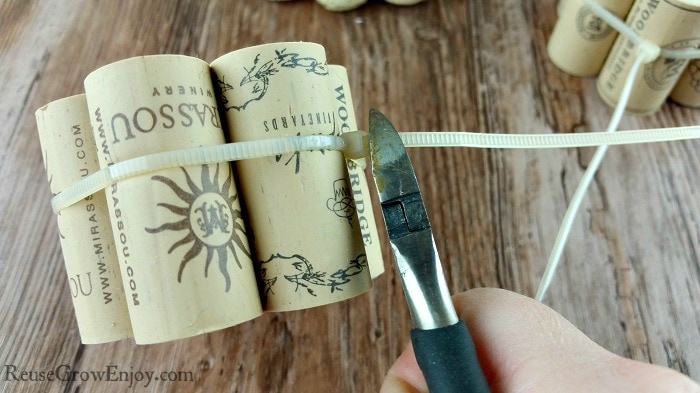
Using the wire cutters or sharp knife, you need to cut off the extra part of the zip tie. Be sure to cut it as close to the closed end as you can.
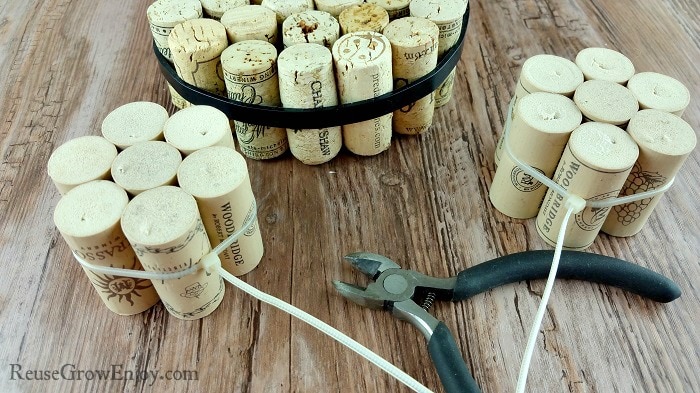
Attaching Ears:
Now it is time to attach the ears to the base. We will do this by using the small zip ties. Simply run one end through the zip tie of the large cork base and then through the zip tie of one of the small ones. Close the zip tie and pull it tight.
Then do the same thing on the other side to attach the other ear. Just eyeball how far apart you want the ears to be. After you have them both attached, you can use your wire cutters again to cut off the extra end of the zip tie.
That is it! You now have an adorable new cork board made from reused corks. Now you can hang it on the wall where you would like. To hang mine, I simply just put a screw in the wall and left it sticking out about a half inch and then just hung it on the screw.