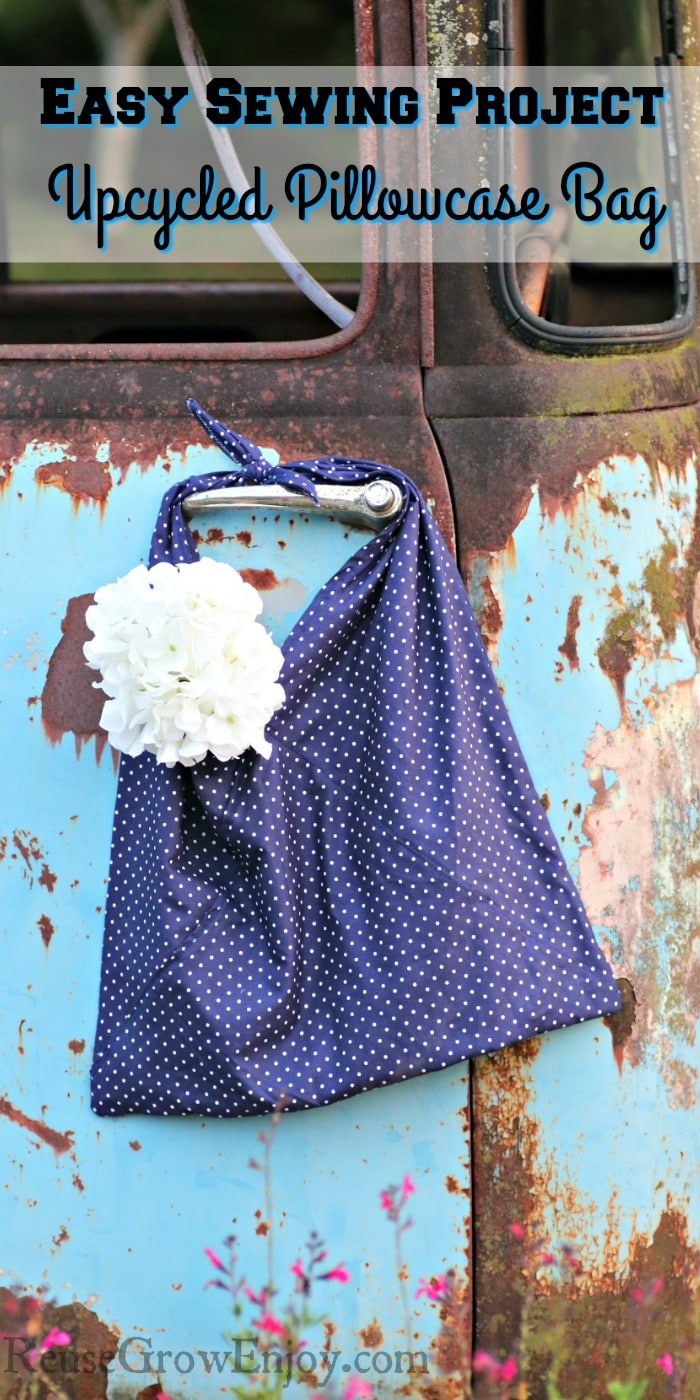
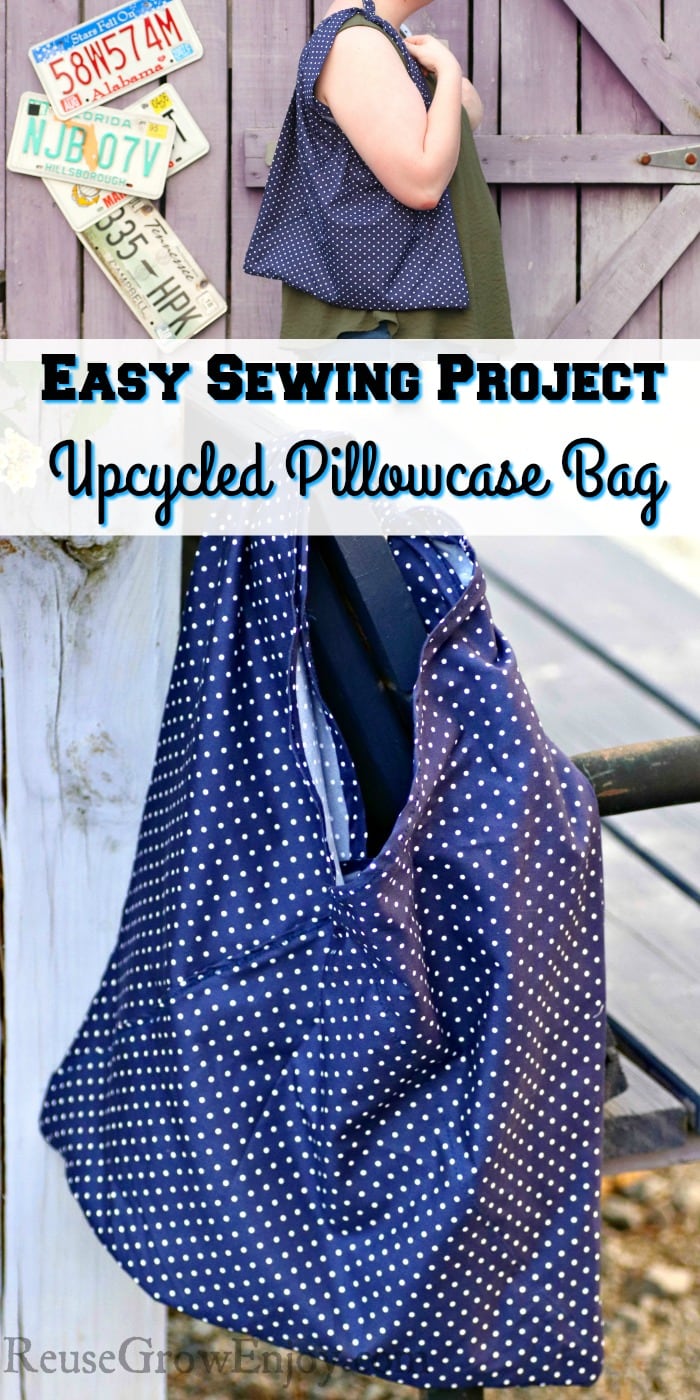
Upcycled Pillowcase Bag
Transforming a pillowcase into a stylish and eco-friendly bag is a fantastic way to upcycle and give new life to an old item. By repurposing a pillowcase, you not only reduce waste but also create a unique and personalized accessory that is both functional and fashionable. The process of creating an upcycled pillowcase bag is simple and requires minimal sewing skills, making it a perfect project for beginners or those looking for a quick and satisfying DIY endeavor. This versatile accessory can be used as a tote bag for shopping, a beach bag for summer adventures, or even a stylish alternative to a traditional handbag. Embrace your creativity and enjoy the satisfaction of giving new life to an old pillowcase while reducing waste and making a fashion statement.

Supplies Needed:
- Sewing Machine (basic like this works just fine)
- Fabric marker or Pencil
- 1 Pillowcase
- Scissors
- All-Purpose Thread (match color of the pillowcase)
- Sewing Pins
- Ruler or Yardstick
How To Make This Upcycled Pillowcase Bag:
Start by cutting the closed end of the pillowcase off. Try and cut it just above the stitching.
Next, you want to turn the pillowcase vertical, with the top and bottom in their proper directions. Use the yardstick or ruler to draw a diagonal line. You want to go from one bottom corner of the pillowcase to the opposite top corner.
If you don’t have a yardstick or ruler, use anything with a flat edge you can place on diagonal across the pillowcase to make a line.
Now cut along the line you just made. Now you should have two triangular pieces.
Next, cut off the sides of the pillowcase. You want it to be about 1/4″ or less from the edge.
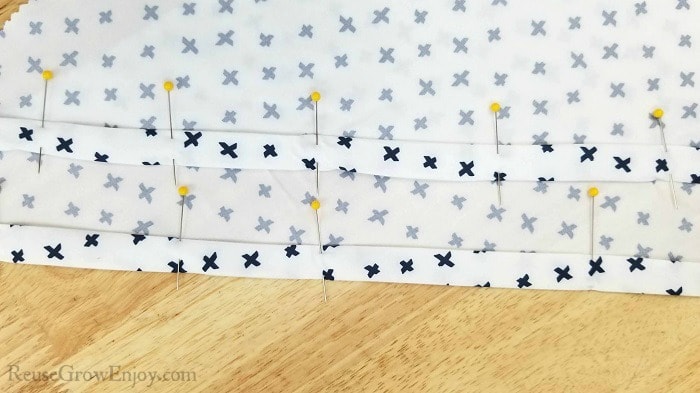
Turn/fold the cut raw edge of the diagonal down 1/4“and turn under 1/4” once more. Pin in place.
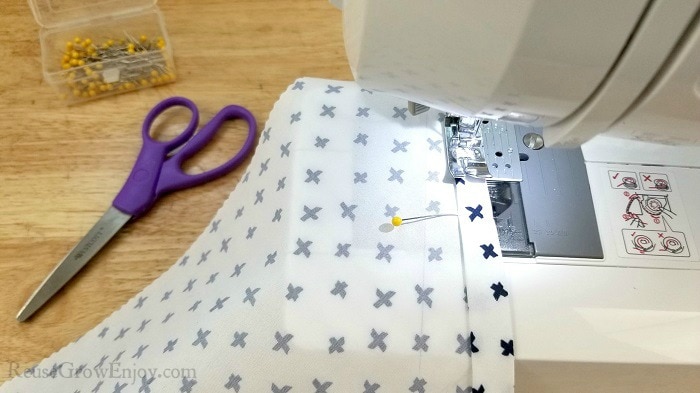
Using the sewing machine, sew along the edge. Repeat on the other pieces, so that you have four pieces like this.
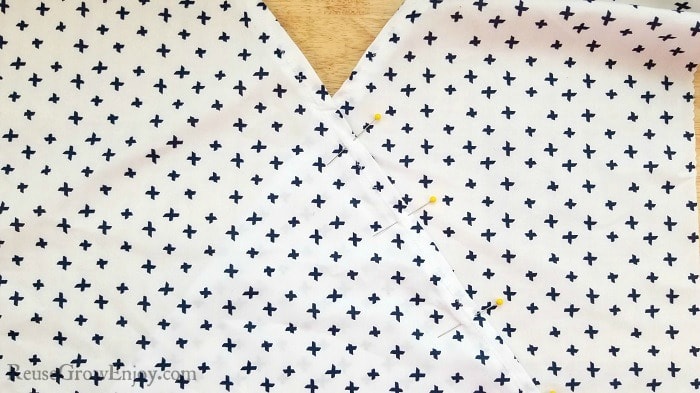
Take one of the triangle pieces of the pillowcase with the right side facing up, making a right triangle. Then lay the opposite piece, right side up, on top of that piece. When you have done this, it should look like the picture above.
Now pin along the diagonal edge and sew in place. Repeat these steps with your other two pieces.
Next, place the two pieces with the right sides together. Using the sewing machine, sew along the sides and the bottom.
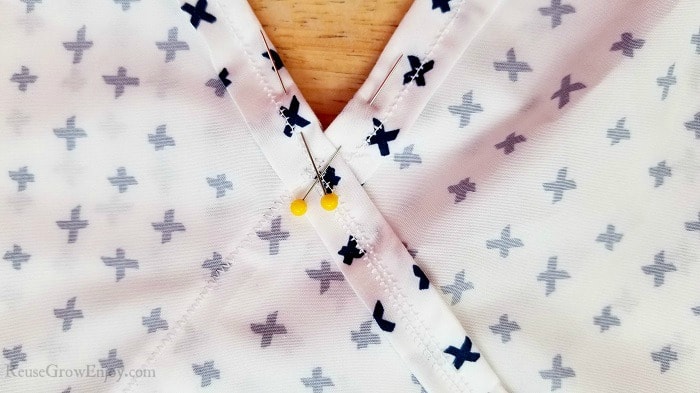
You also want to reinforce the “V” about an inch up.
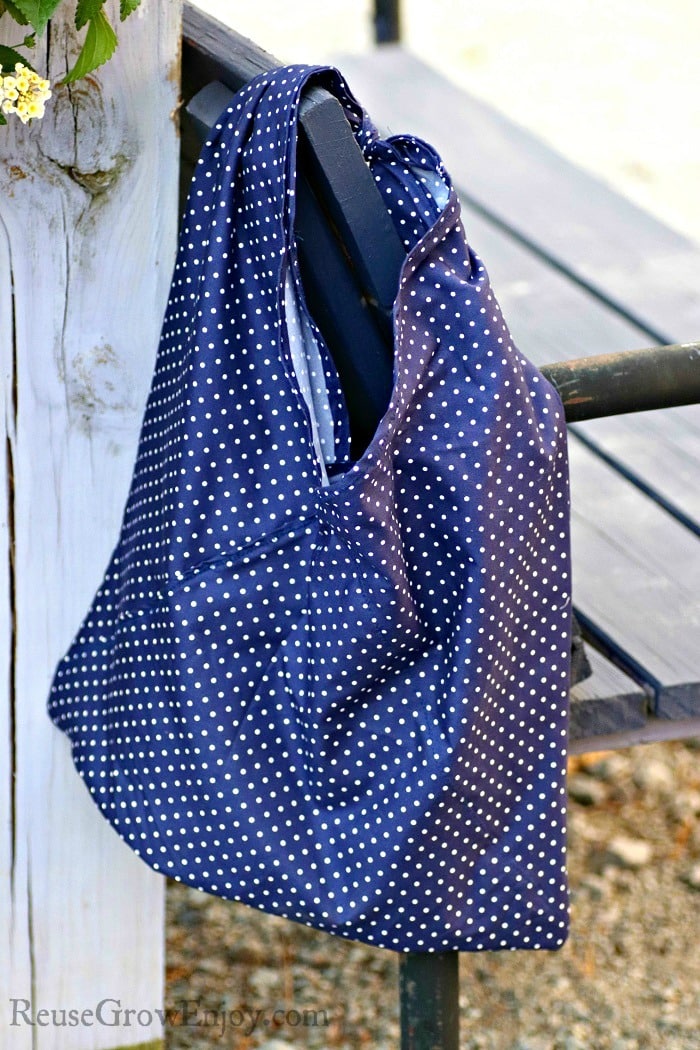
Finish the top two pieces by turning the sides in by 1/4” about 4 inches down. Then turn it right side out. Now tie top pieces and you are done!
You can enjoy your new bag or give it as a gift.
Easy Sewing Project Upcycled Bag Gifting Ideas:
These make a great gift for the host of a party or just a little gift to have on hand for just about any occasion or even as a teacher gift.
Consider adding a few things to the gift bag such as some spices, fresh produce from the garden, bath bombs, lip balm, jewelry or any other small item the receiver might like.
You can also clip on a cute bow or flower to the handles to dress it up even more.
Easy Sewing Project Even Easier:
While the style of bag I explaned above gives you that cute criss cross V detailed look on the bag, there is an eaven eaiser way to make a bag.
If you are not worried about having the extra stitching, here is a faster way to make a bag that is very much like this one but takes less time.
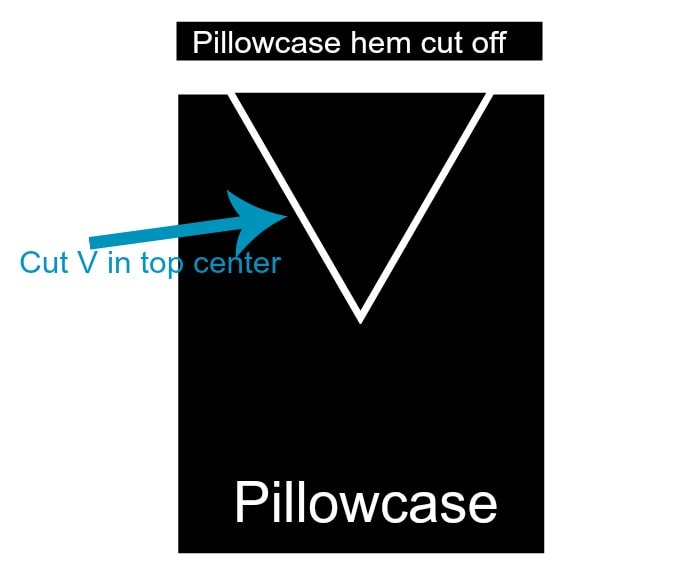
Simply lay the pillowcase down and cut off the top wide hem. Then cut a V out of the center of both sides. You only want the V to go down about 6-8 inches.
Then fold the edges you just cut over slightly and sew them in place. Tie the top together and you are done!