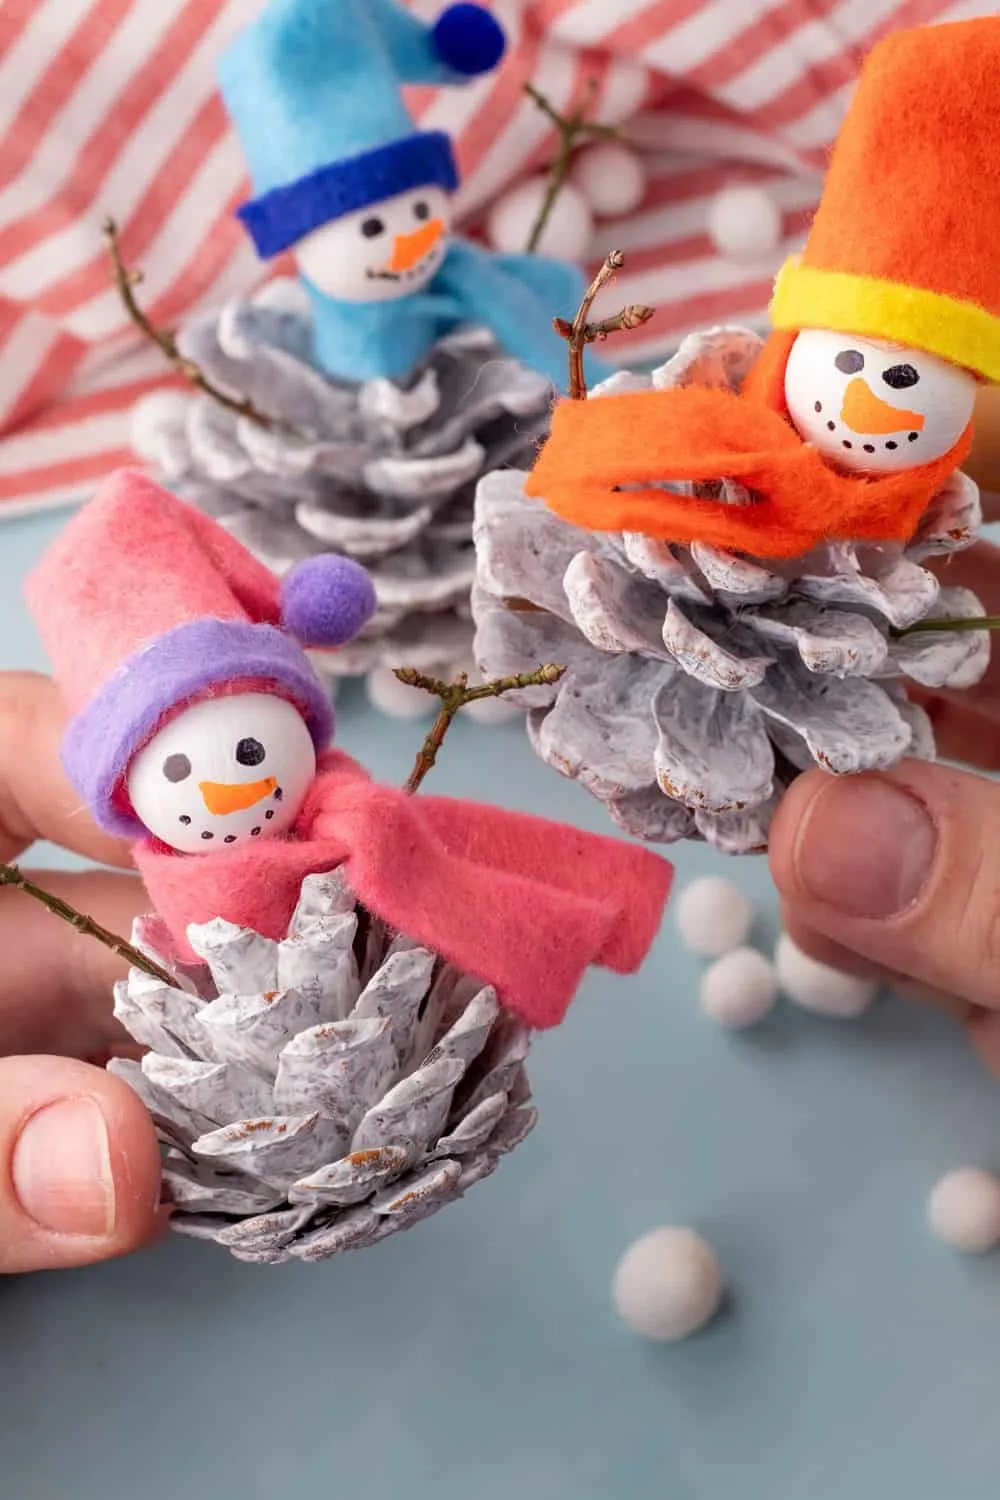
Cute Snowman Pine Cone Craft
A snowman made out of pine cones is a unique and creative winter decoration that can add a touch of whimsy to your home or garden. By using different sizes of pine cones, you can create a snowman with varying heights and shapes. You can also add small twigs for arms, a carrot for a nose, and buttons made out of small pebbles or beads. This DIY project is a fun way to get creative and bring a festive spirit to your surroundings. This charming ornament will add a rustic and natural element to your holiday decor. Whether you choose to make a larger snowman for your yard or a smaller ornament for your tree, incorporating pine cones into your snowman design is a fun and festive way to celebrate the winter season.

Snowman Pine Cone Craft – Materials
- Pine cones
- White paint and paintbrush
- Wooden beads (for the snowmen’s heads)
- Paint markers (for face details)
- Colored felt (for the hats and scarves)
- Mini pom poms
- Scissors
- Hot glue gun
- Twigs for the arms
- String (optional to hang as ornaments)
Pine Cone Snowman Instructions:
Step 1: Gather Pine Cones Collect some pine cones from nature or you can buy some at many craft or grocery stores during the holiday season.
Step 2: Paint the Pine Cones Using white paint, cover the entire pine cone to give it a snowy appearance. You might need to apply two coats if you want to achieve a solid white color. Allow the paint to dry completely.
Step 3: Prepare the Snowmen’s Heads Take wooden beads that are proportional to the size of your pine cones and paint them with white paint. Once dry, use paint markers to add cute faces to your beads.
Step 4: Assemble the Snowmen Glue the wooden bead on top of the pine cone.
Step 5: Craft the Hats Cut felt into a semi circle and roll it to create a cone shape. Secure with hot glue. Then take a strip of felt to make a border for the hat. We pointed the felt hat downwards a bit and hot glued that in place. Finally, we added a tiny pom pom to the end.
Step 6: Attach the Hats Attach the hat to the top of the wooden beads with more glue.
Step 7: Add a Scarf Cut a small strip of felt to serve as a scarf and wrap it around the “neck” of your snowman. Secure it with glue.
Step 8: Add arms Add tiny twigs as arms!
Optional: If you want to turn these into ornaments Cut a piece of string, make a loop, and glue it to the top of the hat. This will allow you to hang your snowman ornament.
Conclusion
Place your snowman family around your home for a festive winter look, or hang them on your Christmas tree as homemade ornaments.
Kids will especially love making these ornaments! Make sure to add personal touches to your snowman family, like different colored scarves or buttons to make them uniquely yours. Happy crafting and enjoy your new pine cone snowman family!