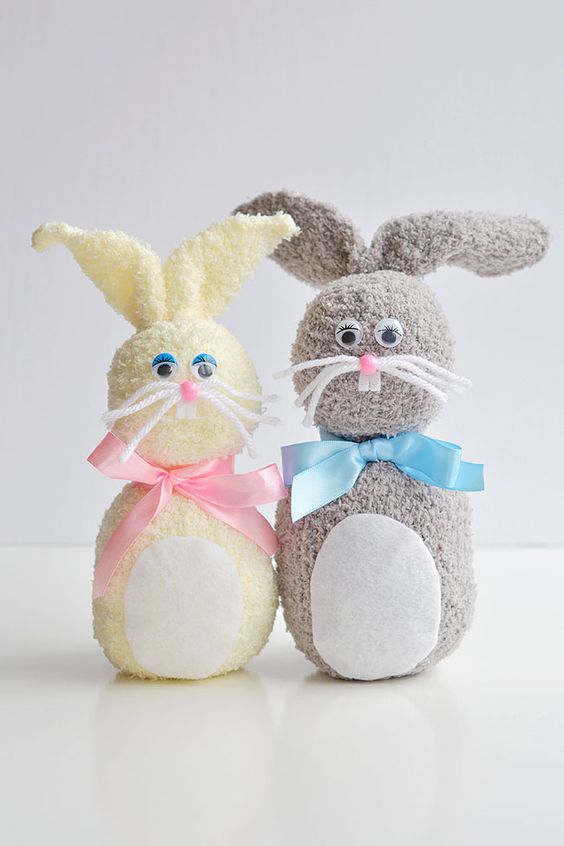
How to Make No-Sew Sock Bunnies
Rabbit Socks are a delightful and whimsical creation that combines the practicality of socks with the cuteness of bunnies. These charming creatures are made by transforming ordinary socks into adorable bunny-shaped toys. Each Rabbit Sock is carefully crafted with attention to detail, from the floppy ears to the fluffy tail. They make for a unique and fun gift for both children and adults alike. Whether displayed as a decorative item or used as a cuddly companion, Rabbit Socks are sure to bring a smile to anyone's face.
How to Make No-Sew Sock Bunnies
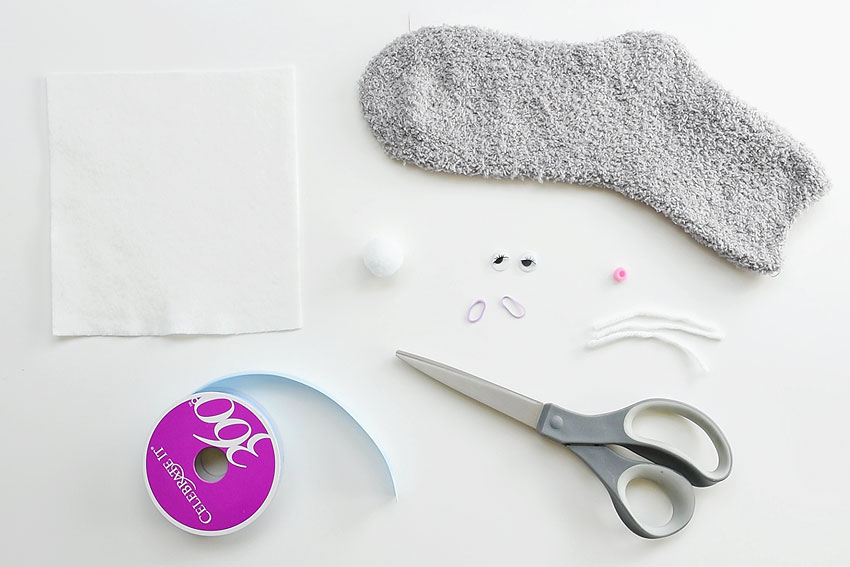
Here’s a list of what you’ll need. The affiliate links below will take you to products on Amazon that are similar to the supplies we used to make this craft:
- 1 Sock
- Teddy Bear Stuffing or Rice (I used the stuffing from an old pillow)
- White Felt
- Googly Eyes
- Pom Pom or Cotton Ball
- Tiny Elastics
- Pony Bead
- White Yarn
- Ribbon
- Glue Gun
I used women’s sized fluffy, cozy socks from the dollar store, but any type of sock will work – even kids sized socks. In fact, if you want to use rice as your “stuffing” kids sized would be much easier to work with.
I keep an old pillow in my craft cupboard for projects like this. You know, the old, flat pillows that no one wants to use anymore? Just cut a slit through the fabric at the end of the pillow, and you instantly have (FREE!) stuffing! I also included a link above if you want to buy fresh teddy bear stuffing. You can get it at any craft store.
Alternatively, you can also fill your socks with dry rice or beans. You might want to use socks with a tighter weave if you’re using rice. I think the rice might poke out the fabric of the type of socks I used? But there’s plenty of options at the dollar store that will work with rice.
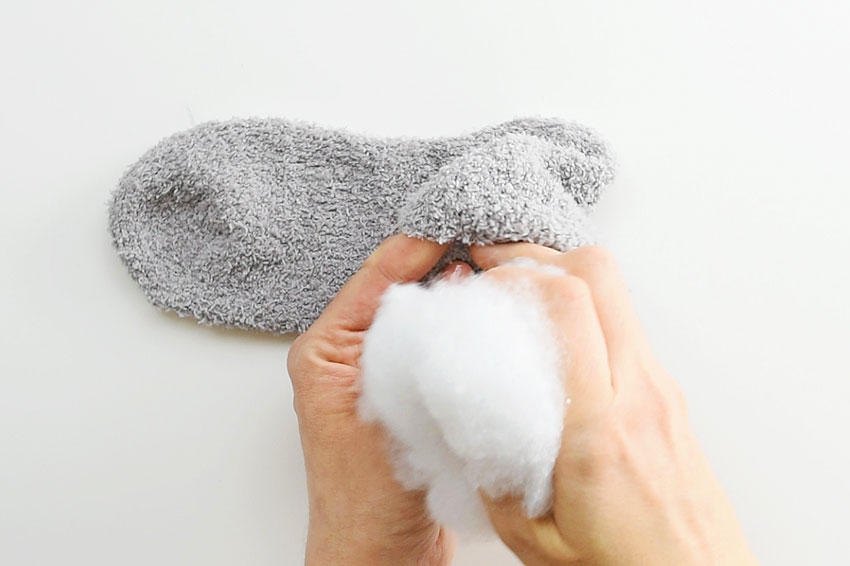
Take a good handful of stuffing and push it into the sock, right down to the toe – this will be the bunny’s body. If you’re not happy with the size of the body, add more stuffing. If you find that the extra stuffing makes the body look bumpy, pull out all the stuffing and work it together into a nicer looking ball before adding it back into the sock.
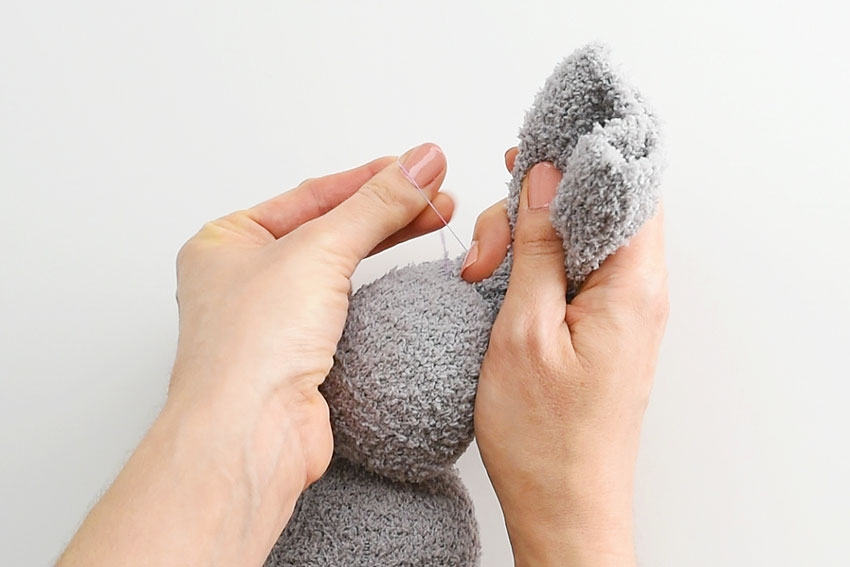
I used tiny hair elastics to hold everything together – also from the dollar store.
Since I used fluffy socks, the colour of the elastic really didn’t matter because it was hidden by the sock. If you’re using a less fluffy sock, you might want to look for clear elastics, or at least elastics that are the same colour as your sock.
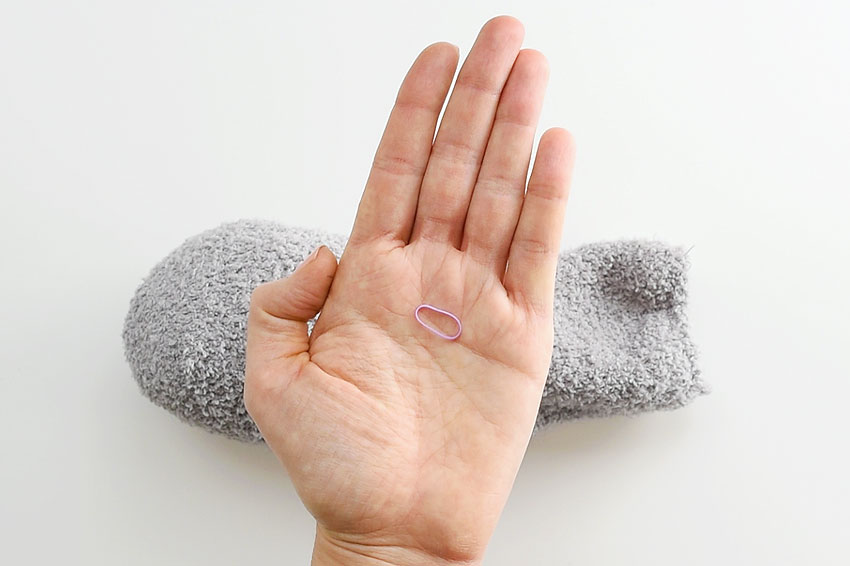
Pinch the sock tightly over top of the stuffing, then add the elastic band onto the sock to hold it all in place. I twisted the elastic two or three times.
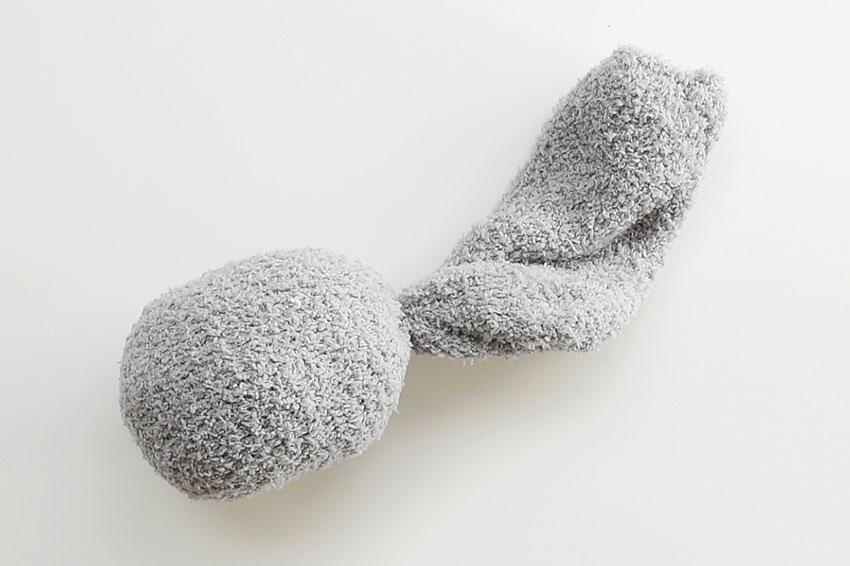
Add more fluff (or rice) to the inside of the sock to make the bunny’s head. The head should be slightly smaller than the body.
Then pinch together the top of the sock, over top of the head, and add another elastic to hold it in place. Again, I twisted the elastic two or three times.
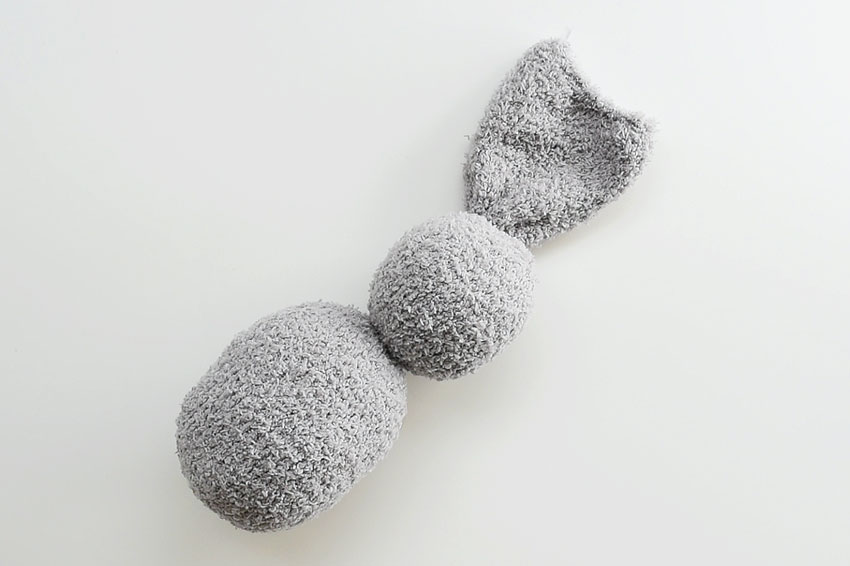
So at this point, your bunny should look like the photo below. It should have a larger body in the toe of the sock, with a smaller head on top (pretty much at the heel of the sock), with a nice size empty part at the opening of the sock.
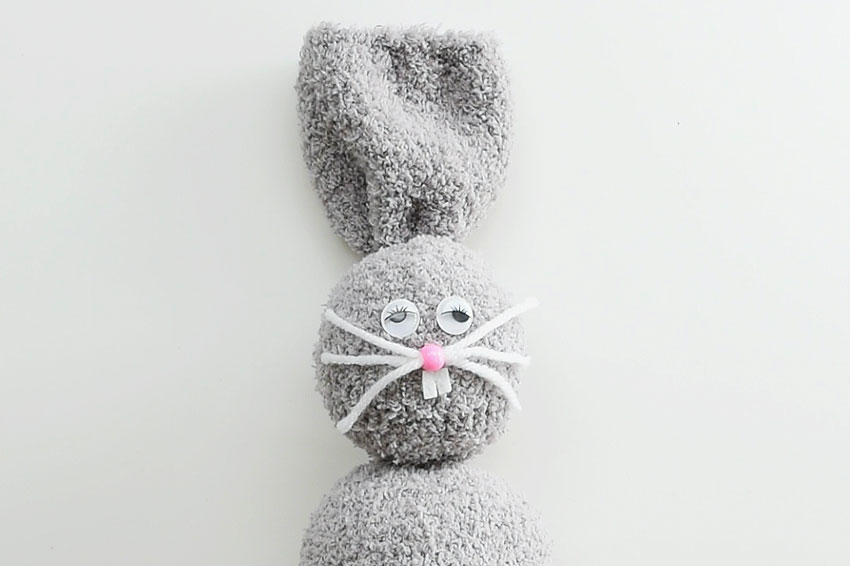
For the nose, I used a pink pony bead with 3 short pieces of white yarn pulled through the bead.
I also cut out a small rectangle of white felt and cut a small slit in one side to make teeth.
Attach the googly eyes, nose and teeth to the head part of the bunny using a glue gun.
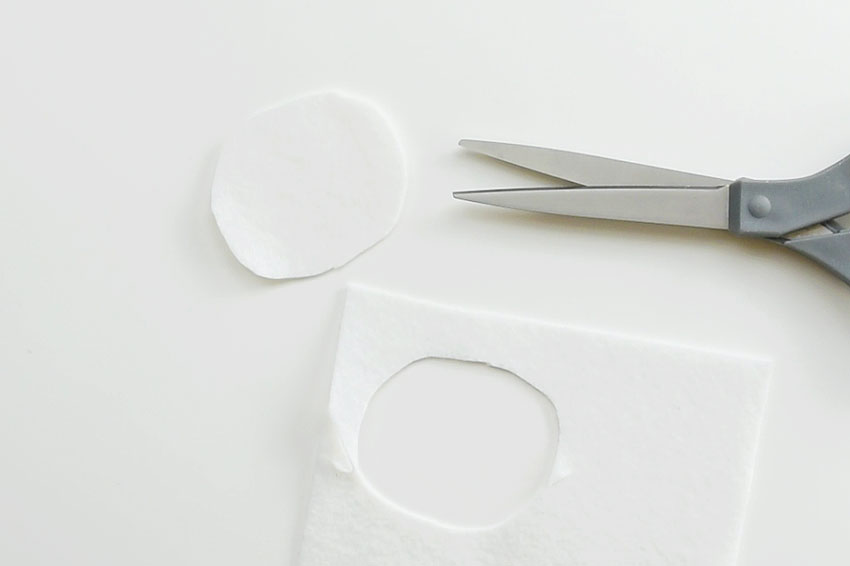
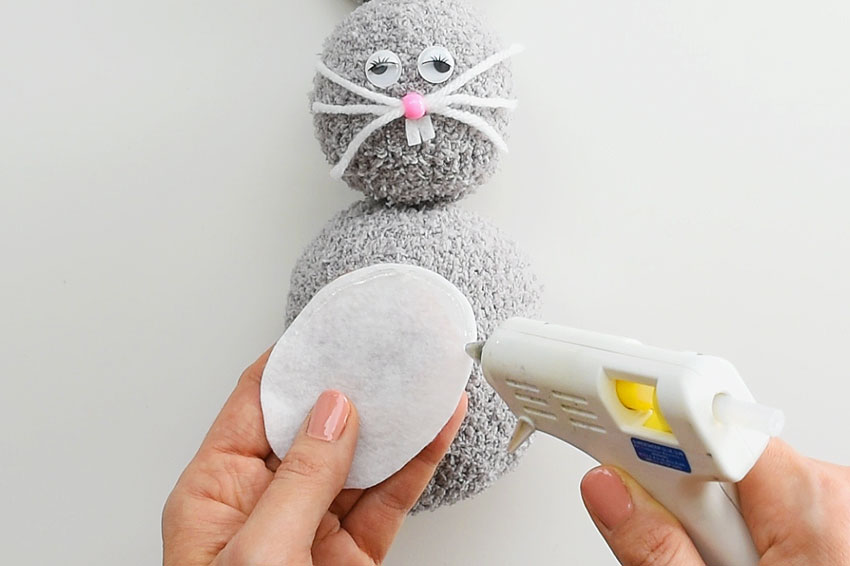
Cut out an oval from white felt. This will be the bunny’s tummy.
Using a glue gun, squeeze out a line of glue around the inside edge of the white oval. Then press it in place onto the bunny’s tummy.
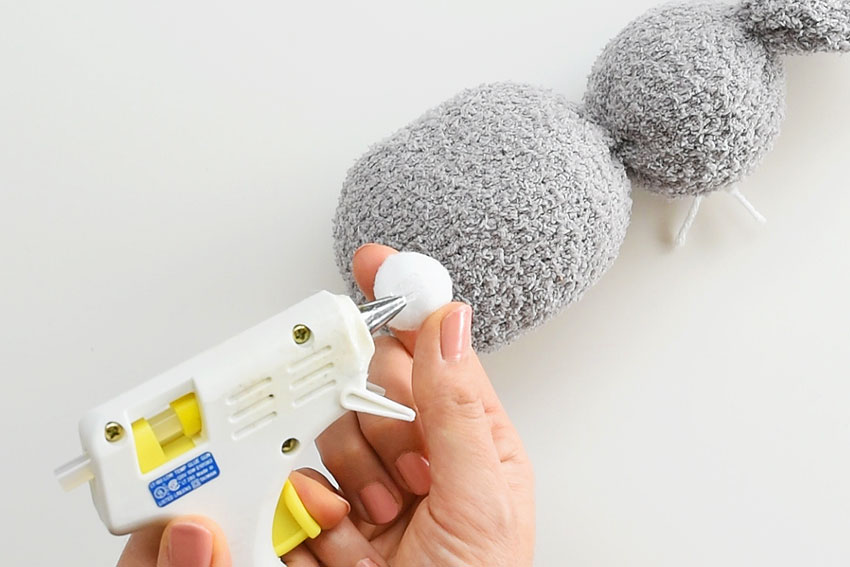
Attach a small white pom pom or a cotton ball to the back of the bunny’s body for the bunny’s tail, again using the glue gun.
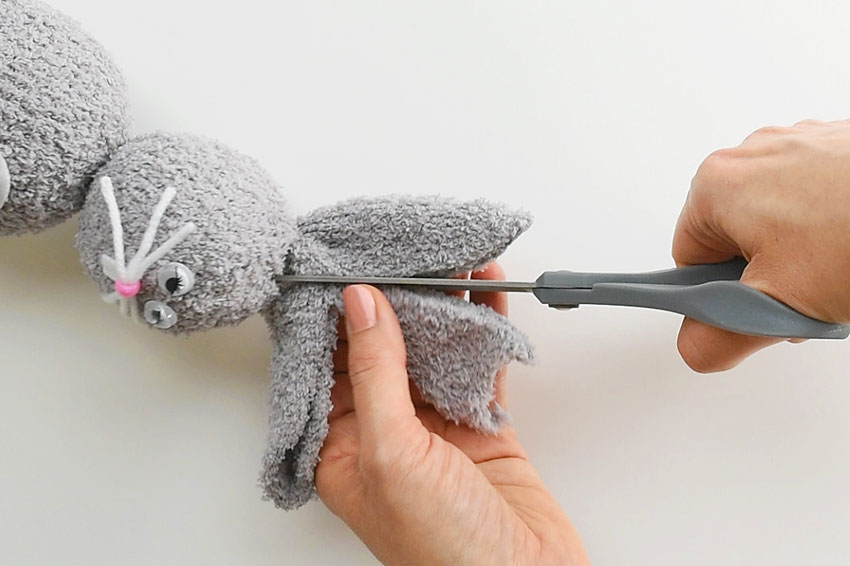
Cut the top of the sock to make two ear shapes for the bunny.
Finally, tie a ribbon around the bunny’s neck.

And your no-sew sock bunny is complete!