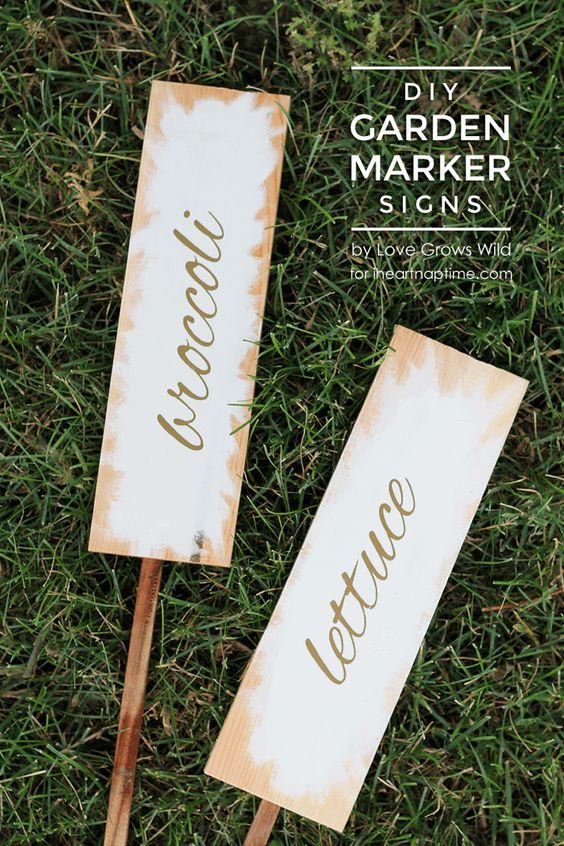
DIY Wooden Garden Signs
Are you looking to add a touch of charm and personality to your garden? Why not try your hand at making your own DIY wooden garden signs? These signs not only serve a practical purpose by labeling your plants and herbs, but they also add a rustic and whimsical element to your outdoor space. These DIY garden signs are not only a practical way to label your plants and flowers, but they also serve as eye-catching decorations that will make your outdoor space truly stand out. Whether you want to label your plants, display inspiring quotes, or simply add a touch of whimsy, the possibilities are endless.
Supplies
- wood board
- sandpaper
- white paint & paint brush
- gold vinyl/stickers or gold paint pen
- clear polyurethane
- garden stakes
- screws & drill
Instructions
Step 1: Cut the wood boards to your desired length and sand down any rough edges.I cut a 1×8 board into 12″ pieces, then cut each piece in 1/2 lengthwise.
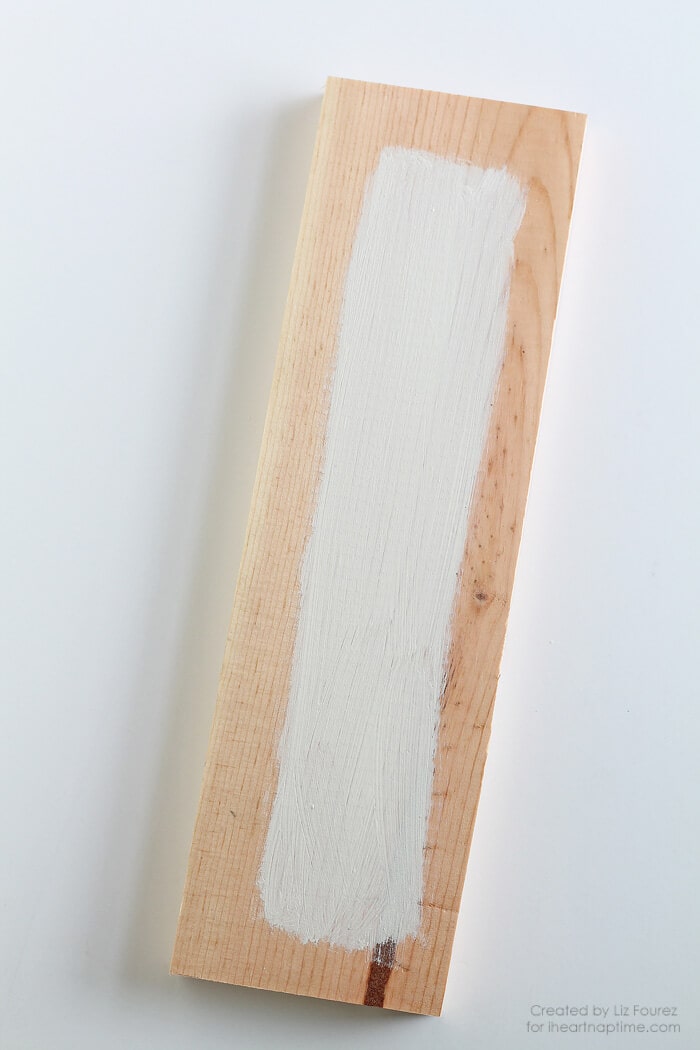
Step 2: Paint a rectangle in the center of your board, leaving about a 1″ border on each side.
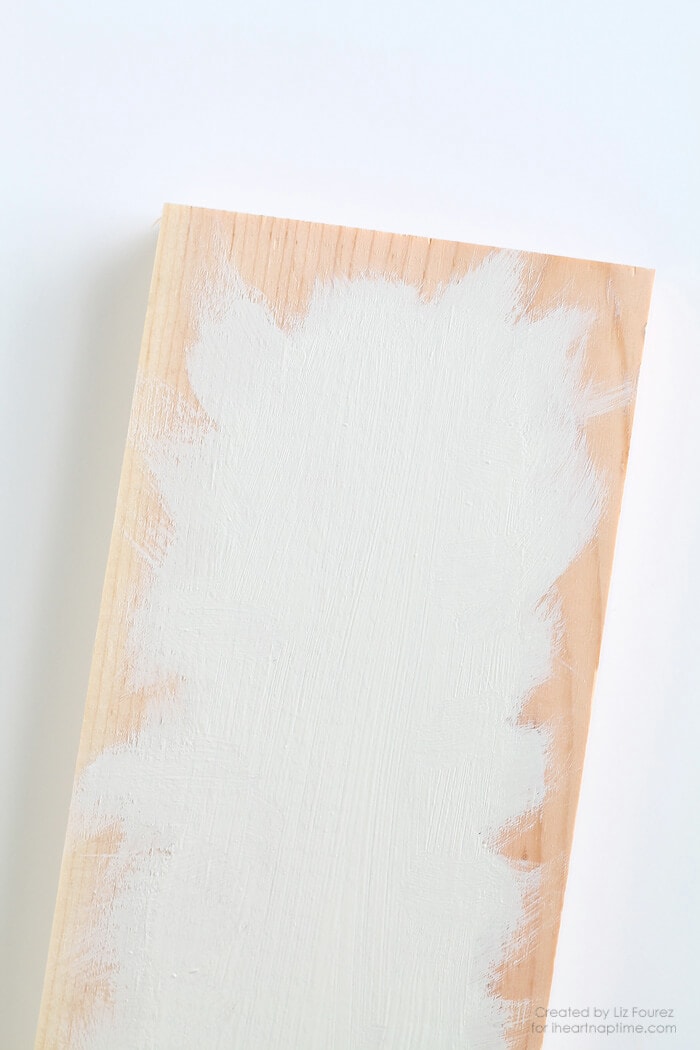
Step 3: Once dry, paint a second coat, feathering the paint outside the rectangle for a messy, paint-splattered look.
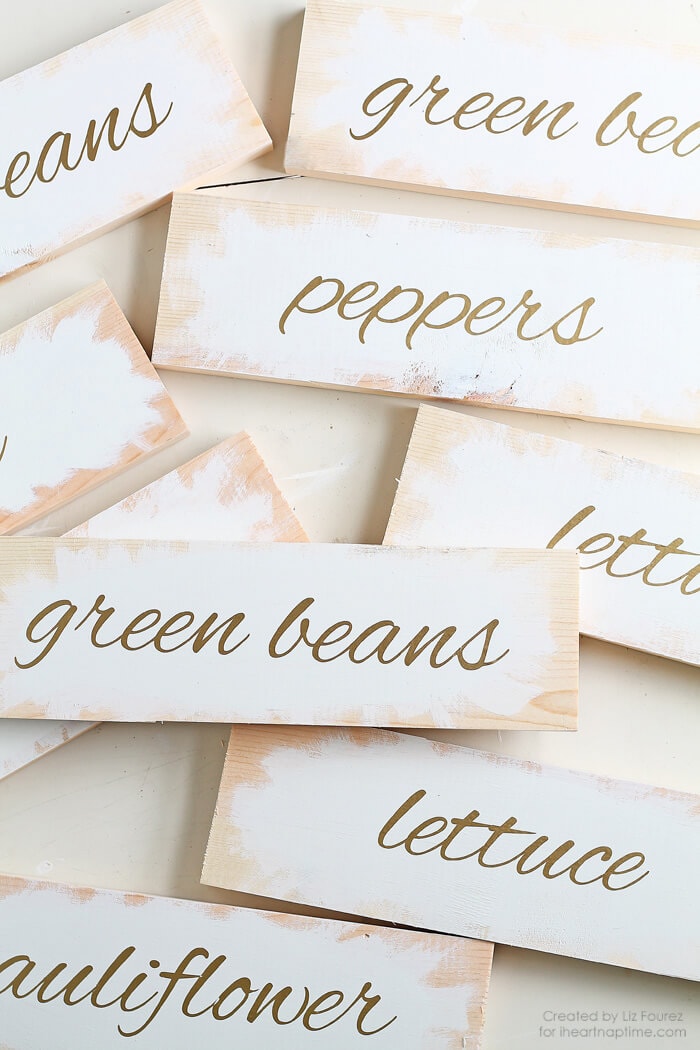
Step 4: Add the lettering for your garden markers, either with gold vinyl, stickers, or using a gold paint pen. I used my Silhouette CAMEO cutting machine to cut these letters out on vinyl using the Alex Brush font.

Step 5: Add a garden stake to the back of each sign using screws to attach the two pieces. I used 1″ screws for the small, narrow garden stakes seen in the photo below.
Step 6: Seal the signs with clear polyurethane to protect them from the elements.
Your’e finished! Enjoy your beautiful garden!