Popsicle Stick Uncle Sam Patriotic Craft
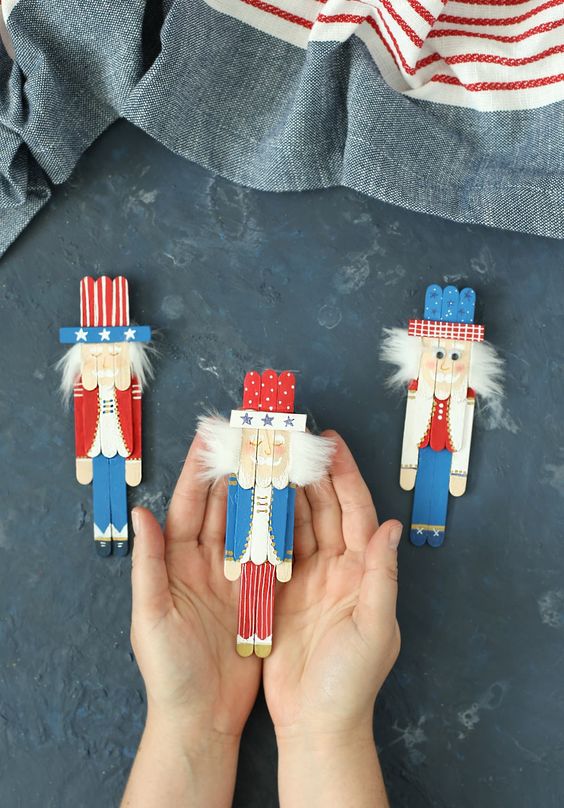
Get ready to show off your patriotic spirit with this fun and creative Popsicle Stick Uncle Sam craft! This craft is perfect for kids and adults alike, and it's a great way to celebrate holidays like Independence Day or Memorial Day. Once everything is dry and secure, your Popsicle Stick Uncle Sam craft is complete! You can display it proudly on a shelf or use it as a decoration for your next patriotic celebration. This craft is not only a fun activity, but it also allows you to show off your love for your country in a creative and unique way. So gather your materials and get ready to make your very own Popsicle Stick Uncle Sam!
Here’s what you need to make your own popsicle stick Uncle Sam:
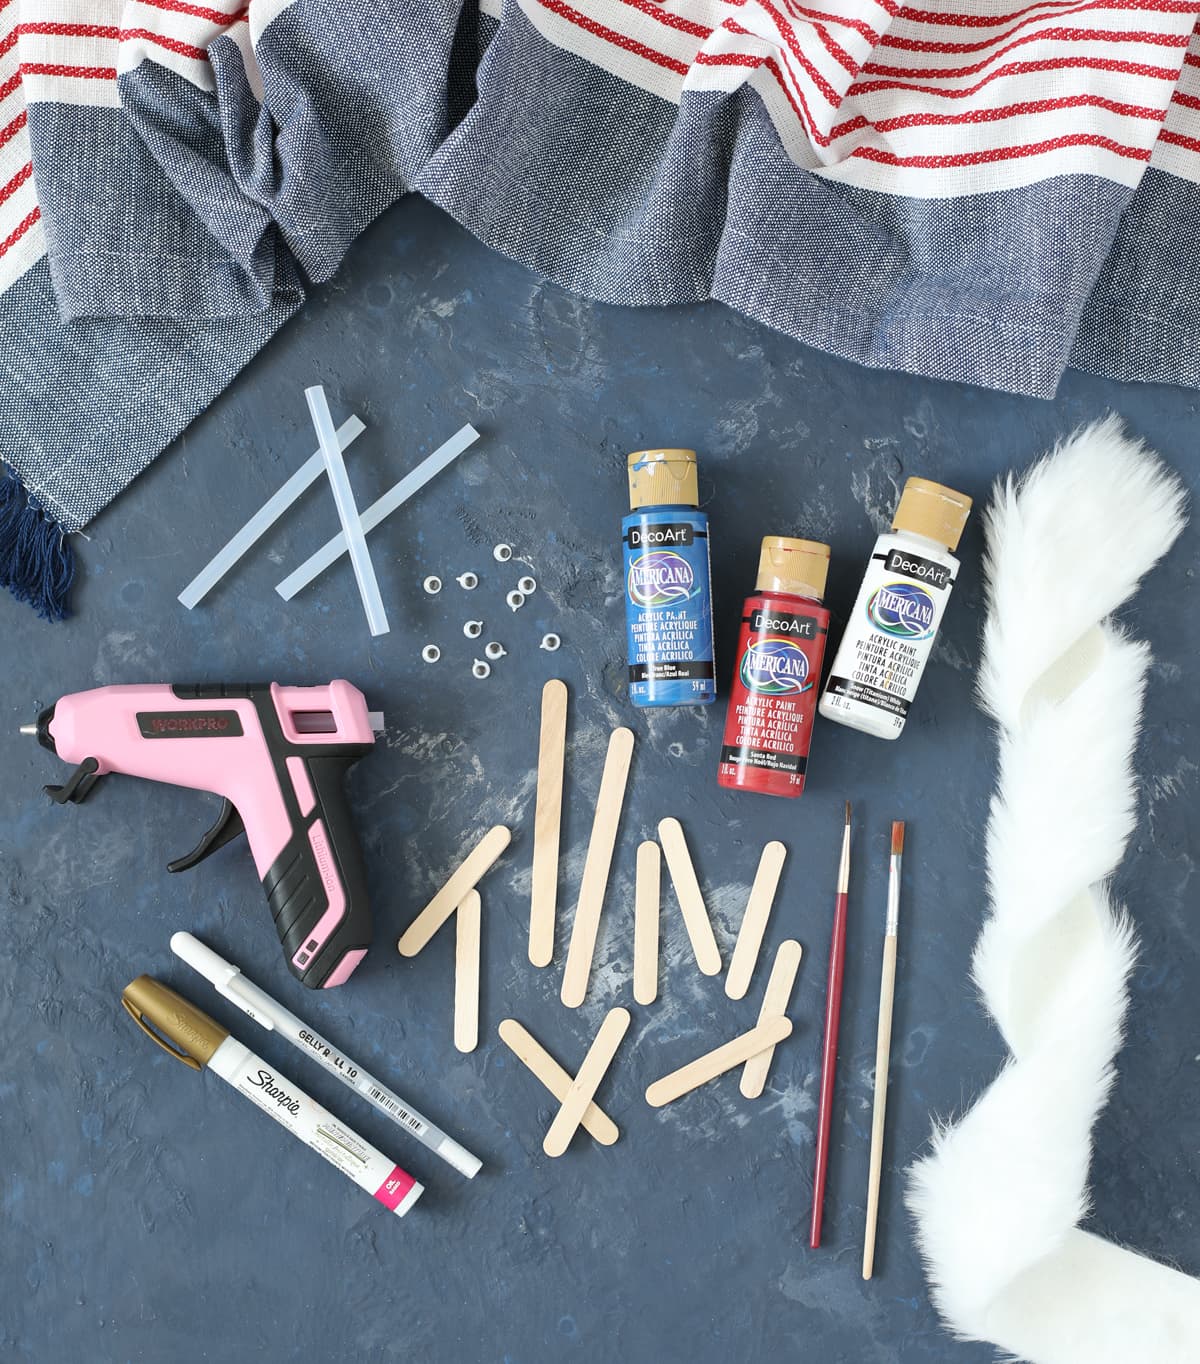
Materials Needed
- 8 Small Craft Sticks (2.5 inches long)
- Two Regular Craft Sticks (4.5 inches long)
- Hot Glue Gun + Glue Sticks
- Craft Paint (Red, White, Blue)
- Small Paint Brushes
- Paint Pens (I used white, gold and black)
- White Faux Fur
Instructions
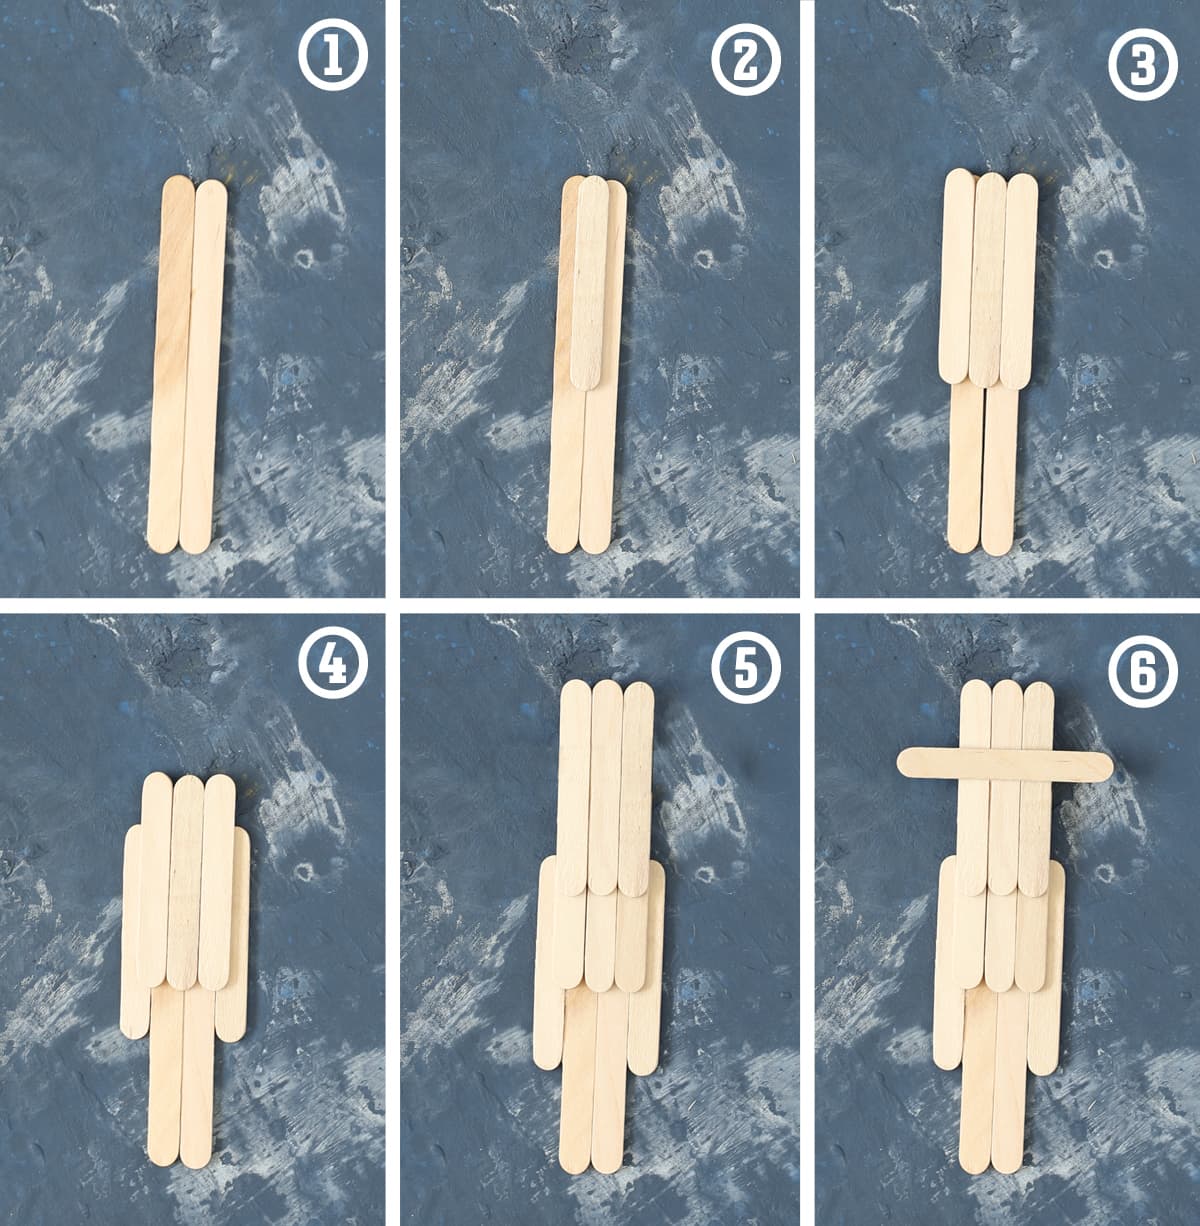
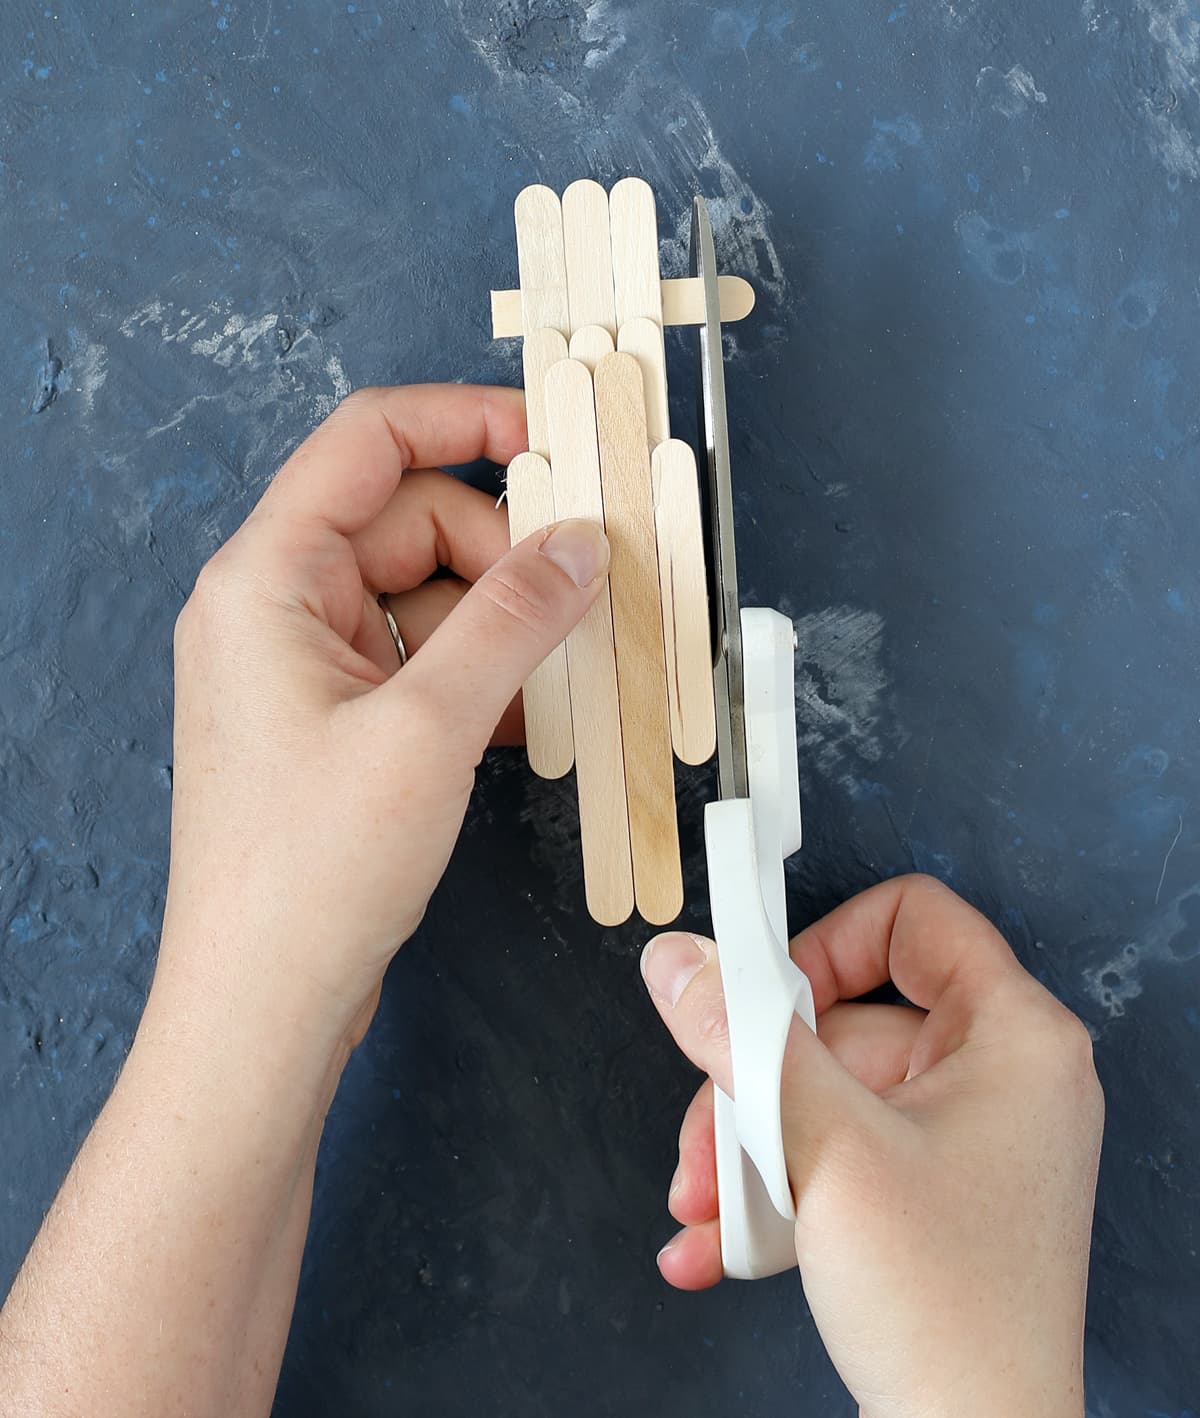
Step 1: Begin by gluing the popsicle sticks together as shown in the diagram below.
- Place the two longest sticks side by side.
- Add hot glue to one small craft stick, then place it on top of the two long sticks, centered and with the top edges lined up.
- Add hot glue on either side of the small stick and press two more small sticks down, lining up the ends.
- Glue two small sticks underneath, so they’re even with the long sticks, but attached to the three small sticks in front.
- Place glue along the top edge, then attach three more sticks, lining the bottom edges up so they’re about 1/3 overlapping the other sticks.
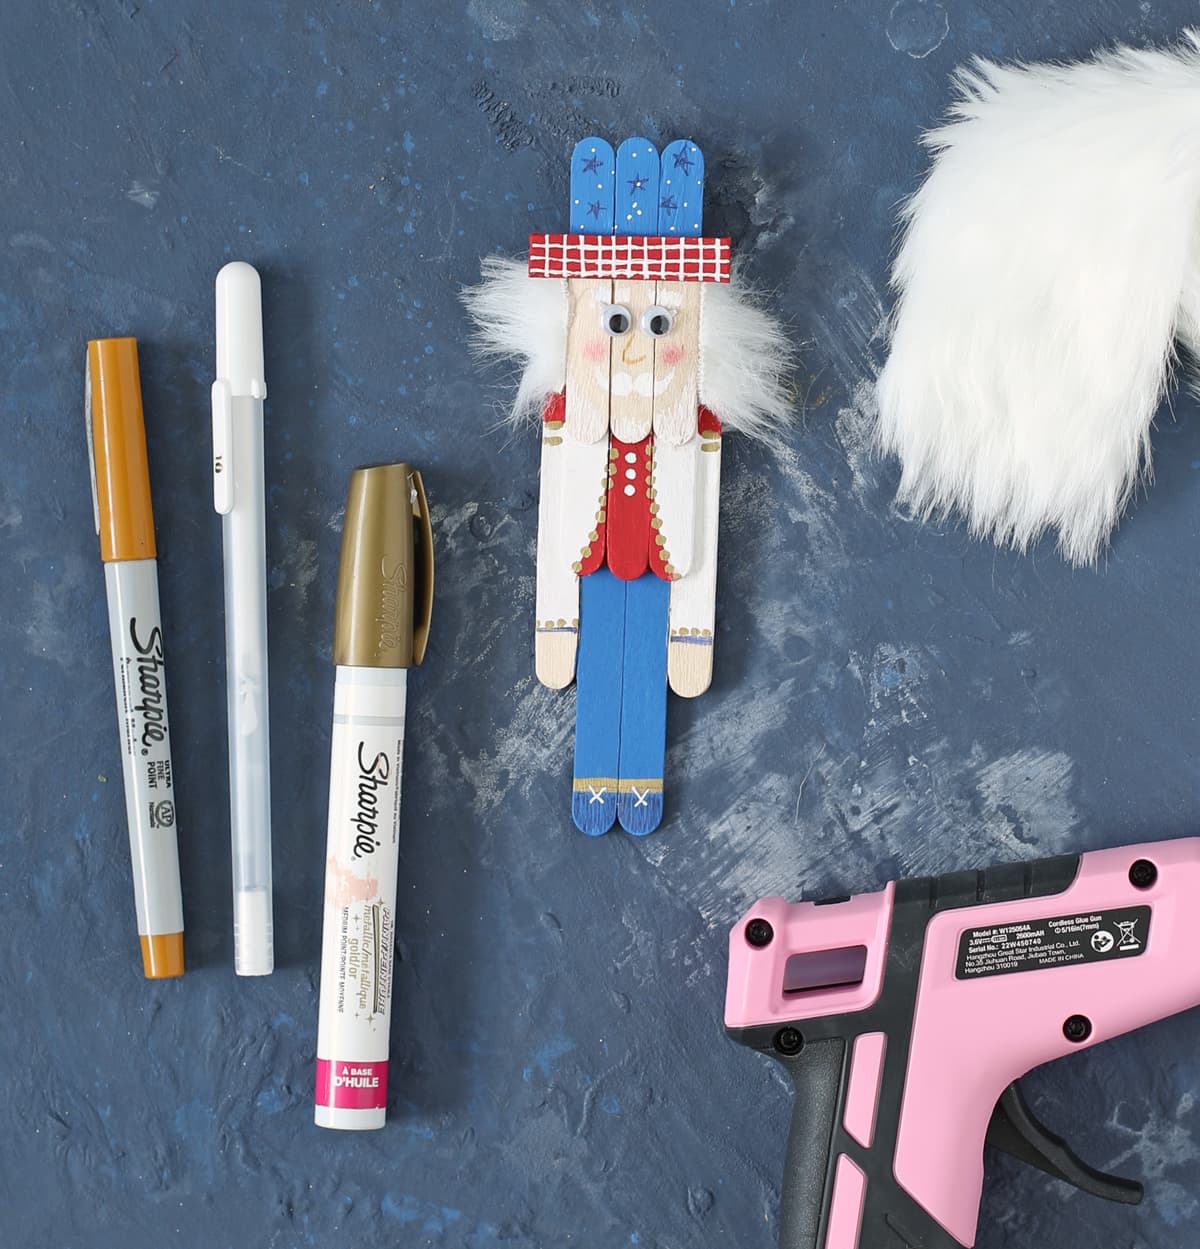
Step 2: Trim off the ends of the hat band so they’re shorter and more in proportion. This is optional, I just thought it looked better.
Step 3: Once all of the sticks are glued together, it’s time to add some color and personality. Paint the top of Uncle Sam to look like his hat, then leave his face area raw wood. Start by painting the base colors of the clothing. I did a red shirt, white jacket and blue pants for this particular one, but you can do them in any combination. Just be sure to leave the face area and the hands raw wood. I curved the center red section out to make it look more like a jacket.
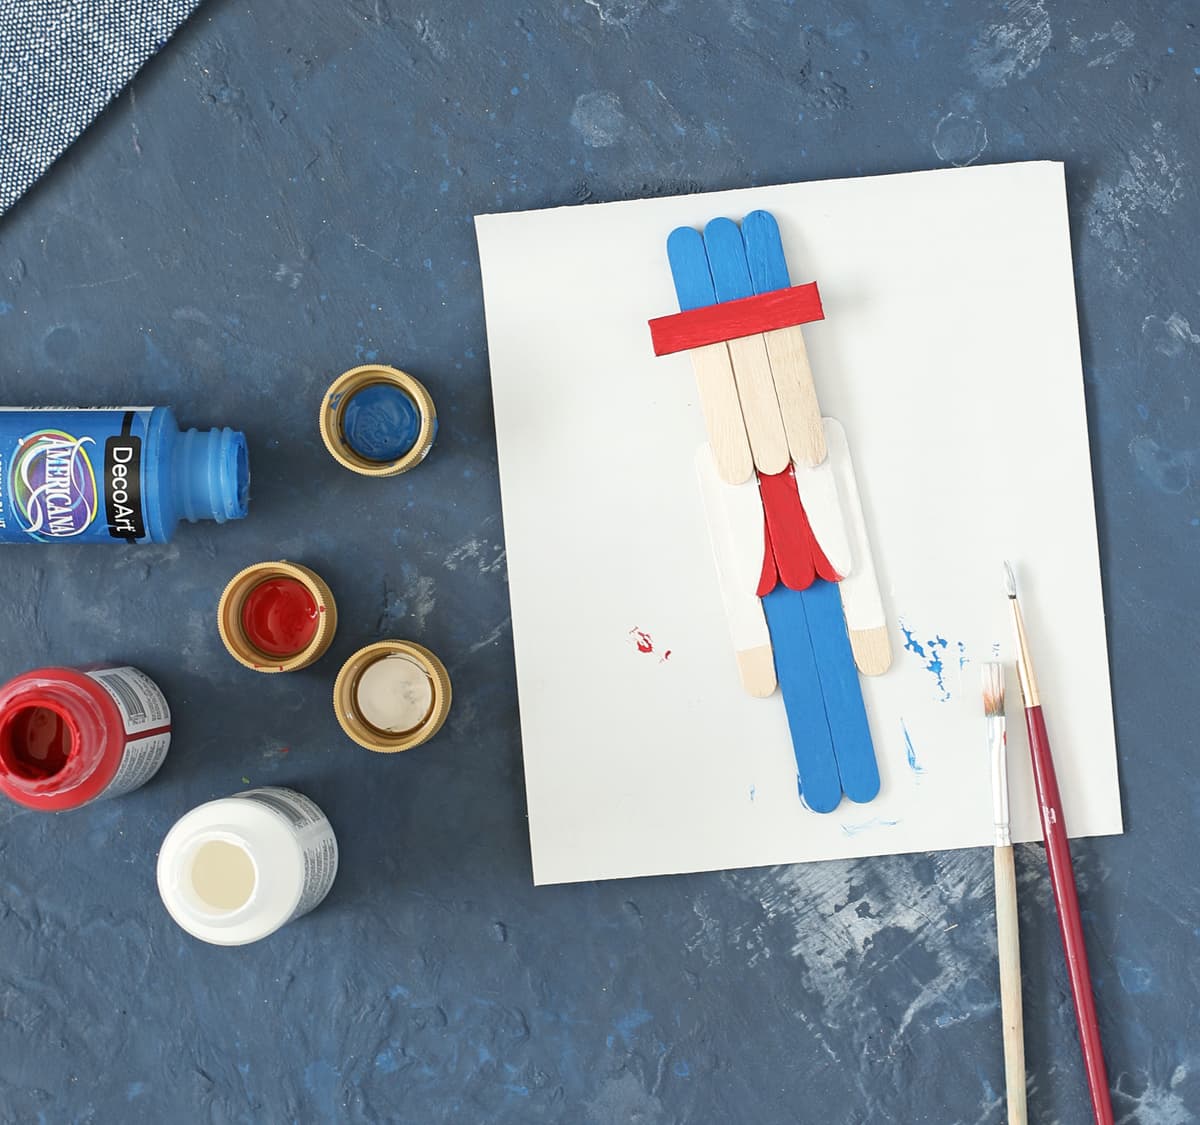
It doesn’t look like much yet, but just wait. We’re about to get to the good part!
Step 4: Using paint pens, add in all the cute details. Add eyes, a nose and a mouth or a handlebar mustache or a beard, etc. You can also glue on googly eyes if desired. I used them on one and just drew the eyes on the other two. Just personal preference! I think they’re cute both ways.
Then fill in details like sleeve cuffs, hat bands, shoelaces, buttons and patterned fabrics. Have fun with it. I think more is more here, but nobody ever accused me of being a minimalist. LOL.
Step 5: Cut tiny little strips of faux fur and hot glue them to the sides of the face area to give the nutcracker some hair.
HELPFUL TIP – If you’ve never crafted with faux fur before, try cutting it from the back side. Slide the tip of your scissors just under the backing fabric so you aren’t actually cutting the fur, just the backing.