Crochet Twisted Scrubbie
Create a unique and stylish scrubber by crocheting a twisted scrubbie. This fun and practical project involves using a crochet hook and yarn to create a twisted design that is perfect for scrubbing dishes, countertops, or even your body. The twisted texture of the scrubbie provides extra scrubbing power, making it ideal for tackling tough messes and stains. You can customize your twisted scrubbie by choosing different colors of yarn to match your kitchen decor or personal style. Not only is it a fun and creative project, but it is also an eco-friendly alternative to disposable sponges or scrub brushes. By using a twisted scrubbie, you can reduce waste and save money in the long run. Plus, the durable nature of crocheted items means that your twisted scrubbie will last for a long time, making it a sustainable choice for your cleaning needs. So grab your crochet hook and yarn, and get ready to create your very own twisted scrubbie today!
Materials and Details
- Yarn: 100 yards cotton in choice of colors. Samples were created with Sugar N Cream, Red Heart Scrubby.
- Crochet Hook: H (5mm), I (5.5mm)
- Miscellaneous: Yarn needle
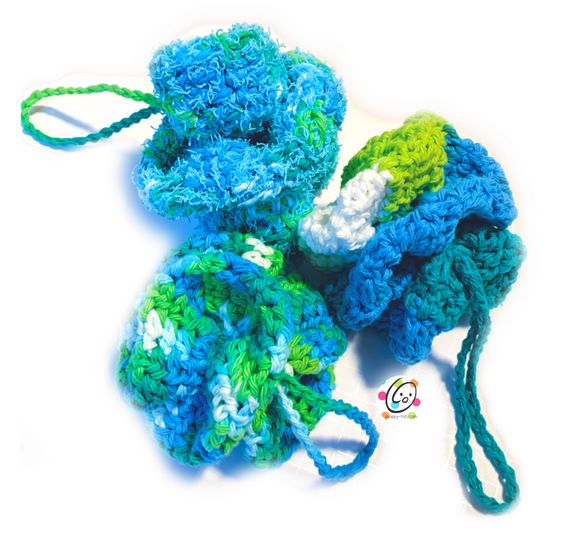
- Finished Measurements: 3-4”
Tips
- Numbers at the beginning of each line may refer to steps and not indicate number of rows.
- Stitch count remains the same unless noted at end of row.
Directions
Plain Cotton Version
See “help photos” at the end of this pattern if needed.
1. With an H hook and ww yarn, ch 10, sc in the 2nd ch from hook and in each ch across. (9sts)
2. Ch 2, turn, hdc in the same st and in each st to end of row.
3. Repeat previous row until 24-36” long. The longer the strand, the bigger your scrubbie will be.
4. Do not finish off. Fold piece in half, matching the long edges. Ch 1. Working through both edges at the same time (to sew them together), sc evenly to end of row. Sl st in the first st of the row to join in a circle.
5. This step creates the hanger. Ch 50, sl st in same st on main piece. Cut yarn, leaving a long yarn tail (at least 24”) for next step.
6. With a yarn needle, use the yarn tail to sew the short ends together. Weave the needle back up through the seam to finish at the base of the hanger.
7. This step will gather the circle. Weave the yarn needle in and out of the top edge sts, gathering the yarn AS YOU GO. Be careful to pull gently so the yarn doesn’t break. Gather as much as possible. Secure the yarn at the end (at the hanger) with a knot. Cut the yarn and weave in ends.
Continue to “twist” section below the scrubbie version instructions.
Scrubbie Version
See “Help Photos” at the end of this pattern if needed.
1. With an I hook and ww yarn + scrubbie yarn (held together), ch 10, sc in the 2nd ch from hook and in each ch across. (9sts)
2. Ch 2, turn, hdc in the same st and in each st to end of row.
3. Repeat previous row until 24-36” long. The longer the strand, the bigger your scrubbie will be.
4. Do not finish off. Fold piece in half, matching the long edges. Ch 1. Working through both edges at the same time (to sew them together), sc evenly to end of row. Sl st in the first st of the row to join in a circle.
5. This step creates the hanger. Ch 50, sl st in same st on main piece. Cut yarn, leaving a long yarn tail (at least 24”) for next step.
6. With a yarn needle, use the yarn tail to sew the short ends together. Weave the needle back up through the seam to finish at the base of the hanger.
7. This step will gather the circle. Weave the yarn needle in and out of the top edge sts, gathering the yarn AS YOU GO. Be careful to pull gently so the yarn doesn’t break. Gather as much as possible. Secure the yarn at the end (at the hanger) with a knot. Cut the yarn and weave in ends.
Continue to “twist” section below.
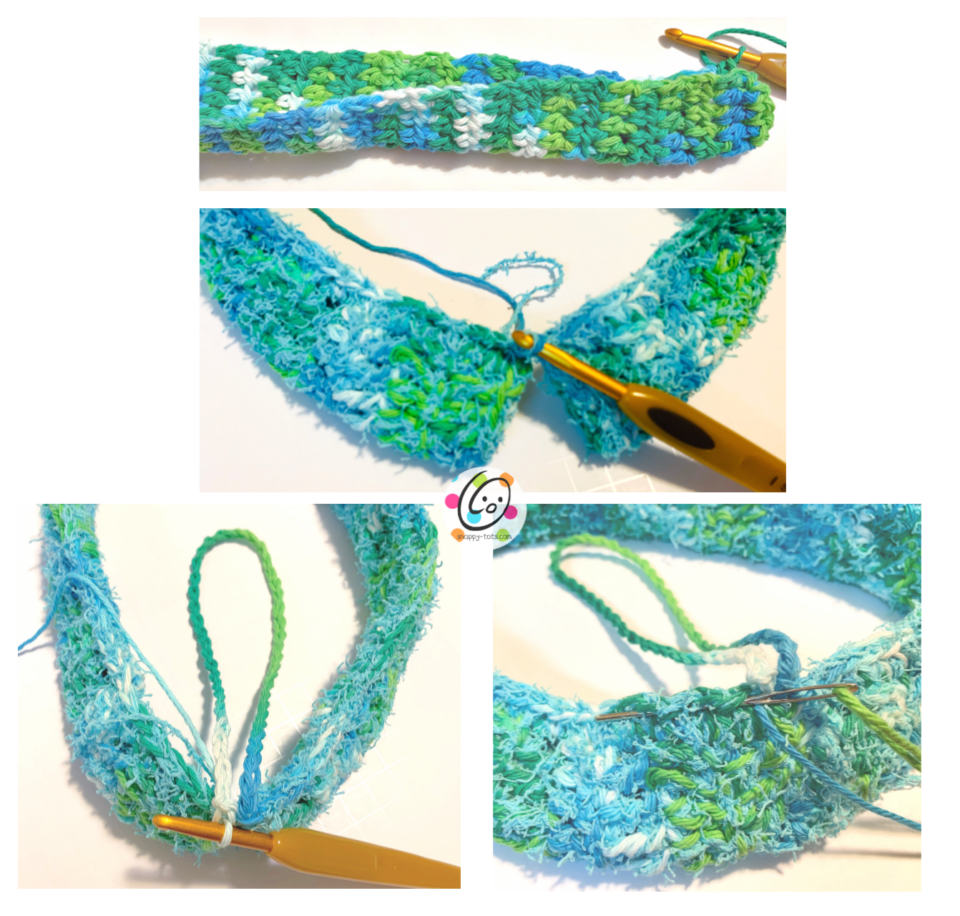
Lay the circle on a flat surface with the hanger at one side as shown in photos below. Twist the circle so it looks like the photo below (top right).
Thread the hanger through a yarn needle. Use the yarn needle to thread the hanger from the bottom to the top of the twist. Work through spaces between sts and not through the st or you will not be able to pull the hanger through.
How to Twist
When the hanger is at the top of the twist, thread the yarn needle through the crocheted piece (see photo bottom right). Pull hanger through and tie a knot at the base of the hanger. BE AWARE: The scrubbie will still be able to untwist a bit after this step.