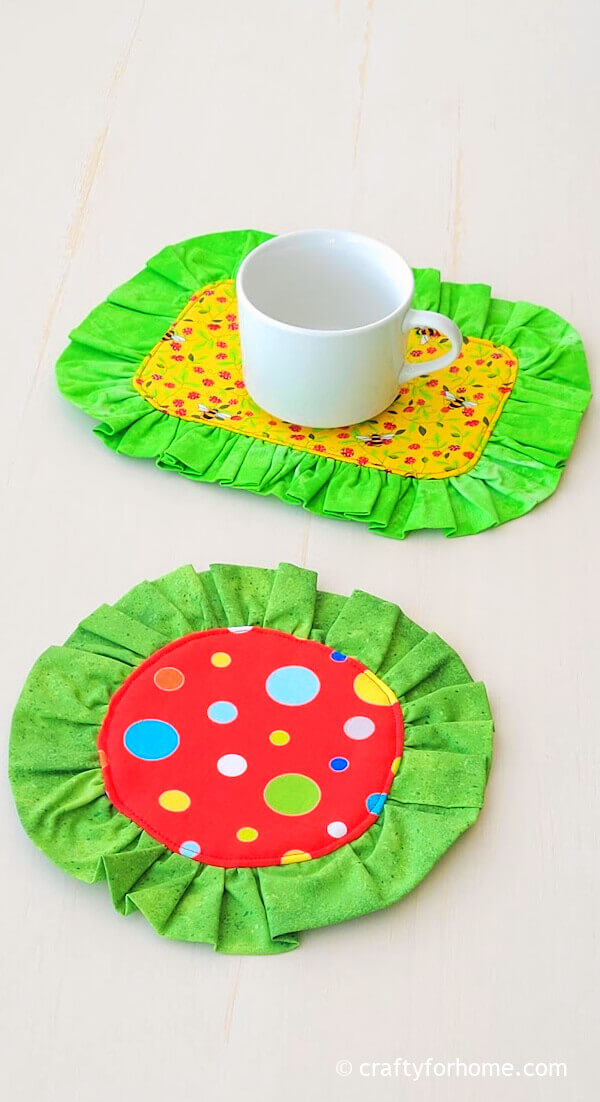
DIY Ruffled Coaster
Create your own unique set of ruffled coasters with this fun and easy do-it-yourself project. Using simple materials like fabric, thread, and a sewing machine, you can add a touch of charm to your home decor. Start by cutting out circles of fabric in your desired size, then sew a basting stitch around the edge of each circle. Pull the thread to create ruffles, adjusting the tightness to your liking. Once you have ruffled all the circles, sew them onto a backing fabric to complete the coaster. Whether you are a seasoned crafter or a beginner looking for a fun project, making these ruffled coasters is a great way to add a handmade touch to your home. So gather your materials and get started on creating your own set of charming ruffled coasters today!
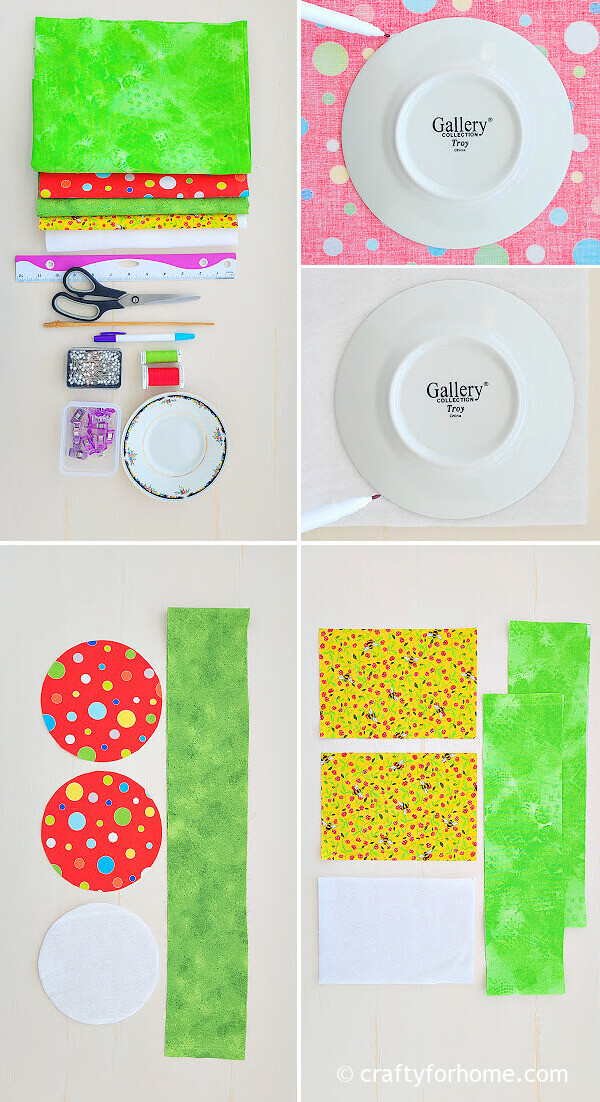
SUPPLY TO MAKE RUFFLED COASTER
The coaster only needs a small piece of fabric, but the ruffle would need a long piece. However, you can use fat quarter fabrics to make the ruffle by sewing several short fabric pieces to form a 36″ rectangle piece for the round coaster or a 54″ long rectangle for the mug rug.
If using a fat quarter to create a long fabric piece, cut several pieces 4″ wide, then sew them together using this fabric strap tutorial or by connecting the short edges of each piece. Then, press it with an ironing machine.
Make the circle using a 6″ diameter small plate or pen compass for the round coaster template.
- 1 piece of fat quarter fabric for the circle and rectangle fabric
- 1 yard fabric, or a fat quarter fabric for the ruffle
- Fusible fleece
- Disappeared ink marker. This dual-purpose fabric marker is my favorite.
- Pins or quilting clips
- Small 6″ diameter plate or pen compass
- Thread
- Ruler
- Chopstick
- Scissors
- Sewing machine
- Ironing machine
Prepare the material as follows:
Use the small plate or compass to prepare the material for circle ruffled coaster
2 pieces of 6″ diameter circle fabric
1 piece of 36″ x 4 fabric for the ruffle
1 piece of 6″ diameter circle fusible fleece
Use the ruler or measuring tape to prepare the material for the rectangle ruffled mug rug
2 pieces of 5.5″ x 8″ rectangle fabric
1 piece 54″ x 4″ fabric for the ruffle
1 piece 5.5″ x 8″ fusible fleece
Helpful tips:
The measurement formula for the length of the fabric for the ruffle is twice the circle’s total circumference or twice the rectangle’s total perimeter.
Circumference of the 6″ circle is 18.8″, rounded to 18″, then the fabric for the ruffle is 18″ x 2 = 36″
The perimeter of the 5.5″ x 8″ rectangle fabric is 27″, then the fabric for the ruffle is 27″ x 2 = 54″
For a smaller or bigger coaster, use the measurement formula above to determine the length of the fabric you need for the ruffle.
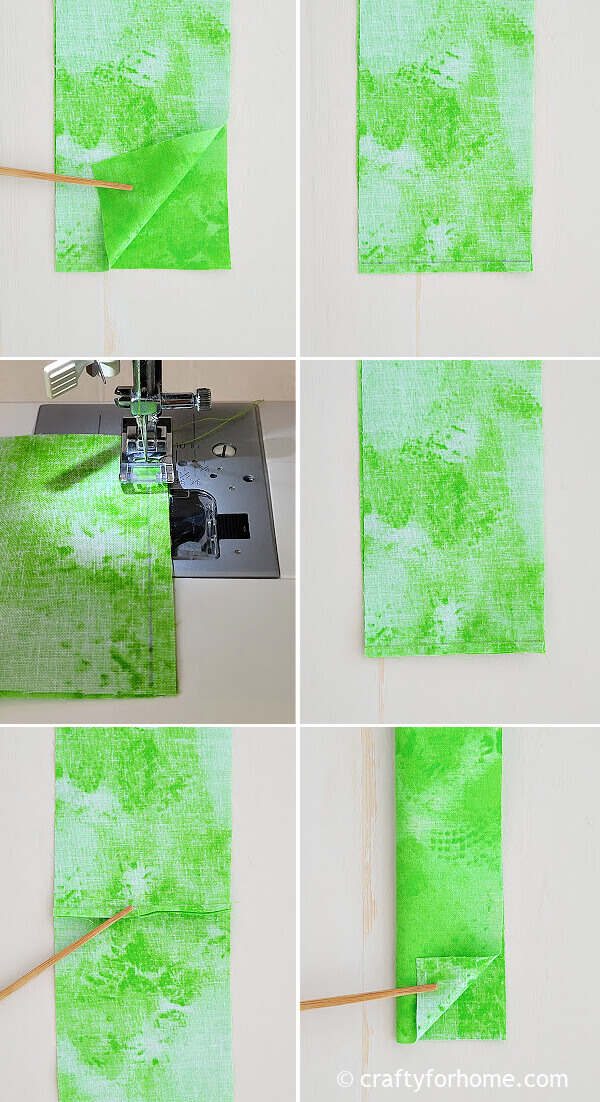
To make one long piece of fabric for the ruffle, put two short pieces together with the right sides facing each other.
Sew both fabrics on one short side.
Fold the fabric in half lengthwise, then press it with an ironing machine.

Fold one of the short ends inward and press it with an ironing machine. There is no fold on the other short edge.
Gather the fabric using the sewing machine or hand-sewing needle with a 0.25″ seam allowance.
Leave the thread long enough on both ends and no backstitching at the start and the end.
Use the straight stitch and set the stitch length to the highest number.
If using a hand needle, sew a straight stitch and leave the thread long on both ends.
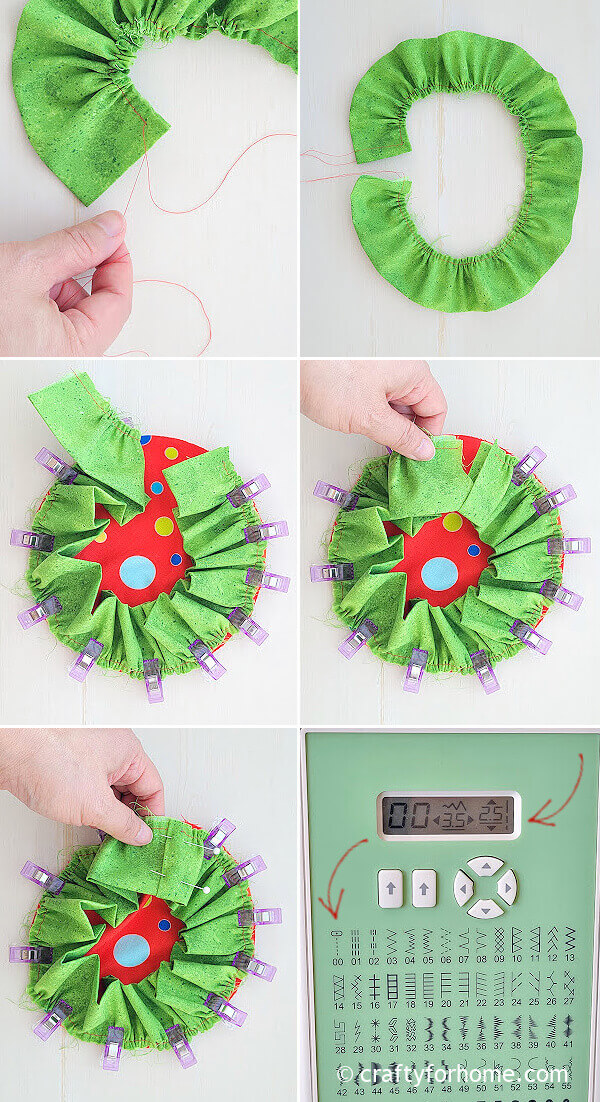
Pull one thread on both ends, and it will create the ruffle. Adjust the ruffle evenly along the fabric length.
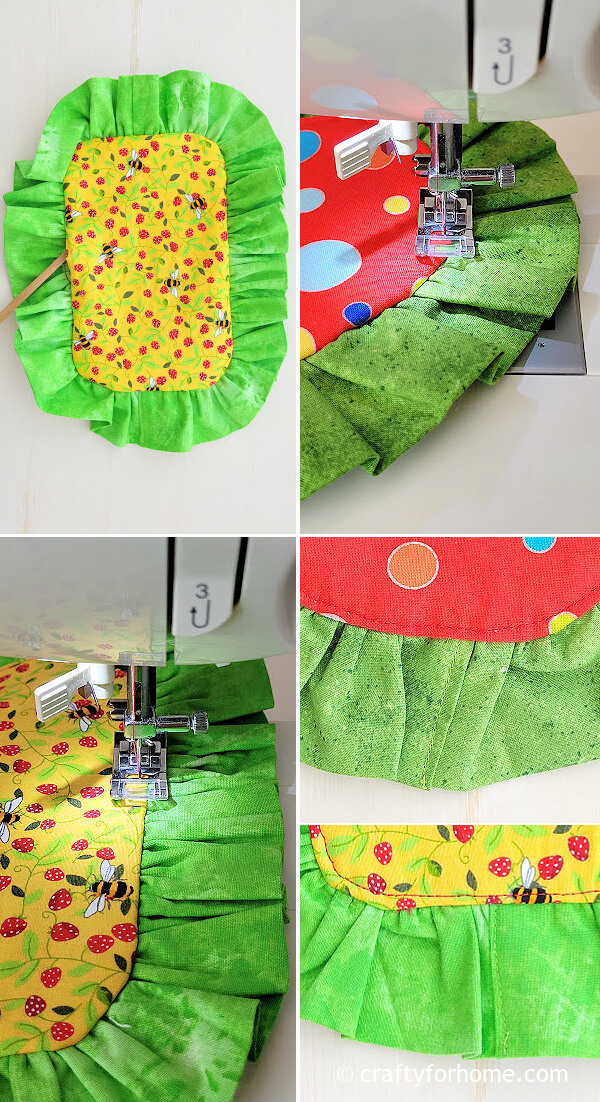
Align the raw edge between the ruffle and the circle fabric.
If the ruffle fabric is too short or too long, adjust accordingly.
Insert one of the raw ends of the ruffle fabric into the folded end.
Pin it, then top stitch it using a regular straight stitch length.
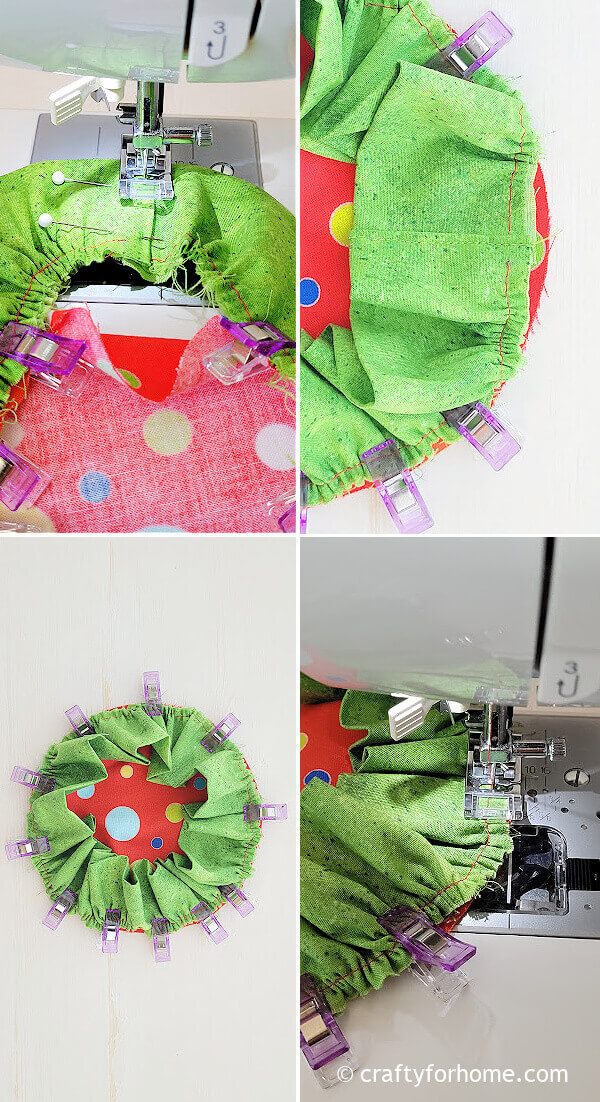
Sew along the circle’s edge with a 0.25″ seam allowance or right on top of the stitch on the ruffle fabric.
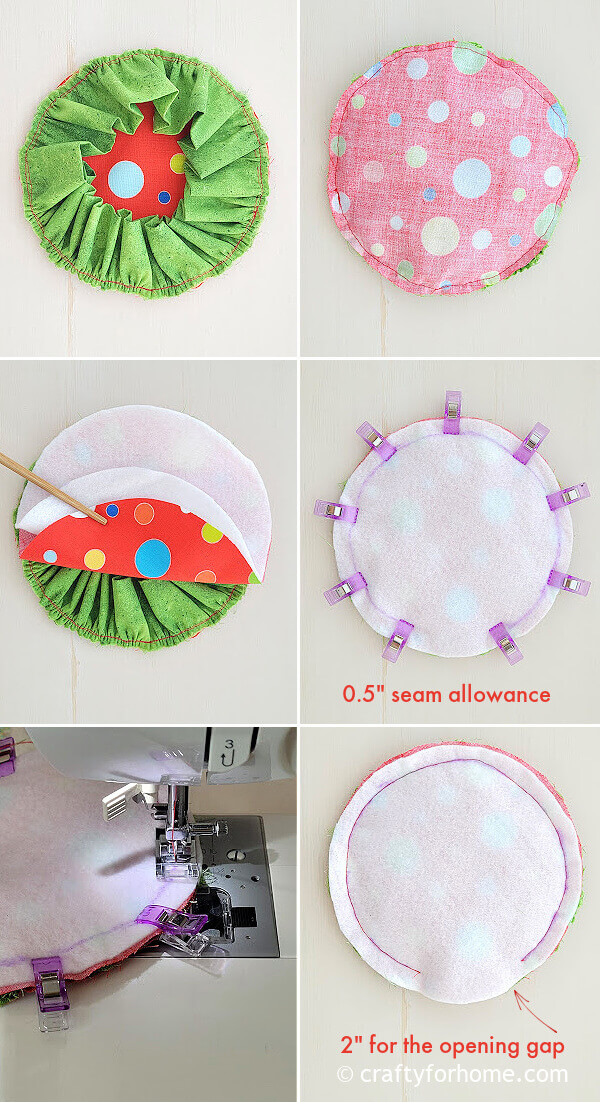
Pin the fabric with the ruffle right side up, then the fabric with the right side down, and the fusible fleece.
Sew the coaster along the edge with a 0.5″ seam allowance, and skip around 2″ for the opening gap.
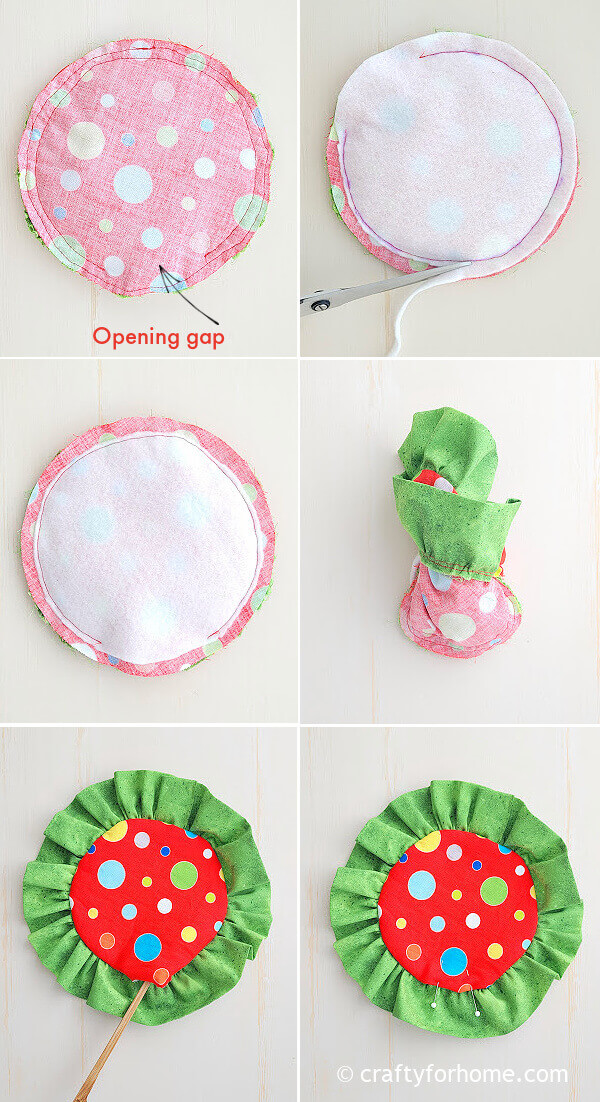
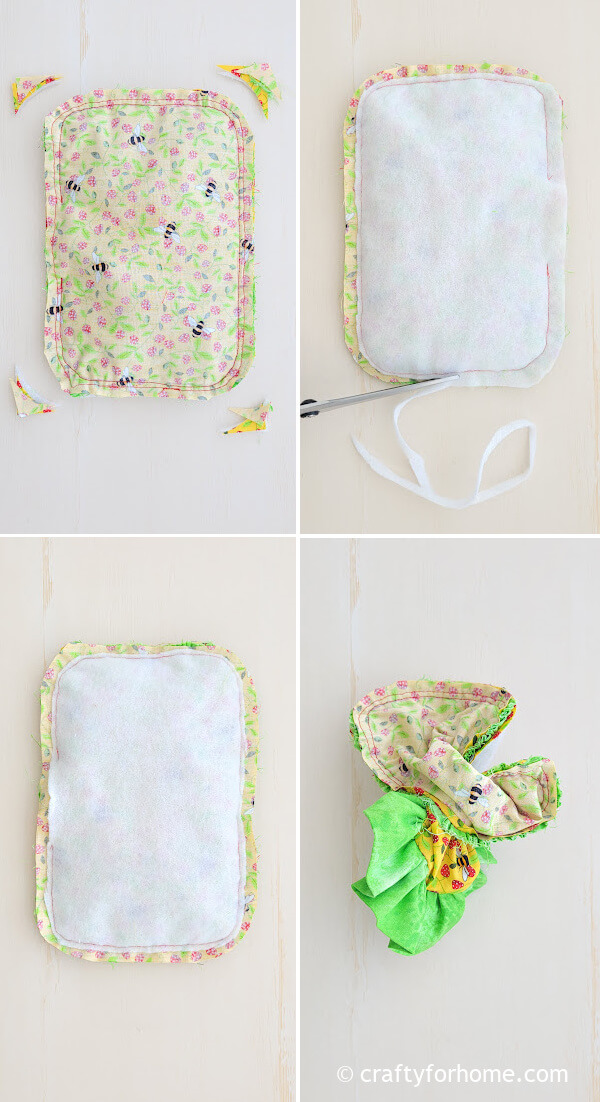
Trim the extra fusible fleece from the stitched line. You can notch the seam or leave it.
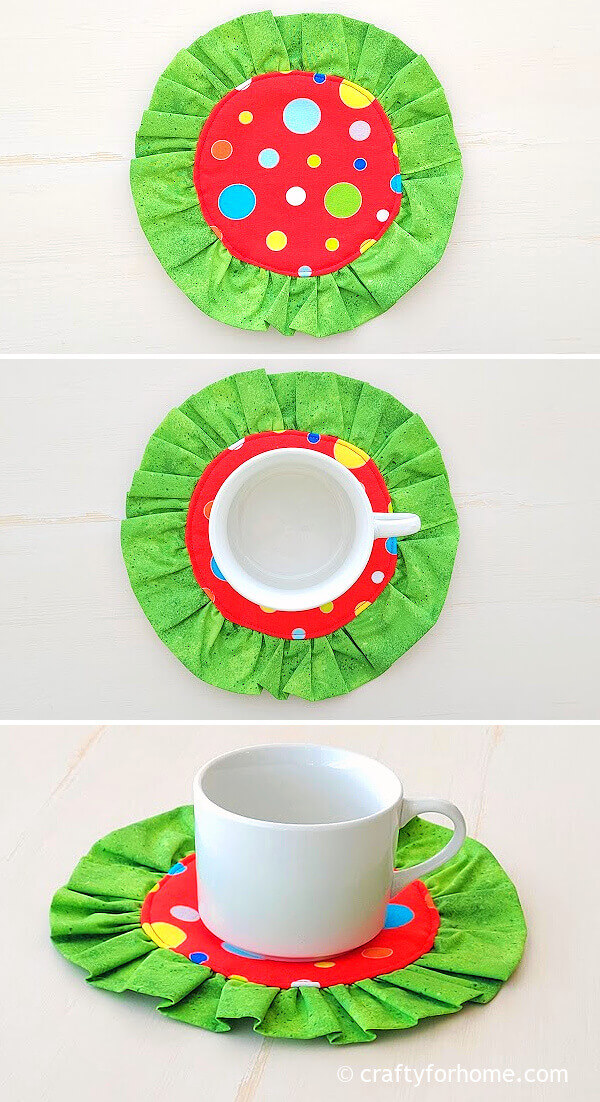
Turn the coaster right side out through the opening.
Push the edge with the chopstick.
Fold the opening gap inward and tuck the ruffled edge in.
Press the coaster with an ironing machine.
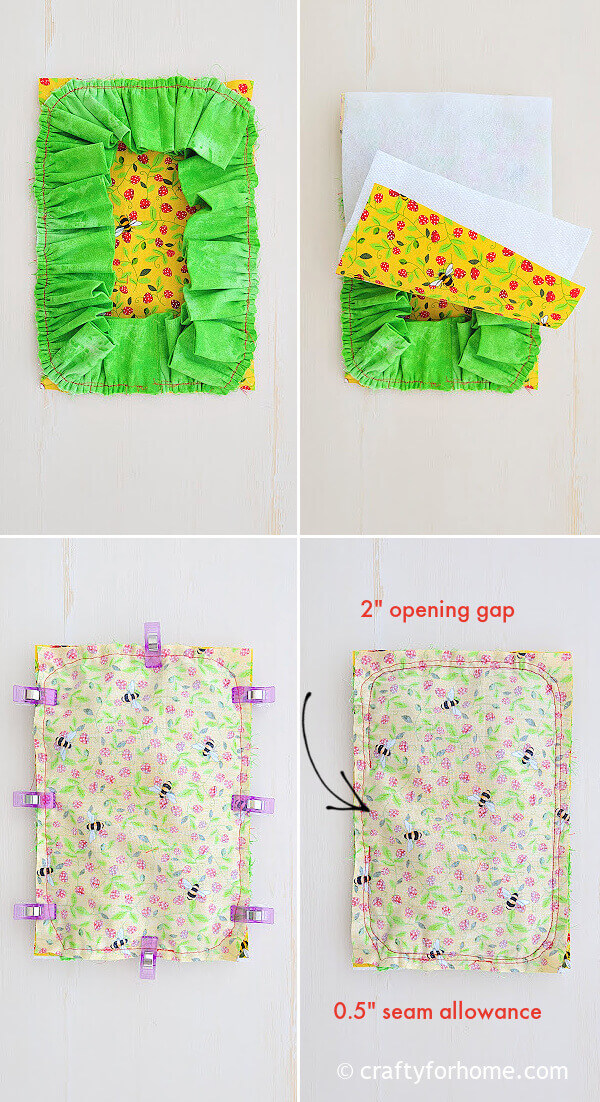
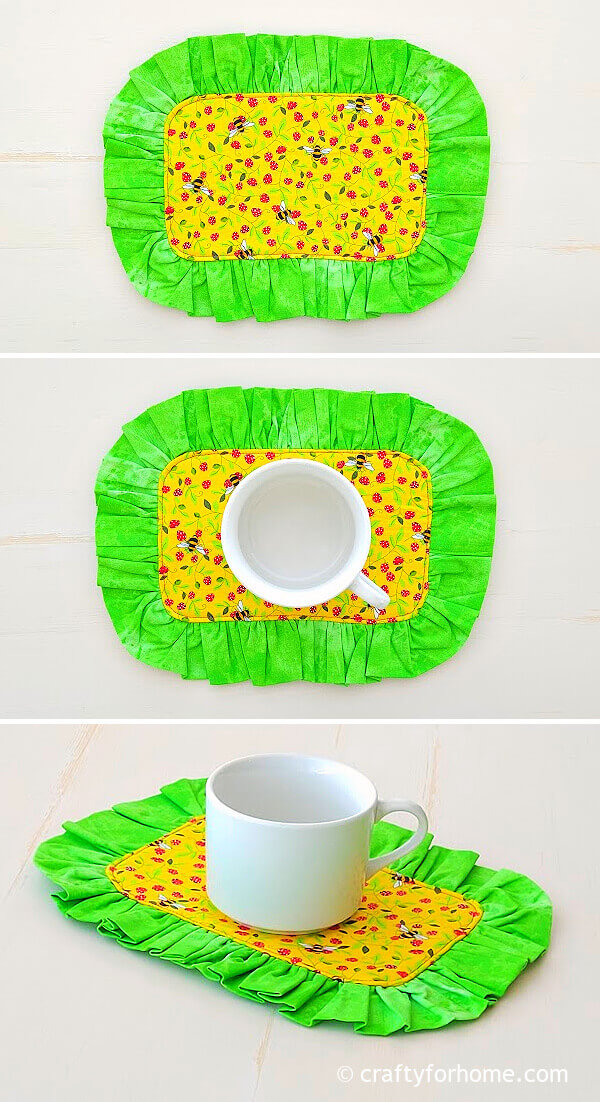
For the rectangle coaster, pin the ruffle by creating a curved edge on all four corners.
Sew the ruffle with the rectangle fabric right on top of the stitch on the ruffle fabric, and follow the shape in all curved corners.
Pin the fabric with the ruffle right side up, then the fabric with the right side down, and the fusible fleece.
On the fabric with the stitched ruffle facing up, sew the coaster along the edge with a 0.5″ seam allowance, following the curve line on all corners. Skip around 2″ for the opening gap.
Clip all four corners by following the curve shape.
Trim the extra fusible fleece from the stitched line.
Turn the coaster right side out through the opening.
Push the edge with the chopstick.
Fold the opening gap inward and tuck the ruffled edge in.
Press the coaster with an ironing machine.
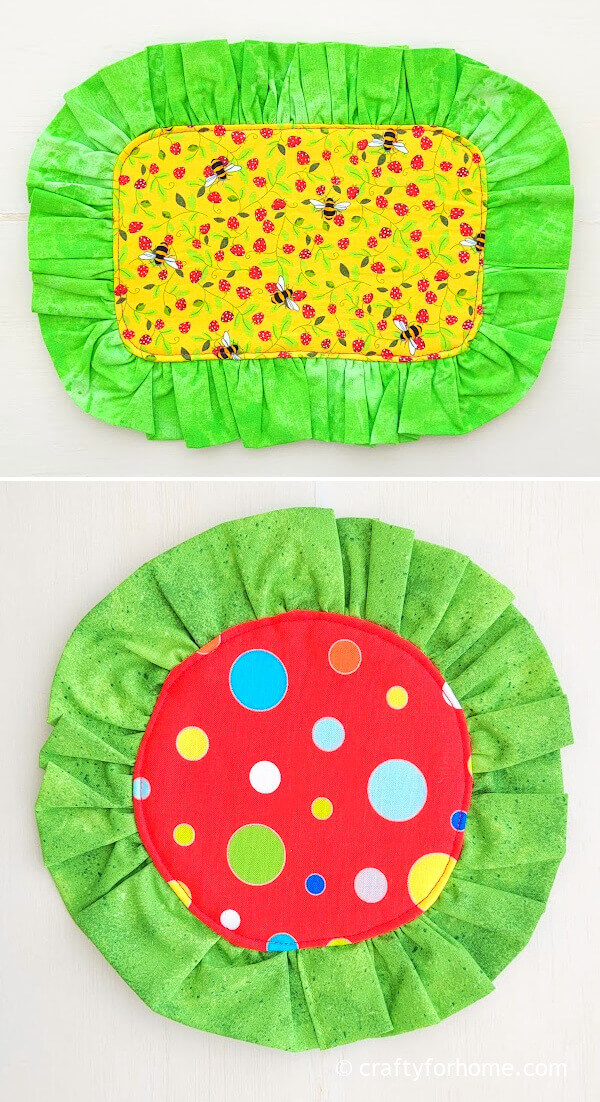
Top stitch the coaster along the circle and the straight edge fabric, closing the opening gap at the same time.
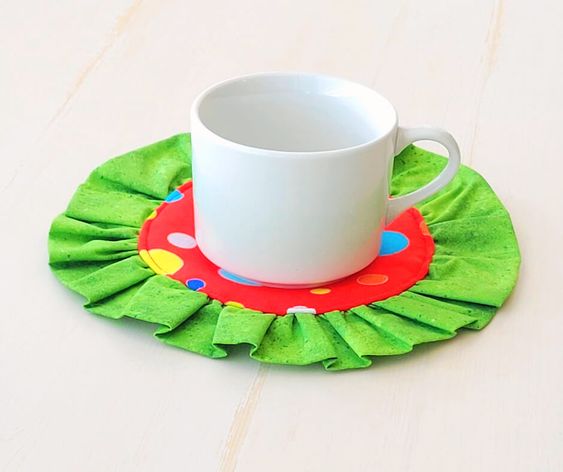
The ruffle coaster is ready to use now.
These frilly coasters remind me of vintage fashion, which came back in trend a few years ago. Ruffles or pleats are a timeless fashion style. It looks beautiful on dresses and homeware textiles.
If you are making a different-shaped coaster, use the measurement formula above to determine the length of the fabric you need to create an even ruffled edge. The frilly fabric is adjustable to fit the perimeter of the coaster shape.
Use pink or red fabric and print for the sweetest Valentine’s Day coaster. From this ruffle edge tutorial, you can make a large round one for the Christmas tree skirt or round table cloth, using the Holiday theme fabric color and print.