How To Make Kitchen Hot Pads
Kitchen hot pads are essential accessories for any cooking enthusiast. These handy tools not only protect your hands from scorching hot pots and pans but also add a touch of style to your kitchen decor. Made from heat-resistant materials such as silicone or cotton, kitchen hot pads provide a reliable barrier between your skin and the sizzling heat of the stove. With their thick padding and sturdy construction, they offer a secure grip, ensuring that you can confidently handle hot cookware without the fear of getting burned. Whether you're flipping pancakes on a Sunday morning or baking a delicious casserole for dinner, kitchen hot pads are your trusted companions in the culinary world.

What You’ll Need:
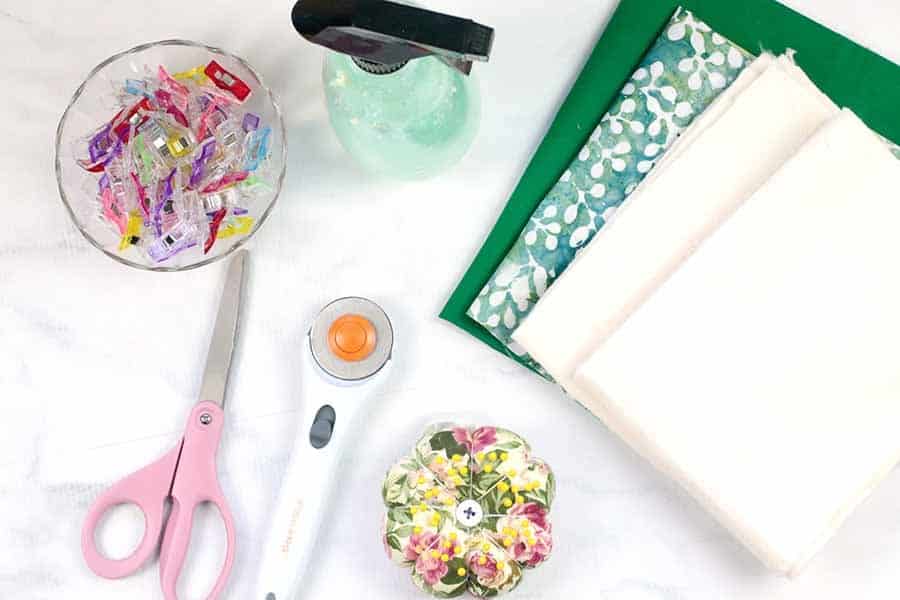
- 13”x9” rectangle out of your top fabric
- 2-13”x9” pieces of Insul Brite
- 16”x12” rectangle of your bottom fabric
- Basting spray
- Matching thread
- Sewing pins or clips
- Scissors
- Fabric marking pen
- Turning tool
- Rotary Cutter, Mat, & Ruler
- Iron
- Sewing machine
How To Make Kitchen Hot Pads
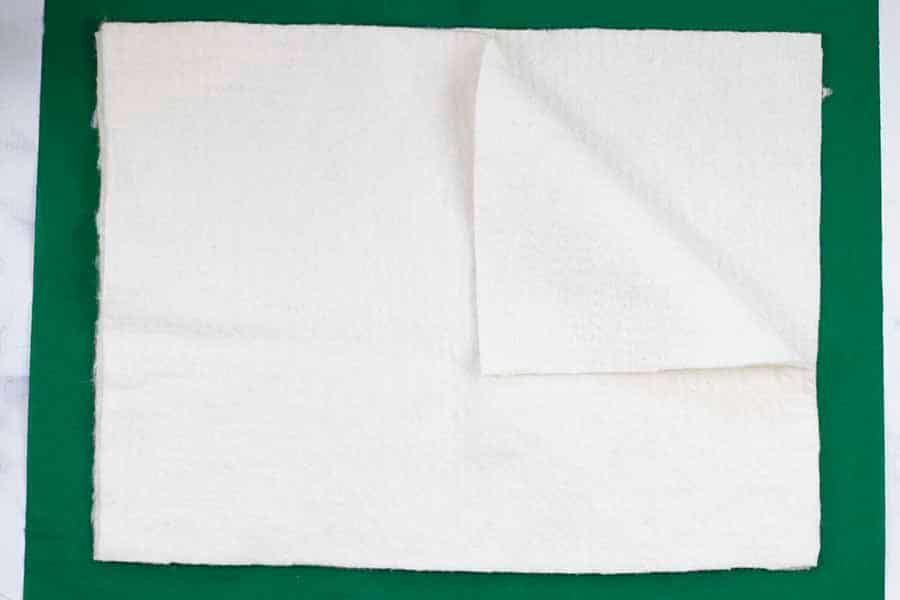
To get started on this how to make kitchen hot pads sewing tutorial, cut out your fabric and Insul Brite pieces. You’ll need one 13″x9″ rectangle for your top fabric, 2 13″x9″ pieces of Insul Brite, and one 16″x12″ rectangle for the bottom fabric. Once you have all your fabric cut out, lay your 16”x12” rectangle of your bottom fabric on a flat surface. Next, center your two layers of 13”x9” Insul Brite on top of that. You are off to a great start in sewing this oven pad.

Center your 13”x9” rectangle of top fabric on top of your Insul Brite. I recommend using a ruler here to make sure you are actually center, as we will get into some fairly precise cutting in some later steps.
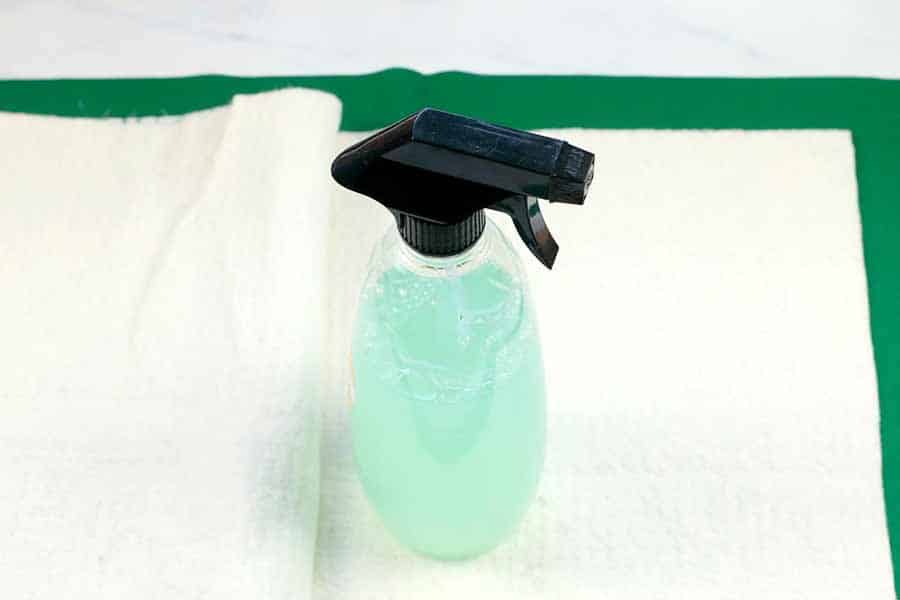
Next on this how to make kitchen hot pads sewing tutorial, lightly spray the layers together using a basting spray. This is a great way to hold all the layers together.

Using a fabric marking pen and your cutting mat and ruler as a guide, mark any pattern you would like to quilt your fabric. I decided to do a standard diagonal quilting pattern and I think it turned out great! The quilting helps hold all your layers in place so they don’t shift around with regular use.
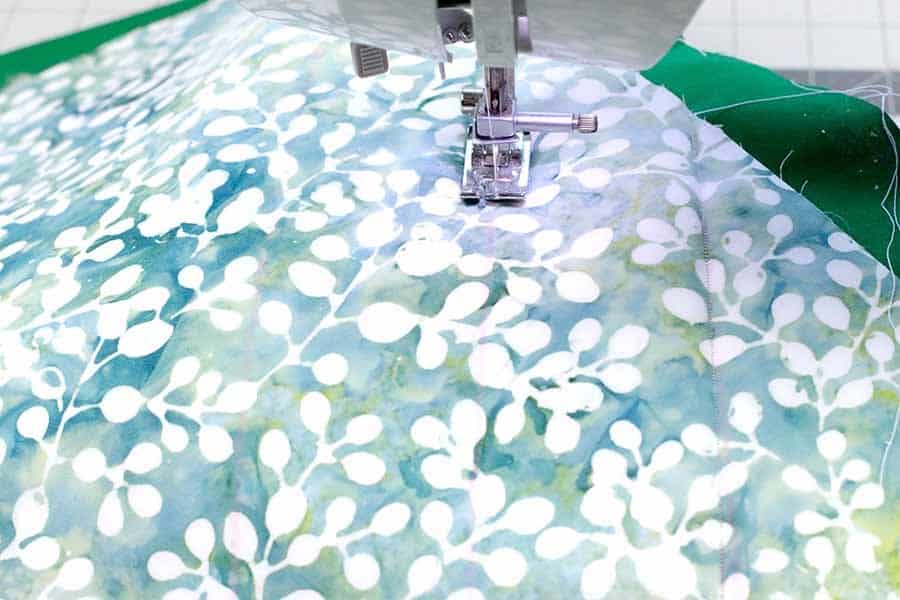
Now on this how to make hot pads sewing tutorial, it’s time to sew! Stitch your fabrics together along your marked lines. Repeat until all lines have been stitched.
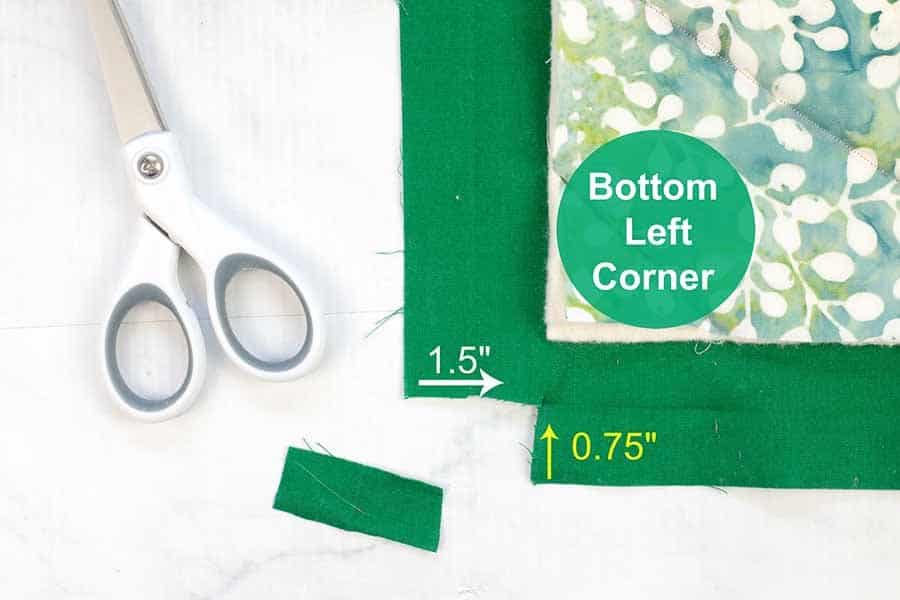
Position the hot pad in front of you as a rectangle. Starting in the lower left-hand corner, cut a rectangle out of the fabric that is 1.5”x0.75”. To be clear…I would use a ruler and a fabric marker and mark 1.5” across the fabric and .75” up. This will make a small rectangle to cut from the corner. This will do two things for you. First, it cuts out the bulk from the mitered corner and it makes doing a mitered corner much easier 😊 We are about halfway through this how to make kitchen hot pads sewing tutorial!
To make your mitered corner:
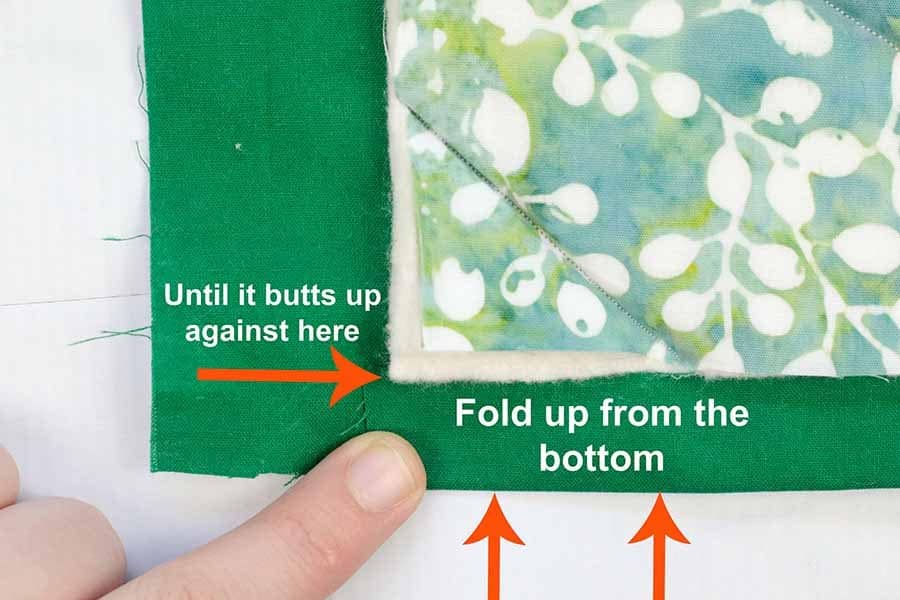
Fold the bottom fabric (the green fabric in our picture) up until the raw edge touches the edge of the Insul Brite and finger press it.
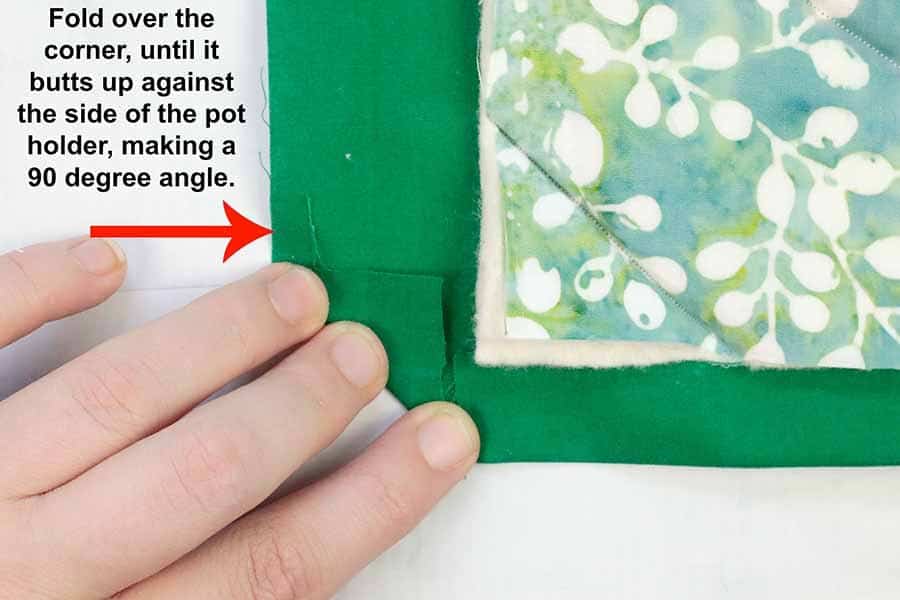
Fold the green fabric on the left side to form a corner, making it butt up against the side of the hot pad, forming a 90-degree angle.
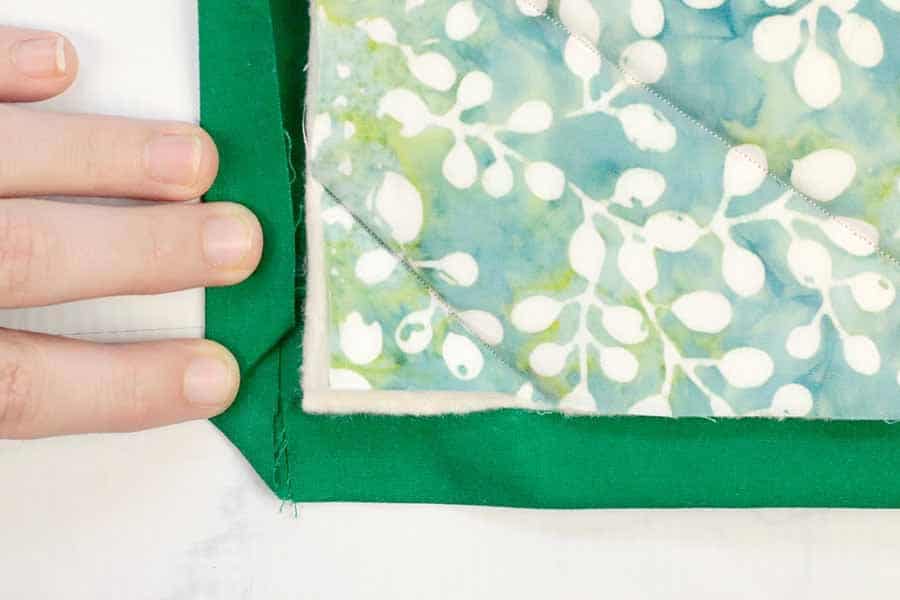
Fold the left side once more, which will make you fold the back half of the corner, until it butts up against the side of the hot pad.
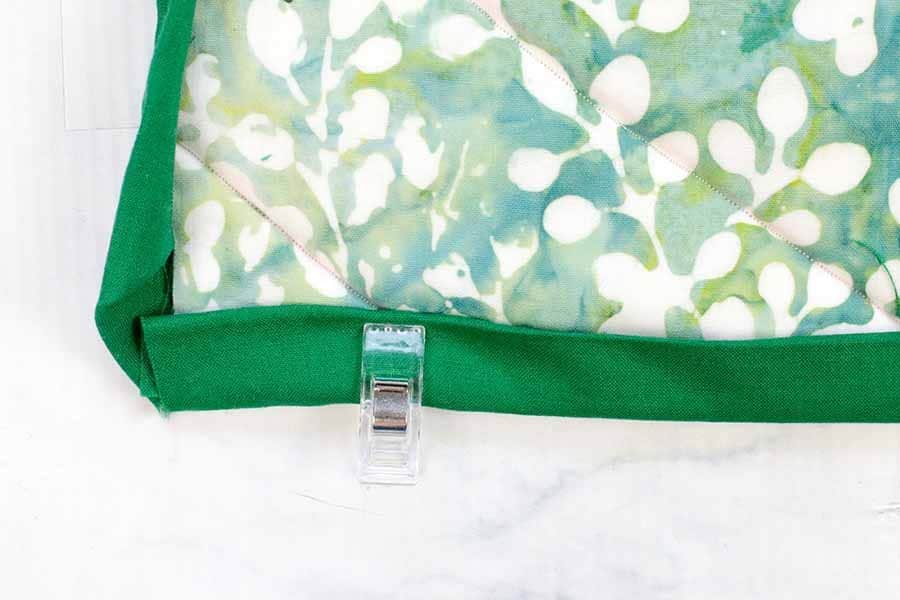
Now on this how to make kitchen hot pads sewing tutorial, go back to the bottom and fold the fabric over the top and pin or clip into place.
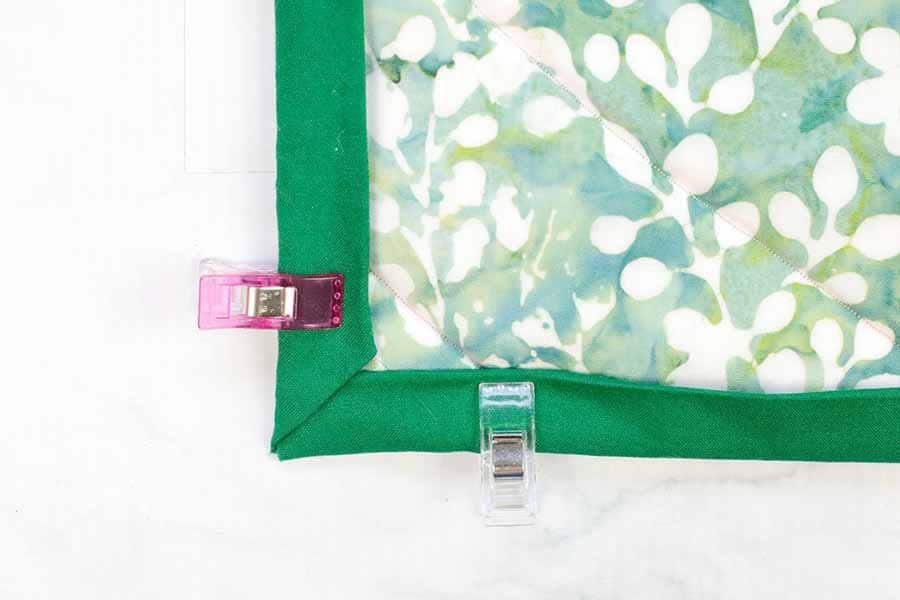
Fold the other side over the side and pin or clip into place. You should now see a nice and neat mitered corner. Now rotate your hot pad so the next corner is next in line and repeat the process until all 4 corners are complete.

Clip or pin around the perimeter of the hot pad.
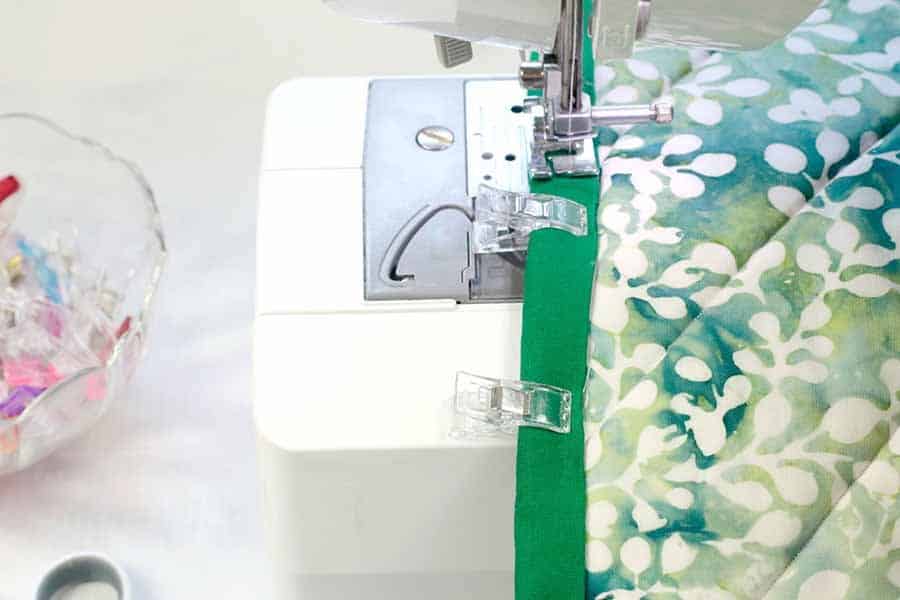
For the final step in this how to make kitchen hot pads sewing tutorial, sew all the way around the hot pad using a 3/8” seam allowance.
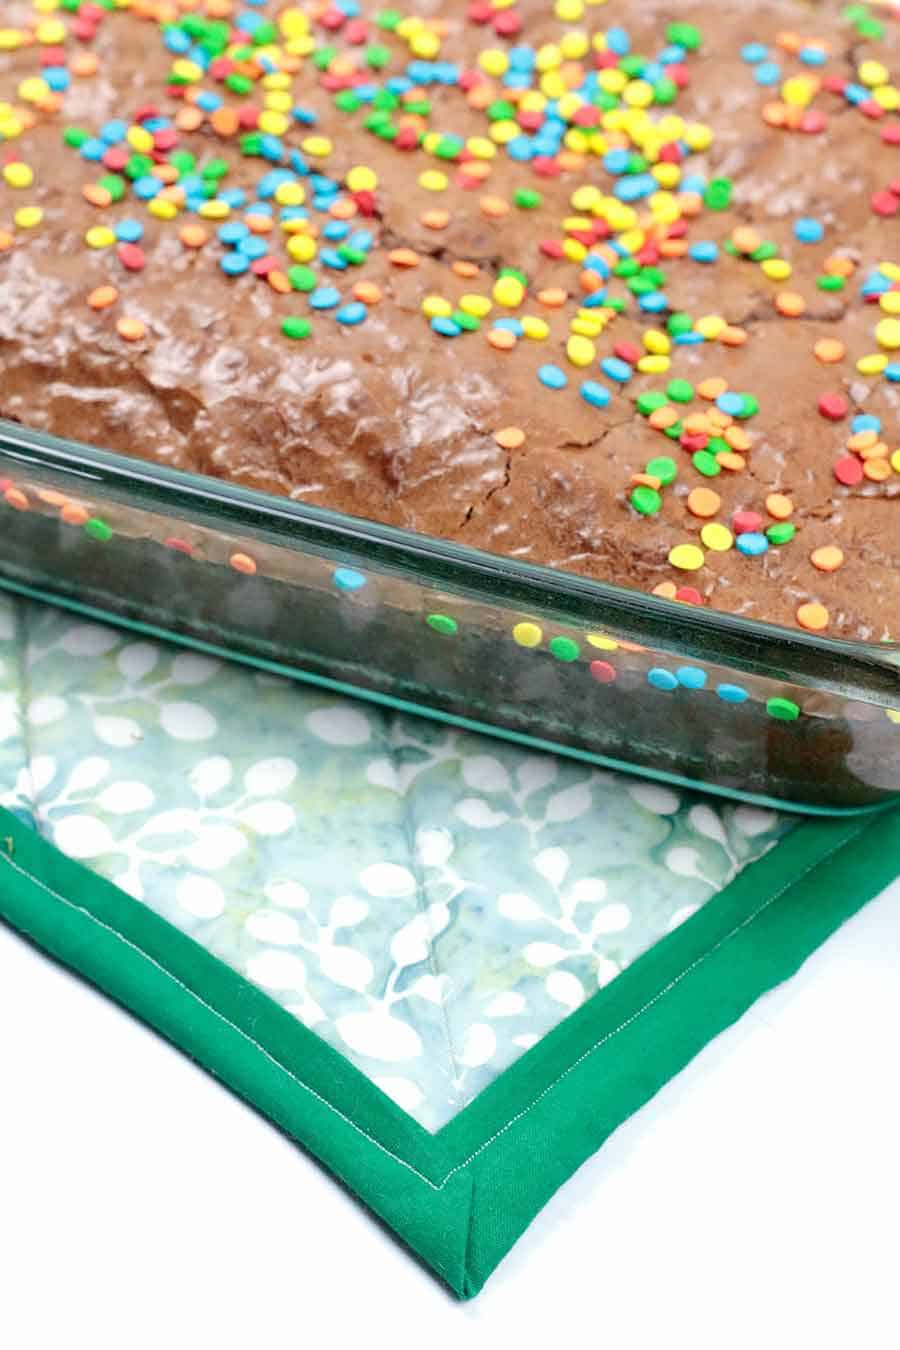
And that’s it! Now you know how to make kitchen hot pads! This simple sewing is perfect for protecting your surfaces from your large baking dishes when you put them on the counter or the table to cool. I love mine and I use it all the time when I am serving food as well. You can go right from the oven to the table so the food stays nice and hot.