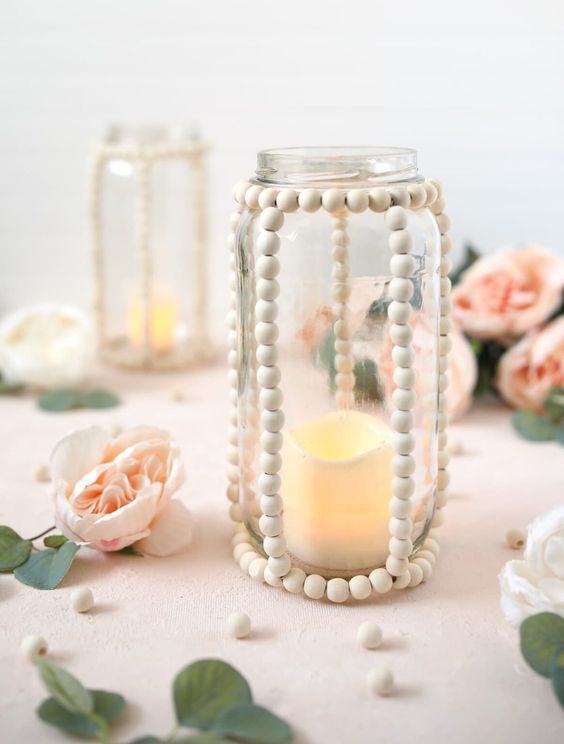
DIY Wood Bead Lanterns
Looking to add a touch of rustic charm to your home decor? Why not try your hand at creating a stunning wood bead lantern? This delightful DIY project is not only a fun and creative way to spend your time, but it also allows you to customize your lantern to perfectly match your personal style. This project allows you to unleash your creativity and create a stunning piece of decor that will surely become a conversation starter. With your own handcrafted wood bead lantern, you can add a touch of elegance and charm to any room in your home. Whether you choose to hang it from the ceiling, this project is sure to impress everyone.
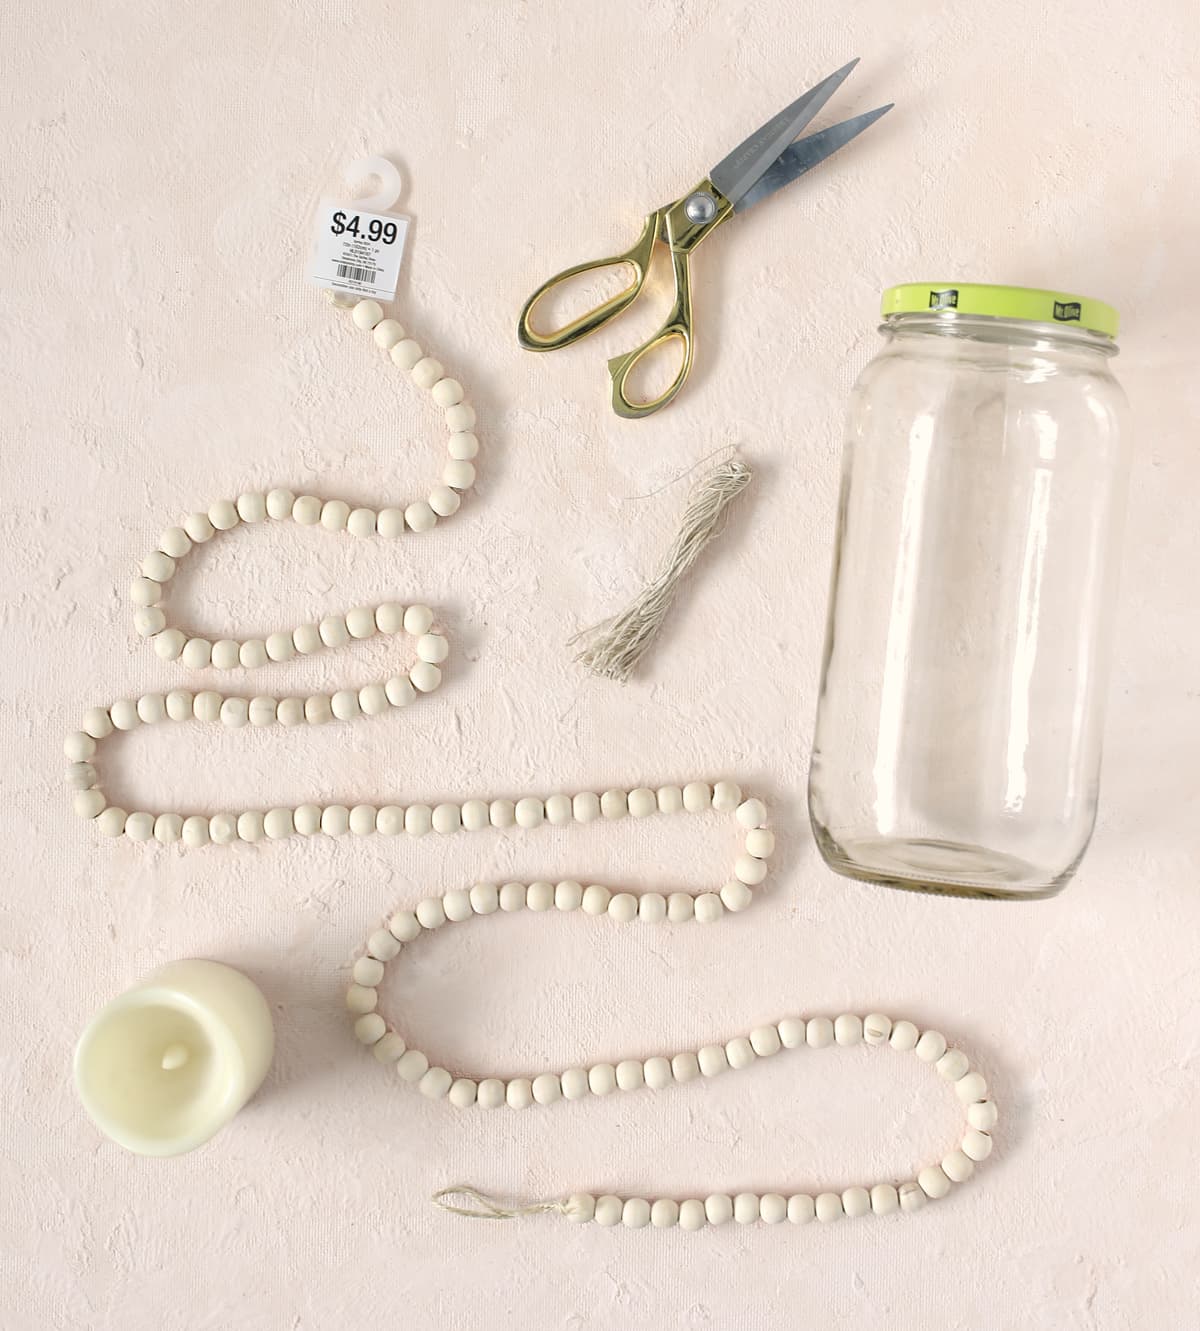
Materials Needed
- Big Glass Pickle Jar
- Beaded Wood Garland
- Twine or String (in a similar color to the beads)
- LED Candles
- Scissors
You can absolutely use any size of wood beads and any size of jar for this project as long as there is some kind of lip at the top to keep the top round of beads in place. The largest size of mason jars would work. There’s a whole section of glass jars at Hobby Lobby to choose from too.
I used LED candles, but since the jar is glass, real flame candles would be safe to use too.
One last note about the materials because curious minds want to know. The flowers I used in the photos are these cabbage rose and silver dollar eucalyptus bushes in white and peach. Gorgeous!
Instructions
Step 1: Remove the labels from your pickle jars and run them through the dishwasher. I used a razor blade scraper to get my labels off. If your jar has any dates printed in ink on the glass, use acetone and a cotton swab to remove the ink.
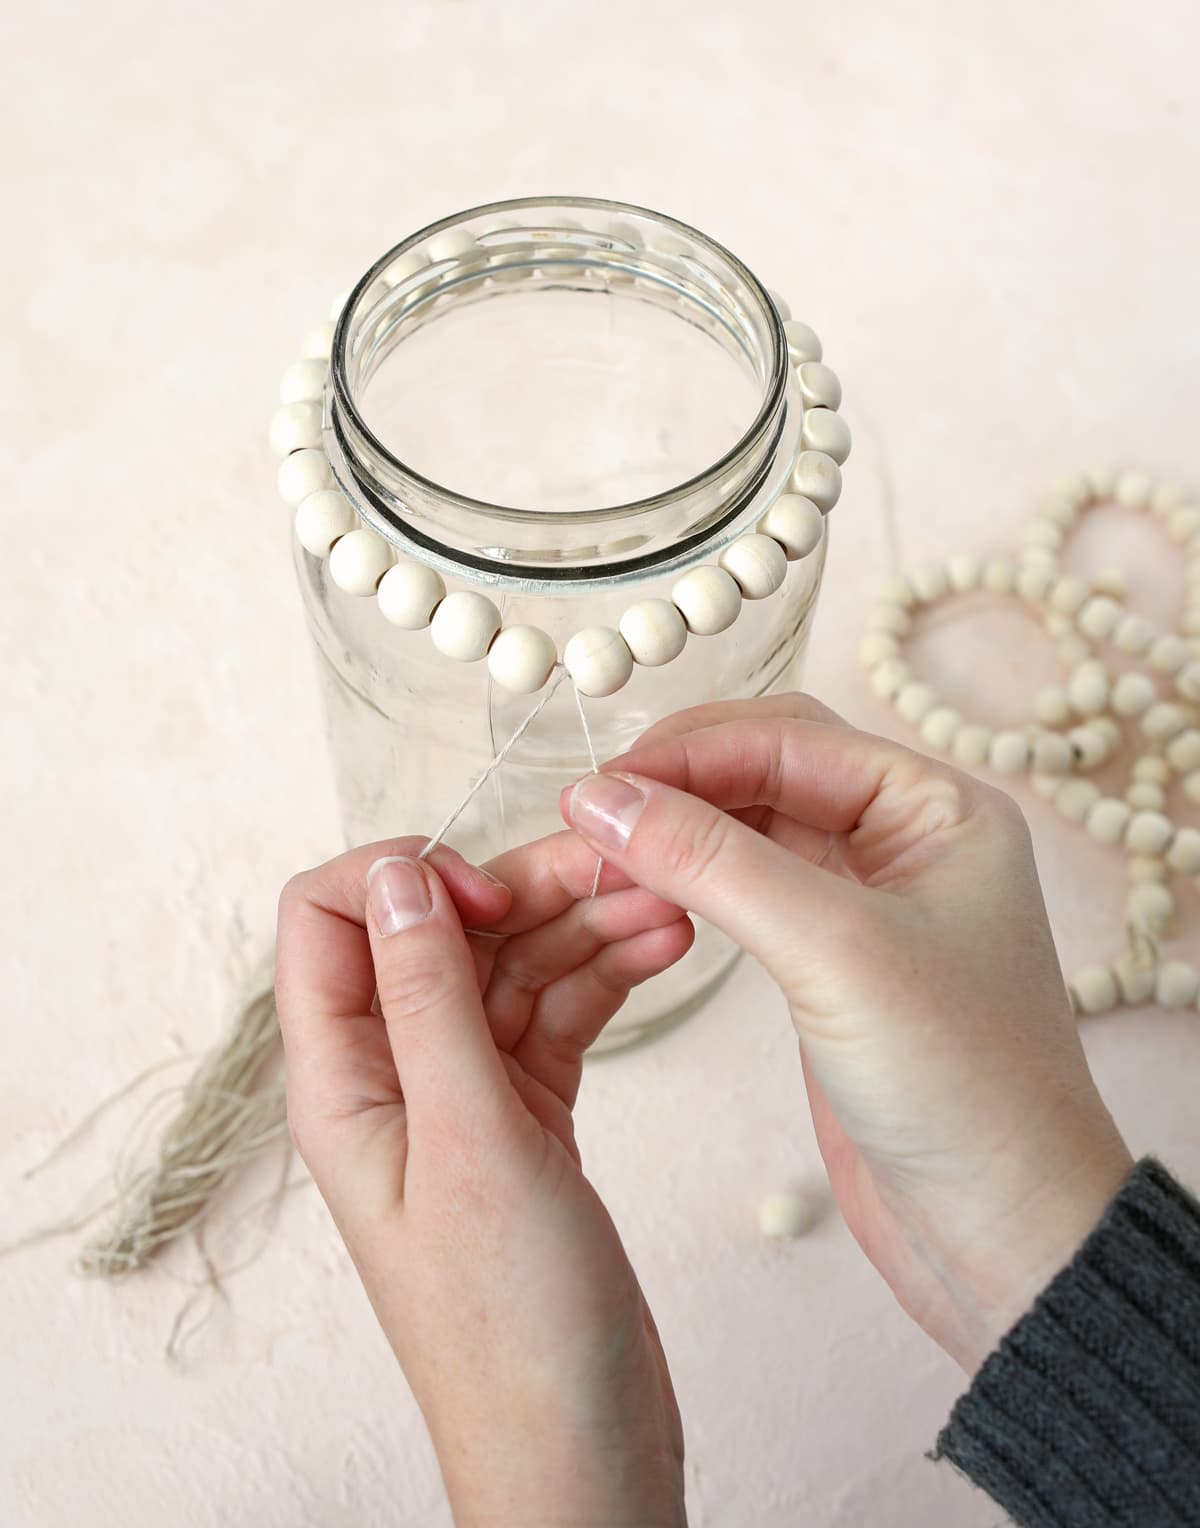
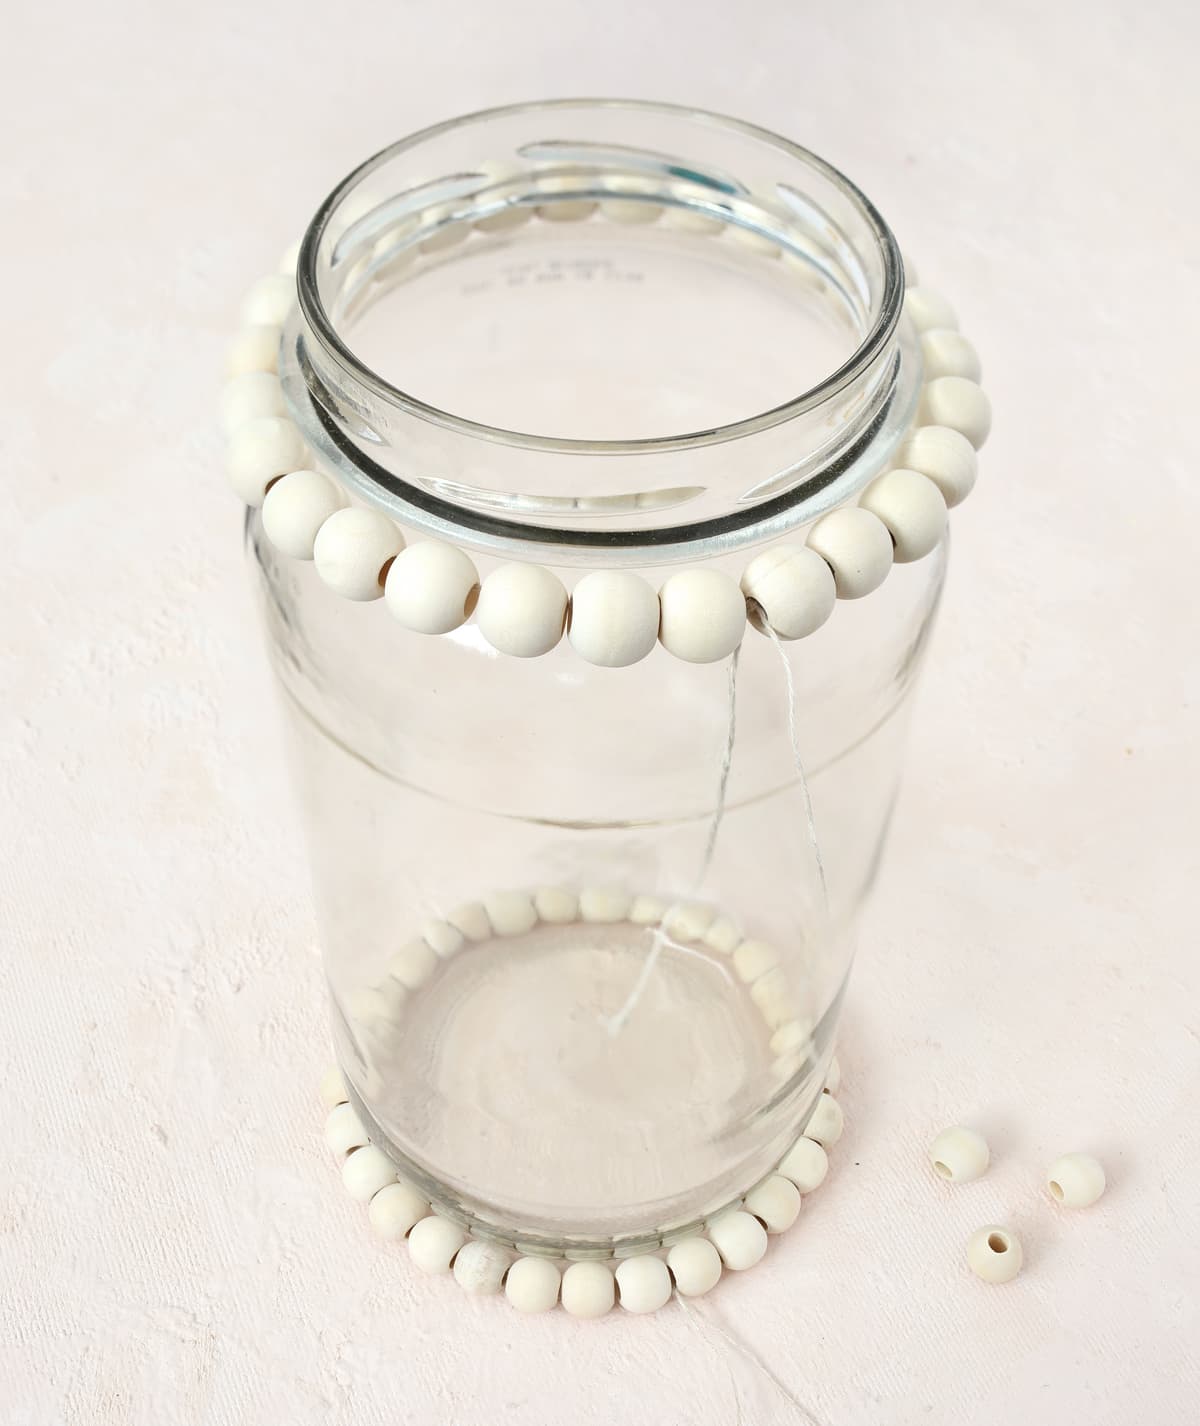
Step 2: Cut the beaded garland apart and save the wood beads. Cut a length of twine to fit around the top of the jar with plenty extra length. DON’T SKIMP on the length of your string or it will make it hard to tie the knots and keep the beads on. Add enough beads to the string to go all the way around the jar. You want your beads to touch and be tight against the jar. Tie the twine ends together tightly.
Step 3:Repeat the process again, making a circle of beads to fit around the bottom of the jar. This circle won’t stay in place by itself. The jar is really just sitting inside the bottom bead circle. But that’s okay. We’ll connect them together in the next step.
Step 4: Now we’ll begin making the vertical pieces that connect the top bead circle to the bottom. Cut a generous piece of string (remember, don’t skimp on length or you’ll be hating life) and tie it to the top circle. Add enough wood beads to reach the bottom. I used 16 beads. Then tightly tie off the string to the bottom circle of beads. You want the string to completely disappear and the beads to sit flush to the jar and the two circles.
Repeat this process of adding the vertical beads all the way around the jar, spacing them evenly and using the same number of beads on each piece.
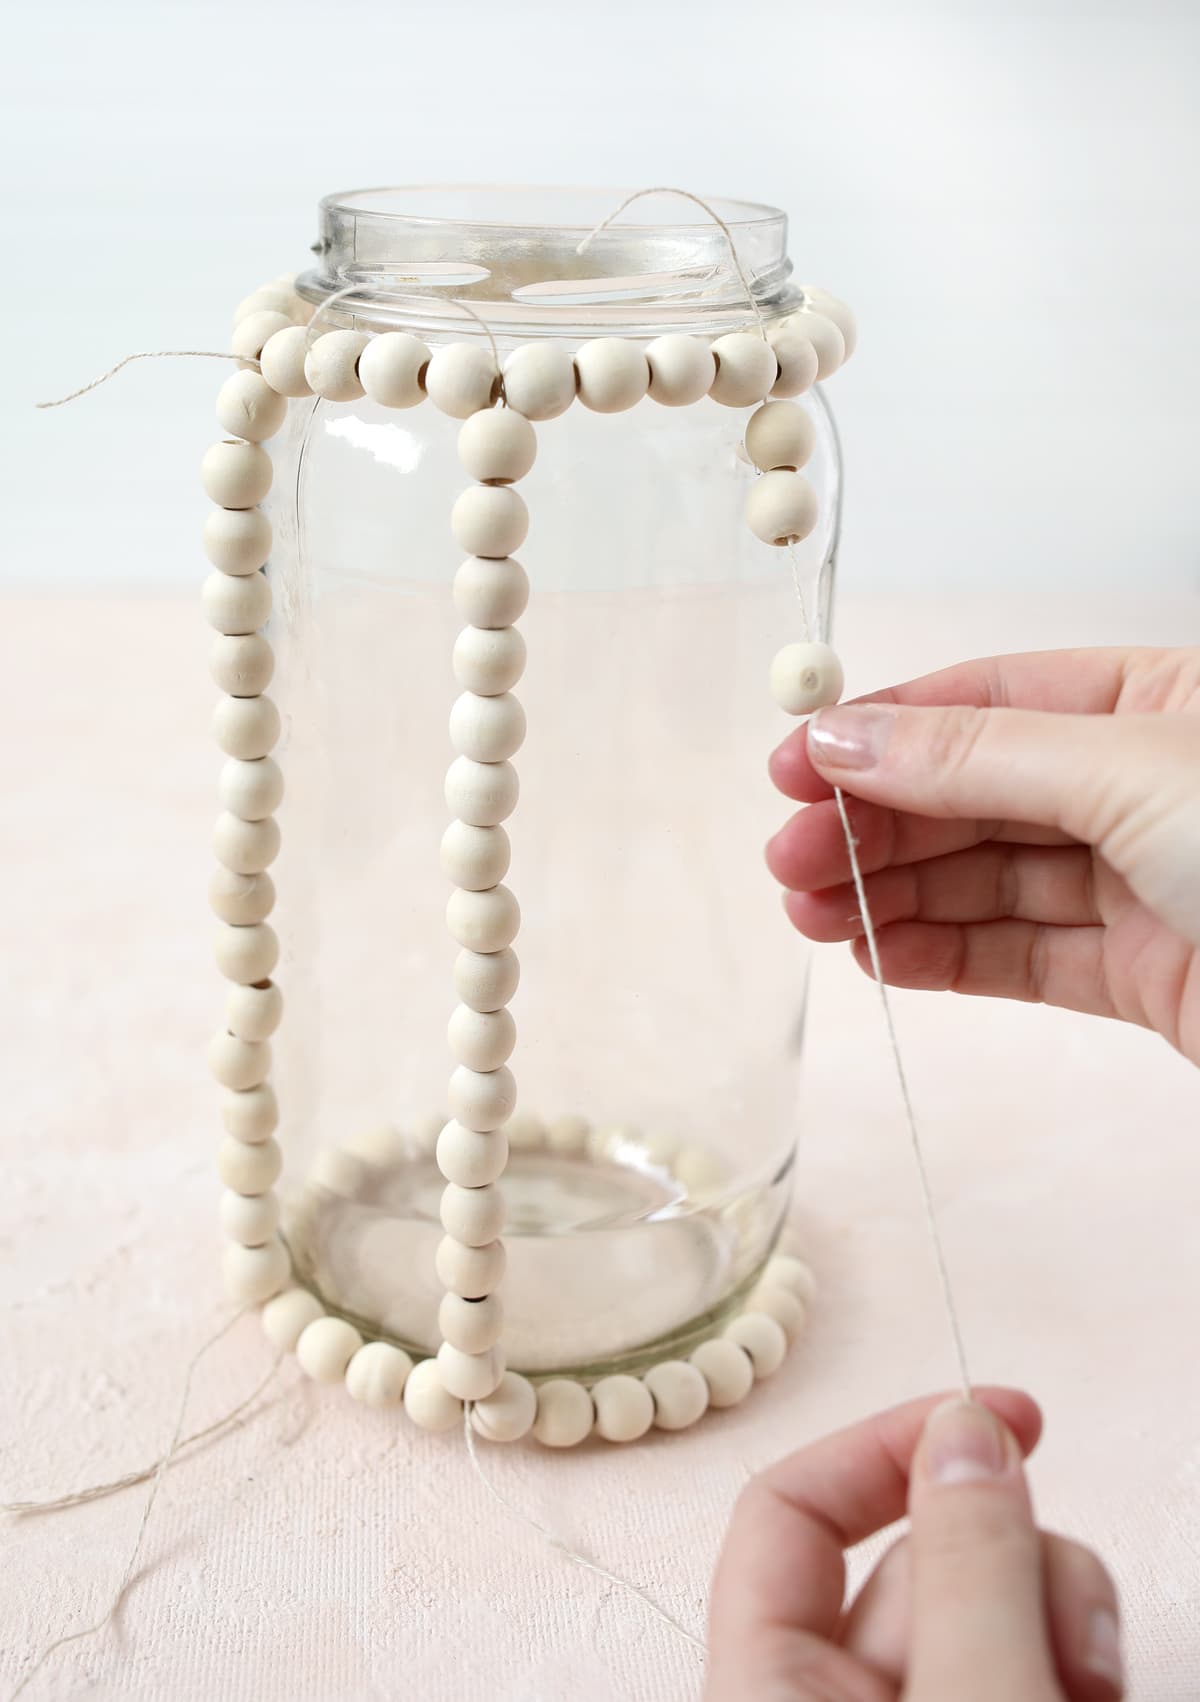
Step 5: Tuck the string ends through the bead centers nearby to hide them, then trim off any visible ends.

Step 6: Add a candle inside and you are done!