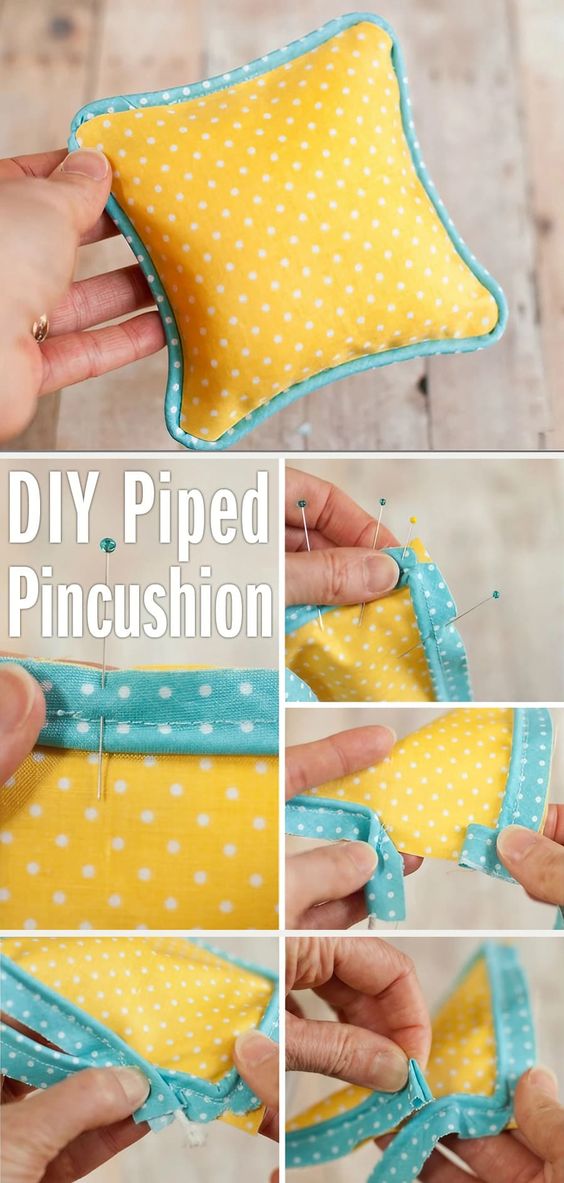
Tutorial - How to Make a Piped Pincushion
Create your very own pincushion with this unique sewing pattern that features a fun and stylish design. The Piped Pincushion pattern is perfect for adding a touch of creativity to your sewing projects. With detailed instructions and step-by-step guidance, you'll be able to easily bring this charming pincushion to life. Whether you're a seasoned seamstress or just starting out, this pattern is a great way to hone your sewing skills and create something practical and beautiful at the same time. You can customize the size and shape of the pincushion to suit your preferences, making it a versatile and customizable project. Whether you're looking to add a pop of color to your sewing space or create a thoughtful handmade gift for a fellow crafter, this pattern is sure to inspire your creativity and bring joy to your sewing experience. Get ready to stitch up something special with the Piped Pincushion pattern!
What you’ll need
* 1/8in thick (or about that size) cording
* 22in (56cm) of continuous bias, made from a 1 1/4in (32mm) strip of woven cotton.
* Two 5 x 5in (13cm) squares of woven cotton fabric. My piping and squares are from Riley Blake Designs.
* A little bit of stuffing of some kind
* Regular sewing supplies
* A sewing machine with a zipper foot
How to sew piping
I inherited my mother-in-law’s Bernina 1260 a couple of years ago, and I thought she had purchased every foot imaginable for that machine. So I assumed I had a piping foot!
I assumed wrong.
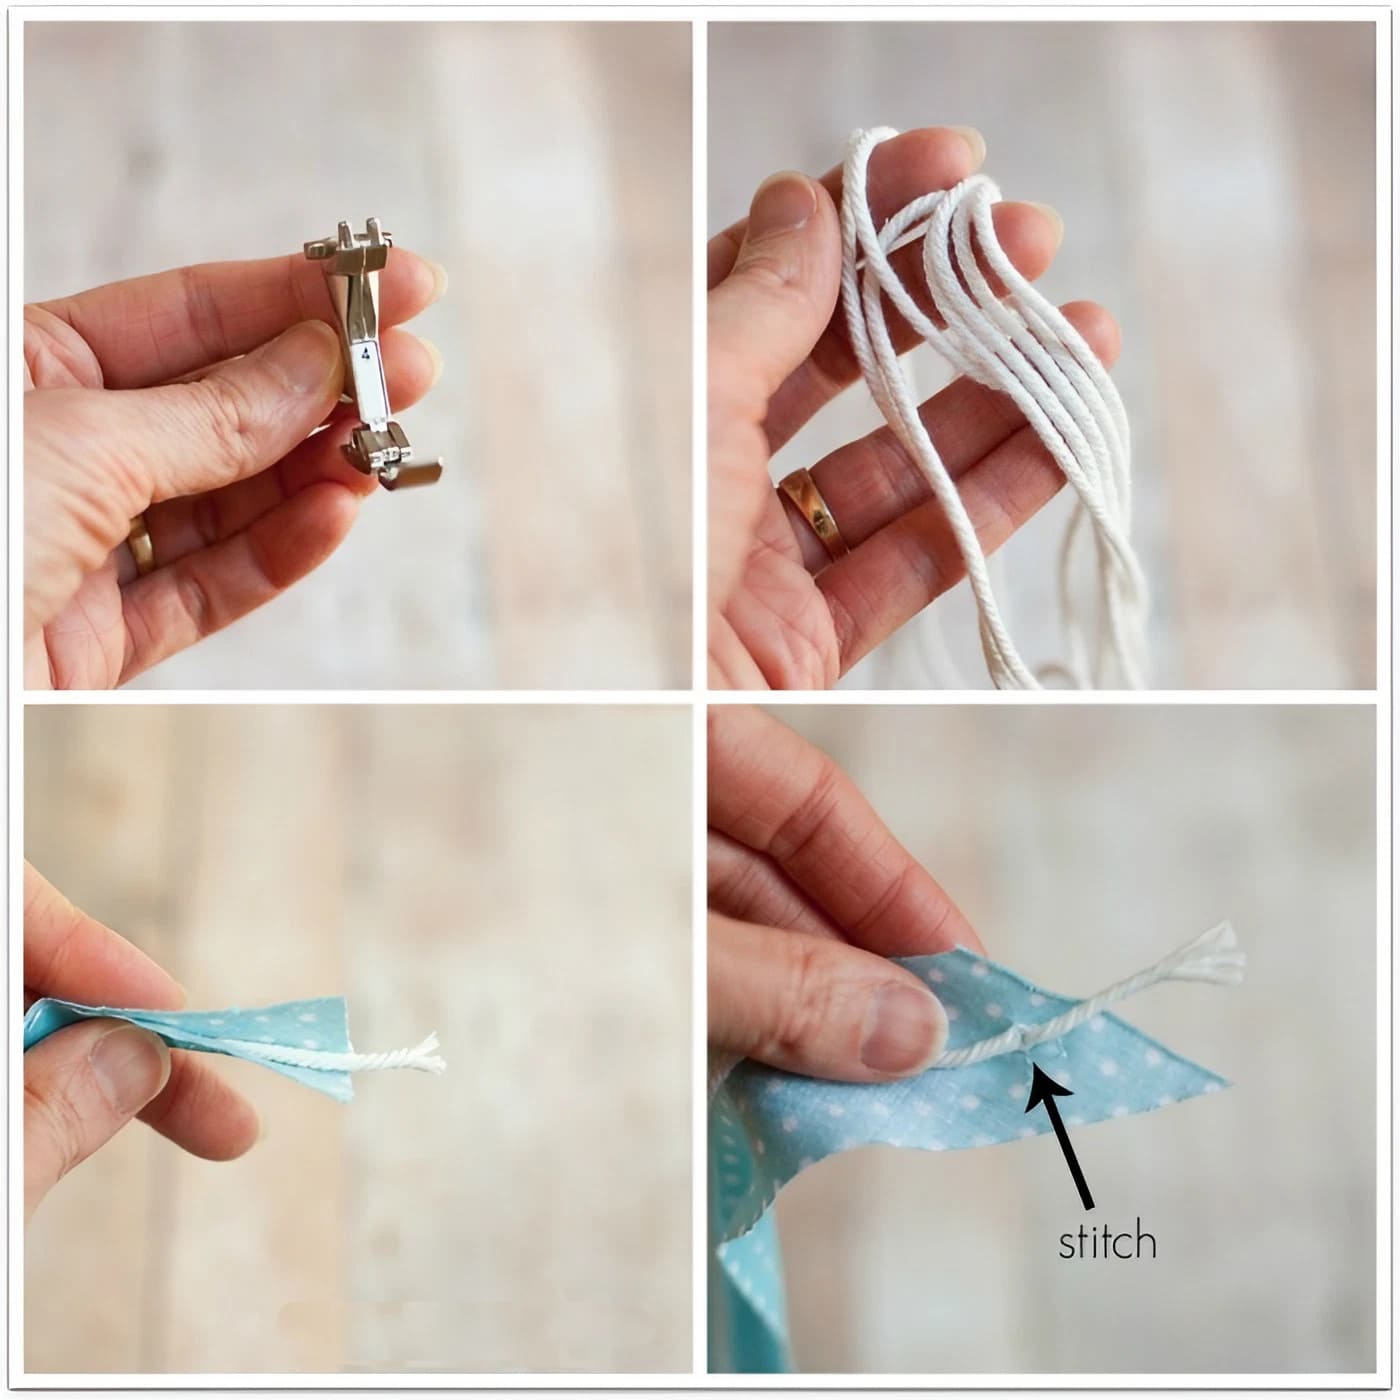
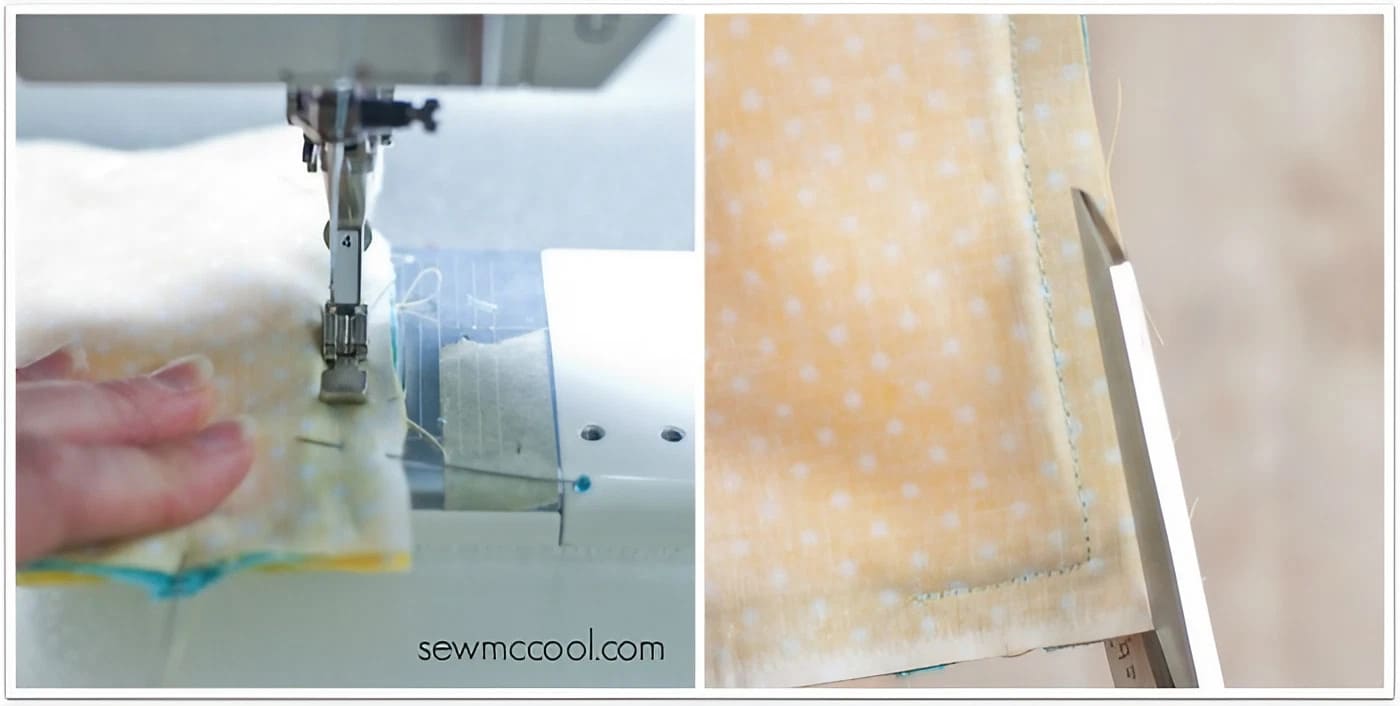
But…if you’re like me, without a piping foot, pull out your regular zipper foot (first photo below). That will work just fine!
Now cut your cording to 23in (58cm) and have the 22in (56cm) bias handy.
Place the cording inside the bias, right in the fold on the wrong side of the fabric, with a little cord sticking out. Stitch it down, just at the beginning, so you won’t have to worry about pulling it out while you’re sewing.
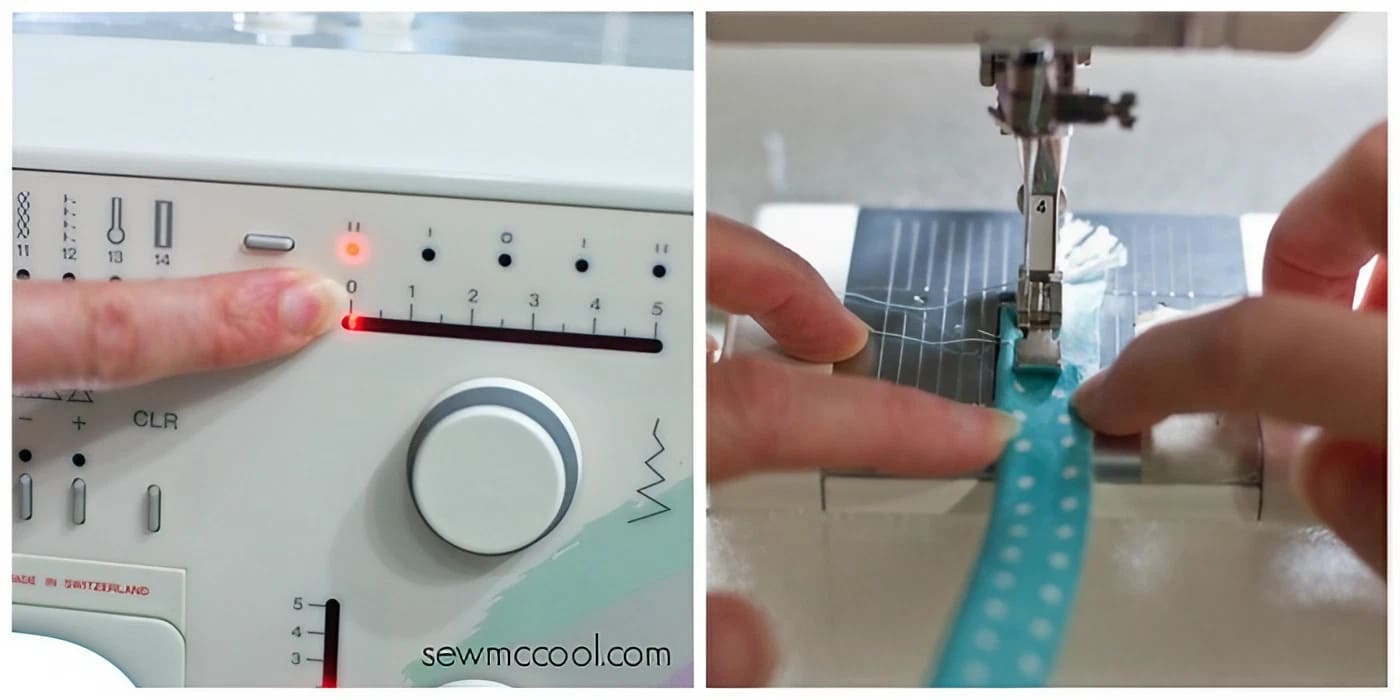
Pop on your zipper foot, and make sure to change your needle position to the left…or whatever you need to do on your machine to make sure it doesn’t strike the zipper foot. Sew your cording into the channel by abutting it to the fabric fold and stitching very close to the cording. You won’t want to pin the bias closed – just use your fingers.
…it’s not difficult, but it helps to drive slowly!
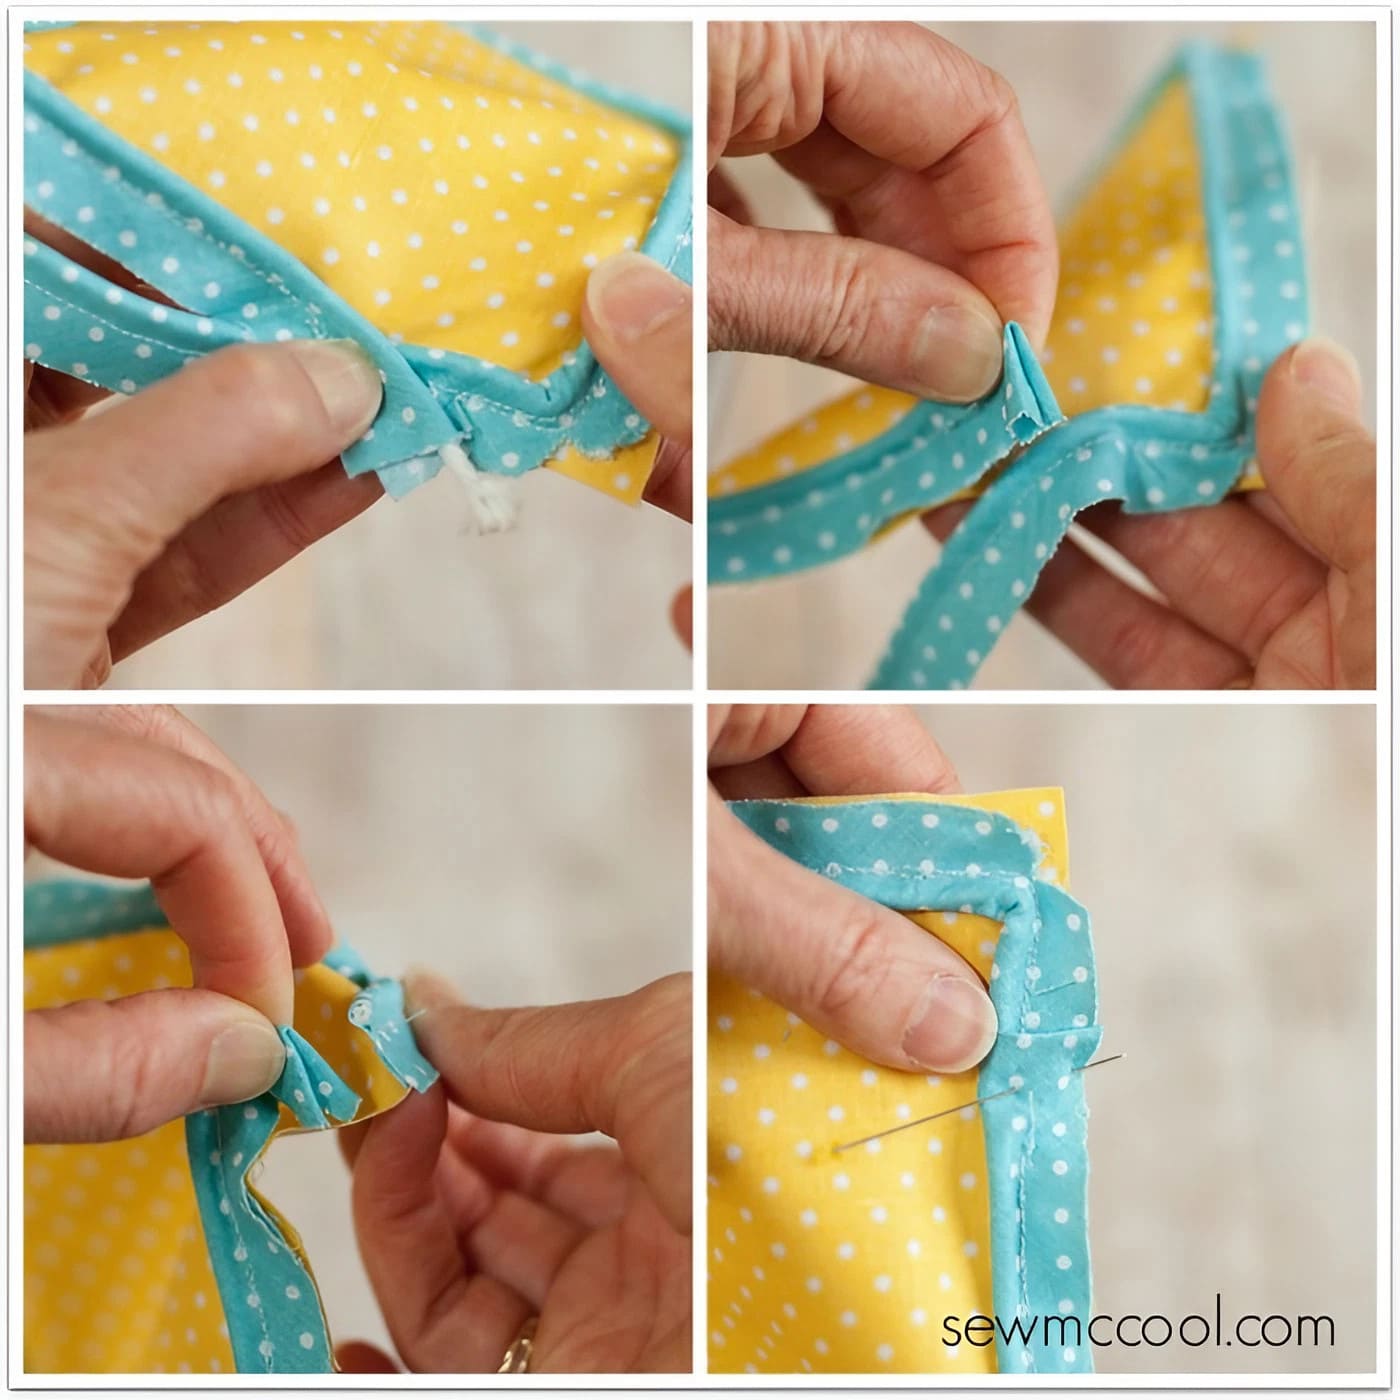
When you’re finished, pin the unfinished side of the bias to the right side of one of your squares, along the edge. Start in the middle of the square and not at a corner. Also, don’t start pinning (or sewing) right at the beginning of the strip – leave about an inch free.
When you get to the corner, clip the a little triangle into the edge of your bias (but not into your stitching or the cording!). Keep pinning until about an inch from the starting point.
Now, stitch it the piping to the square, by (again) sewing very close to the cording. Stop about an inch from where you started – shown in the lower right photo below.
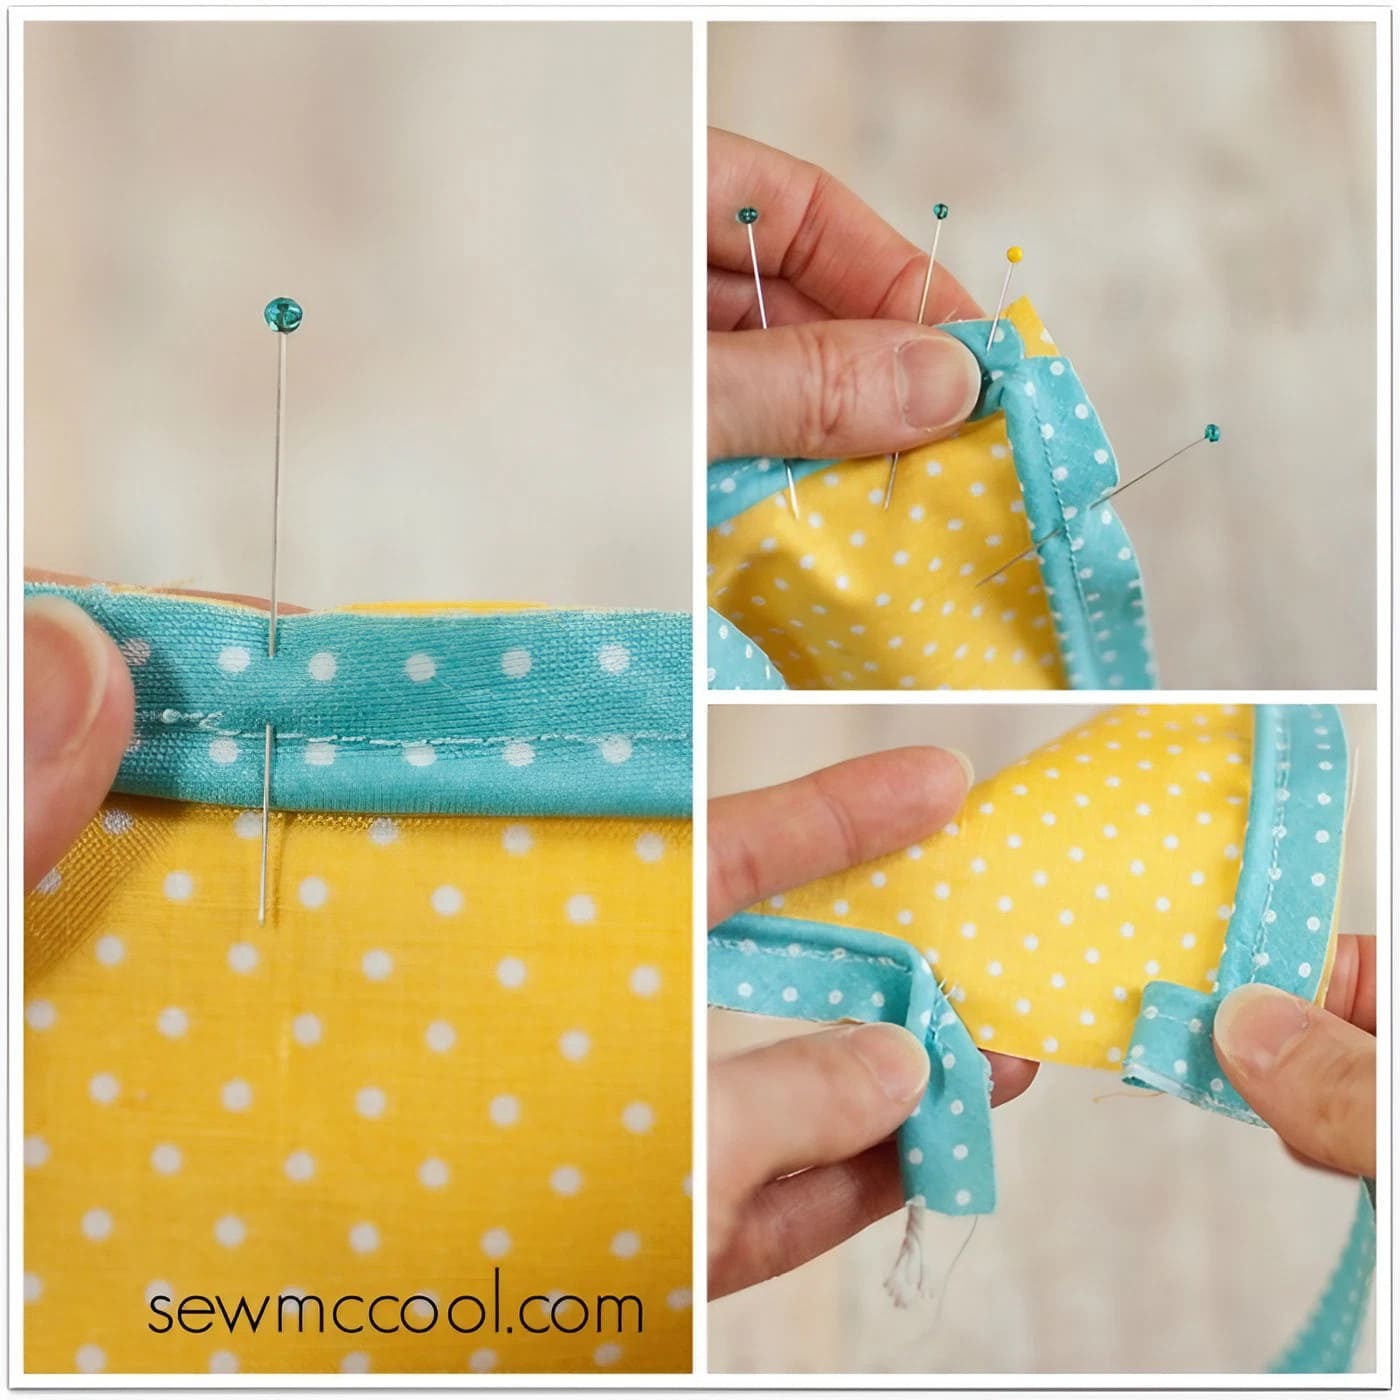
There are a couple of different ways to finish piping. The first way is to simply overlap the edges, leaving the raw edges in the seam allowance and trimming after stitching them down (left photo on top, below).
But I prefer folding about 1/4in (6mm) of the starting bias inside itself, and trimming the cord just below that point. Then trim the other end to the exact length that will match the first side, and tuck it inside.
Then you can sew it closed, and have a nice, even edge (right photo on bottom, shown before stitching).
Easy, huh?
Now take the second square and place it right side down, sandwiching the piping underneath. Stitch around almost all of the square, next to the piping again – just go slowly so you can feel the piping! Make sure to backstitch at the beginning and end, and leave about 2in (5cm) open for turning the pincushion right side out…
…or you’ll have a sad time picking out stitches, right?
Trim the seam allowances in half, and clip the corners close to the stitching, so they’re smooth after you’ve turned them.
Stuff the inside of the pincushion, fold the open seam allowance to the inside, and stitch it closed!
Here’s your adorable little pincushion! Or doll pillow. Or…whatever. :) But it’s beautifully piped, isn’t it?
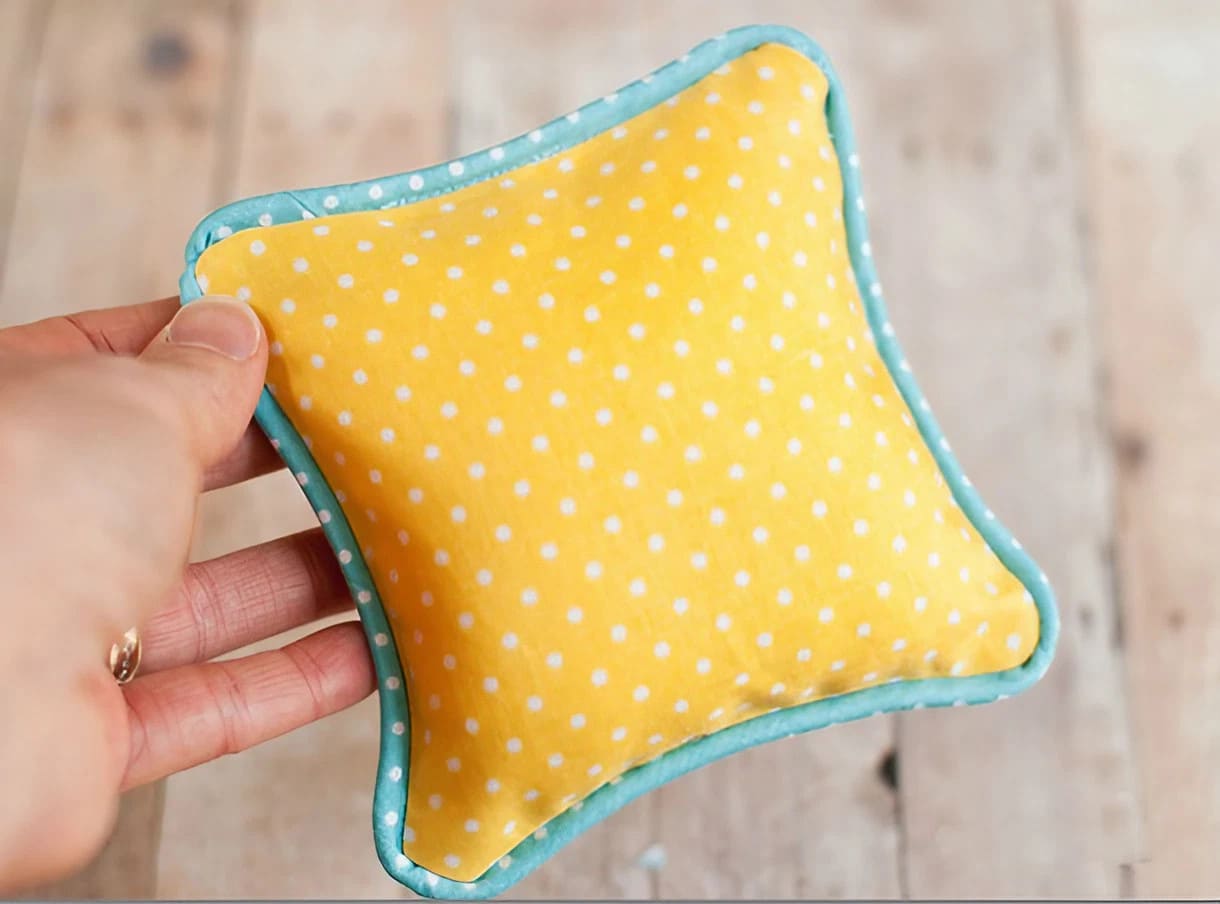
Now you can add piping to pillows and cushions, bodices of dresses, shirts, the sides of slacks, purses and bags….pretty much anything with a seam! Different sizes of cording can create different effects, but match the cording (and the resulting piping!) to your project for the most beautiful result.
Have a piping palooza! What type of project will you add piping to first?
