DIY Floral Decoupage Spring Flower Pots
Create your own unique spring flower pots with a fun and easy floral decoupage technique. This do-it-yourself project allows you to personalize your pots with beautiful flower designs that will brighten up any space. Simply gather your supplies, including flower images, mod podge, and clay pots, and get ready to unleash your creativity. Transform plain clay pots into stunning works of art by layering on delicate floral patterns. Whether you choose to use real flower images or opt for a more whimsical design, the possibilities are endless. These DIY floral decoupage spring flower pots make for a perfect weekend craft project that will add a touch of charm to your home or garden. Let your imagination run wild as you create one-of-a-kind pieces that will bring a burst of color and joy to your surroundings.
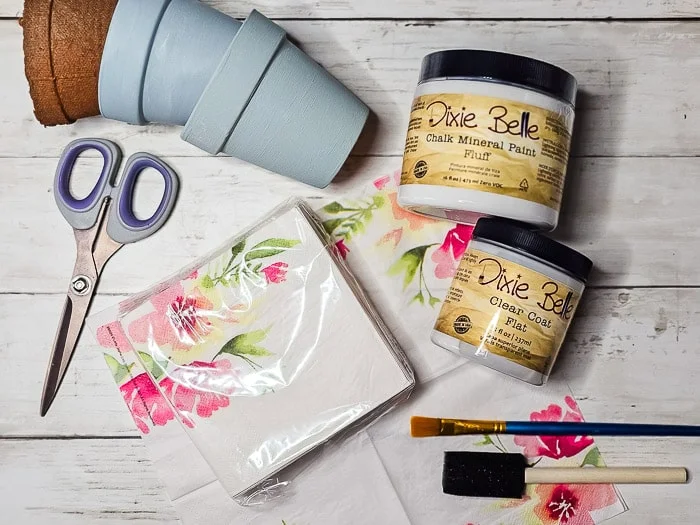
Supplies:
- flower pots or 4" peat pots*
- paint (I used this white chalk paint)
- craft brushes (I used a foam brush and a small flat craft brush)
- floral paper napkins
- scissors
- decoupage medium
So what to do with those leftover napkins?
- use them for table decor to match your DIY
- make custom candles
- decoupage inexpensive dollar store chargers
- upcycle a tarnished silver tray from the thrift store
- recycle old ornaments or even pumpkins
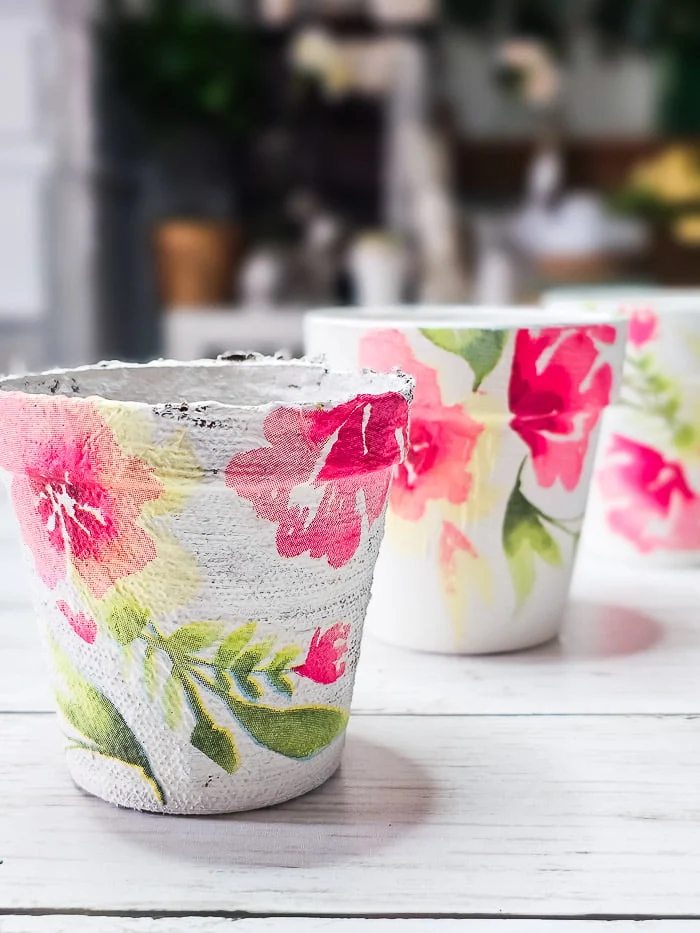
Steps to decoupage flower pots
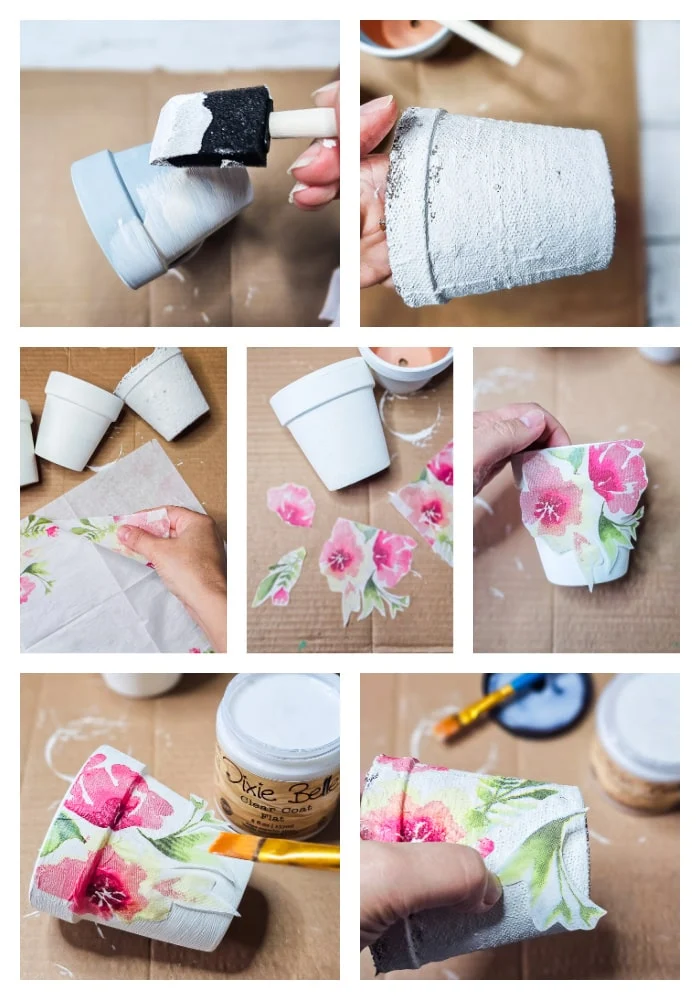
Step 1 - paint
Step 2 - peel
Step 3 - cut
Step 4 - dry fit
Step 5 - glue
Additional tips
- Don't be afraid to let some pieces slightly overlap the edges of the flower pot, it actually looks really good!
- You can decoupage the entire pot, or focus on just one side (that's what I did)
- Feel free to separate pieces of the design with your scissors
- If you want to be able to shift your design once wet, add a thin layer of decoupage medium to the pot before adding design
- Try not to overbrush the design with glue, once it's wet it's even more fragile and can easily tear.

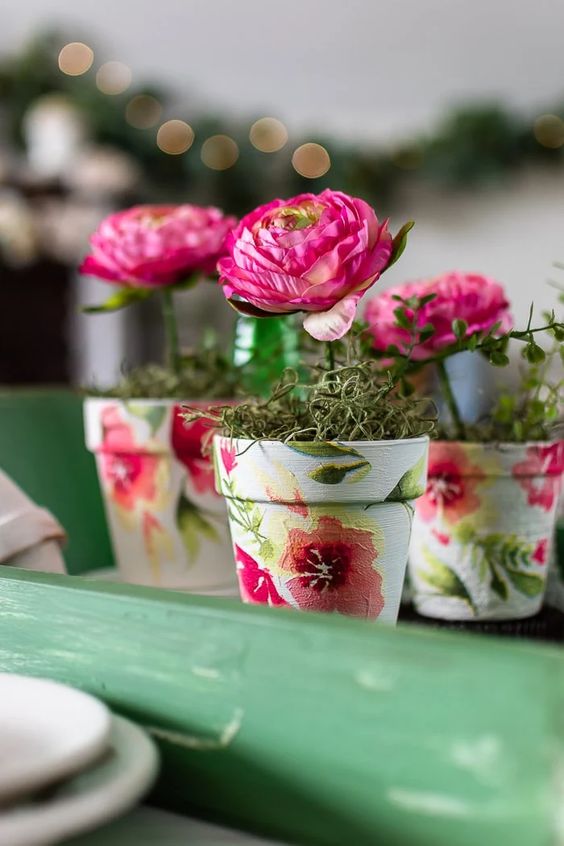
Keep reading to see how to add flowers to decorated Spring pots.
- Styrofoam balls
- hot glue - optional
- flower single stems (I used pink ranunculus from Hobby Lobby)
- greenery - optional
- moss
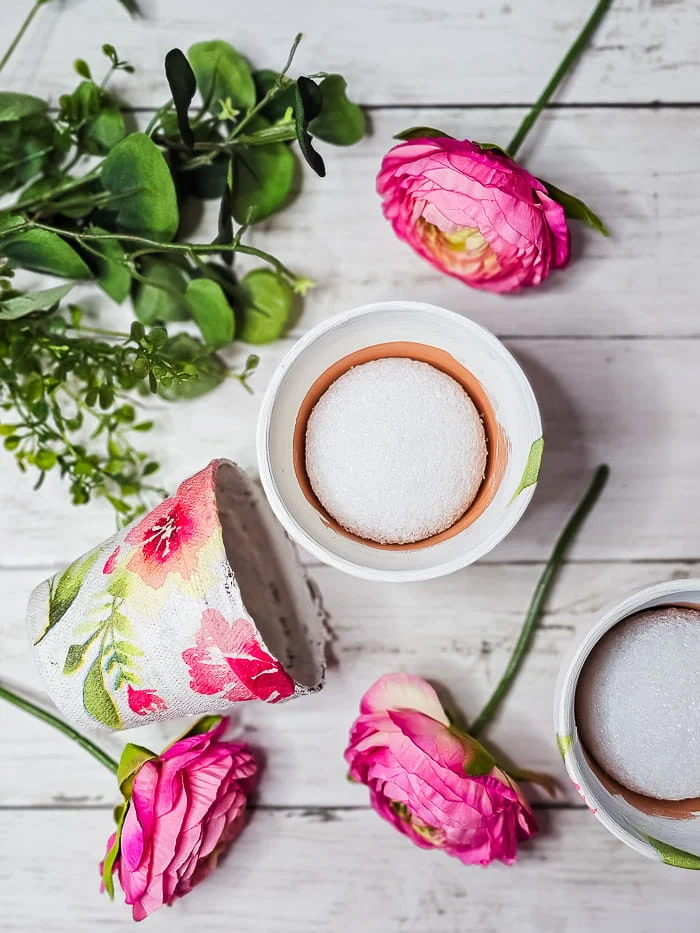
Add a foam ball to each pot, hot gluing in place if it doesn't fit snugly. Push the flower stem and a small piece of greenery down into the foam (again, glue in place if it needs a little extra support).
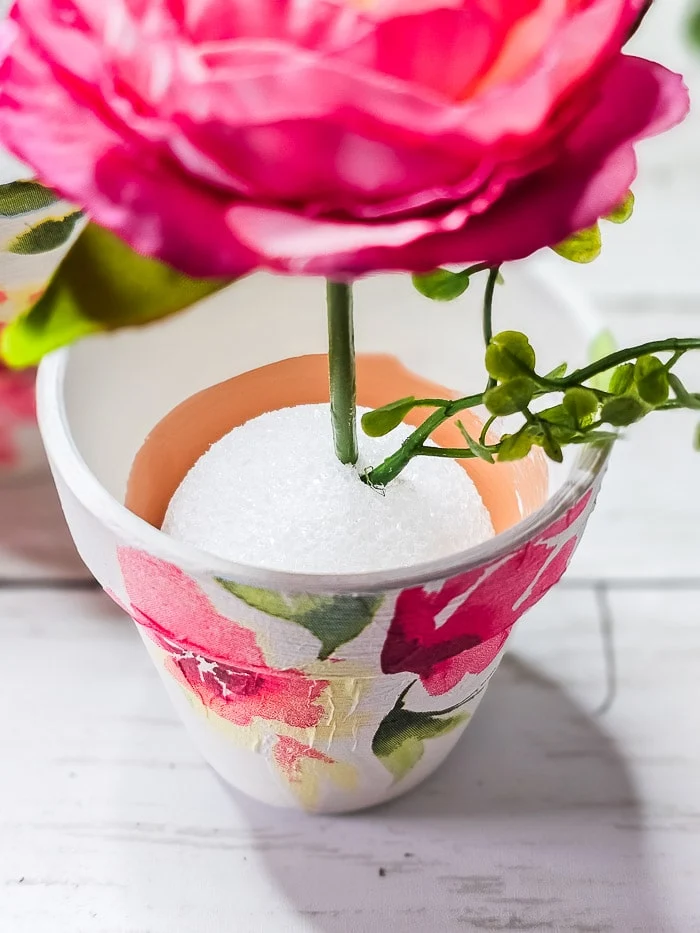
Top the foam ball with a little bit of moss to hide everything and give your Spring flower pots a finished look. I had way too much fun styling and photographing these sweet floral pots. Feel free to pin any images you'd like to save!
