How to Make Paper Pinwheel
Paper pinwheels are a great craft project for kids and can be customized with different colors and patterns to make them unique. They are perfect for outdoor parties, picnics, or just a fun afternoon activity. You can experiment with different sizes of paper to create pinwheels of varying sizes, or even try using double-sided paper for a more colorful effect. Once you've mastered the basic pinwheel design, you can get creative and add embellishments like glitter, stickers, or ribbons to make your pinwheel stand out even more. Let your imagination run wild and enjoy the simple pleasure of watching your paper pinwheel spin in the breeze!
Glue a bunch of pinwheels on a foam circle to create a wreath. String them on baker’s twine to create a party garland. Cluster several together in a vase to create a party centerpiece. Hang an oversized one on the wall using poster putty. (You can also do the same with smaller ones.) Use them as cake and cupcake toppers, or add a pretty pinwheel to a gift in place of a bow.
Now that I’ve got you hyped to craft and party, let me show you how to make pinwheels.
Supplies:
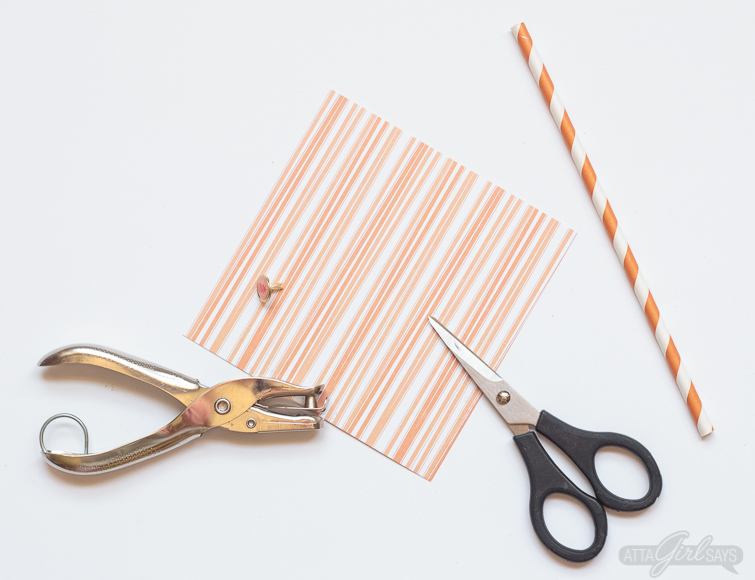
- Double-sided scrapbook paper or cardstock
- Scissors
- Small hole punch
- Decorative brads
- Paper straws
Instructions
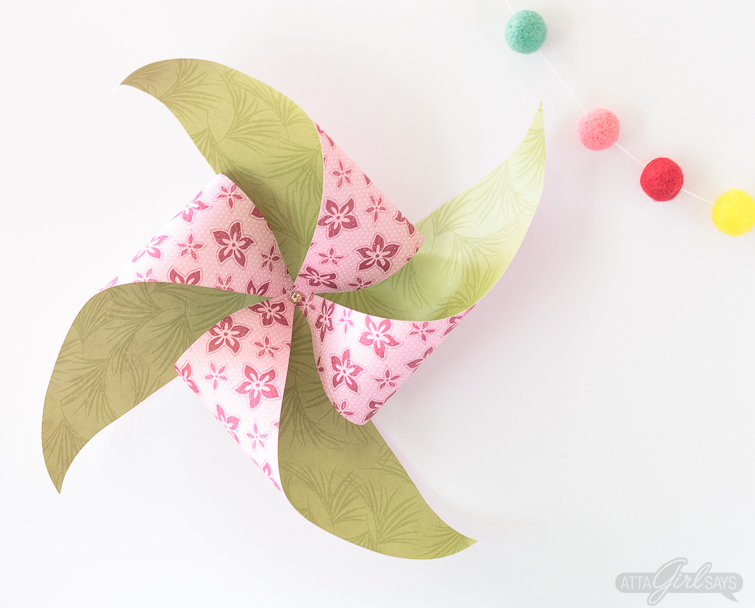
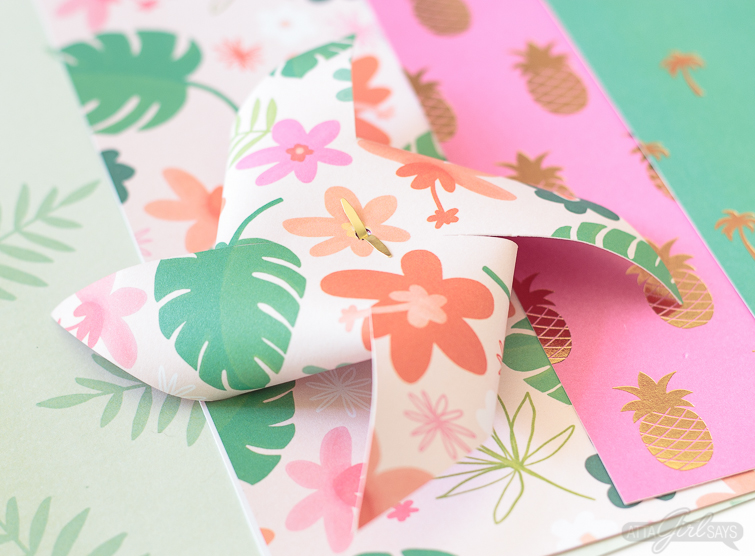
You can make pinwheels out of any square sheet of scrapbook paper or cardstock. I like to use paper with coordinating designs on each side. In the photos you see here, I made pinwheels using 12-inch, 6-inch, 5-inch and 4-inch squares of paper. Many of the patterns I used are from the My Mind’s Eye Palm Beach Collection. It’s perfect for summer!
If you want to be precise with your cuts, fold the paper square in half, into a triangle. Then, fold in it half again to create a smaller triangle. Unfold and flatten the paper.
Use the fold lines to cut from each corner of the paper to the center. (Don’t cut all the way to the center. Leave a half-inch or so, depending on the size of the paper.)
Of course, I I usually don’t do this. I skip the folding and just eyeball it with scissors or use my paper trimmer to make the cuts.
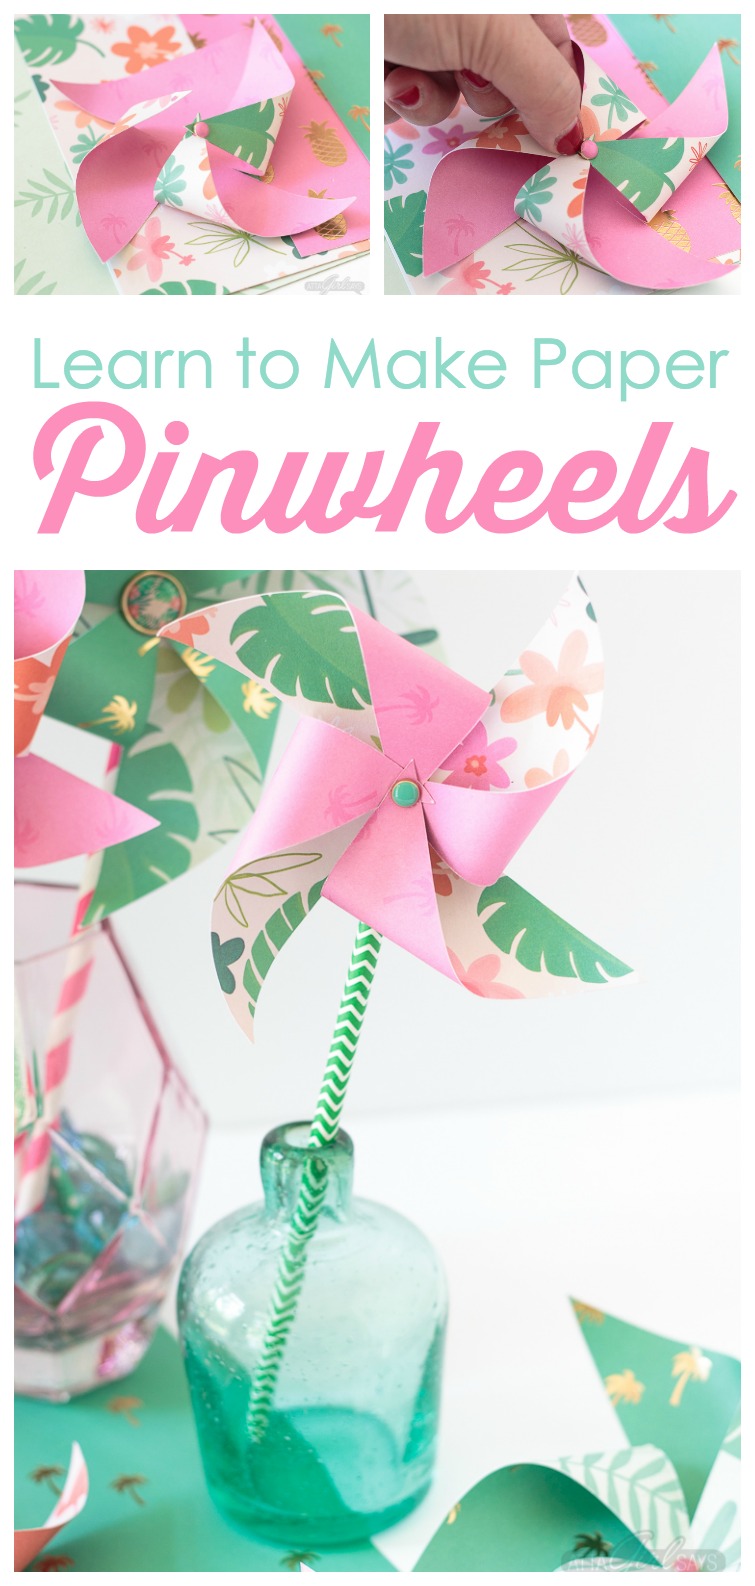
Next, use a small hole punch to create a small hole in every other point of the paper. Punch a small hole in the center of the paper, too. If you’re mounting the pinwheel on a paper straw, flatten one end and punch a hole.
I love my Crop-A-Dile Big Bite for punching holes! If you do a lot of papercrafting, cardmaking or scrapbooking, this is a must-have tool.
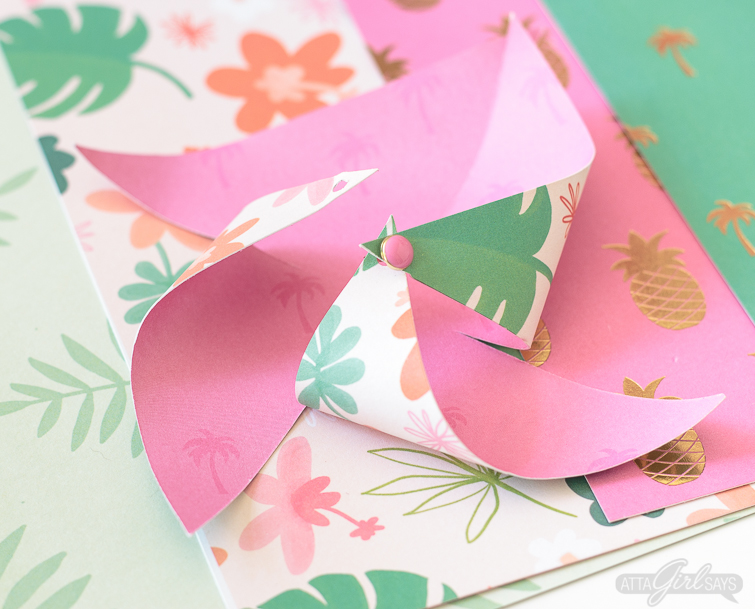
Thread a decorative brad through one point of the pinwheel, then fold up the three other points. Thread them onto the brad, then push the brad through the center of the paper to create the pinwheel shape.
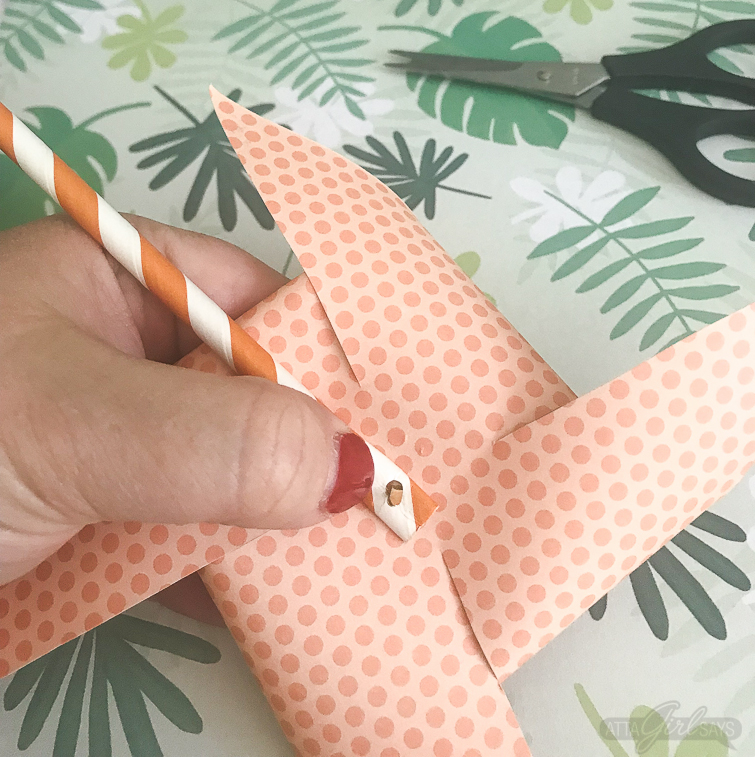
If you’re mounting the pinwheel on a paper straw, thread the brad through the hole in flattened paper straw and open the ends to secure.
If you’re not adding the straw, then just push the brad through the center hole on the pinwheel and open it to secure.
Way cute, easy and fun, right?