How to Paint Peg Dolls – Simple Craft to Entertain Kids
Unleash your creativity and bring life to plain wooden figurines by adorning them with vibrant and eye-catching paints. Transforming simple peg dolls into unique and personalized works of art is not only a fun and engaging activity but also a fantastic way to express your artistic flair. With a wide array of colors at your disposal, you can let your imagination run wild and create stunning designs that reflect your individual style. Revitalize your collection of peg dolls by giving them a fresh and vibrant makeover with a splash of colorful paint. By infusing these simple wooden figurines with your artistic touch, you can turn them into captivating characters that will capture the imagination of both children and adults alike. The process of painting peg dolls is not only a delightful way to spend your time but also an opportunity to explore different color combinations and experiment with various painting techniques.
Step one is easy but optional. You can paint the top half of your doll whichever skin color you want or you can leave it as plain wood, that’s up to you. I paint it. I’m not sure why, I just do.
It just needs one coat of paint and by the time you’re finished painted your other dolls, the first one should be ready to add hair.
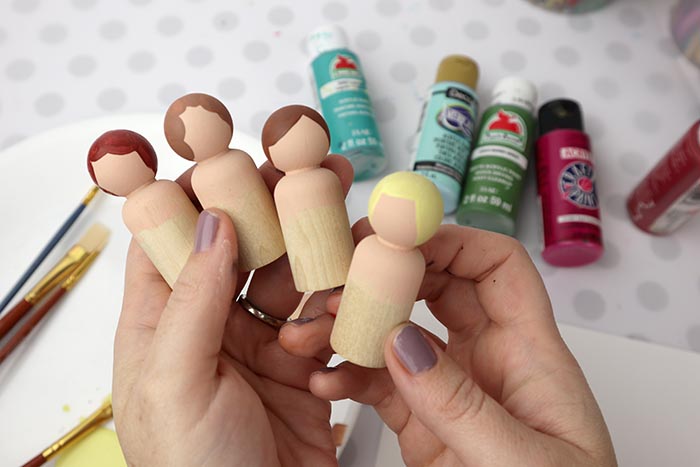
I did a variety of hair colors and styles. The tip when making hair on peg dolls it to decide where you want the face and then frame it with a style. Using a small flat paintbrush you can easily make bangs or swoops to represent curls. After I paint the front of the hair, I simply paint the back of the head in the same color. Don’t worry about details on this step.

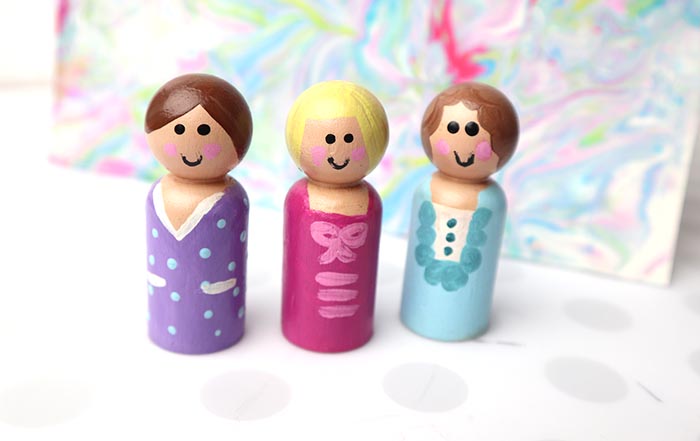
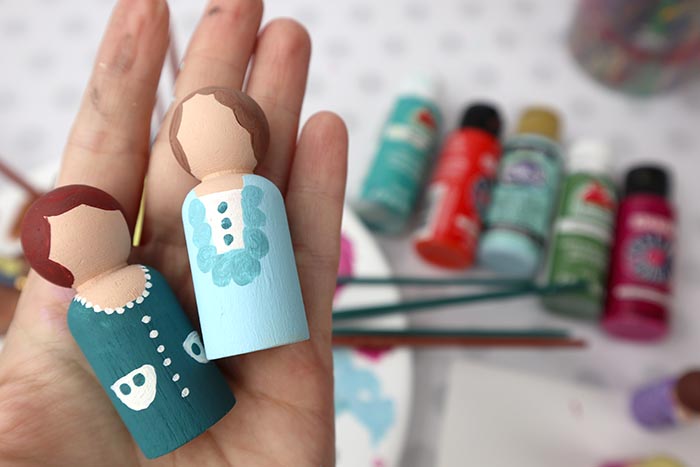
Next we’re going to add clothes. Add a neckline right under where your peg doll’s face will be and then paint the rest of the doll the same color.
Now we’re going to add some details. One trick I figured out a long time ago is that dots and simple lines can really make a peg doll outfit pop. If you’re doing this for the first time, don’t try to get really detailed. Just add a collar to the neckline, maybe some pockets or buttons and call it done.
The best tip I can tell you for painting peg dolls is to use the end of the paint brush to make dots.
Once you have their outfits done with cute details, you’re going to add cheeks using pink dots and then eyes using black dots.
Practice on a piece of paper getting similar sized dots by barely pressing the wrong end of the brush into the paint and then where you want the dot to be placed.
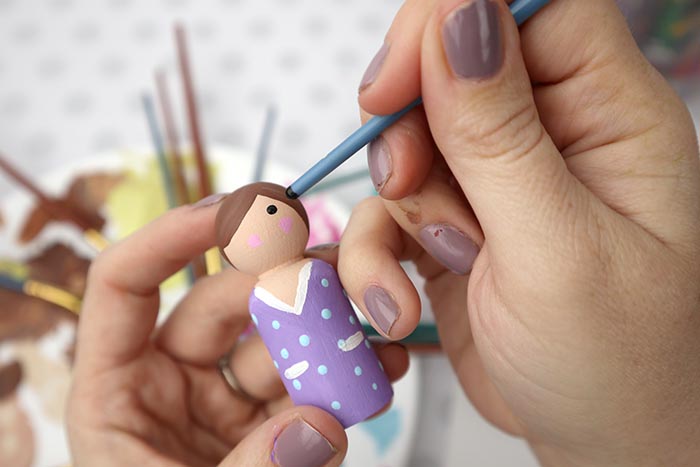
When you’re ready, add the eyes and cheeks to your doll. The purple doll also got blue polka dots added to her dress.
Dots will save the world, just wait and see.
Once you have your cheeks and eyes, using the smallest paint brush you have, add a simple half moon smile and you’re done painting.
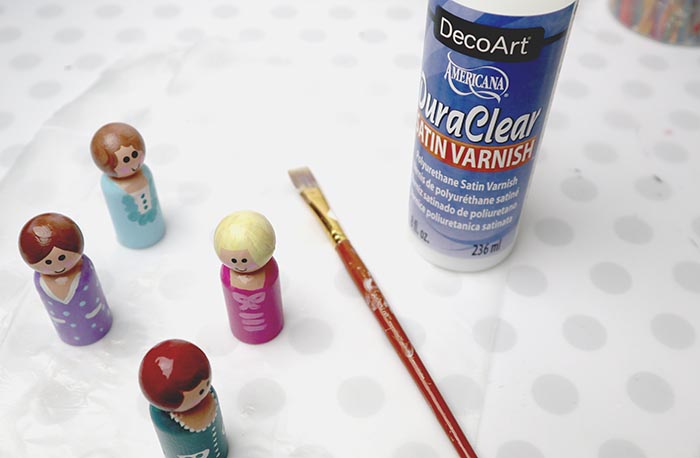
The final step when making peg dolls is simply to seal the dolls. It adds a bit of shine and keeps the paint you so carefully applied nice and safe.
In the past I’ve used Triple Thick to seal the dolls and I loved it. It gave the dolls a really nice shine and helped them last for years.
However this time my craft store was out of Triple Thick so I decided to give DuraClear Satin Varnish a try and I love how fast it dried. This product was very easy to use and it looks great.

Now these peg dolls are ready for the swim meet this weekend and entertaining my sweet little friend.