DIY Valentine's Day Rustic Love
Create a Rustic Love-themed Valentine's Day celebration with a touch of DIY charm! Embrace the beauty of nature and the warmth of handmade crafts to make this day truly special. Start by setting the scene with rustic decorations like burlap table runners, mason jar candle holders, and wooden signs with heartfelt messages. These simple yet elegant touches will instantly create a cozy and romantic atmosphere. Handmade cards with heartfelt messages will surely melt your loved one's heart, while DIY gifts like a hand-painted wooden photo frame or a jar filled with love notes will show your thoughtfulness and effort. Don't forget to incorporate natural elements like pinecones, twigs, or dried leaves into your DIY projects to enhance the rustic aesthetic. With a little creativity and love, your DIY Valentine's Day Rustic Love celebration will be a memorable and unique experience for both you and your partner.

Tip: The biggest time commitment when it comes to making this craft is in the time to paint them. If you’re going to do it as a group, consider using flat spray paint so they will dry quicker and be ready for the next step.
So let’s make this!
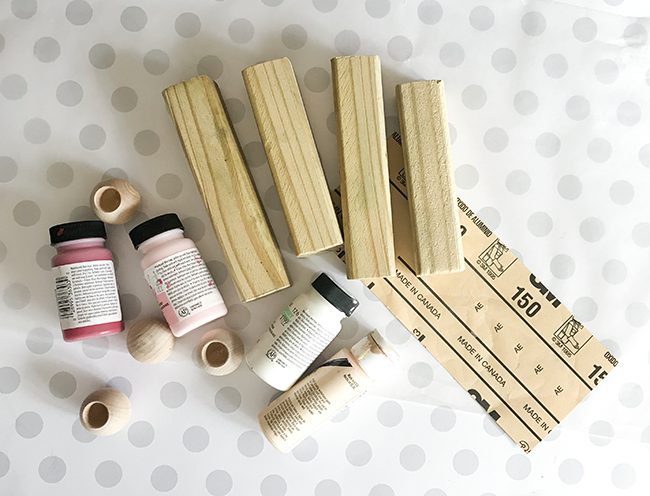
Step 1 – Gather your supplies. For this craft you will need:
- 1.5″ X 1.5″ wood board from the lumber store cut into 5.5″ and 6″ lengths.
- Round wooden balls – I used 1 1/4″ Dowel Caps from Hobby Lobby
- small wooden hearts (the same ones I used in this Vday project)
- paint – skin tone and white, red, and pink
- hot glue gun
- sandpaper
- twine
I recommend using chalk paint for this project if you’re going to paint it by hand simply because it dries so fast. Start by cutting the wood into 5.5″ and 6″ pieces. After your wood is cut, sand the edges to round them slightly. You just want to take away some of the sharpness of the edges. After I sanded the wood, I painted the round wood pieces that will be the heads each a skin-tone color.
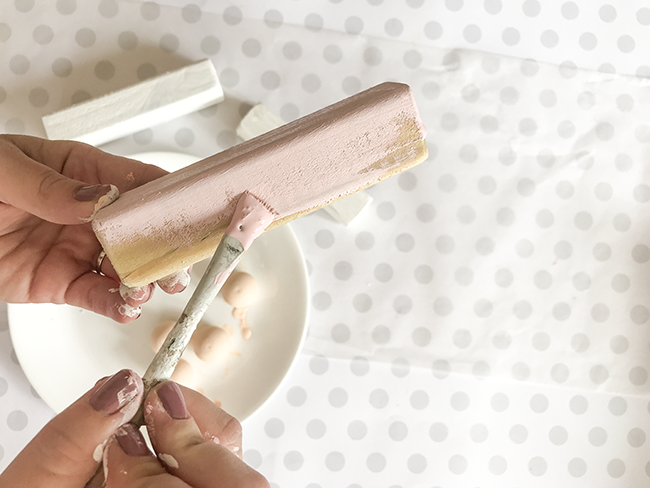
Then you paint the other wood pieces. For the white dolls, I painted one longer piece and one shorter piece white. The other dolls I painted the shorter piece a light pink and the taller piece red.
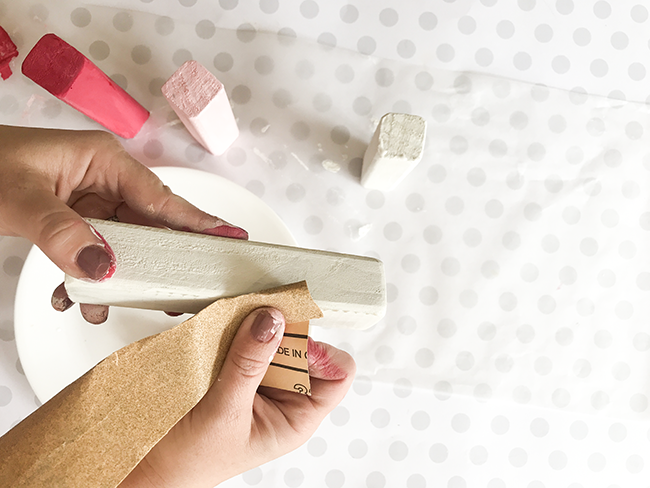
Once it’s dry you want to sand the edges again to remove a little bit of the paint. This helps give it an antique/ rustic feel.
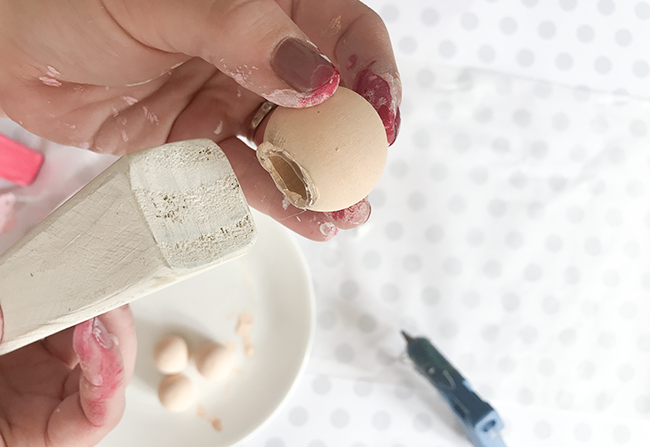
Once it’s lightly sanded, glue the head on top using hot glue. And yes, my hands are covered in paint because I was rushing to get this project done but it’s totally worth it.
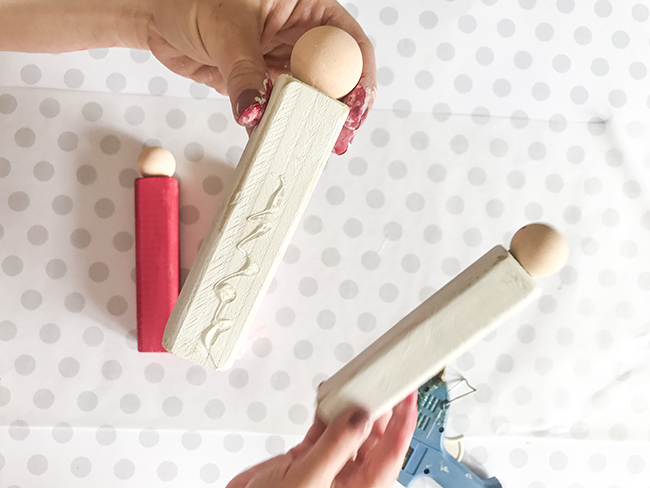
Glue the two pieces together but you have to be careful! The bottoms need to be lined up correctly or they will lean to one side.
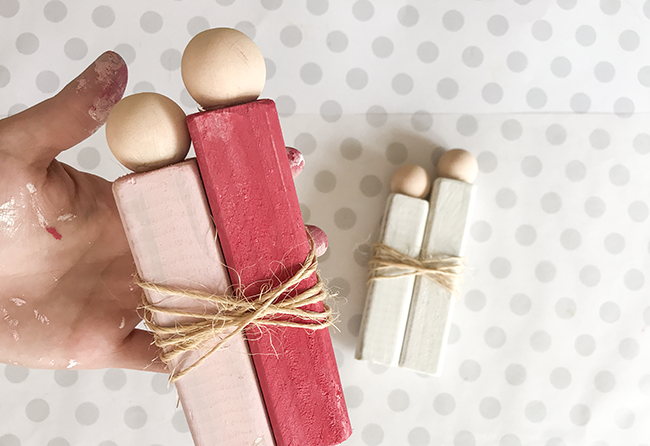
Now take your twine, put a small dot of glue on the back of the decoration to hold the end of the twine, and then wrap it, criss-crossing around the blocks, around the middle of it. Use another dot of glue to hold the end of the twine after you’re done. The last step is to steal two small wooden hearts and glue them on top of the twine.
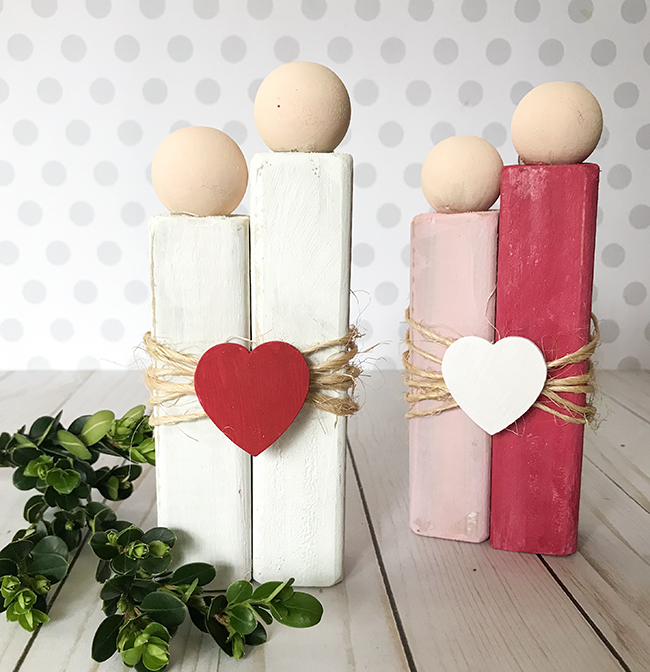
Do you love them as much as I do? Sigh. The messy hands and paint on my table (oops) are totally worth it. Other than painting, this craft is very quick. The best news is that since it’s a rustic style craft, it’s hard to mess it up. Anyone can make this. Will you give it a shot? Save this to Pinterest –