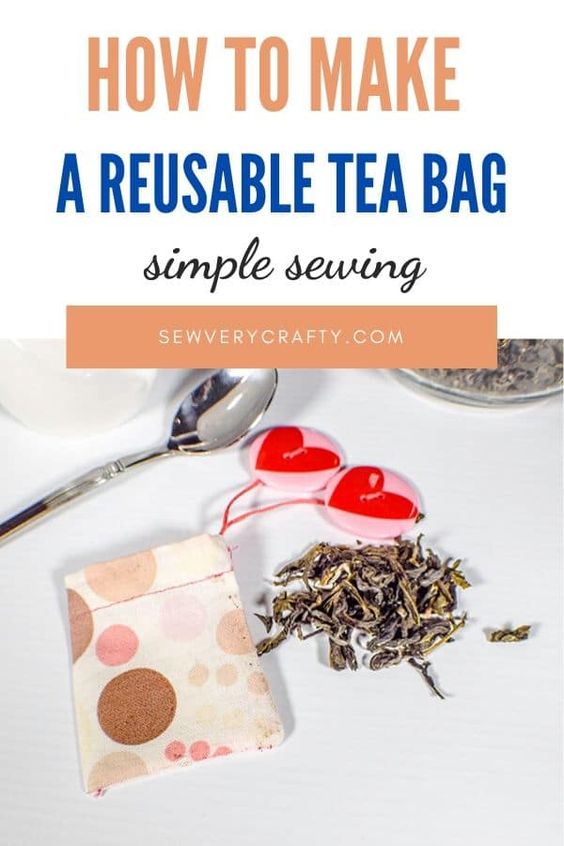
How to Make Reusable Tea Bags
Discover the wonders of sustainable tea brewing with our innovative Reusable Tea Bags Sewing Pattern! Say goodbye to single-use tea bags and hello to a more eco-friendly tea-drinking experience. This sewing pattern allows you to create your very own reusable tea bags, ensuring that you can enjoy your favorite loose-leaf teas without any guilt. With our Reusable Tea Bags Sewing Pattern, you can unleash your creativity and personalize your tea bags to suit your style. Whether you prefer vibrant patterns, soothing colors, or elegant designs, the possibilities are endless. Not only will you be reducing waste by using these reusable tea bags, but you'll also have a unique and stylish accessory to enhance your tea-drinking ritual. Made from high-quality materials, these tea bags can withstand multiple uses without compromising the flavor of your tea. So why settle for ordinary tea bags when you can create your own reusable ones? Embrace sustainability and add a touch of creativity to your tea time with our Reusable Tea Bags Sewing Pattern.
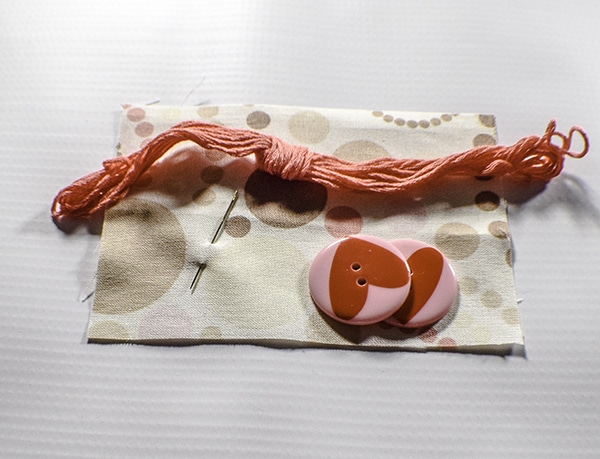
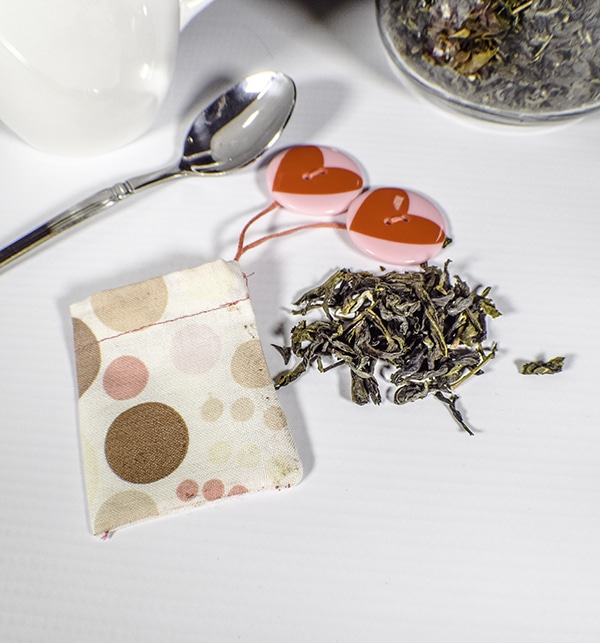
What you will Need: How to Make Reusable Tea Bags
- 5 x 3 1/2″ piece of pre-washed cotton, muslin, or gauze
- 2 buttons
- 12-inch piece of cotton string or embroidery thread
- Standard Sewing Supplies
What you will Need Tea Bag
Step 1: Wash your Fabric
Before you start this project make sure that wash, dry and press your fabric. Fabric contains sizing in it and you want to make sure that all of that sizing is washed out.
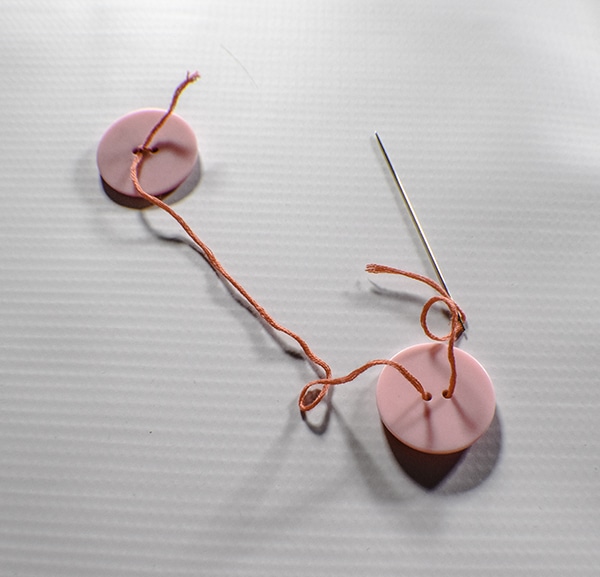
Step 2: Add the buttons
Using a hand needle sew one end of the thread ( I used embroidery floss for mine) through the back of the button and back through the front. Tie the string in a knot. Repeat for the second button on the other end of the string.

Knot your Buttons
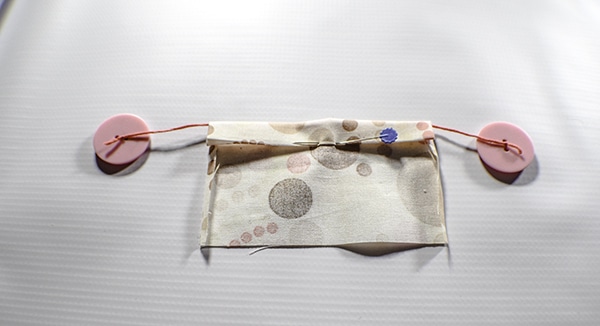
Step 3: Create the casing
Fold the short edges of the fabric in by 1/8″ and press. Then fold down one of the long sides of your fabric by 1/4″ and press. Fold again by 1/2″ and press again. Lay your string inside the casing so that it centered. Stitch along the casing edge using a 1/8″ seam allowance. Make sure not to stitch over the string.
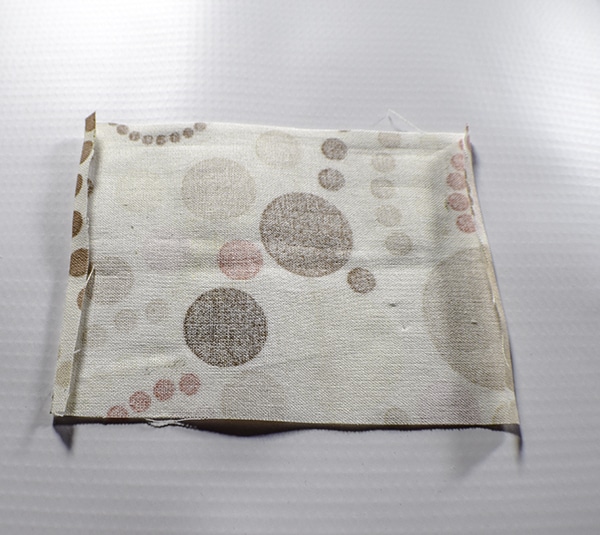
Fold in the short sides
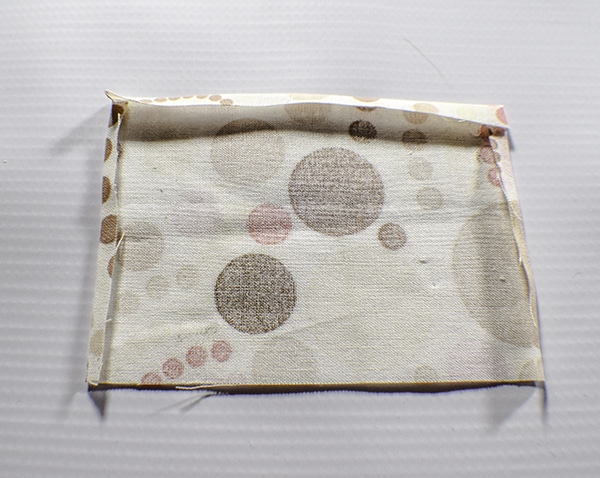
Fold the top
Knot your Buttons
Add button to casing
Stitch the casing
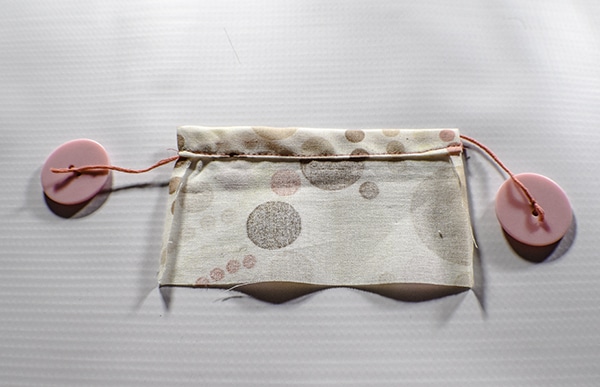
Step 4: Stitch the Tea Bag Together
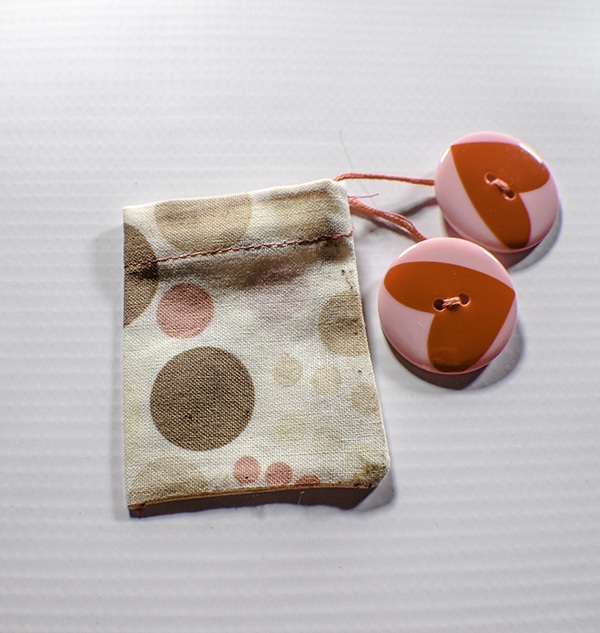
Place the tea bag right sides together and pin. Stitch the bag closed along the folded and raw edges without sewing over the string. Back stitch at the top of the tea bag for support. Turn right sides out. Add your tea and insert the bag into a cup of hot water for a nice cup of tea.

Sew right sides together
Turn right sides out
I hope you enjoyed this project