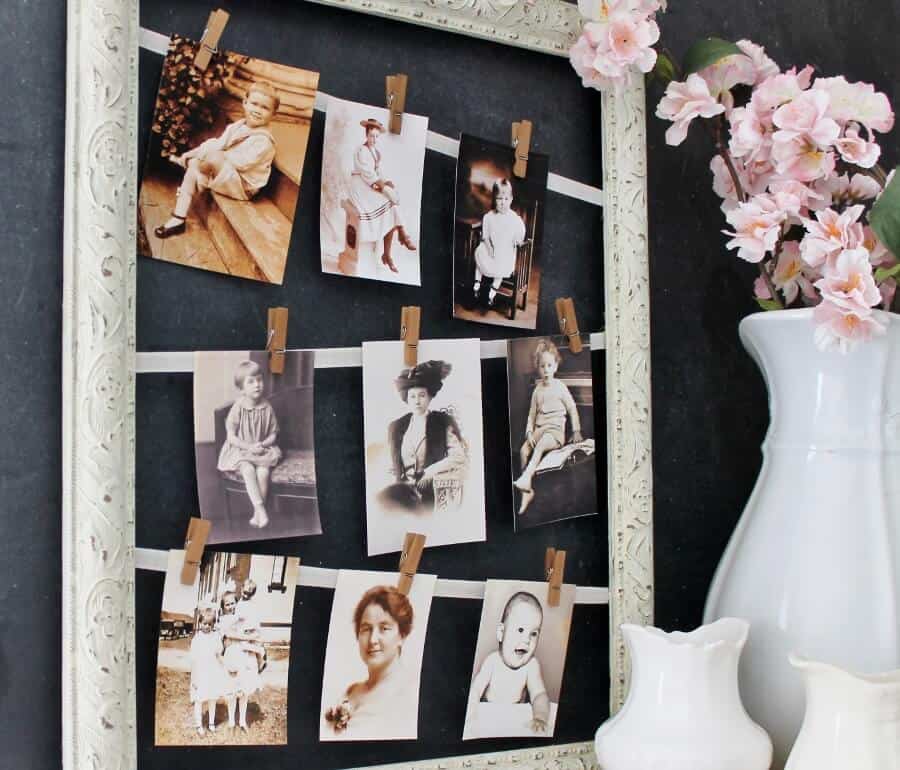
DIY Photo Clothesline Display
This DIY photo clothesline display is a great way to personalize your space and add a touch of nostalgia to your home decor. You can easily switch out the photos whenever you want to update the display with new memories or seasonal images. Get creative with the arrangement of the photos, mixing and matching different sizes and orientations for a dynamic look. You can also add other decorative elements such as fairy lights or small trinkets to enhance the display. This project is not only fun and easy to do, but it also allows you to showcase your favorite moments in a unique and stylish way.

Materials for Photo Clothesline Display
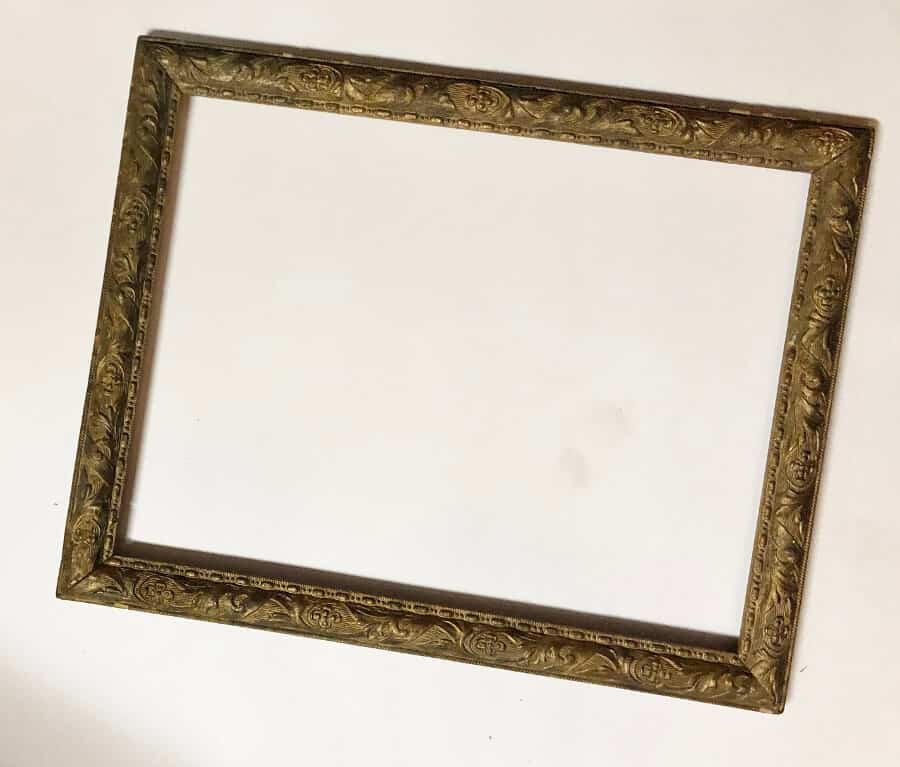
I picked up this large, gold gilt frame at a flea market for $3. I could have had a piece of glass cut for it and used it to frame a piece of art, but it had a lot of chips and was too dark for my taste.
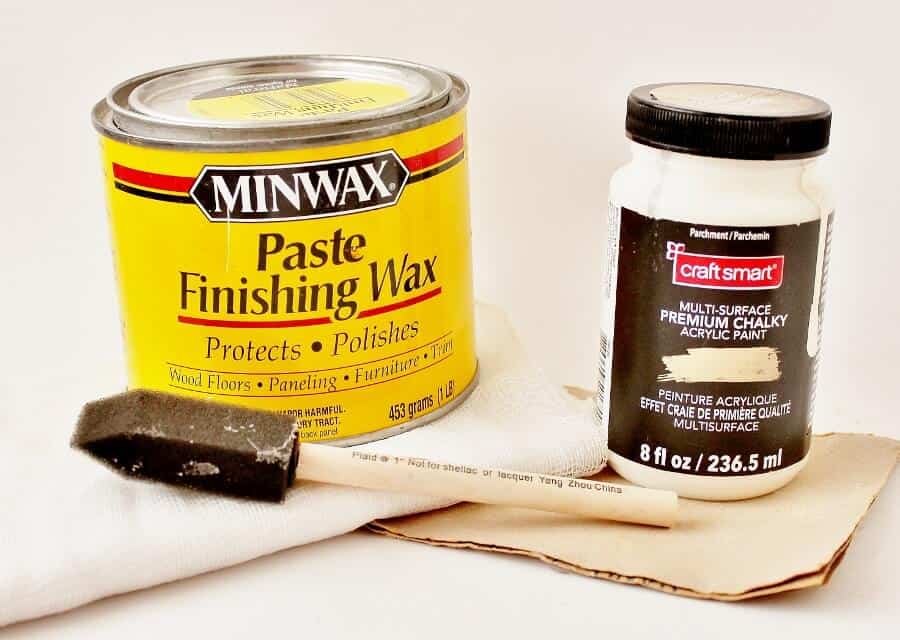
Materials:
- Vintage or antique frame
- Chalk paint (mine is “Parchment” from Hobby Lobby)
- Foam brush
- Sand paper
- Paste wax
- Cheese cloth
- Ribbon or jute (not shown)
- Tacks (not shown)
- an Old paint brush (not shown)
Step 1: Paint the Antique Frame
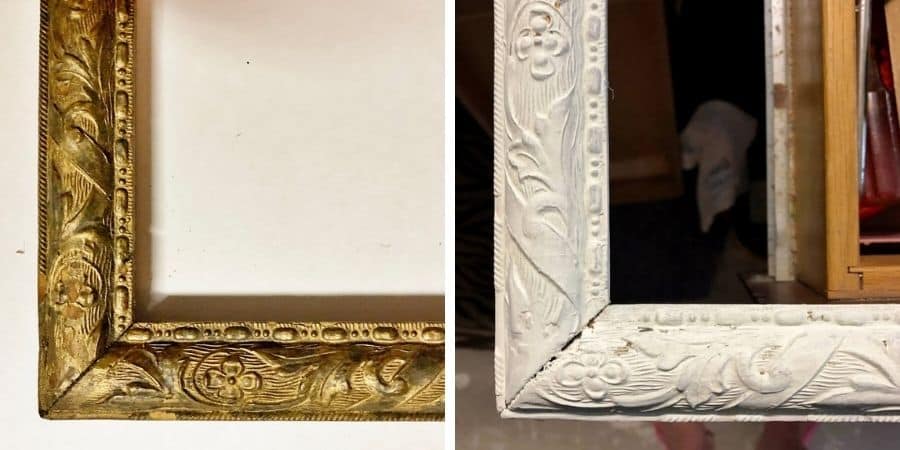
One good coat of chalk paint was enough to cover the gold. Depending upon which brand you use, you may need two coats. You can find my recipe for homemade chalk paint here.
Step 2: Sand the Antique Frame
Lightly sand some of the paint back, especially on the high points of the design, to reveal the paint or stain beneath the paint. This gives your project an aged, antique look.
Step 3: Wax the Antique Frame
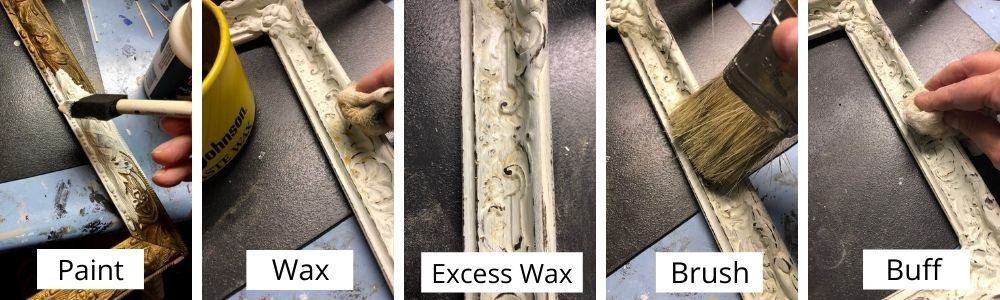
After painting and lightly sanding the frame, it’s time to apply some paste wax. This will not only protect the surface from scratches and moisture, but will give the project a nice, satin sheen.
Apply the wax with a piece of cheesecloth. If the frame is ornate, as mine is, you’ll have globs of excess wax stuck in the design crevices. I keep an old paint brush on hand for just this occasion.
The brush will remove the excess wax nicely! Let the piece rest for about ten to fifteen minutes and then buff it out by rubbing it vigorously with a clean piece of cheese cloth, until no excess wax remains, the surface is dry, and a slight sheen remains behind.
Step 4: Attach Ribbon to Back of Antique Frame
Criss-cross the back of the frame with ribbon, string, or jute (I used antique seam binding), using thumb tacks (or hot glue) to hold it in place.
Step 5: Hang Your Photos on Your Clothesline Display

It’s now time to hang your photographs, stand back, and admire your work! Tiny clothespins available at most craft stores (and even the Dollar Tree) work perfectly, but so would paper clips, pins, and small binder clips.
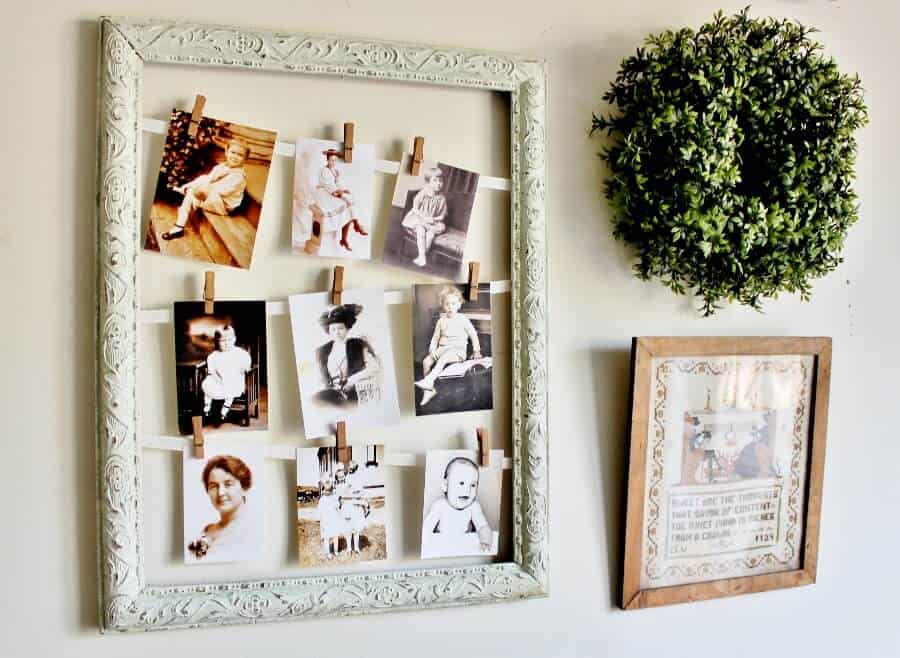
Hang it on the wall for everyone to see and enjoy