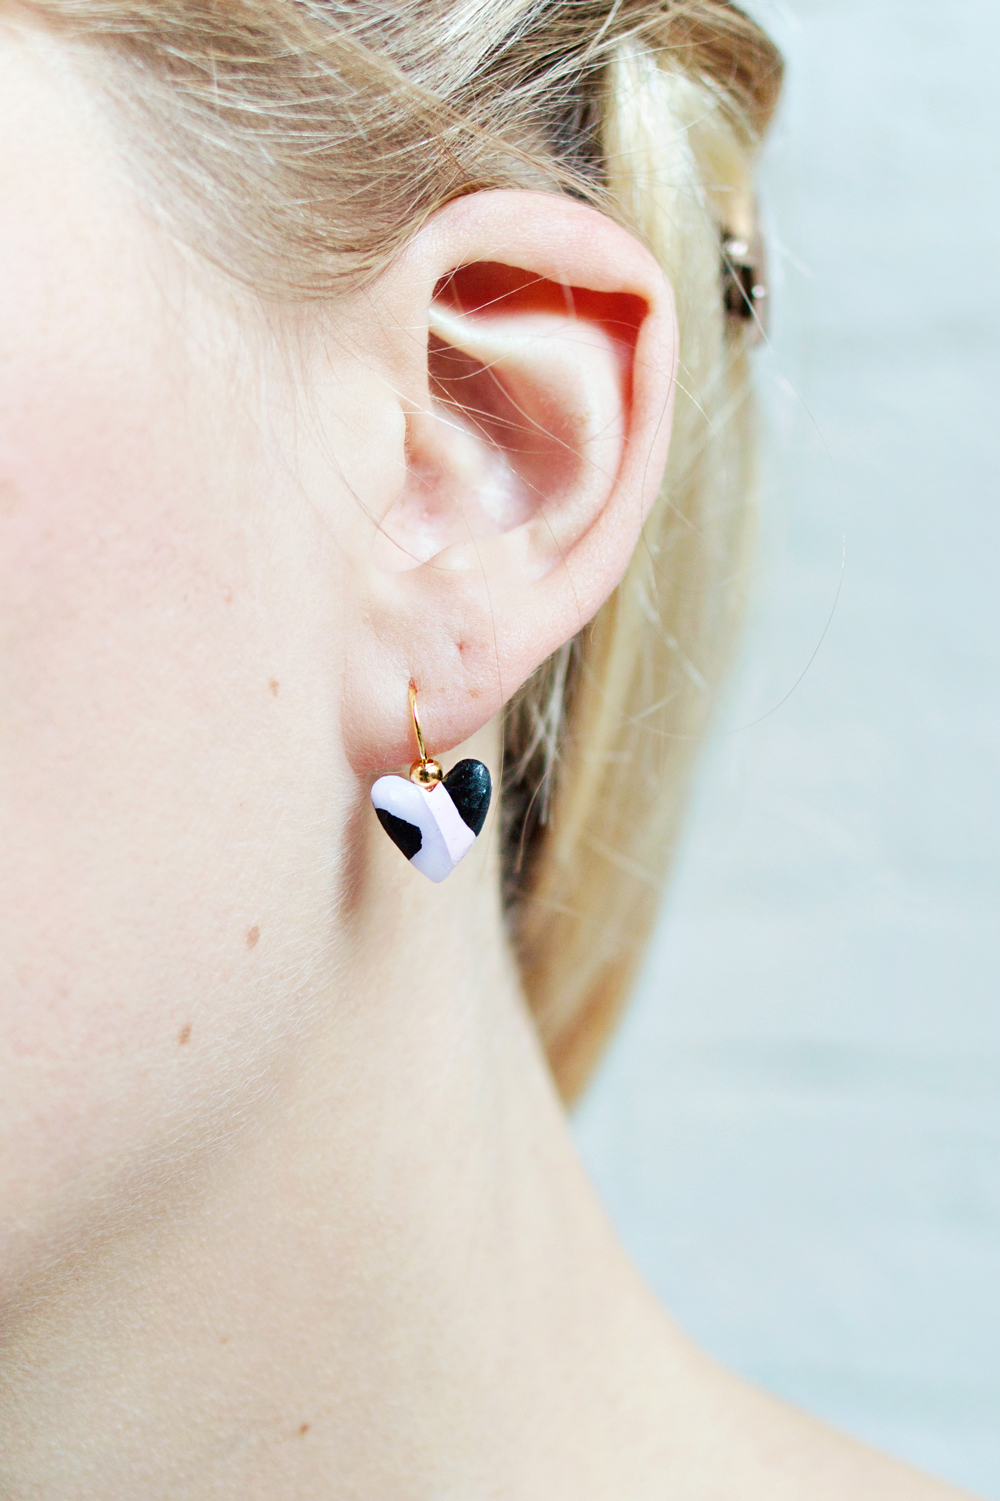
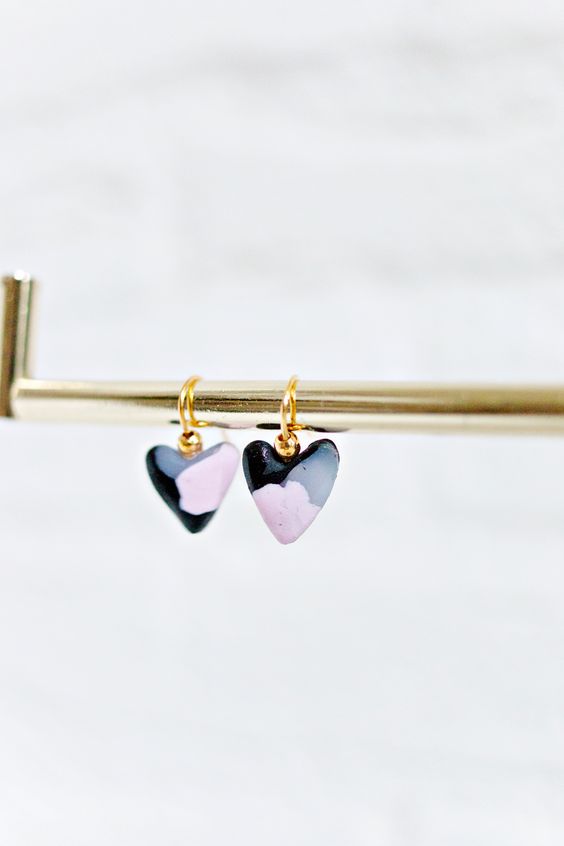
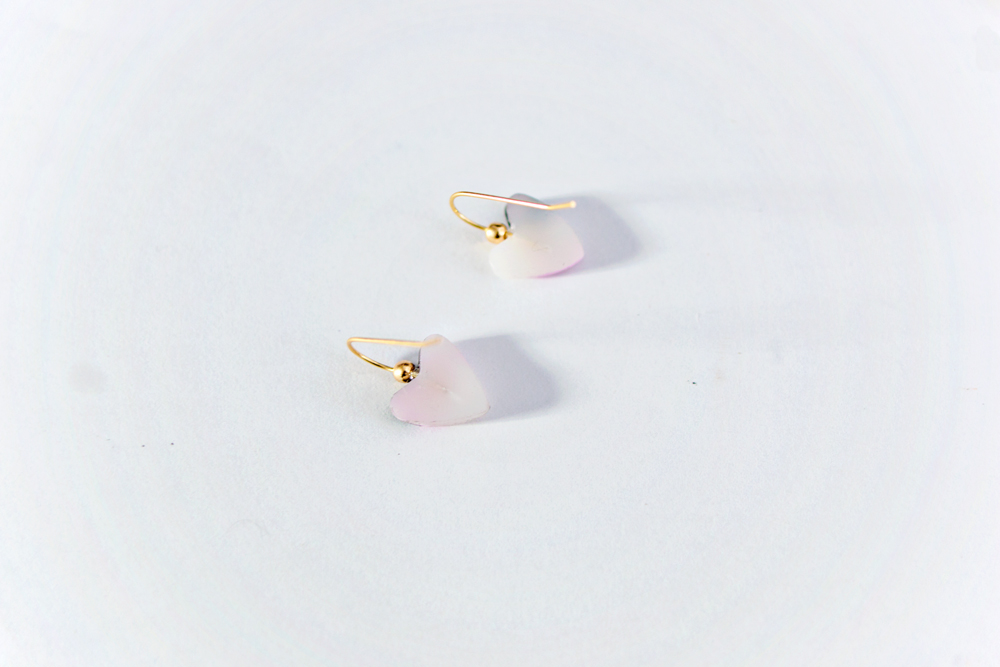
DIY Minimal Clay Heart Earrings
These exquisite earrings are crafted with the utmost care and attention to detail, resulting in a truly unique and captivating design. Made from high-quality clay, these minimal clay heart earrings are a perfect blend of simplicity and elegance. The delicate heart shape adds a touch of romance and femininity to any outfit, making them a versatile accessory for both casual and formal occasions. Handcrafted with precision, these clay heart earrings are a testament to the artisan's skill and creativity. The minimalistic design allows the beauty of the clay to shine through, showcasing its natural texture and earthy charm. The lightweight nature of the earrings ensures comfort throughout the day, while the secure clasps guarantee they stay in place. Whether you're looking to add a subtle touch of charm to your everyday look or want to make a statement at a special event, these minimal clay heart earrings are the perfect choice.
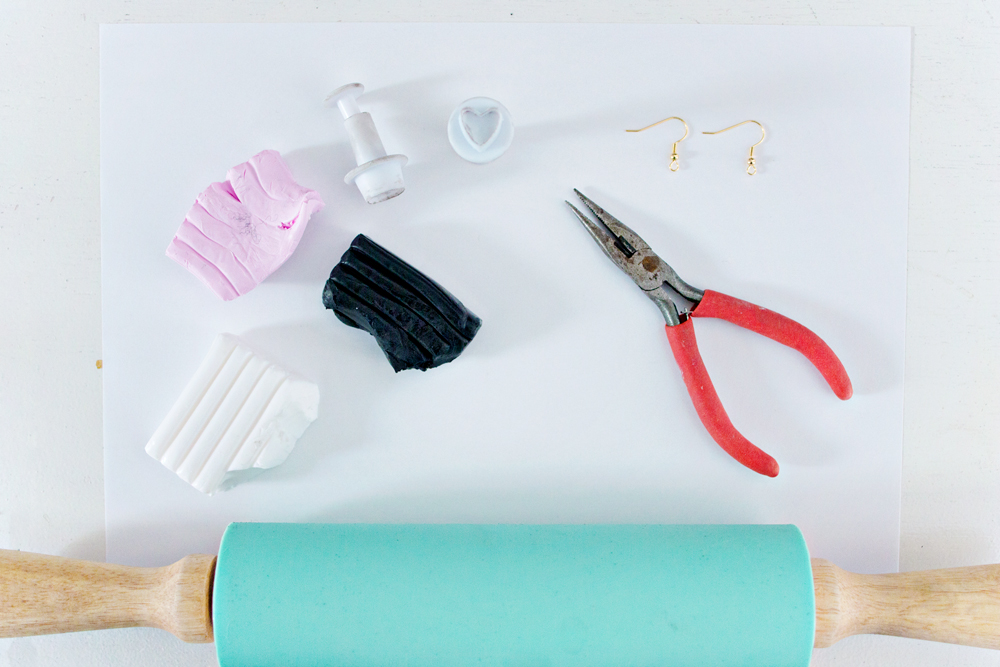
SUPPLIES
– 3 Shades of polymer Clay
– Rolling Pin
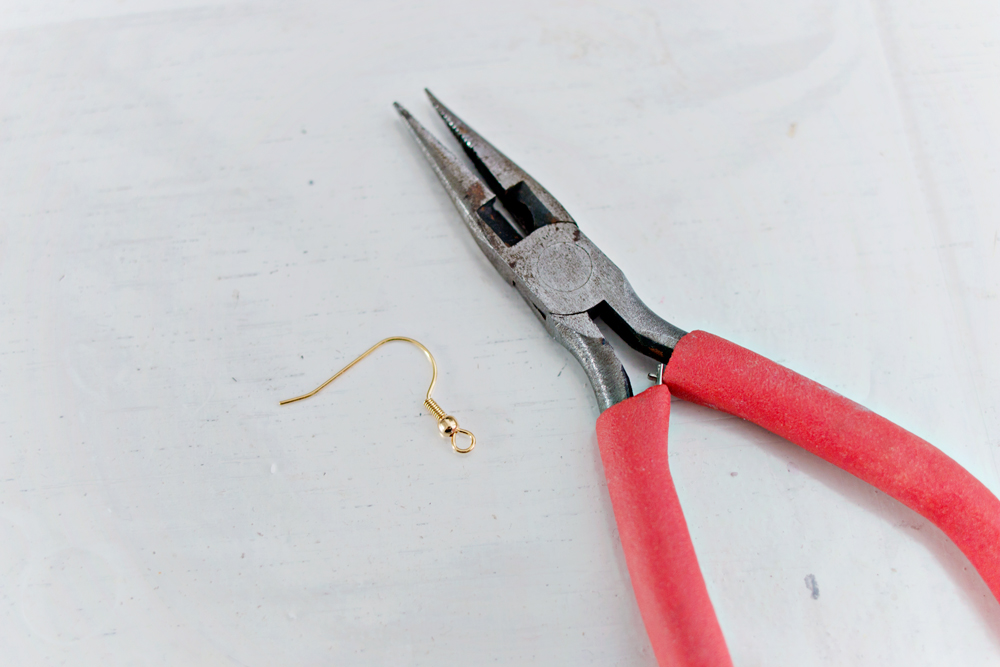
– Earring Hooks
– Pliers
– Something to create the heart (or circular, etc.) shape. I used a mold that I found in the baking section of a dollar/euro store.
– Jewellery Glue
– Oven
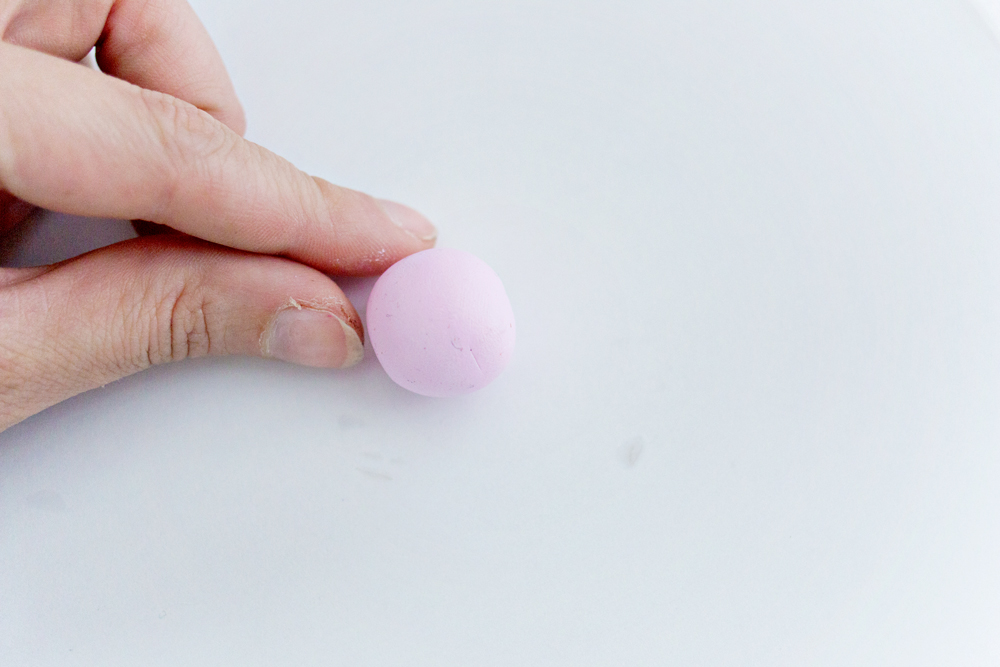
STEP 1
– Preheat your oven according to your polymer clay instructions.
– Take a piece of polymer clay and roll it up into a ball.
STEP 2
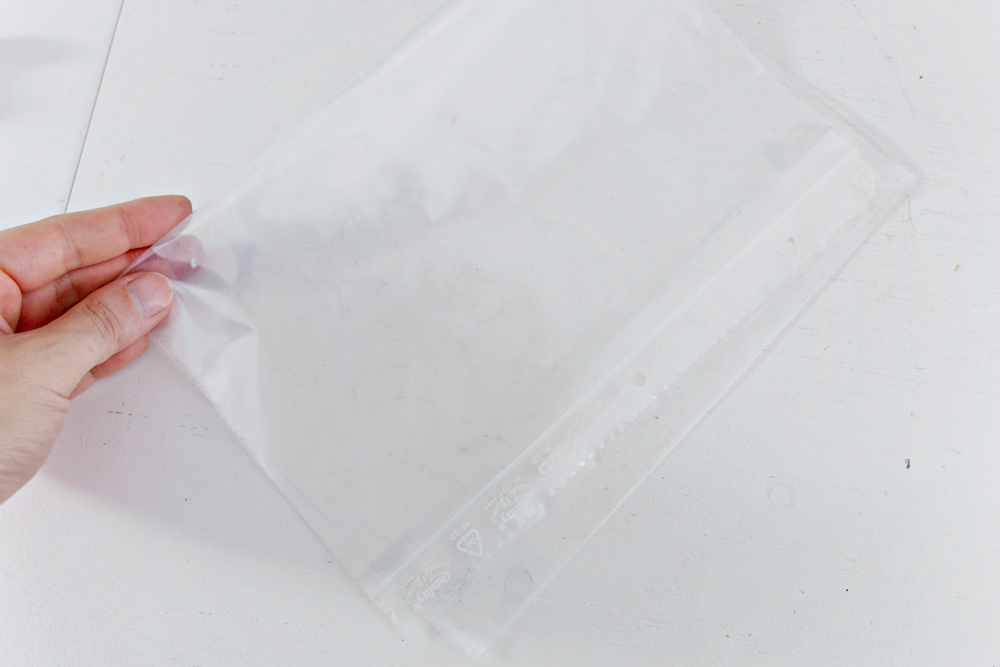
– Prepare your surface, you can use a baking sheet, smooth desk/table or a piece of plastic.
STEP 3
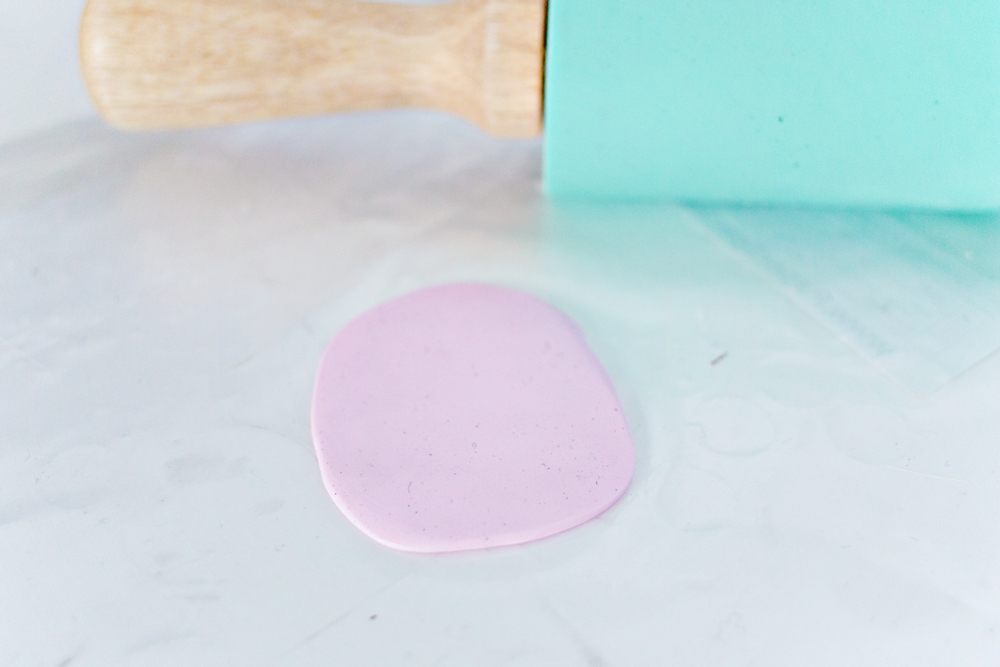
– Roll the polymer clay ball out on the smooth surface.
– Roll it slightly thinner than you would like (the next step will add a bit of extra thickness)
STEP 4
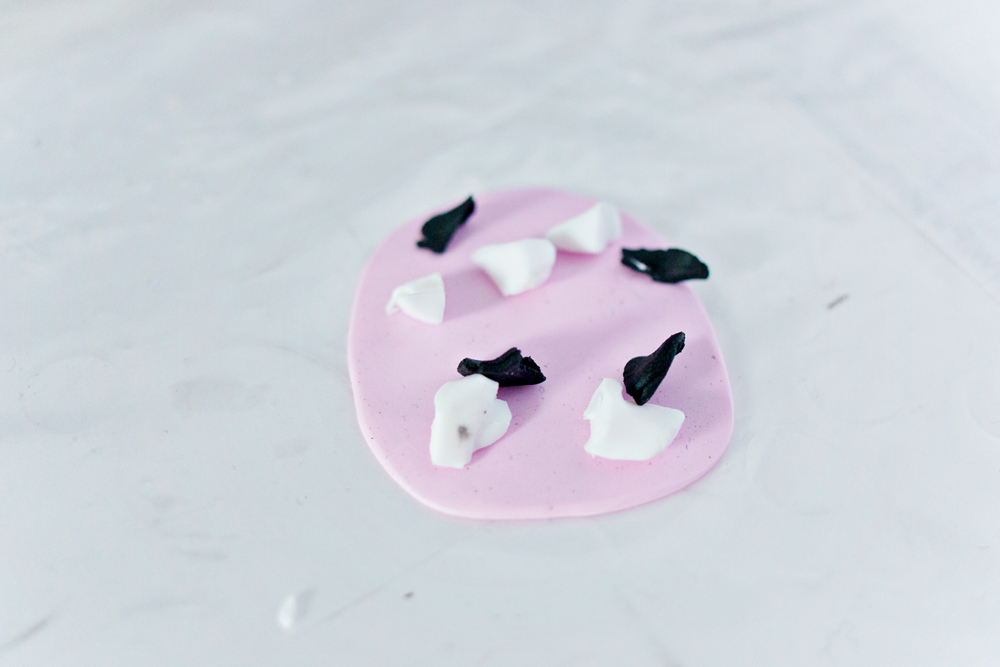
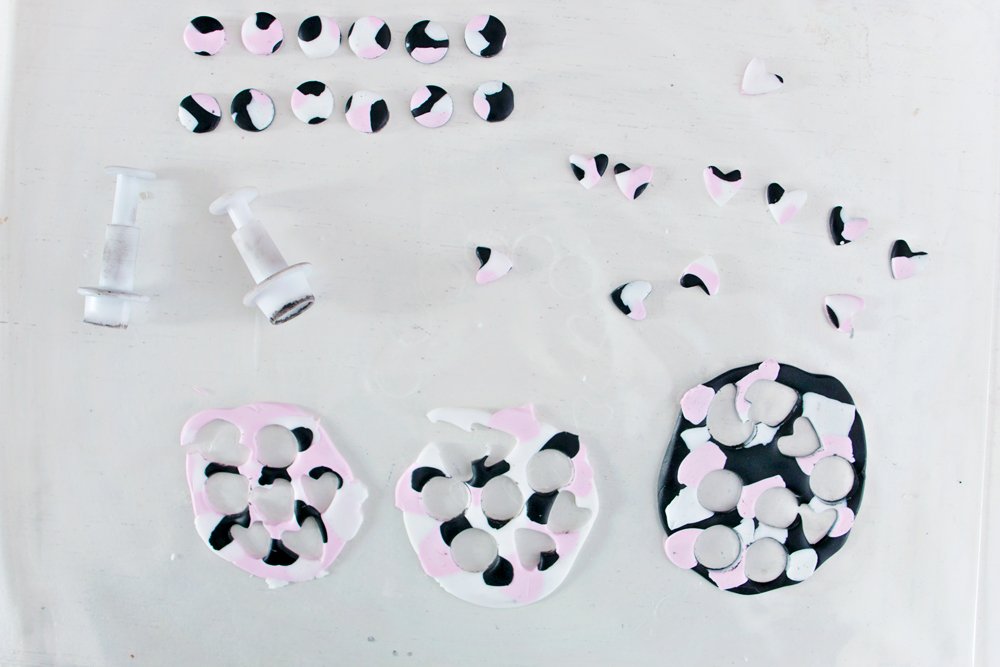
– Take small pieces of clay from the other two colors and randomly place them on top of the rolled out clay.
– If you are using black polymer clay like I am, touch it as little as possible* and apply it at the last moment.
*Black polymer clay is unfortunately known for making your hands and surface black, which will also effect your other clay colours. To avoid ending up with grey all over your pretty clay earrings, clean your hands, rolling pin and surface as often as possible.
STEP 5
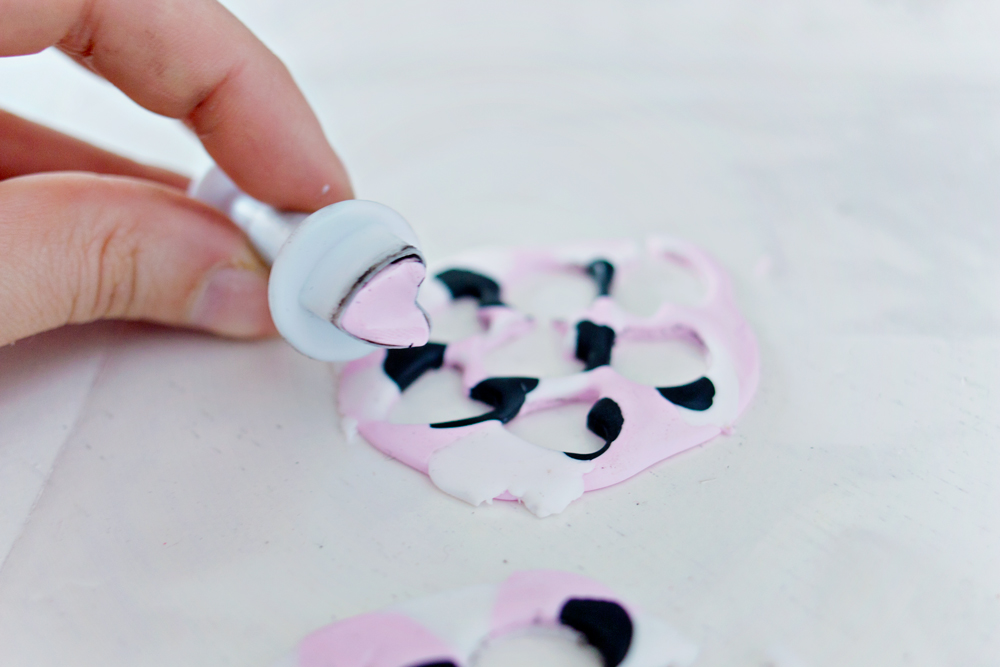
– Use your rolling pin and merge the small pieces into the flay clay surface. Roll until you have reached your desired thickness.
– Take the mold and start making your earring shapes.
STEP 6
– Repeat making as many shapes as you like.
STEP 7
– Take your earring and pliers for the next few steps.
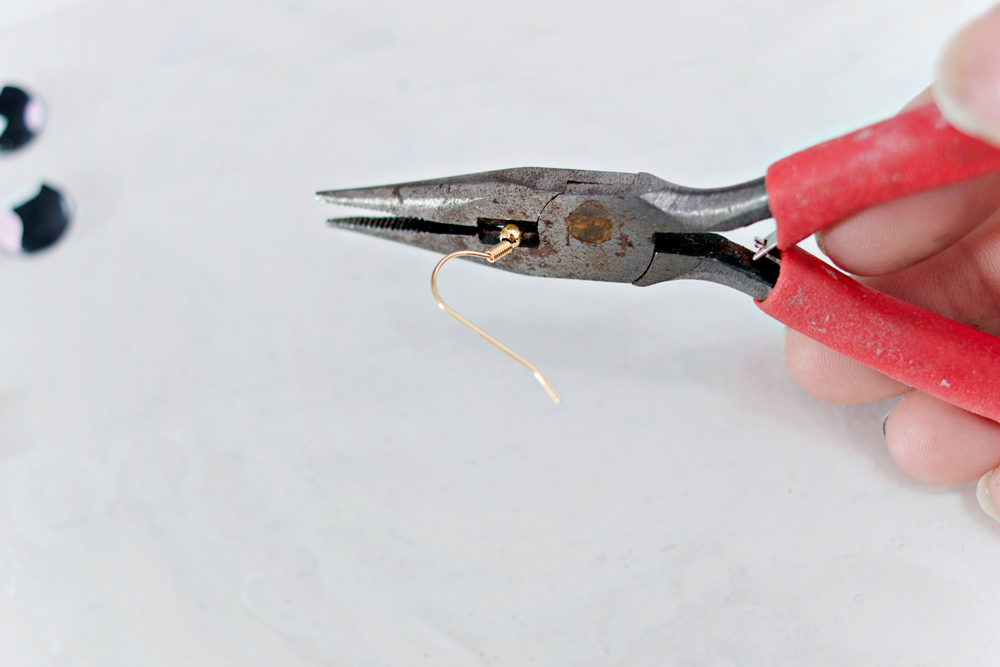
STEP 8
– Use your pliers to cut the end of the earring off.

STEP 9
– Make sure that you still have about 1 cm left on the earring to attach the clay shape.
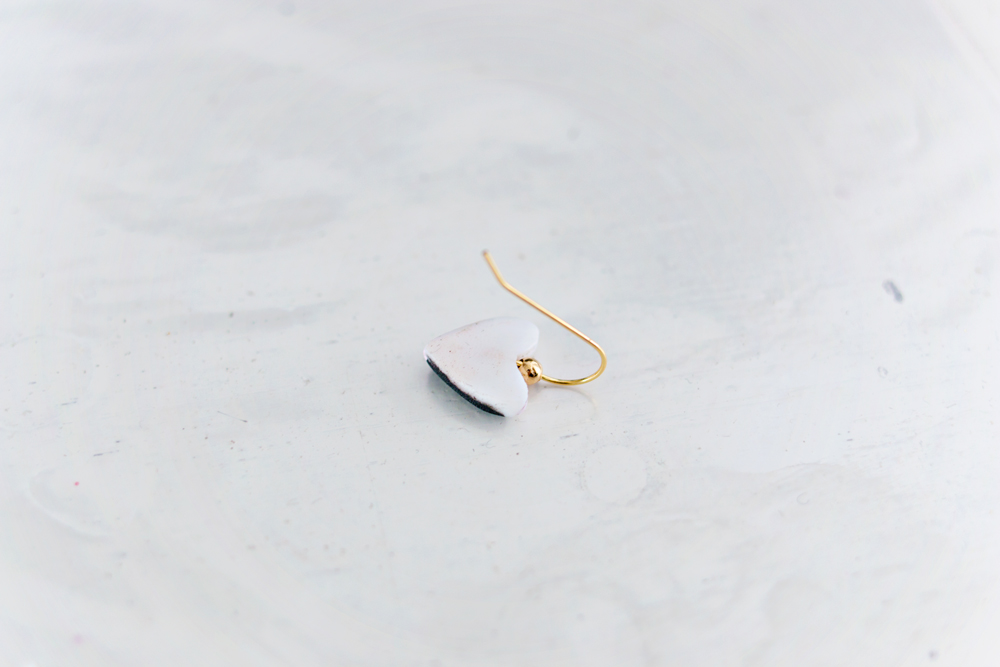
STEP 10
– Press the end of the earring inside the top of the earring, gently pressing it down, making sure that it doesn’t stick out in the back or front.
– Remove the earring from the clay and place your clay pieces on a baking sheet and place them in the oven.
– Bake your clay earrings according to the instructions of your polymer clay.
– Once they are done, take them out of the oven and let them cool down.
STEP 11
– Apply a tiny bit of jewellery glue to the end of the earring and slide it into the previously made hole in the clay.
– Let the glue dry.
And that is it! You will now have your very own clay heart earrings!!