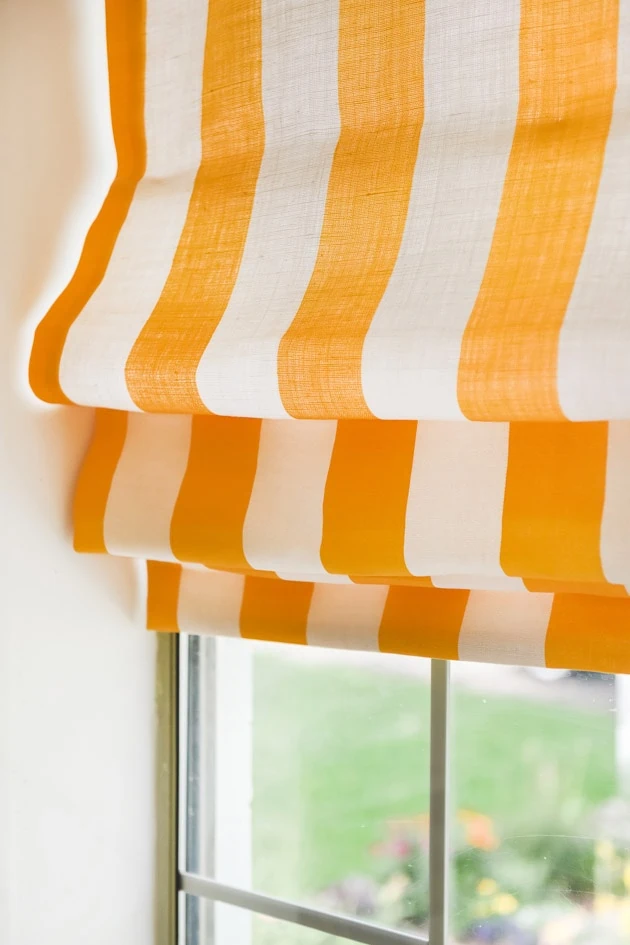
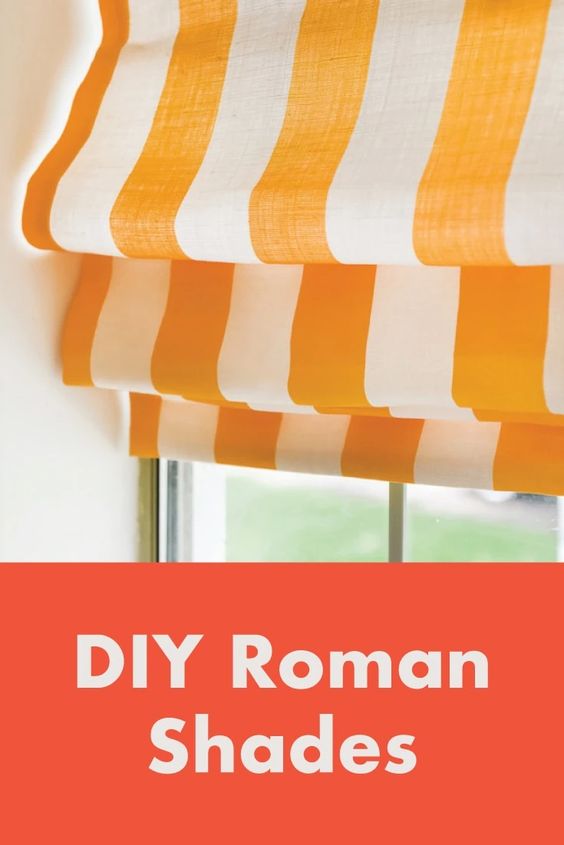
DIY Roman Shades
Are you looking to add a touch of elegance and sophistication to your windows? Look no further than DIY Roman shades! These stylish window coverings not only provide privacy and light control but also add a beautiful decorative element to any room. With a few simple materials and some basic sewing skills, you can create your own custom Roman shades that perfectly suit your style and taste. These versatile window treatments not only add a touch of style and sophistication to any room but also allow you to control the amount of light and privacy you desire. With a little creativity and some basic sewing skills, you can transform your windows into stunning focal points that reflect your personal taste and flair.
Cutting the Wood Pieces
- First, cut the 1” x 2” so it’s a little less than the window width. It should fit snugly inside the window.
- Now, cut the wooden dowels to match.
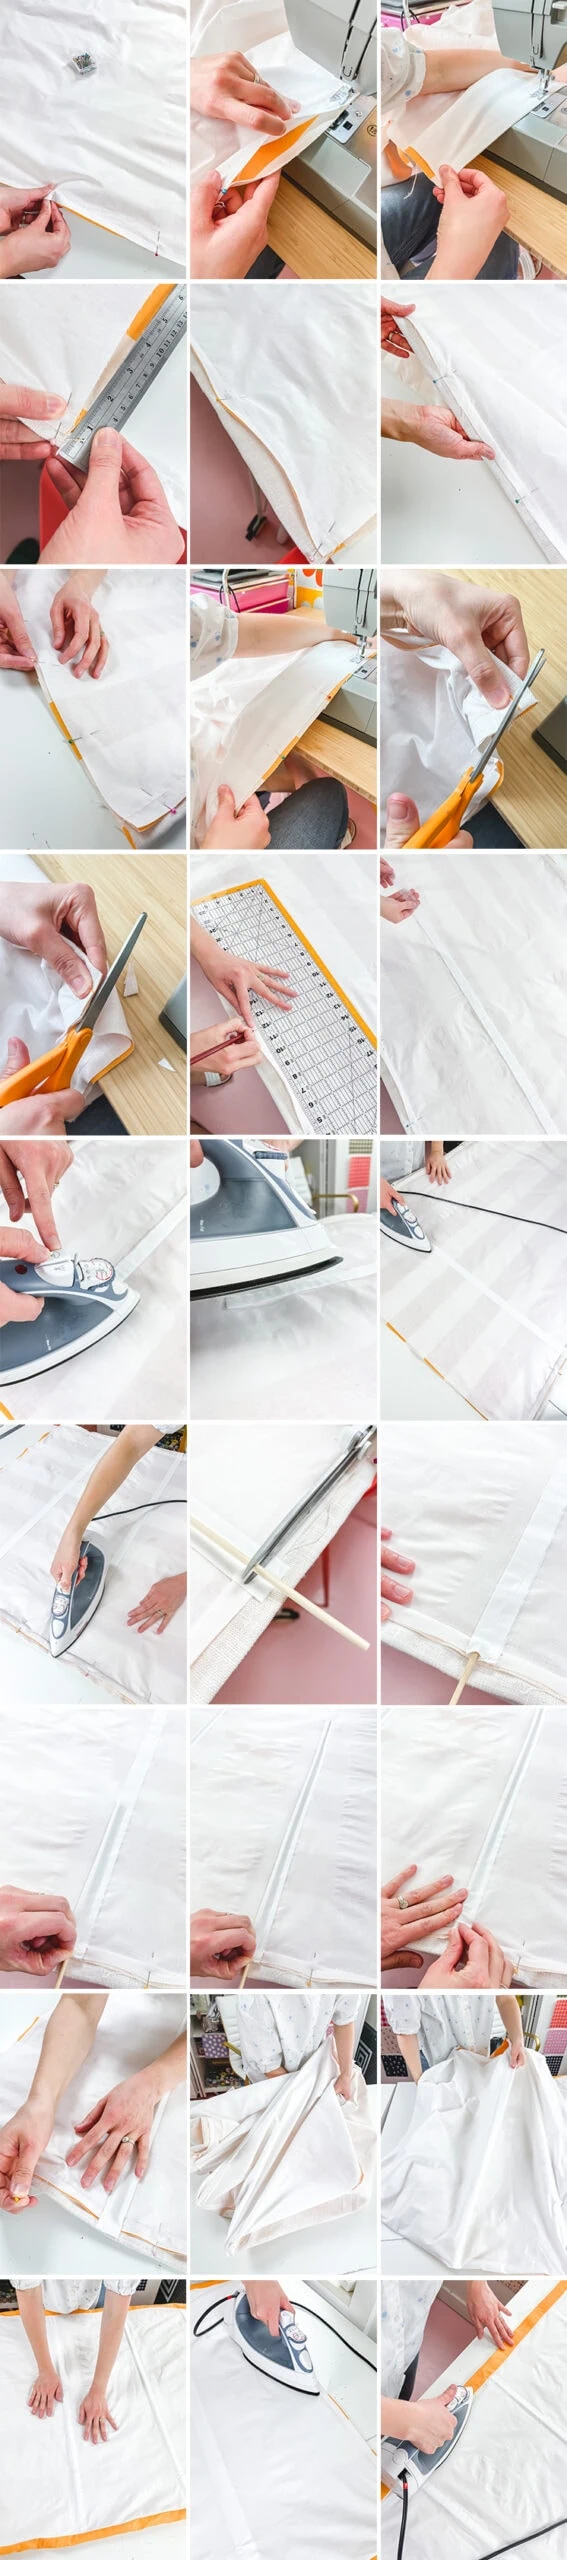
Prepping your Fabric
- First things first: iron out your fabric so it’s nice and flat. What you don’t want are wrinkly Roman shades. Note: washing is optional, since you probably won’t be taking these babies down once they’re screwed into place.
- Next, cut the front and lining pieces down to size. Dimensions of the front fabric should be 3 inches wider and 5 inches longer than the window dimensions. The lining should be the same height as the front fabric and one inch shorter than the window width.
Sewing your Fabric Pieces Together
- It’s time to sew the front and lining pieces together. For this, line up one long side of the two fabric pieces, right sides together.
- Next, sew it in place using a ½” seam allowance.
- Repeat steps 1-2 for the other side. Note that the lining is narrower than the front, so you’ll have to let the front fabric bunch a bit to line up both sides.
- Now smooth out the two pieces of fabric so the lining is centered on the front piece. You should have an inch of the front fabric on either side of the lining.
- Next, pin the bottom all along the width and sew in place.
- Center the lining along the top edge, as you did in step 4 for the bottom. Now, fold the seam allowance so it faces out on either side and pin in place all along the length.
Dowel Measurements
- For this, you’ll need to do a little math (it’s simple, don’t worry)!
- First, decide how big the gaps between dowels will be. (It will vary depending on how tall the window is, but usually 8-12 inches works well–we used 12).
- Next, calculate the excess below the lowest dowel. This one should be ½ the distance between dowels plus 1 inch. So since we have 12 inch gaps, the excess should be 7 inches (half of 12=6+1=7).
- Finally, the top measurement. This doesn’t have to be quite as exact, but it just needs to be a bit bigger than the distance between dowels. (For us, that means bigger than 12 inches.
- Now, with the wrong side of the front fabric piece face up, draw in the first dowel’s placement. Remember, you’ll have a seam allowance and hem at the bottom, so add 3 inches to the bottom gap (2 ½ inch hem + ½” seam allowance). Our total is now 10 (7+3).
- At this point, you can go ahead and measure the placement of the other dowels, using the first dowel as a reference.
Adding the Dowel Casing
- To make casings for your dowels, cut 2” strips that are the same width as the lining. Cut out one strip per dowel.
- Fold each strip in half, iron, and sew the open side length closed with a ¼” seam allowance.
- Next, cut your stitch witchery to the length of the strips. Cut one strip of stitch witchery for each strip.
- Now lay your stitch witchery in place where you marked the dowels, with the sewn strips lined up on top. Iron in place so the strips stick.
- After the strips are adhered, slide the dowels into place.
- Now you can take out the pins holding the side seam allowances in place. Clip the bottom corners and carefully flip the fabric pieces and dowels so the shade is right side out. If you need, use scissors to help turn the corners. Adjust and straighten everything and iron the seams so everything is nice and flat.
- With the shade right side out, hem up the bottom (end with the finished seam) 2 ½”. Press and sew in place. If you don’t want your stitches to show on the front, you can hand stitch it in place or use a blind hem stitch on the machine.
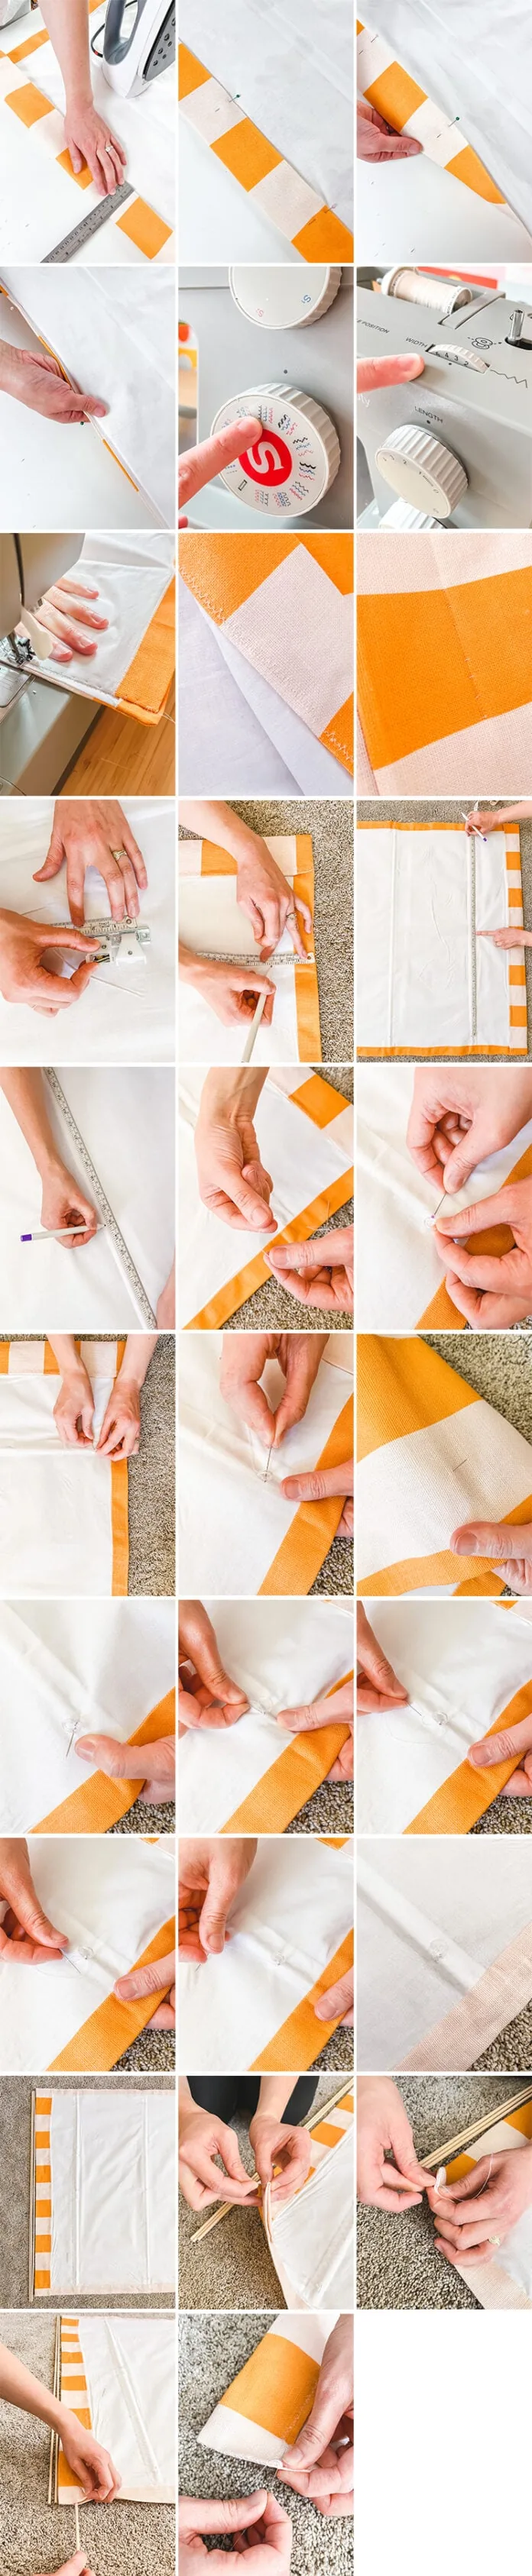
Measuring the Ring Placement
- You’ll add three rings to each dowel: one on each end, and one in the center.
- To calculate the placement, put the cord lock and pulley together so they overlap one screwhole. Measure from the cord lock base to the spot where the cord comes up through the pulley (Roughly 2 ½”).
- Now, mark 2 ½” in from the end of each dowel. A ring will go in each of these spots you’ve just marked.
- For the middle rings, simply measure halfway between each dowel and mark. If you have 4 dowels, you should now have 12 ring markings total.
Sewing the Rings in Place
- Now hand sew the rings in place according to the markings. To do this, bind the thread around the dowel a few times without catching the front fabric piece with the needle. On the third or fourth time around, catch the front fabric piece in the needle. Then poke the needle back through to the back side, tie off your thread and trim.
- Repeat step 1 for each of the rings. Note: make sure the rings are all facing the same direction, with openings pointing downwards so the string can be threaded through seamlessly.
Attaching the Roman Shades Hardware
- To attach the hardware for the roman shades, you’ll first need to mark where it needs to go. To do this, take the wooden board and line it up with the top row of rings you just sewed. Mark the placement of the rings on the board with a pencil.
- Now, take one of the three pulleys and line the right side of it up with the right ring marking on the board. Mark the two screw holes.
- Repeat step two for the middle pulley.
- Now for the far left side. This one will be a little different, since you’ll need both the cord lock and a pulley this time. For this, line up the cord lock with the left edge of the board with the straight edge on the inside (the diagonal edge should be on the outside, closest to the edge of the board). Mark the screw holes.
- Next, line up the last pulley with the cord lock so they share a screw hole. Mark the pulley placement.
- All that’s left now is to drill pilot holes, then screw the pulleys in place where you marked them.
- In addition to the holes for the pulleys and cord lock, you’ll also want to drill two or three more holes all the way through the board. These will be used to screw the roman shades into place on the window.
- Now, with all hardware in place, it’s time to staple the board to the fabric. Measure up from the bottom of the shade and mark the window height. Line up the board with the window height markings, then wrap the excess over the board and staple in place.
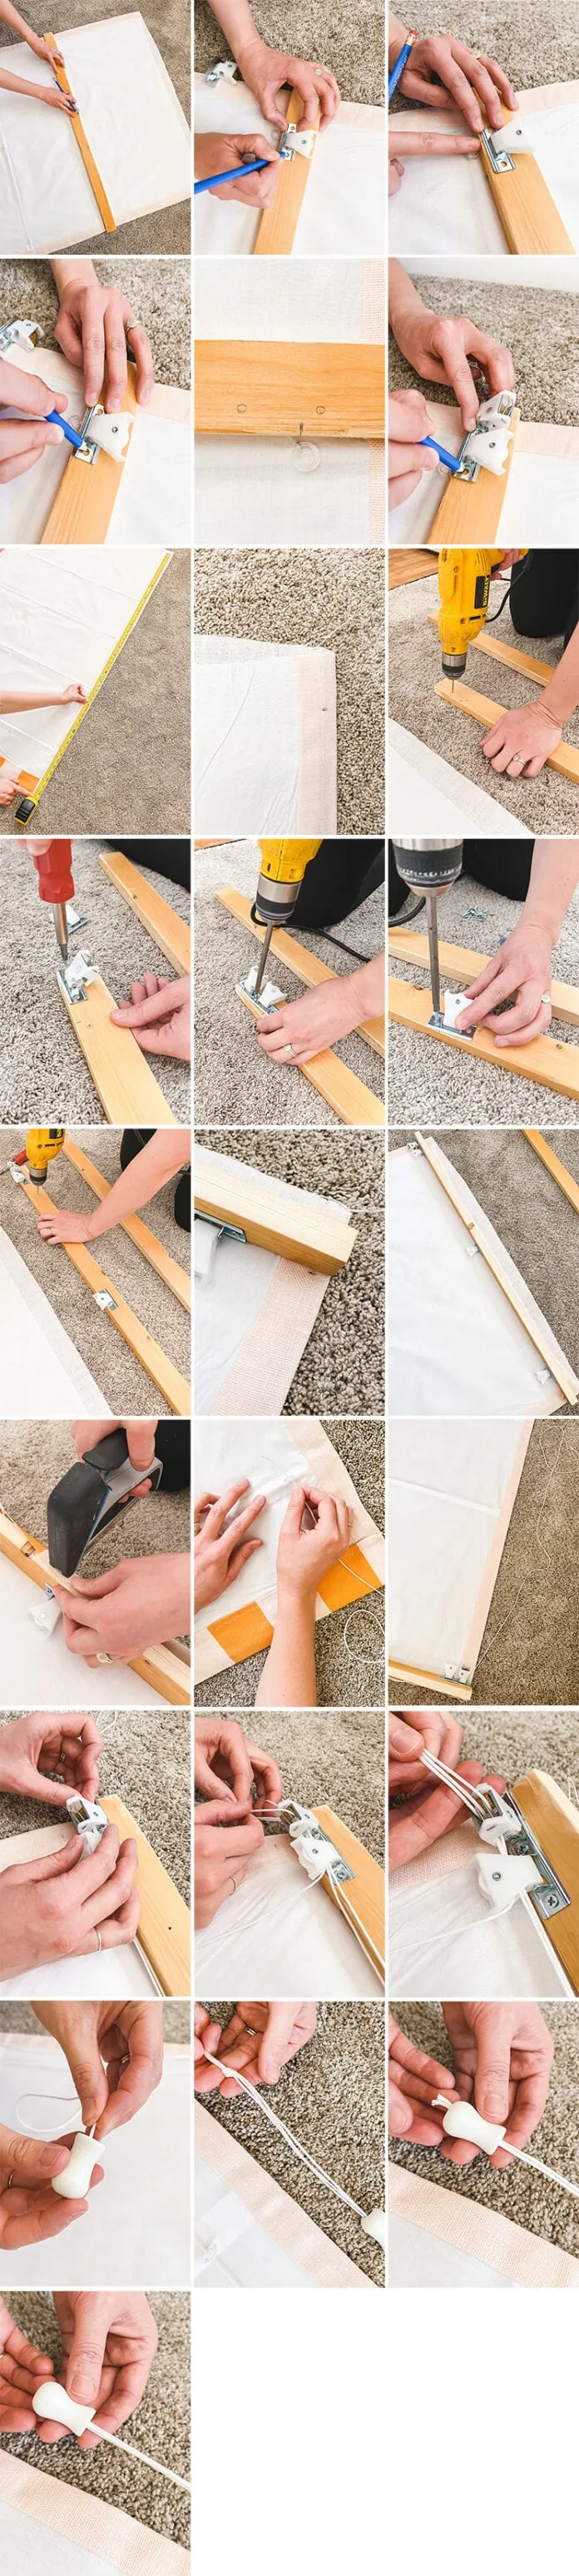
Adding the Cording
You’re almost done with your roman shades! Just a few more steps to go. Here’s what’s left:
- The last thing to do is to add the cording and tidy things up.
- To add the cording, feed the cording up through the rings in the far right row. Tip: to thread the cord through a bit easier, wrap a bit of tape around the end so it doesn’t fray.
- When you get to the pulley at the top, feed the cord through the right side and pop it out the opposite side. Repeat for the middle pulley.
- When you get to the far left pulley and cord lock, thread the cord through the pulley as with the other two. Then thread it down the cord lock from the top and pull it through when it pops out the bottom. Pull the cord so there are a few feet of slack. Then clip the cord back by the first ring you started with and tie a knot to secure it to the ring.
- Repeat the same process for the remaining two cords. Note: there will be three separate slots to slip the cord through. Make sure each separate cord goes through a different slot, individually.
- Once all cords have been threaded through, trim them to the finished length you like. Now, thread them through the pull end, knot them all together, and hide the knot inside of the pull end.
- Pull the cord to test out your shades and make sure they’re working right and voila! Your roman shades are finished!