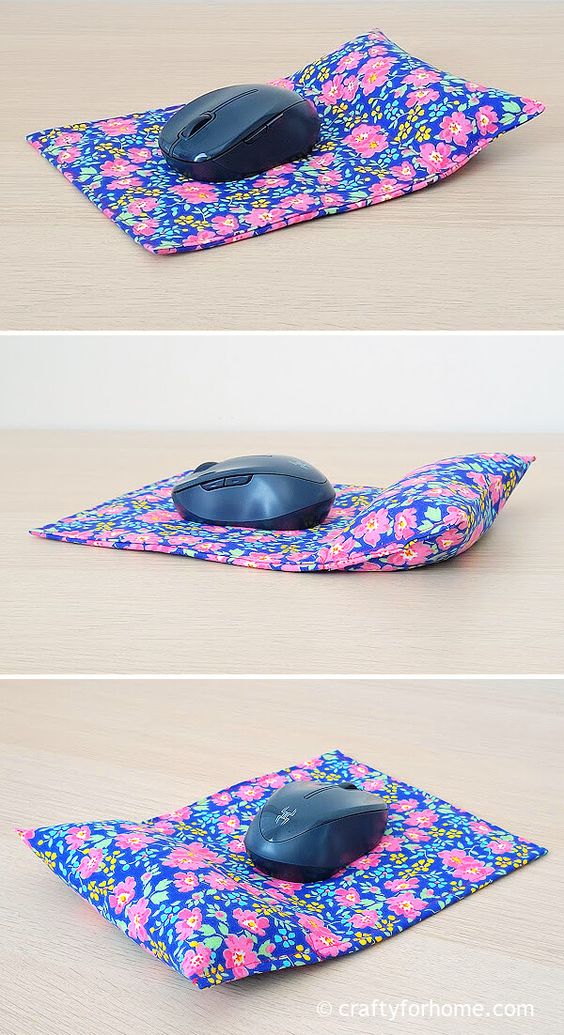
DIY Mouse Pad with Wrist Rest
Are you tired of using a plain, boring mouse pad that offers no comfort or style? Why not take matters into your own hands and create a DIY mouse pad with a built-in wrist rest? Not only will this project allow you to unleash your creativity, but it will also provide you with the ultimate ergonomic solution for those long hours spent in front of the computer. This fun and easy project will not only enhance the aesthetics of your desk but also provide you with the ergonomic support your wrists deserve.
Materials needed:
- 1 piece of 8″ x 13″ fabric
- 1 piece of 8″ x 9″ fabric
- 2 pieces of 6.5″ x 8″ fusible fleece
- 1 piece of 7″ x 8″ fabric for the rice pouch
- 1 cup of uncooked rice, or as much as needed to fill the pouch
- Disappeared ink fabric marker, I use the dual-purpose fabric marker
- Pins or quilting clips
- Scissors
- Thread
- Ruler
- Chopstick
- Sewing machine
- Ironing machine
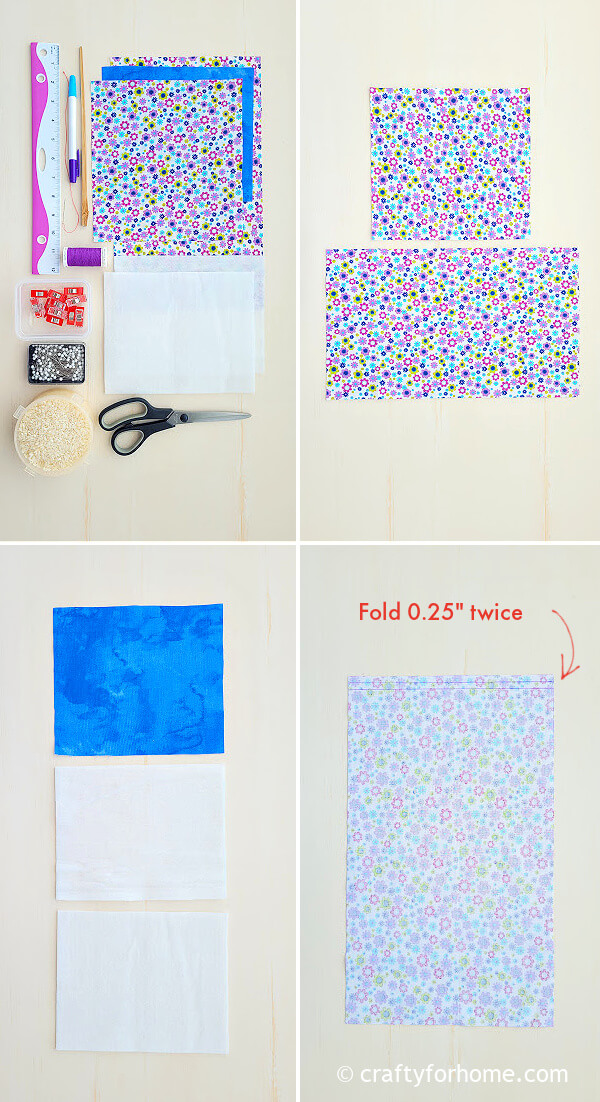
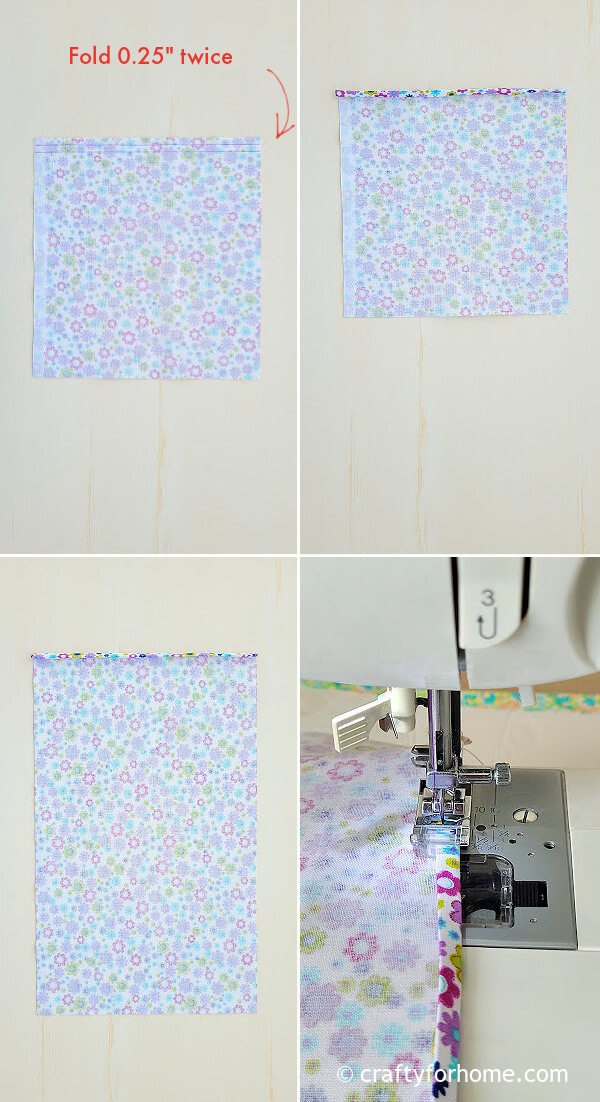
On the wrong side of both fabrics, fold one of the short edges 0.25″ inward, then fold them again 0.25″, press it with an ironing machine, and topstitch the hem on both fabrics.
Put the fusible fleece on both fabrics from the no-folded short edge. Press it with an ironing machine to fuse it.
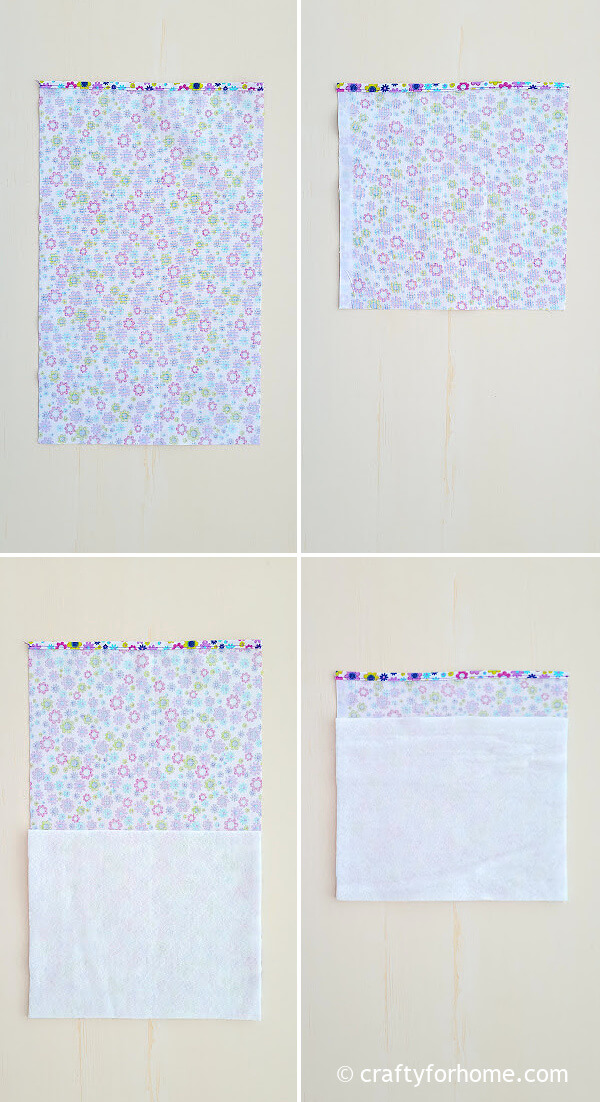
Mark 3.25″ on the wrong side of the larger fabric from the folded edge. Turn it up so that the right side of the fabric faces up. Fold the folded edge inward from the 3.25″marking spot.
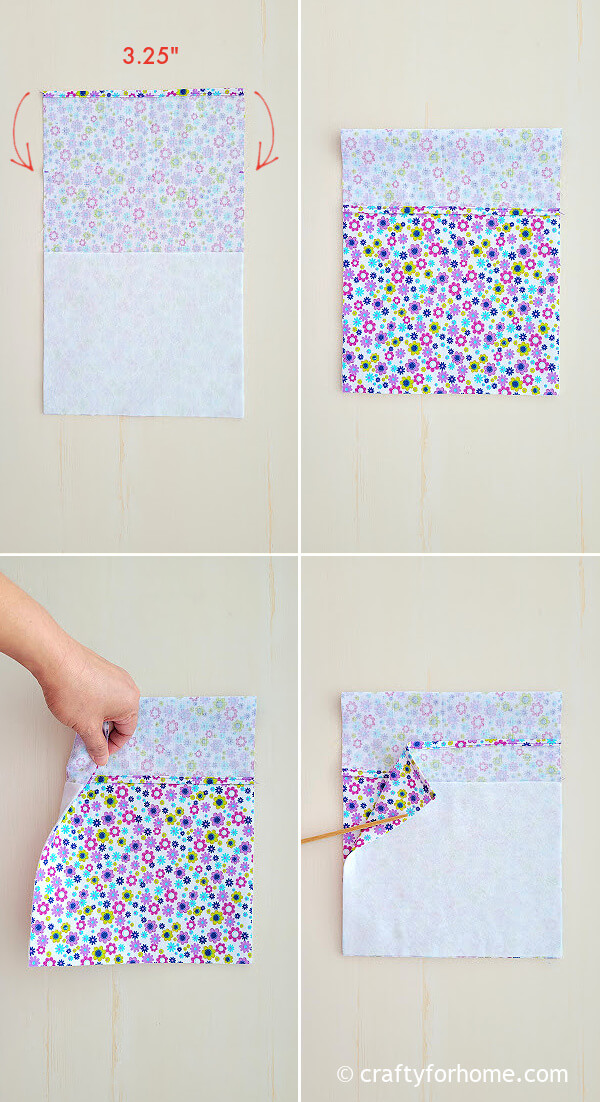
Place the smaller fabric piece with the right side facing down, and the fabric will overlap on both short sides.

Pin the fabric pieces or use quilting clips. Sew along the raw edges with a 0.25″ seam allowance. Clip all four corners to reduce bulk. Turn the fabric right side out through the flap where the fabric is overlapping.
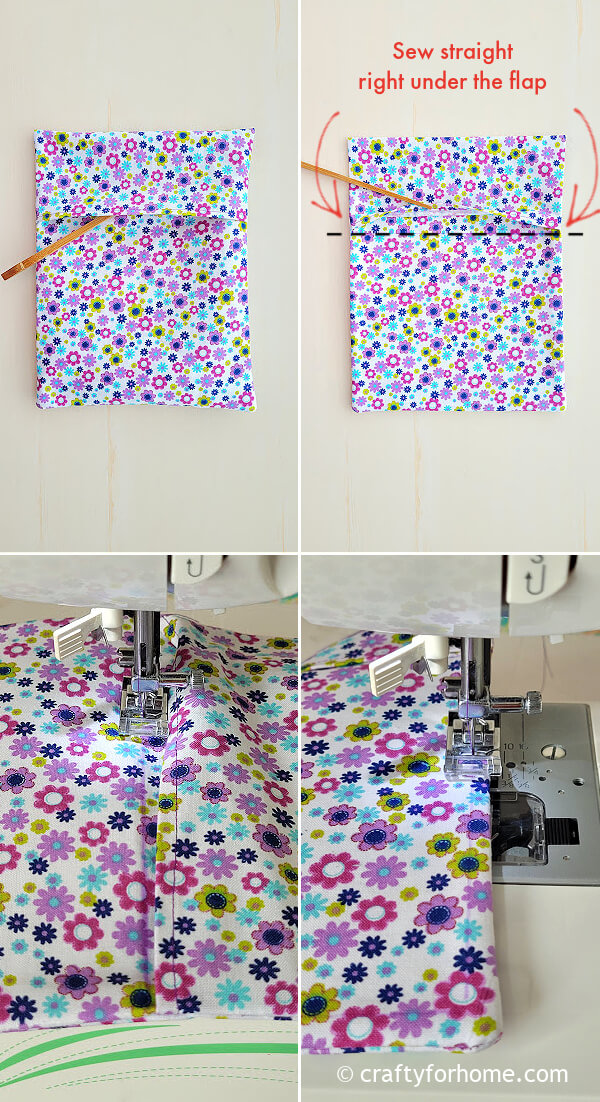
Push each corner with a chopstick. Press the fabric with an ironing machine. Mark the fabric on the fusible fleece edge below the flap. Topstitch the fabric on the marked line. Topstitch the pad along the edge except the flap edge.
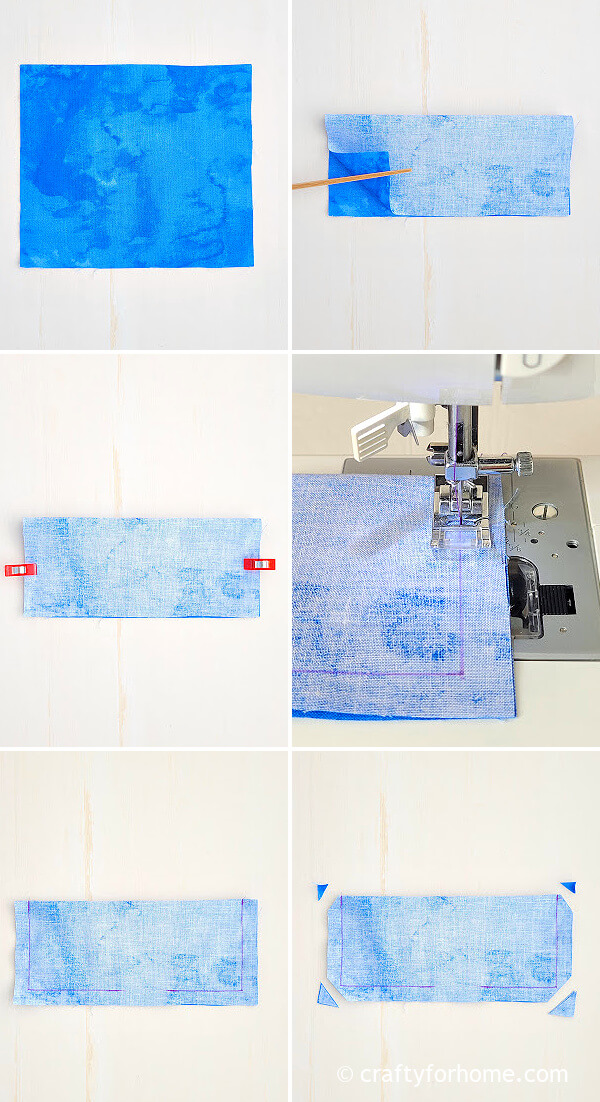
For the rice pouch, put the right side of the fabric facing up and fold it in half lengthwise. Sew along the raw edge with 0.5″ seam allowance, and skip 1.5″ for the opening gap. Clip all four corners to reduce bulk.
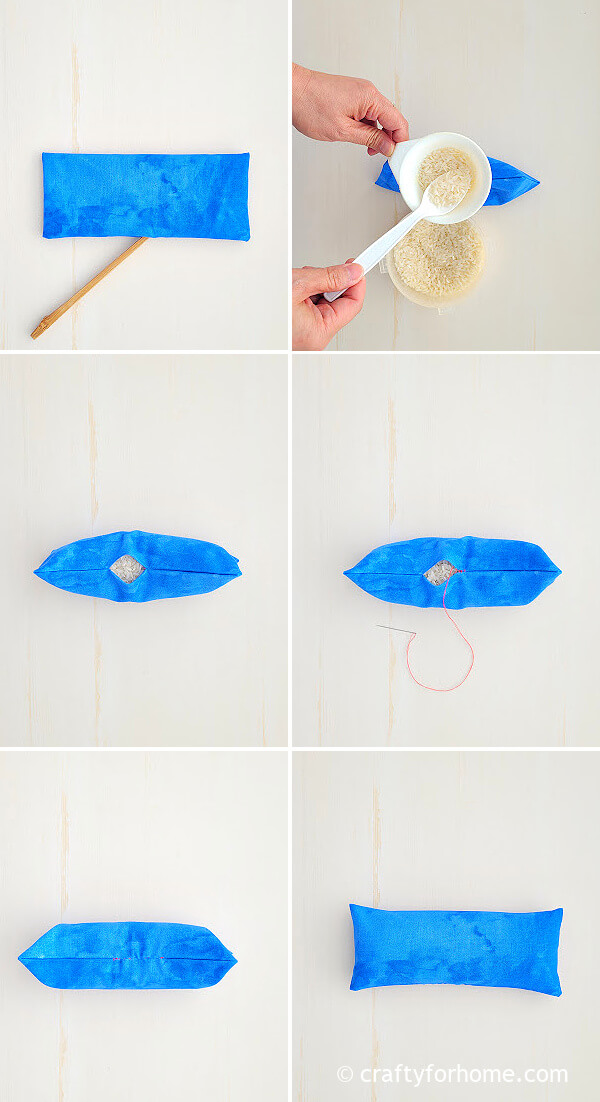
Turn the fabric right side out. Push all corners with a chopstick, then press it with an ironing machine. Fill the pouch with uncooked rice. Use a funnel to put the rice in easily.
Fill the bag as needed until the pouch feels like a nice cushion for your wrist and there is still enough room for the rice to move around. Close the opening gap by using a ladder stitch.
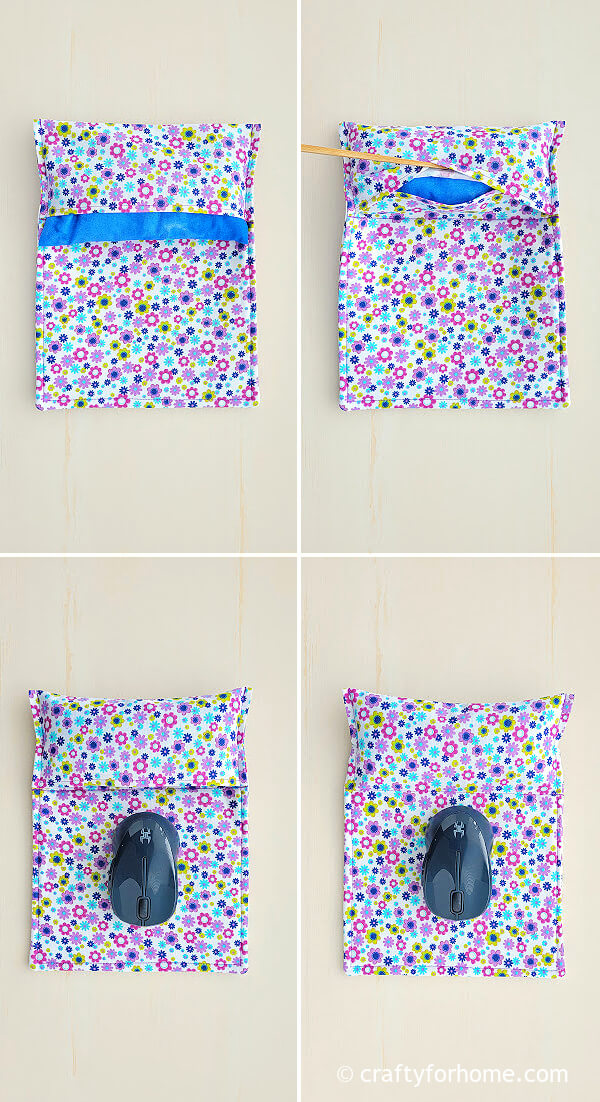
Insert the rice pouch into the overlapping flap. The DIY mouse pad is ready to use now.
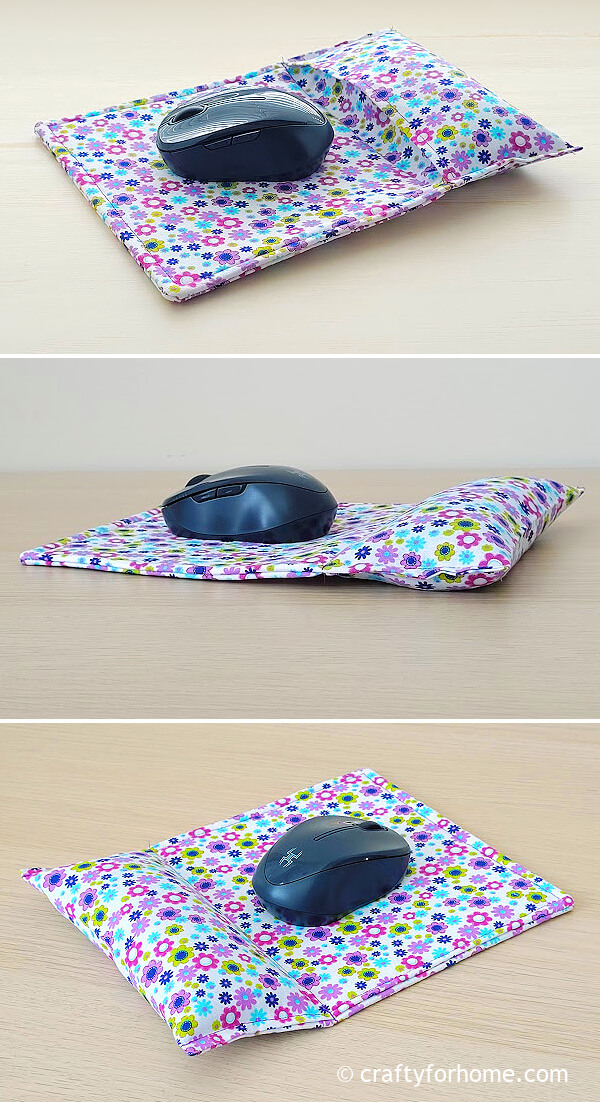
When you need a heating pad for your wrist but also need to work on a computer, warm the rice pouch in the microwave for up to 3 minutes.
The rice will be hot. Then, carefully put the pouch back into the mouse pad flap. The removable pouch allows you to keep using it or use the mouse pad only when working on the computer.
Notes: Warming the rice pouch in the microwave is optional. Pollyfill stuffing or beads are NOT microwavable.