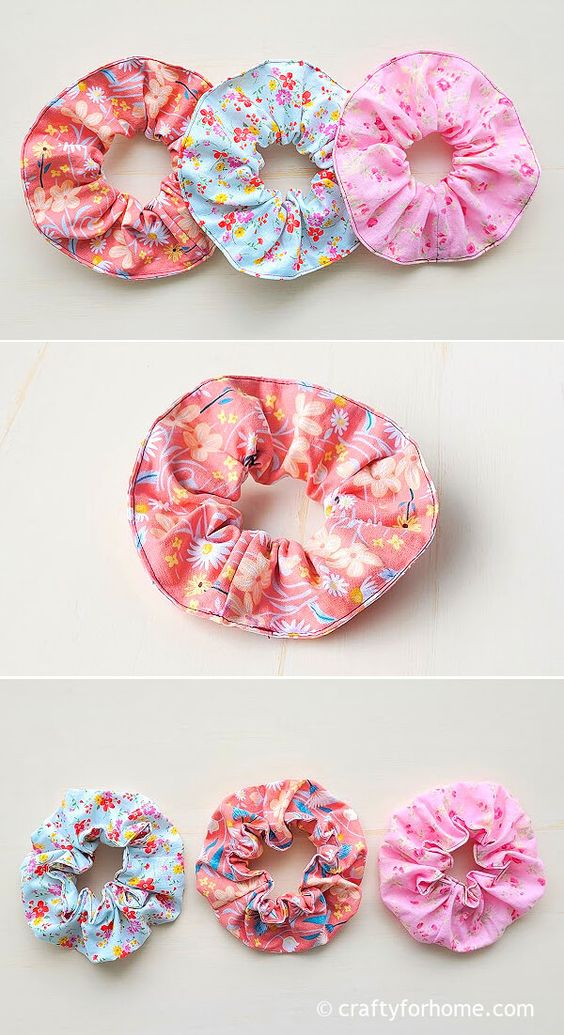
Hair Scrunchie Sewing
Discover the perfect sewing pattern to create your very own hair scrunchie! This versatile accessory is a must-have for anyone looking to add a touch of style and flair to their hair. With this sewing pattern, you'll be able to customize your scrunchies to match any outfit or mood. With this sewing pattern, you'll have the freedom to experiment with different fabrics, colors, and patterns, allowing you to create a collection of unique and stylish hair scrunchies that are truly one-of-a-kind. Whether you prefer bold and vibrant prints or subtle and elegant designs, the possibilities are endless. Not only will you be able to make scrunchies for yourself, but you can also gift them to friends and loved ones, spreading joy and fashion-forwardness wherever you go.
Materials needed:
- 1 piece of 18″ x 5″ fabric
- 1 piece of 8″ elastic size 1/4″ wide
- Pin or quilting clips
- Disappeared fabric marker, I use the dual-purpose fabric marker
- Safety pin
- Thread
- Ruler
- Sewing machine
- Ironing machine
Steps:
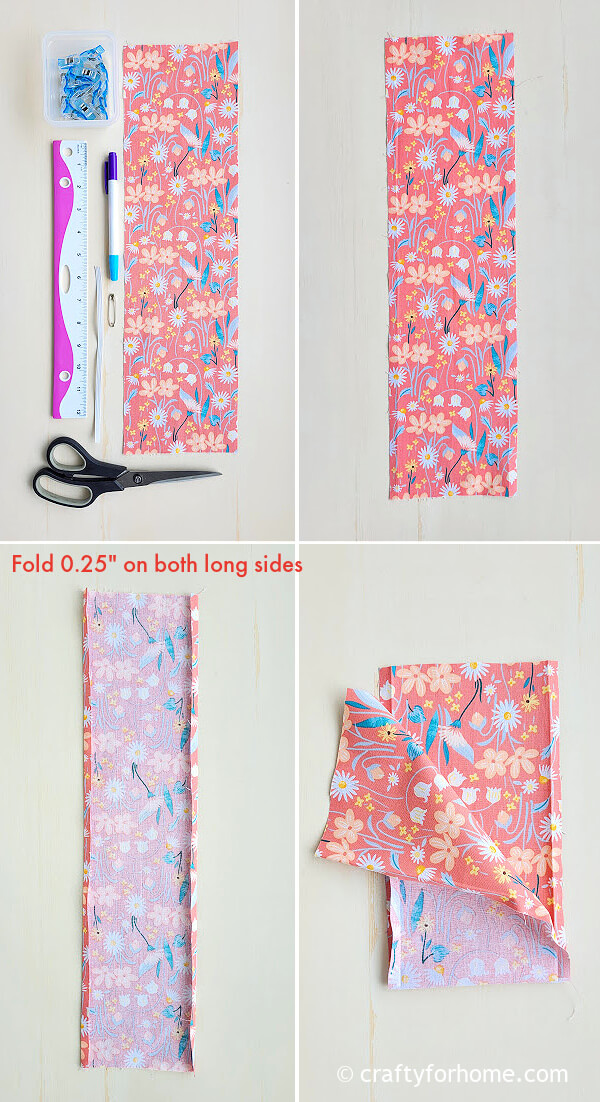
With the wrong side of the fabric facing up, create a tiny hem by folding both raw edges 0.25″ along both long sides inward. Press the fold with an ironing machine.

With the right side of the fabric facing up, fold the fabric in half shortwise and pin the raw edge together along the short side. Sew along the short side 0.25″ from the edge. The fabric would resemble a loop.
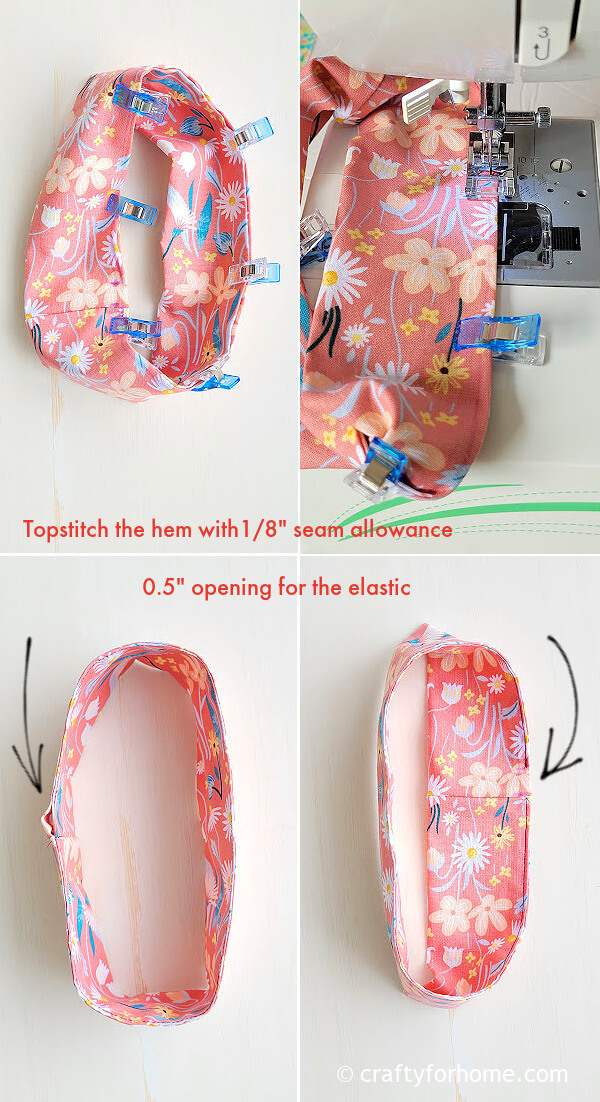
Fold the fabric in half and pin both long edges along the pressed fold so that the right side of the fabric is outside. Sew along the hem with a 1/8″ seam allowance, and skip 0.5″ for the opening to insert the elastic.
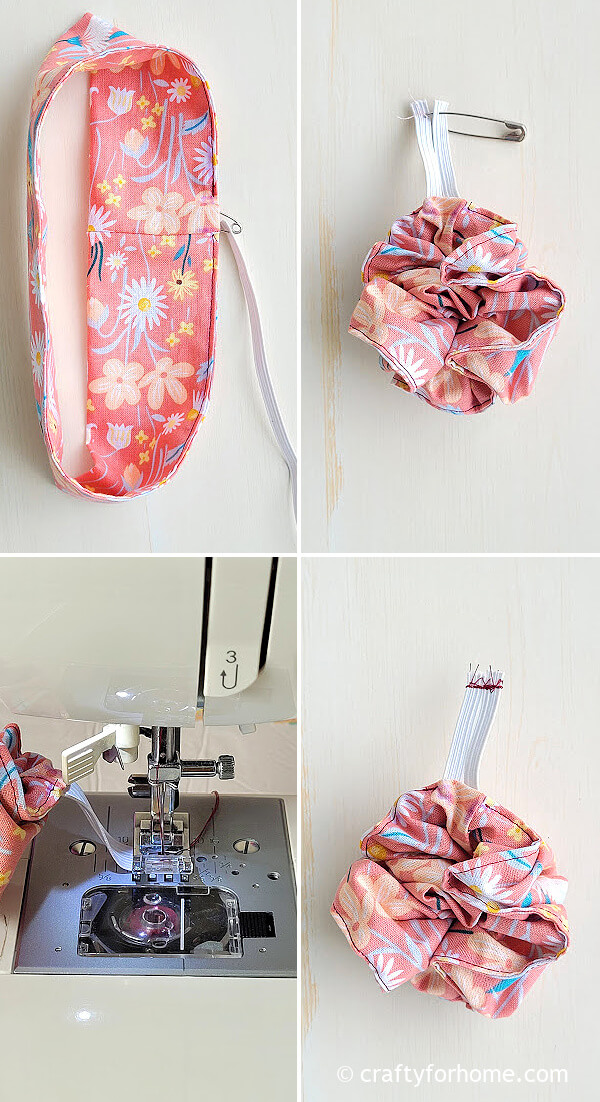
Attach the safety pin to one end of the elastic. Thread the elastic through the opening. Remove the safety pin, keep both ends of the elastic together, then straight stitch or zigzag stitch the elastic.
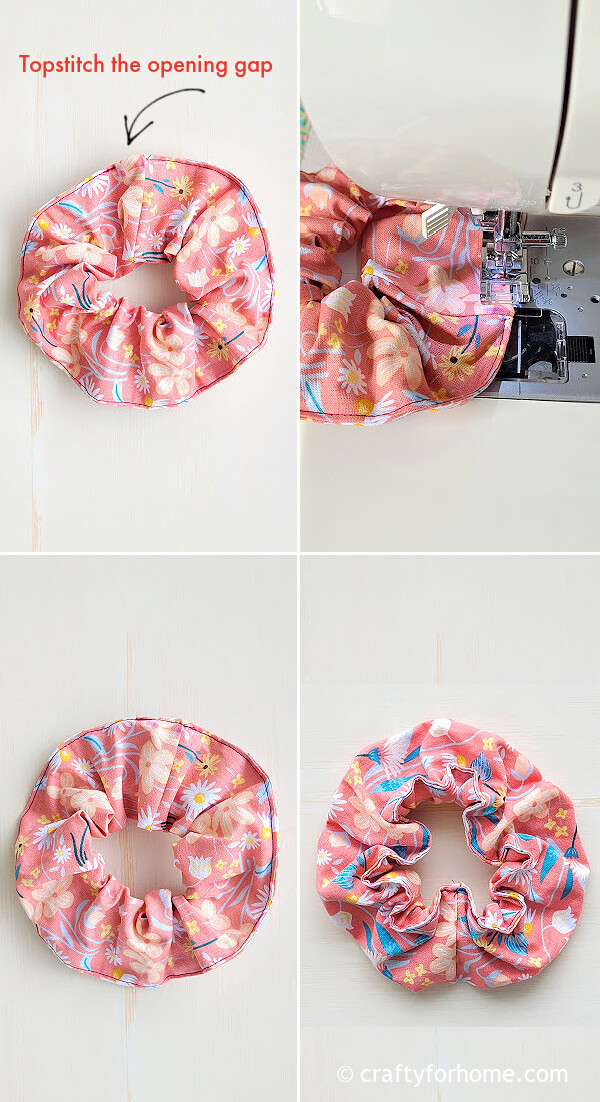
Topstitch the opening to close it. The hair scrunchie is ready to use now.
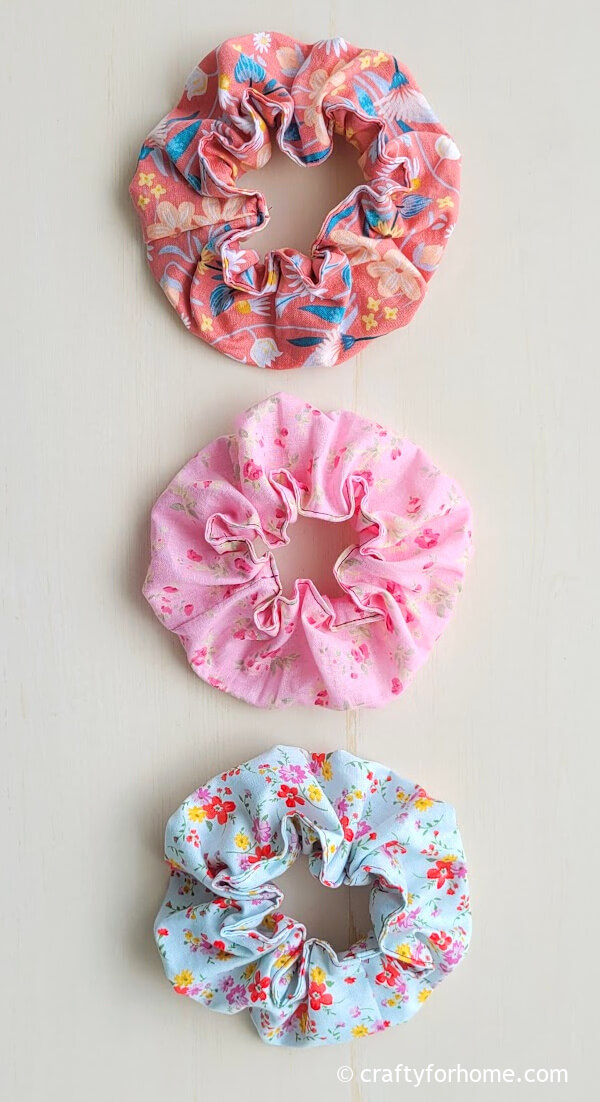
The scrunchie has two sides, depending on your preference. The stitched edge can be the inner side, so the outer side looks fluffy.
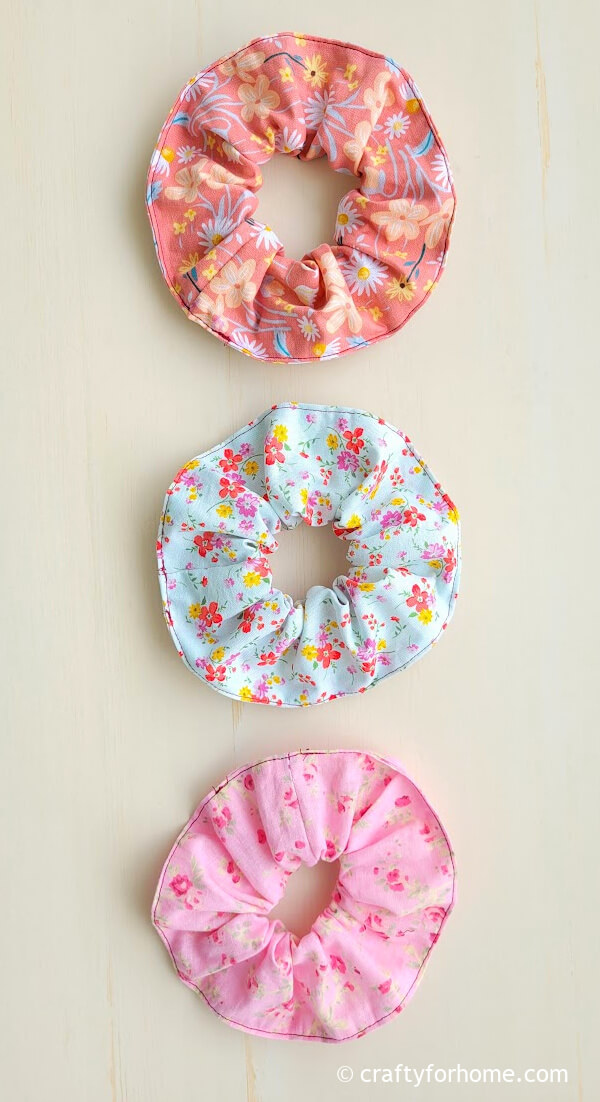
Or, you can adjust the elastic placement so that the fluffy look would be the inner side and the stitched edge would be the outer side, resembling a single flower petal.