Colorful Painted Seashells
These painted seashells are not only visually stunning but also serve as a reminder of the beauty and diversity of the natural world. They offer a glimpse into the imagination and creativity of the artists, who have found inspiration in the delicate curves and textures of the shells. Whether displayed in a gallery, adorning a beach-themed room, or simply treasured as a keepsake, these painted seashells are a testament to the transformative power of art. Whether you're a collector, an art enthusiast, or simply someone who appreciates the wonders of nature, these painted seashells are sure to captivate your imagination and transport you to a world where art and nature intertwine in perfect condition.
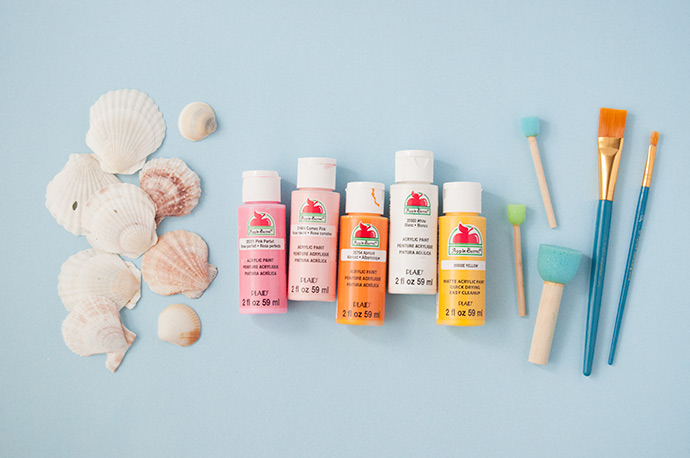
Seashells
Steps:
Step 1
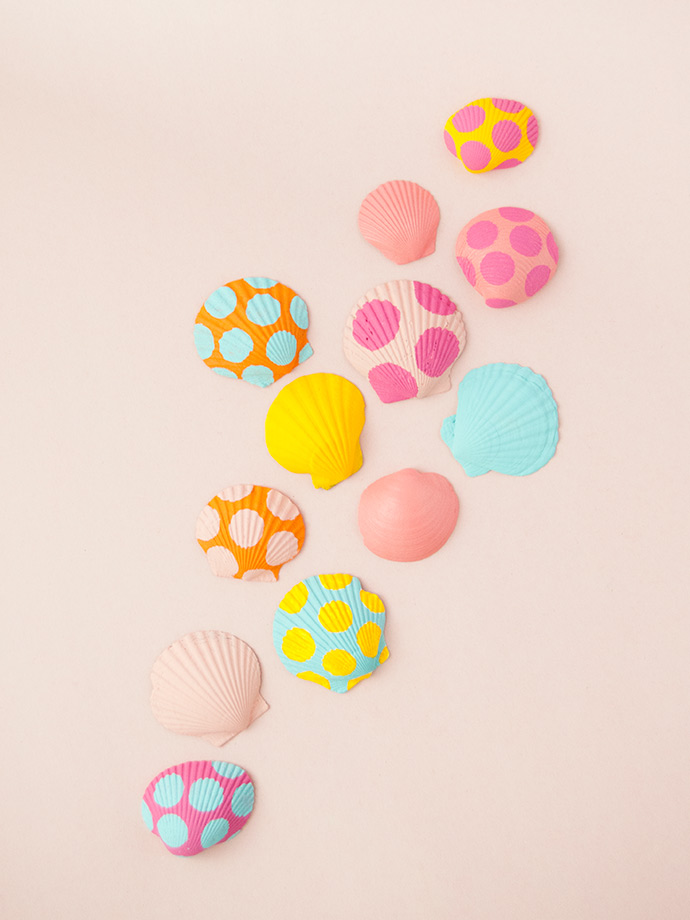
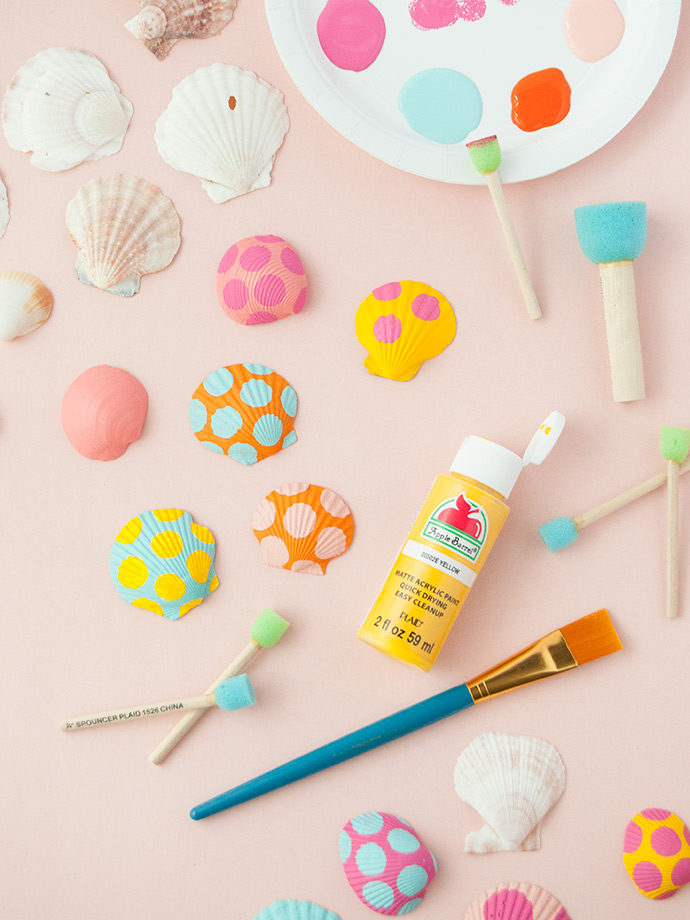
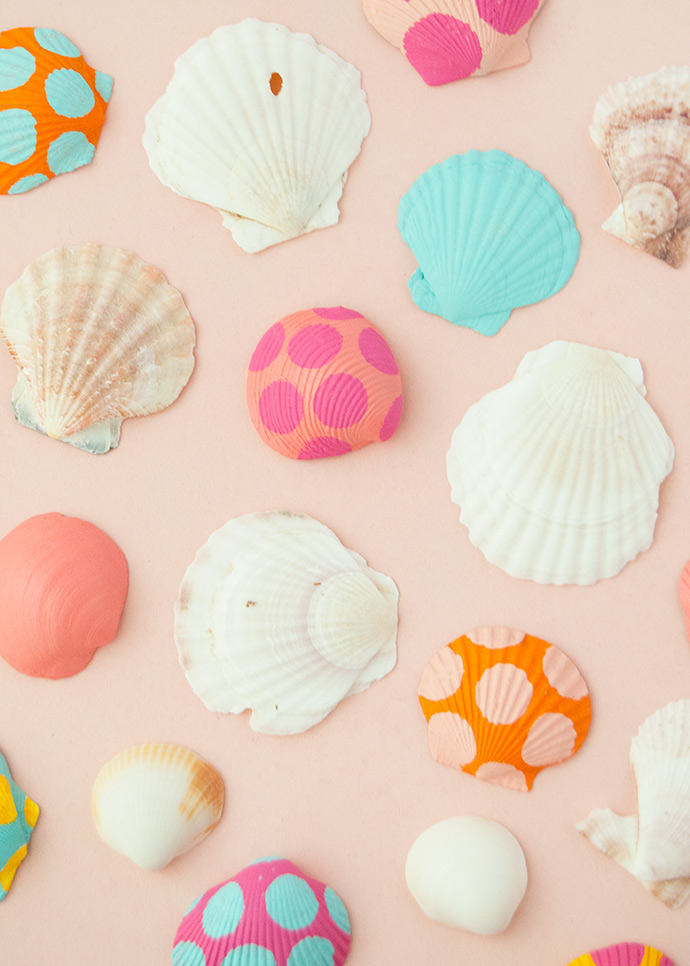
Gently wash your seashell collection in warm, soapy water and dry completely. Once they’re ready, cover your work surface with scrap paper and apply a coat of paint onto each shell. You can paint both sides the same color or mix and match! Depending on the colors of your shells, you may want to apply a couple coats for the best coverage. For white and pale-colored shells, we found that one coat was perfect, but brown shells looked better with a couple coats. Let dry completely.

Step 2
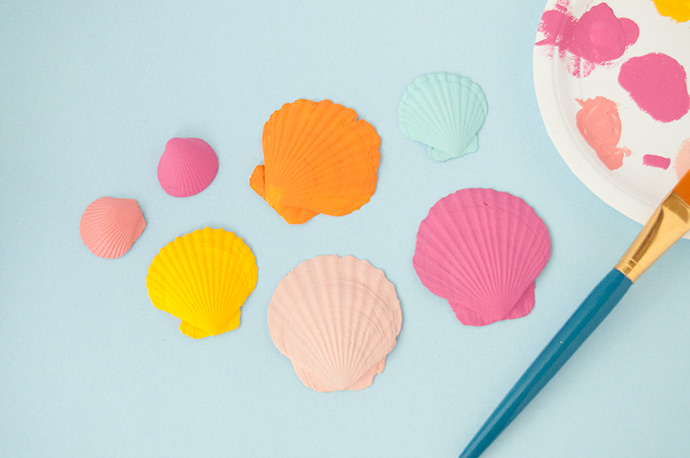
Time to add some fun patterns onto the shells! We used these round foam spouncers to make perfectly round polka dots on the shells. Simply dip the spouncer into paint, dab it a few times on a paper plate or scrap paper to remove any excess, and then press onto the shell, kind of like a stamp. Repeat on as many shells as you like, using different sized spouncers and different colors. You can also paint on other patterns if you like: stripes, squiggles, or even colorblock designs.
Step 3
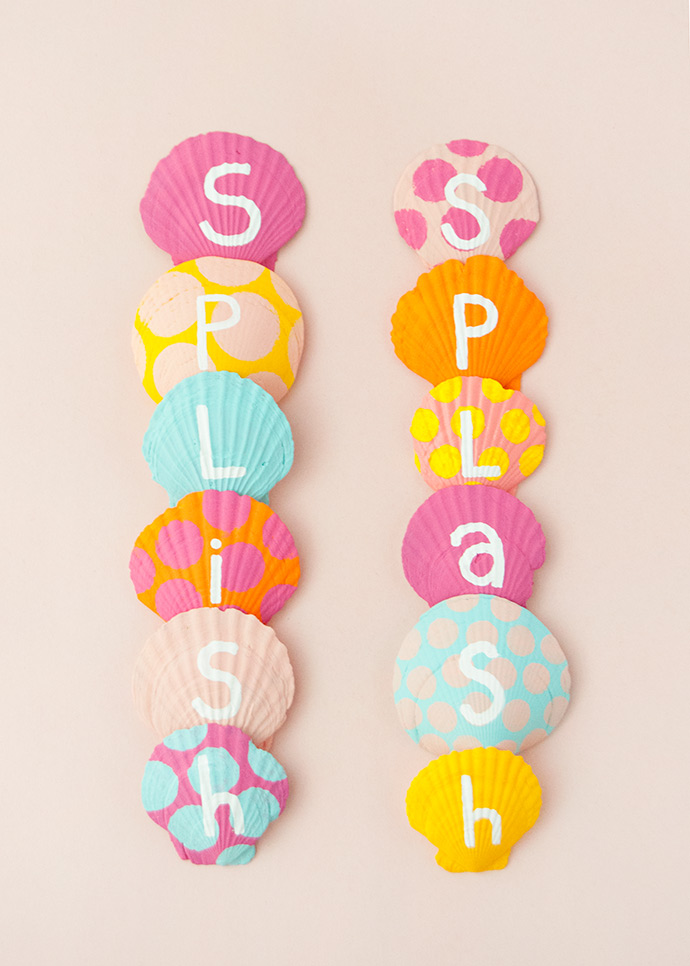
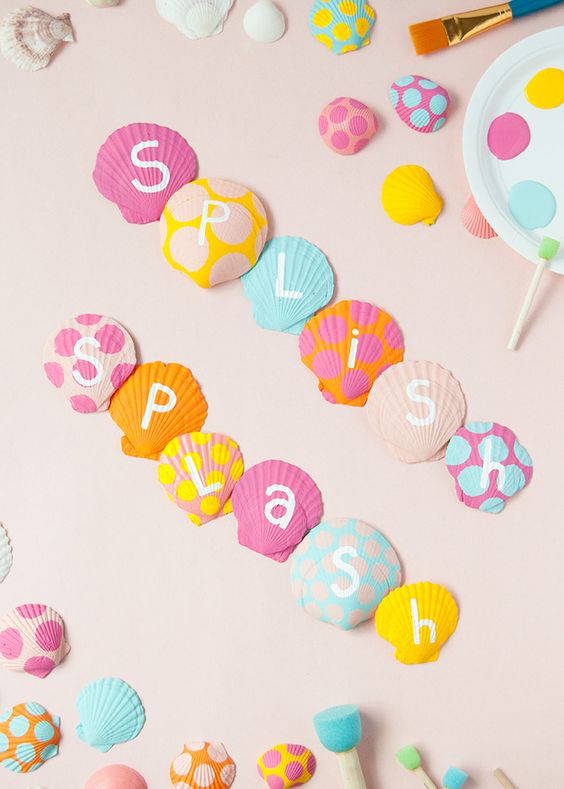
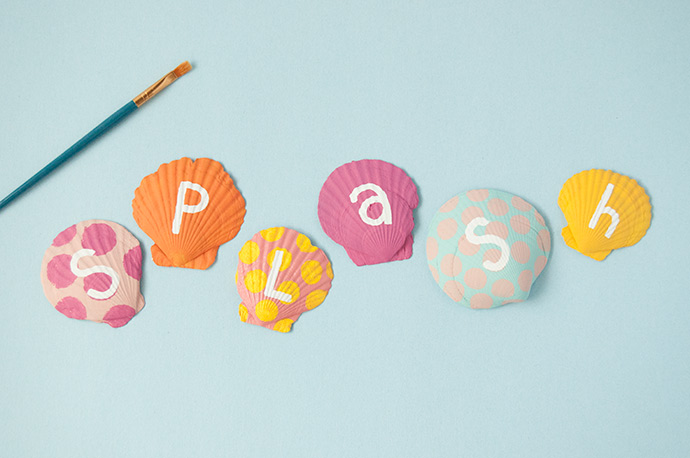
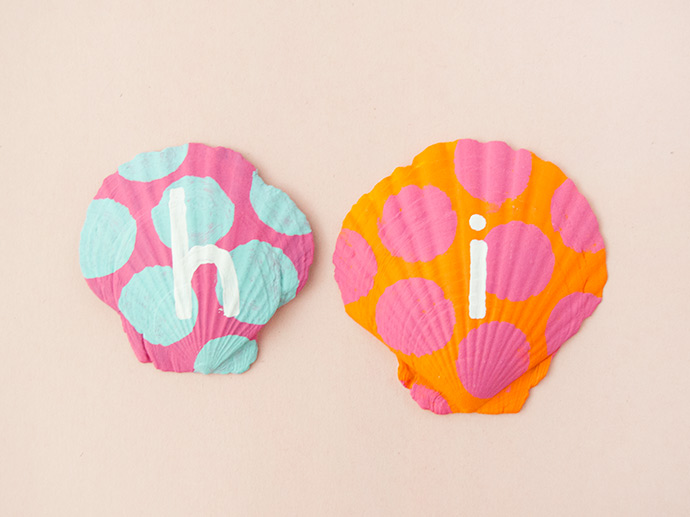
If you want to paint a message on your shells, let the polka dots dry and then use a fine tip brush and a contrasting paint color – we found that white worked nicely with the colors we used here. You can freehand the letters like we did, or use a pencil to draw a guide in first. Let dry.
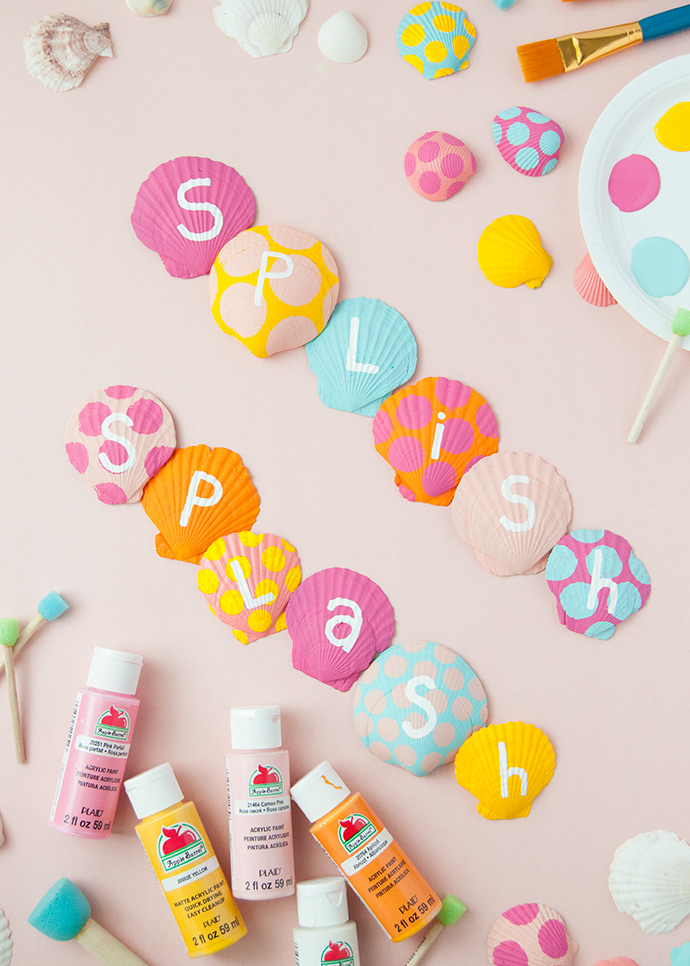
Your shells are ready to go! Attach magnets onto the back to decorate your fridge, glue them onto a blank canvas to use as wall art, or play with them as is.