Easy No Sew Kitchen Towel DIY With Rubber Stamps
Create your own personalized kitchen towels with a fun and easy do-it-yourself project using rubber stamps. Choose your favorite designs or patterns to stamp onto plain white or colored kitchen towels. Make sure to use fabric-safe ink pads to prevent smudging or fading when washing the towels. You can create a repeating pattern or mix and match different stamps for a unique look. These custom kitchen towels make great gifts or add a personal touch to your own kitchen decor. Let your creativity shine with this simple and enjoyable DIY project!
Supplies for Stamped Kitchen Towels
- New Tea Towels: Choose a high quality 100% cotton or linen solid colored kitchen towel as your canvas.
- Rubber Stamps: Select an assortment of rubber stamps that match your kitchen’s theme or personal style. You can find a ton of stamp options from florals & greenery to charming farm animals online or at the craft store.
- Ink Pad: Invest in an acid free, permanent, and waterproof ink pad in a color that complements your towel and stamp design.
- Iron: To seal the stamp print to the towel.
- Fabric Scraps: Choose a small amount of fabric similar to your dish towel material for practice stamping.
Easy Step by Step Tutorial for DIY Kitchen Towels
Step 1: Plan Your Design
Before you begin stamping, visualize your design and how you want it to appear on the towel.
Note: Before stamping your tea towel for the first time, it’s a good idea to practice stamping on a scrap fabric pieces. This will help you decide on the perfect dish towel patterns and the right amount of pressure to apply when stamping.
Step 2: Stamping
Begin stamping your designs onto the towel using your chosen ink color.
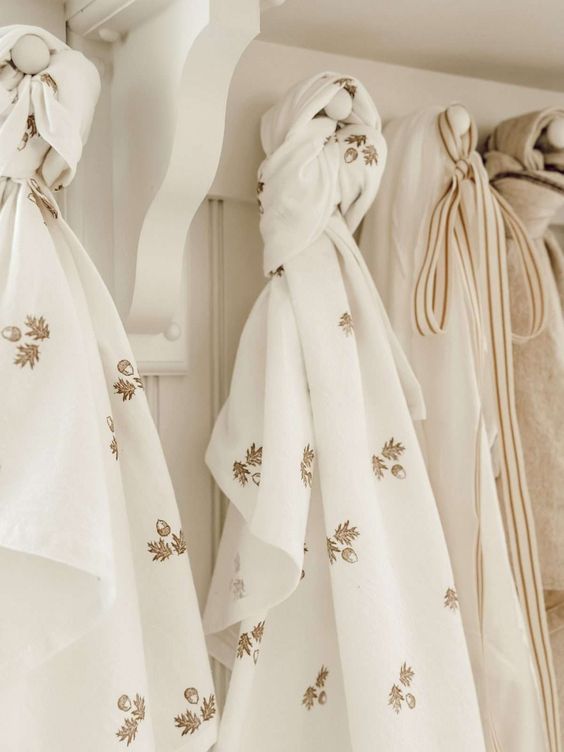
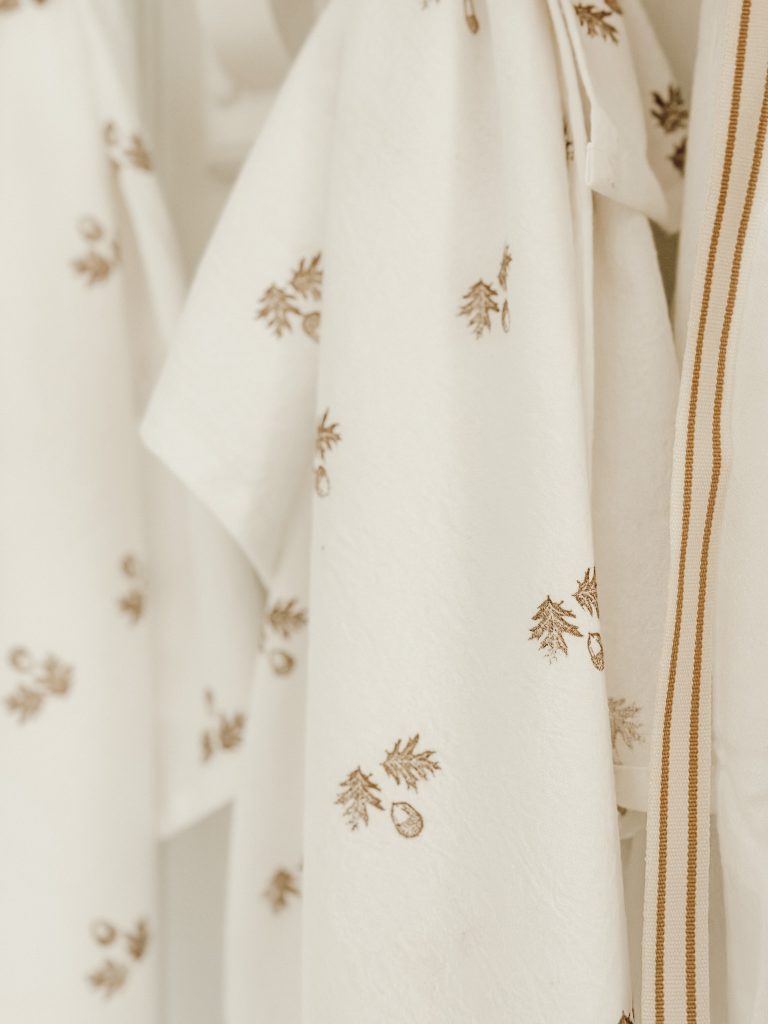
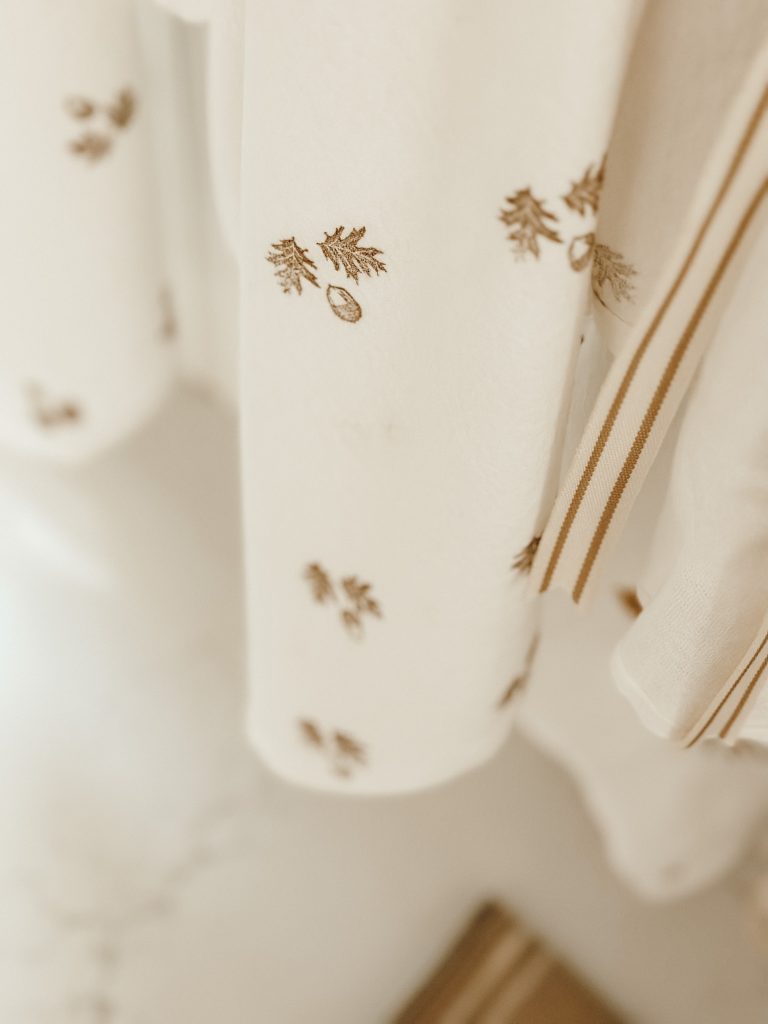
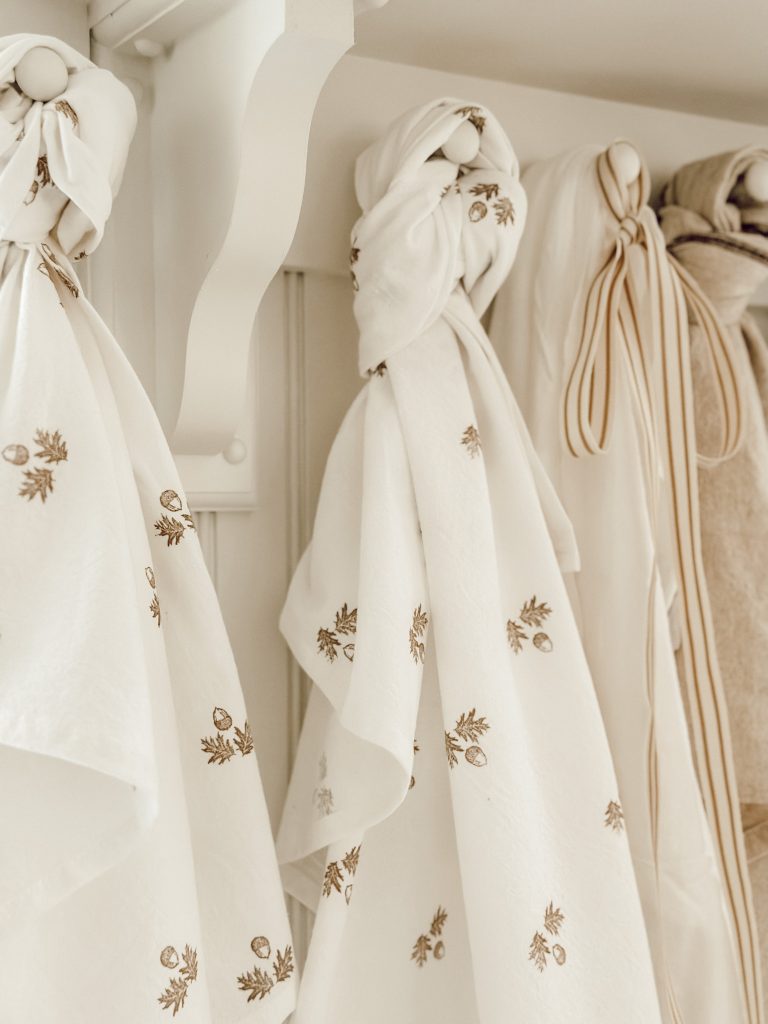
For our fall kitchen towels I wanted a block print pattern, so I decided to stamp 2 oak leaves in opposing directions with an acorn stamped in the middle of the leaves.
When crafting your own kitchen towels you don’t need to worry about perfection. The beauty of each towel lies in it’s uniqueness. No two towels will be the same!
To help with stamp spacing and to create straight lines I used a yard stick.
I began stamping in a vertical line on the bottom of the towel, stamping the oak leaves about 3″ apart, alternating the rows to create a block print. Each row is about 2 1/2″ inches apart.
For the acorn, I alternated those rows as well with one row of the acorn facing down, and the next row the acorn facing up.
Ultimately, the design and pattern you decide upon is completely up to you!
Step 3: Let the Towel Dry
Allow the ink to dry completely, which should take 1-2 hours or you can allow to dry overnight.
Step 4: Iron to Seal
On the highest iron setting with steam, iron your kitchen towel on the side with the stamped design. This will set the ink to the towel.
TIPS
- Test your stamps on a scrap piece of fabric. This helps you get comfortable with the pressure and technique required, ensuring a better outcome on the actual towel.
- Before you start stamping, plan out your design. This will prevent mistakes and help you achieve a balanced look.
- Apply a moderate amount of ink to your rubber stamps. Too much ink can lead to smudging, while too little can result in incomplete or faint designs.
- When stamping, apply even pressure to the entire stamp surface. This helps ensure that the design transfers uniformly onto the fabric.
- Keep some scrap paper or paper towels handy to blot the stamp after inking. This prevents excessive ink from transferring onto your towel, which can lead to smudges.
- Take your time and be patient with each stamping. Rushing can lead to uneven designs and mistakes.