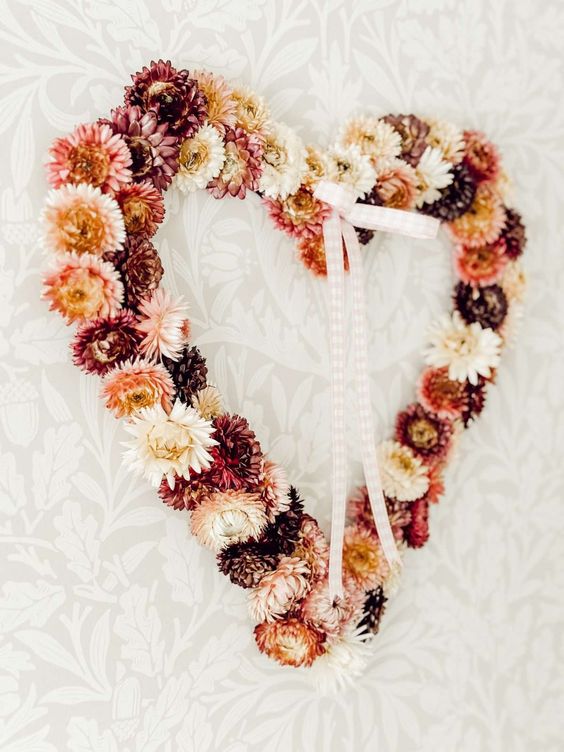
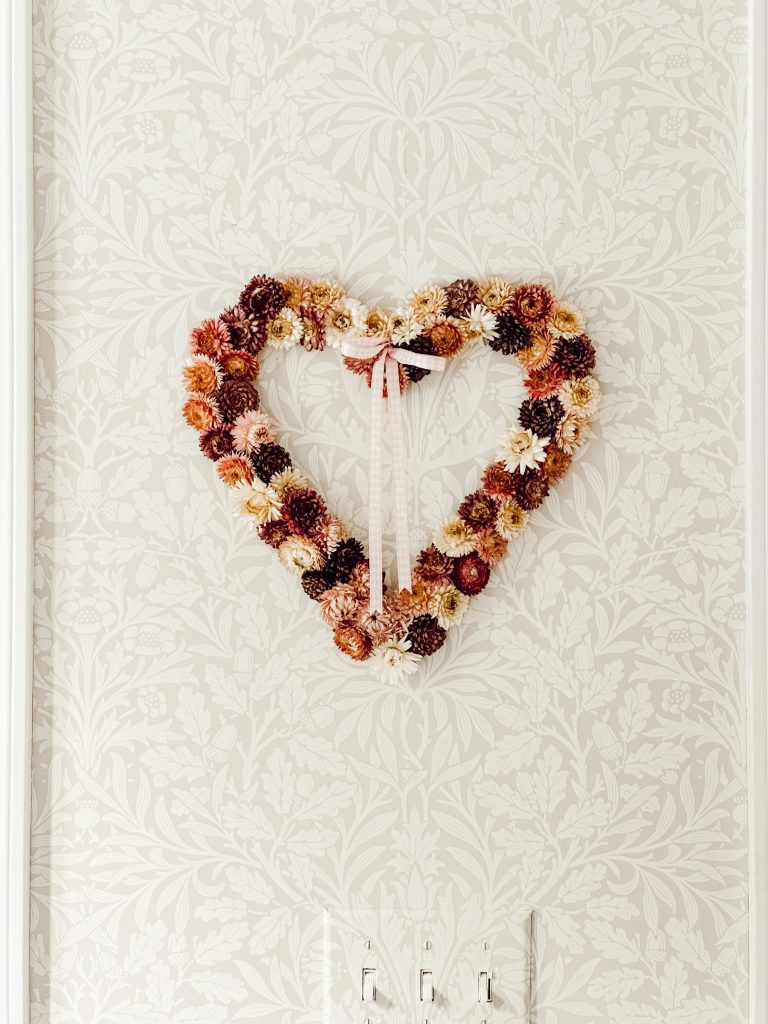
How to DIY a Charming & Rustic Dried Flower Wreath
Create your very own charming and rustic dried flower wreath with a few simple steps. Once you have finished attaching all the flowers, hang your charming and rustic dried flower wreath on your front door or use it as a beautiful centerpiece for your home. Enjoy the beauty of nature in your own handmade creation! This project is sure to amaze your guest once completed. It is a great addition to your home decor and it can be given as a gift to friends and family.
The Supplies You’ll Need to Make This Simple Wreath
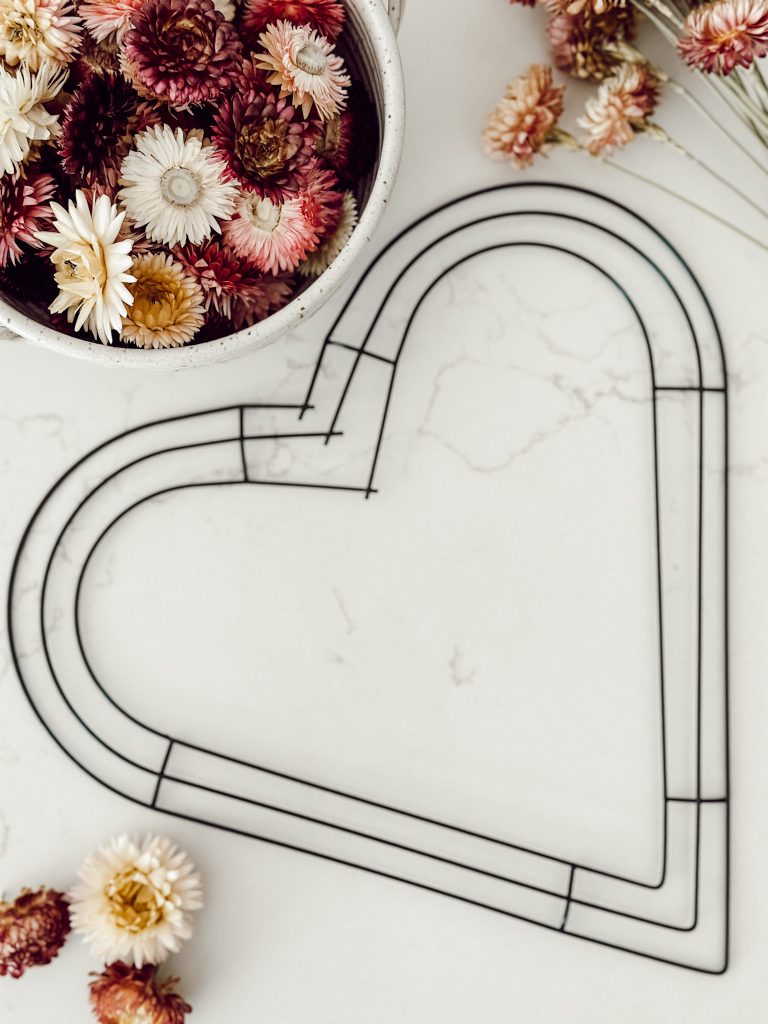
Straw Flowers in Assorted Colors: You could make this wreath with just one color of flower, however I liked the look of the various purples, pinks, and creams combined together. I used about 62 dried straw flowers on a 12″ wreath form.
12″ Wire Heart Wreath Form: The base of the wreath. A grapevine wreath or straw wreath form could also be used as the base for this DIY.
Hot Glue Gun & Glue Sticks
Ribbon: Choose a ribbon you love to complete your dried flower wreath. I had this pink gingham ribbon on hand, and loved the pop of pattern and color it gave to my wreath for Valentine’s Day.
Step by Step Guide to Making Your Own Dried Floral Wreath
Just follow these simple steps and you’ll have a beautiful wreath to hang in your home in no time!
Step 1: Gather Materials & Prep Your Work Space
Gather all of your materials to begin creating the wreath.
Choose an area to work that you won’t mind getting dirty. There will be petals that will fall off the dried flowers and the hot glue can get a little messy.
You could put a drop cloth or even an old tablecloth on your workspace to make cleanup even easier.
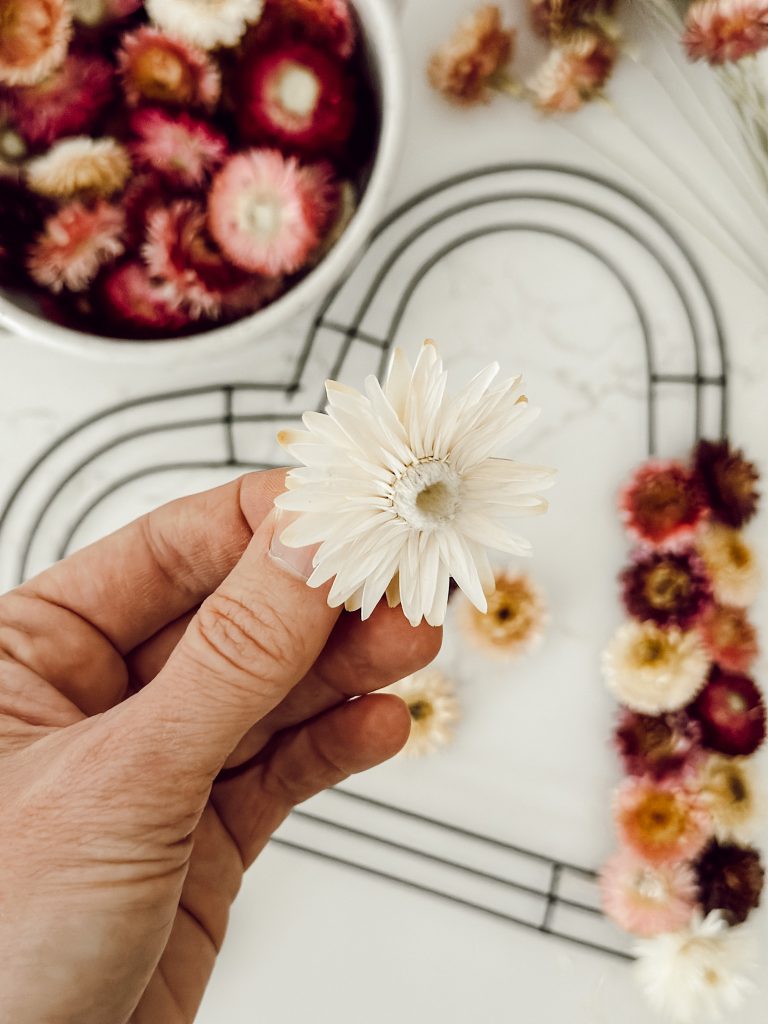
Step 2: Prep the Straw Flowers
If your straw flowers have stems (mine did not) use a pair of snips to remove those and discard.
Separate your straw flowers by color. This will allow you to plan the arrangement and balance of colors on your wreath.
You don’t want too many dark or light colors bunched together, you want the various colors to be evenly distributed.
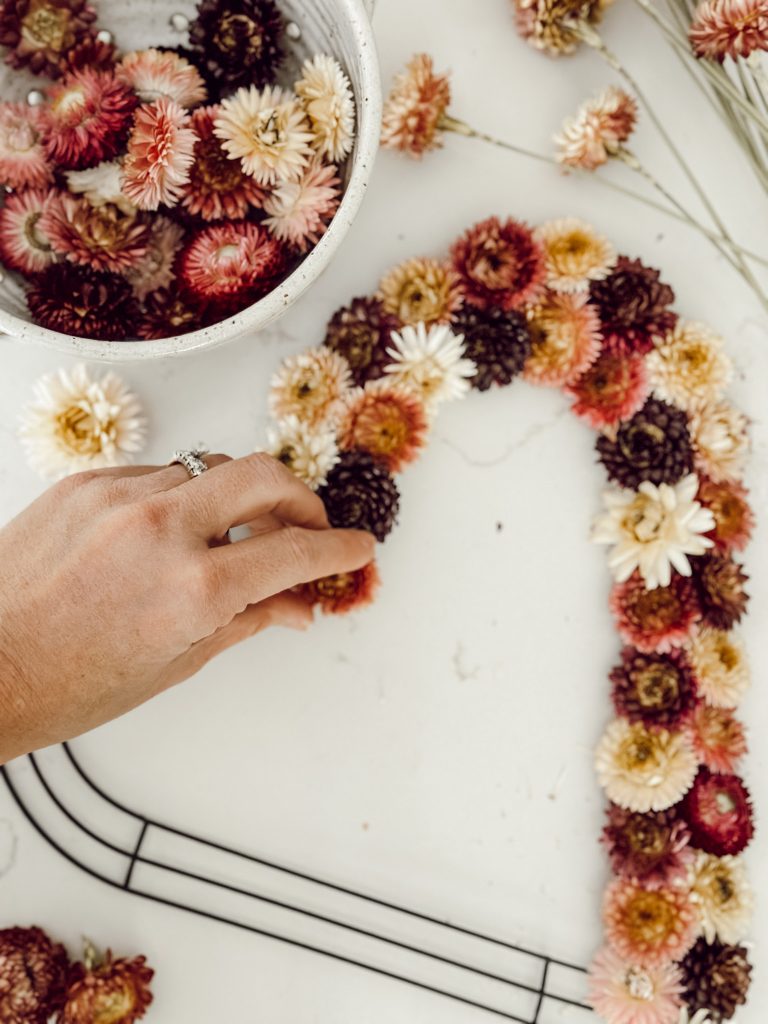
Step 3: Glue Flowers to Wreath Base
Use a hot glue gun to attach each flower carefully to the base.
I liked the look of the back side of the flower best. So, I placed a dab of hot glue on the front, flatter side of the flower and pressed that gently onto the wreath base.
Make sure as you’re adding flowers, to fully cover the wreath base and fill in all empty spots. You don’t want any part of the base showing when your wreath is complete.
Note: When working on your DIY dried flower wreath, keep in mind that hot glue may occasionally drip from the wire base onto your workspace. To protect your surface, consider laying down a protective covering such as drop cloth or an old tablecloth for easy cleanup. I did not do this step, but will definitely do this in the future!
Step 4: Tie a Ribbon
Cut a length of ribbon and tie it in a bow.
Attach the bow with hot glue or floral wire to the top of the wreath or wherever you like the placement.
Step 5: Let the Wreath Dry & Display It
Allow the hot glue on the wreath to dry completely before hanging.
Once dry, find the perfect spot to showcase your homemade wreath!