DIY Book Safe to Hide Your Coolest Valuables
Unleash your creativity and embark on an exciting journey to create a unique and ingenious hiding spot for your most valuable possessions with the remarkable DIY Book Safe. This extraordinary project allows you to transform an ordinary book into a secret compartment, providing an inconspicuous and stylish way to safeguard your coolest valuables. With your DIY Book Safe complete, you can now proudly display it among your collection of literary treasures. No one will suspect that within its pages lies a hidden world, safeguarding your most prized possessions. So go ahead, embark on this thrilling DIY adventure and create a book safe that will not only protect your valuables but also ignite your passion overall.

Skills Required: Beginner. You’re going to be using a craft knife to cut a book and then Mod Podging it. It helps to have previous experience with crafting, but this is sa project anyone can done.
Materials
- Book
- Mod Podge Hard Coat
- Painter's tape
Tools
- Craft knife
- Clamps or clothespins
- Pen or pencil
- Paintbrush
- Ruler
Instructions
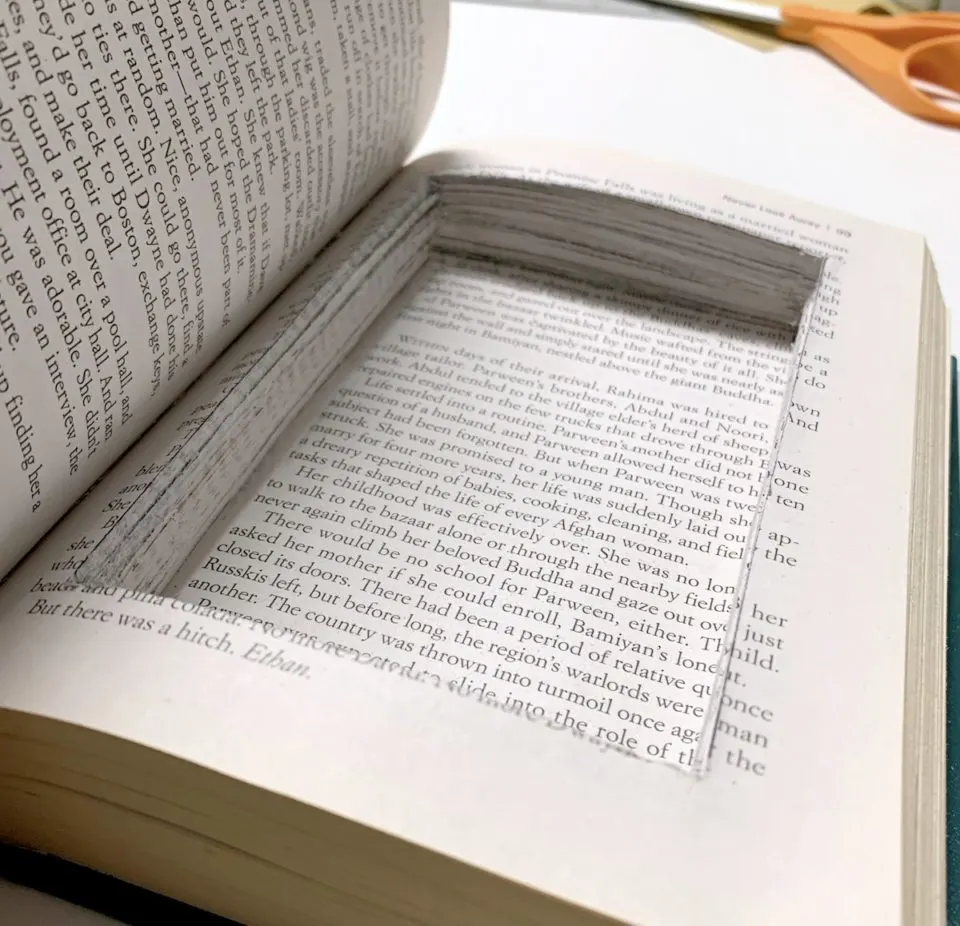
- Decide how deep you would like your safe to be. I mentioned there was about 1 1/2" inches worth of pages in my book. I held about 1/4" worth of pages at the front of the book and then 1/4" worth of pages at the back to be the bottom.
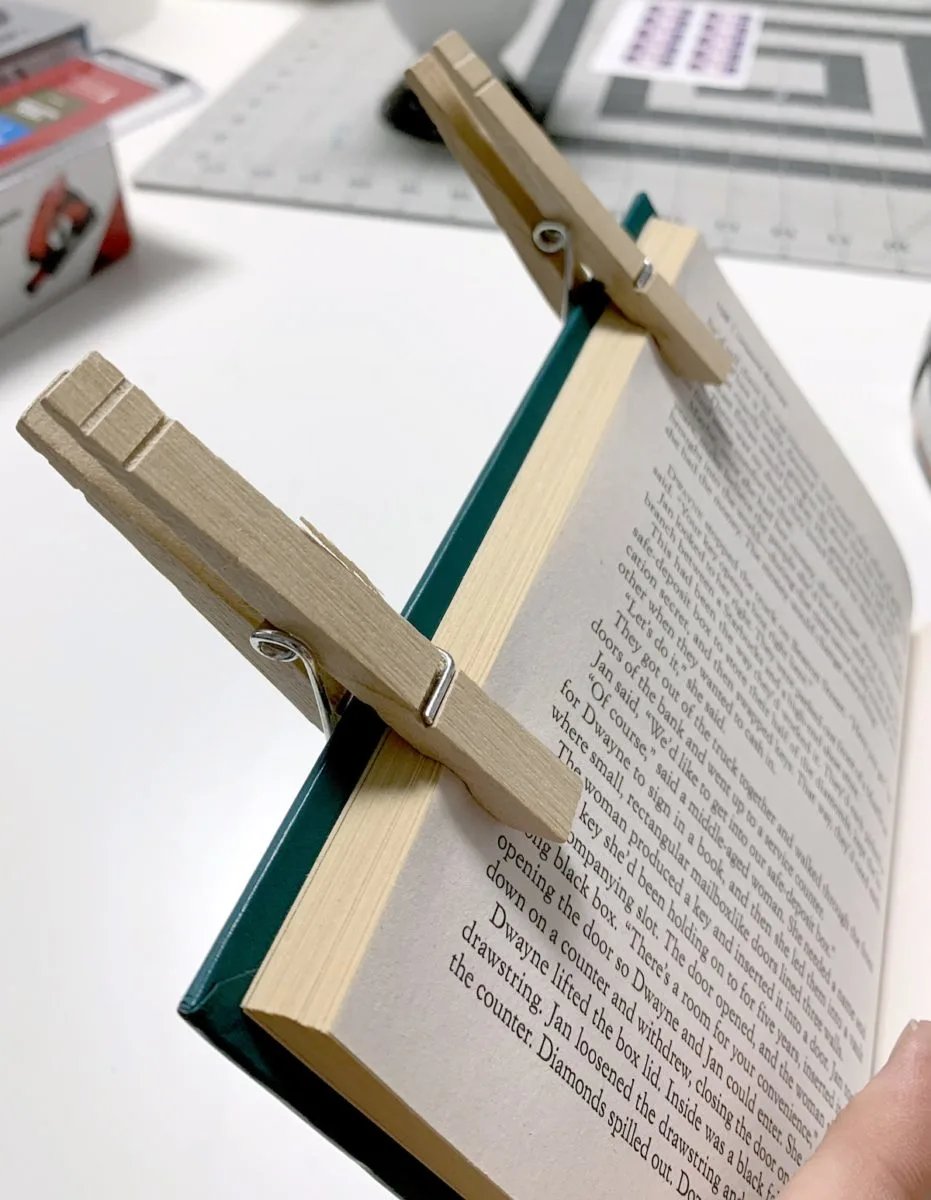
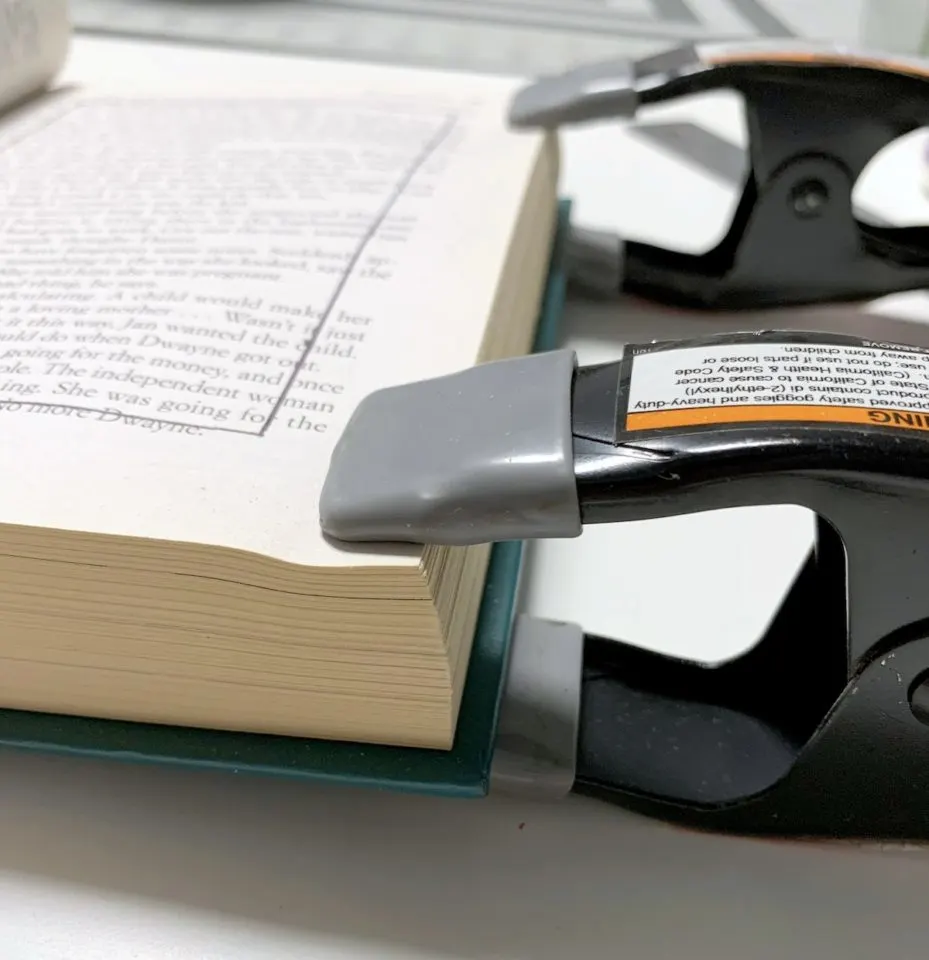
Clip approximately 1/4" of pages to the front cover of the book using clothespins or clamps.
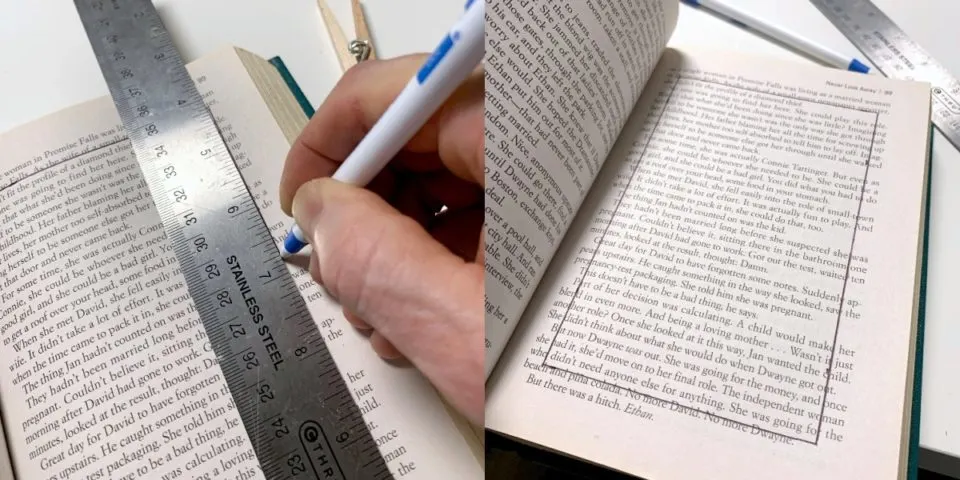
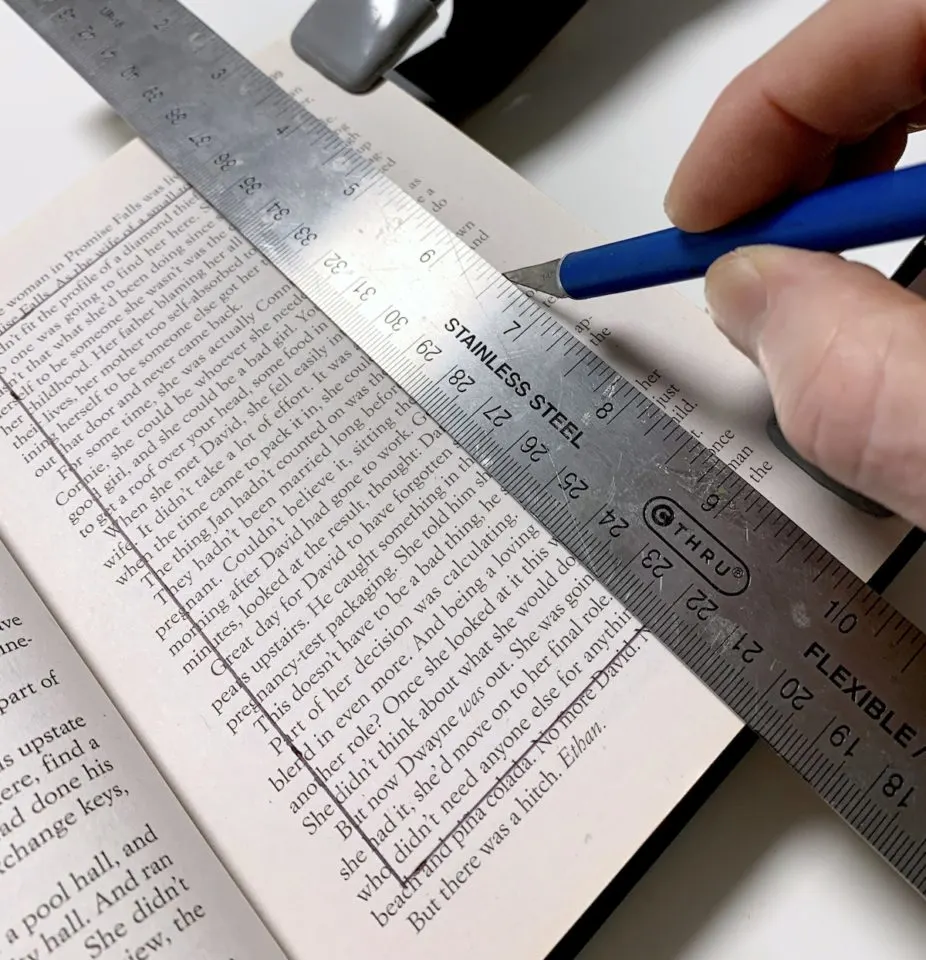
Using a ruler and pen or pencil, draw a rectangle that will be used as your cutting template. Leave at least 1/2" around all sides that will serve as the edges.
Clamp the pages down that you'll be cutting
Using the ruler and craft knife, make cuts on the lines you drew. Go as deep as the knife will let you go; don't try to do too many pages at once.
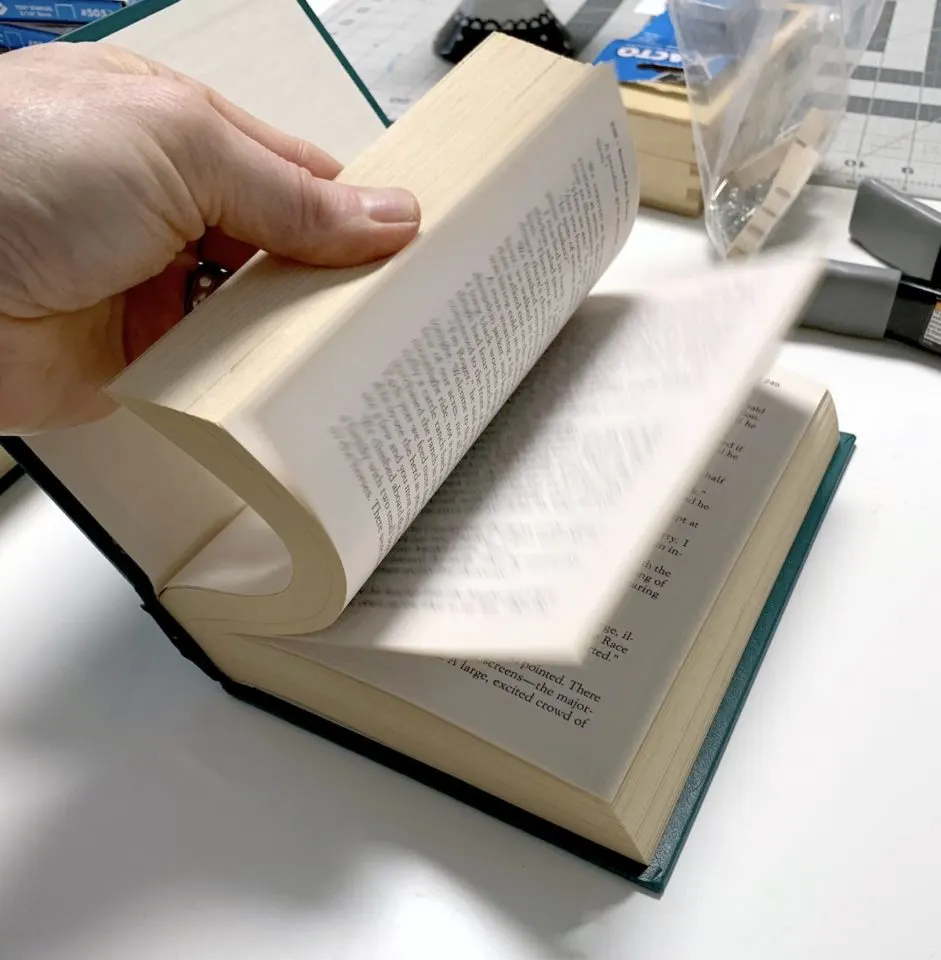
You'll be cutting out 10 - 20 pages at a time with a craft knife. Once you've cut out several pages worth, remove them.
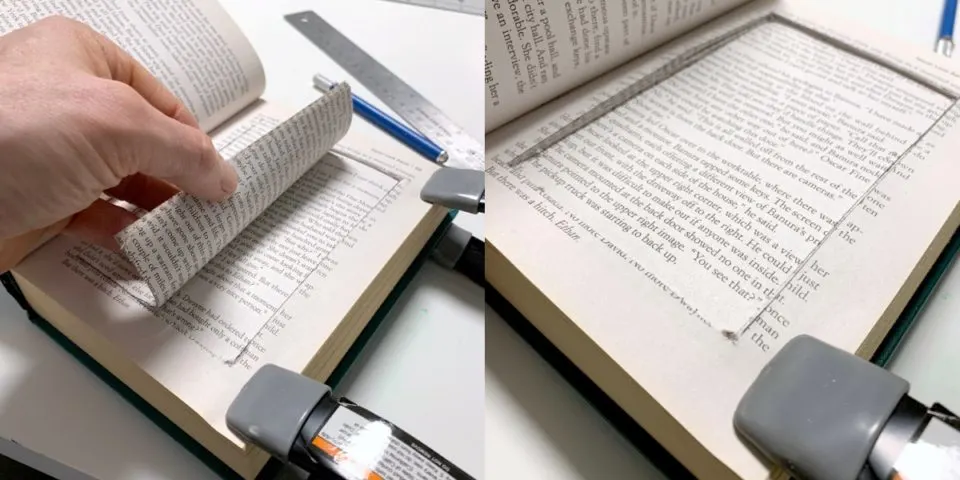
Before flipping the pages of your book safe to make additional cuts, use the previous cuts as a template - draw another rectangle with your pen just inside the rectangle.
Flip the pages you've already cut and reclamp the book. Use the ruler and craft knife to cut additional pages. Complete this process over and over. Repeat cutting and removing pages until the recess is as deep as you would like, leaving at least 1/4" of pages at the back of the book.
To prevent the Mod Podge from seeping into the back of the book, use painter's tape to tape down the back cover. Hold up the front pages of the book in front of the recessed portion.

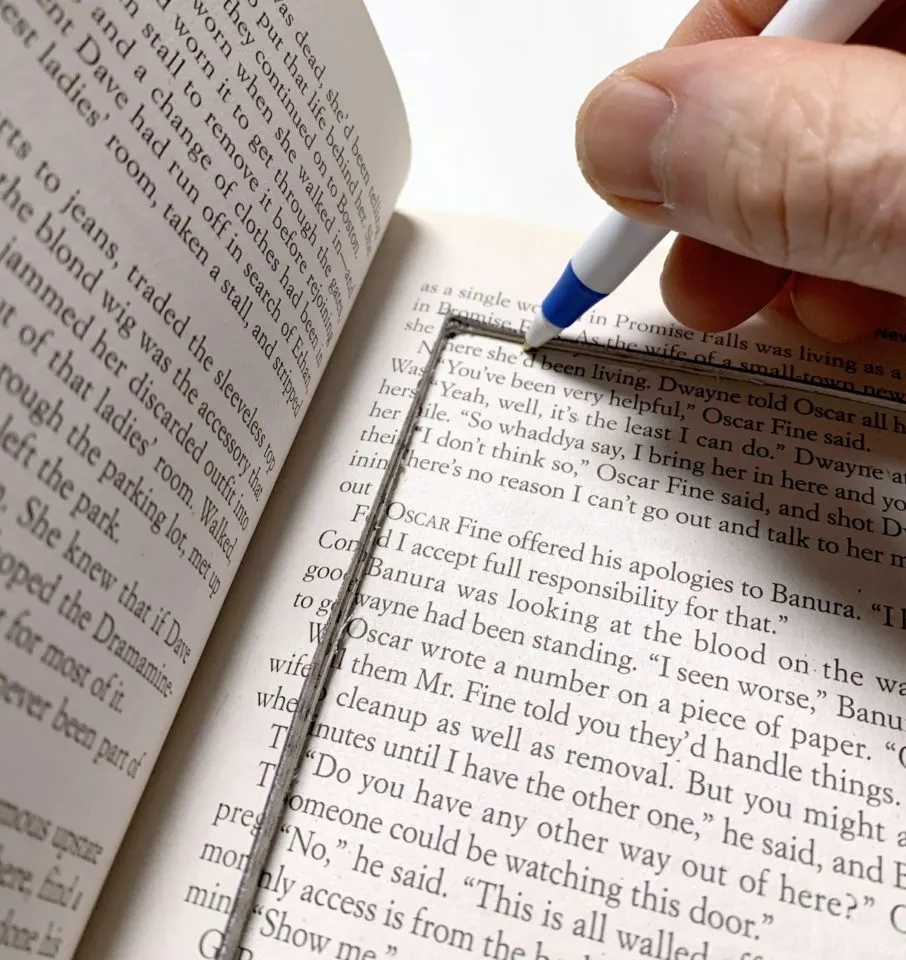
Apply Mod Podge around the pages of the book using a paintbrush. Apply one coat all the way around, let dry. Repeat.
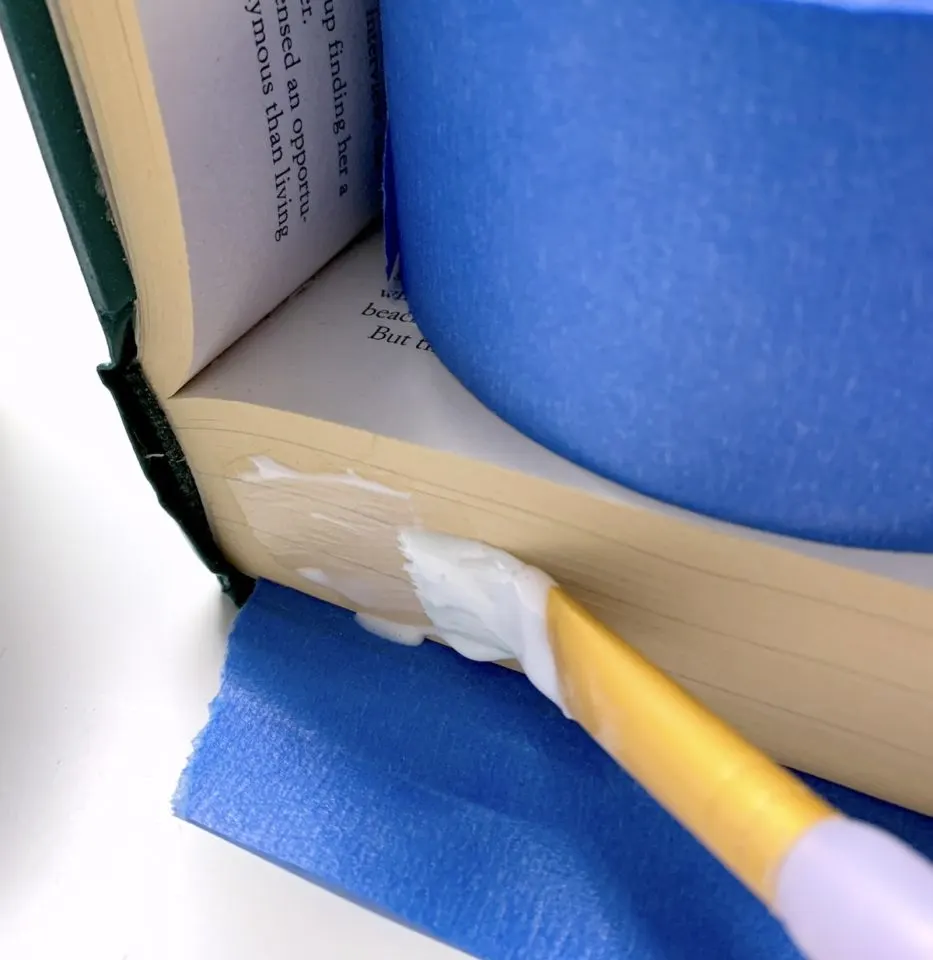
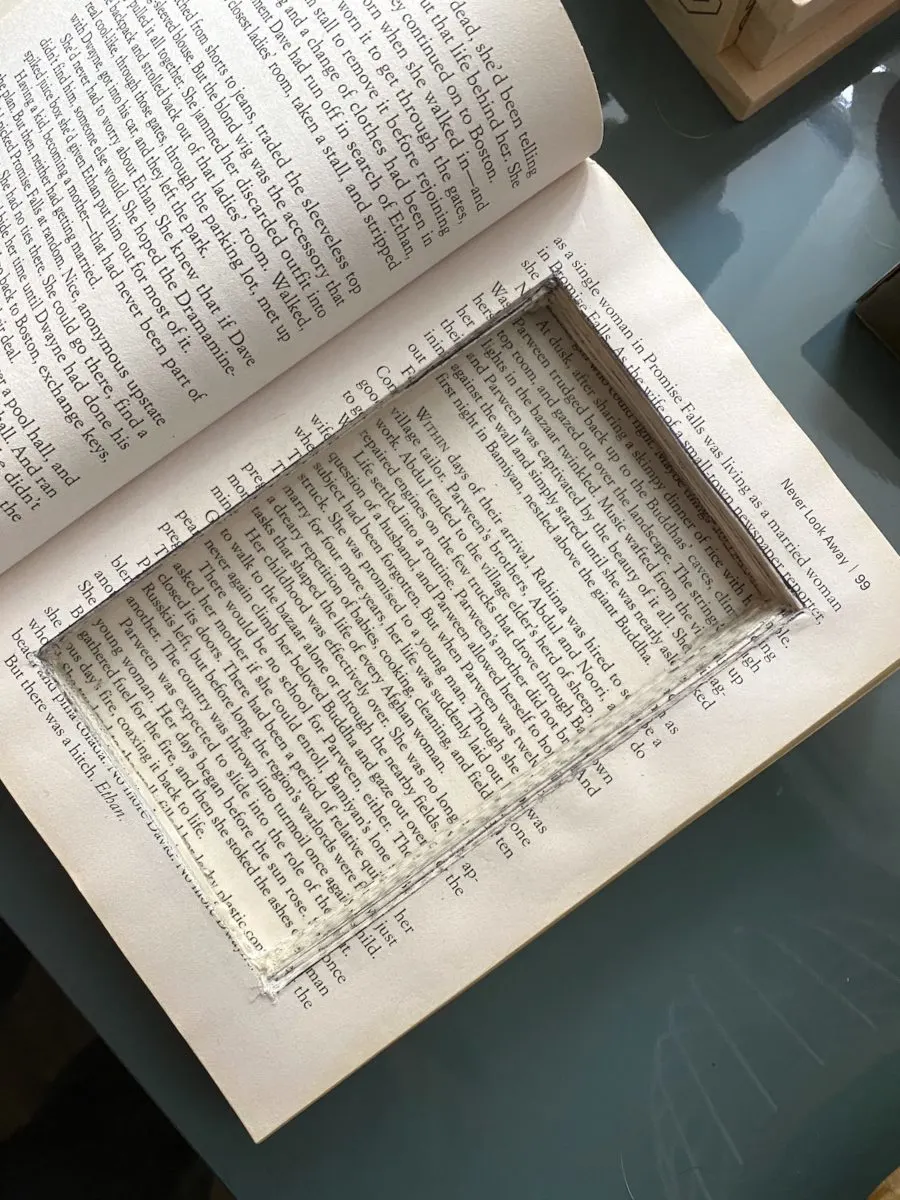
To finish, apply Mod Podge to the inside rim of the recess as shown. Go around the rim with the paintbrush and let dry. Repeat. You don't need to go on top of the pages.

Let dry completely - leave open - before using