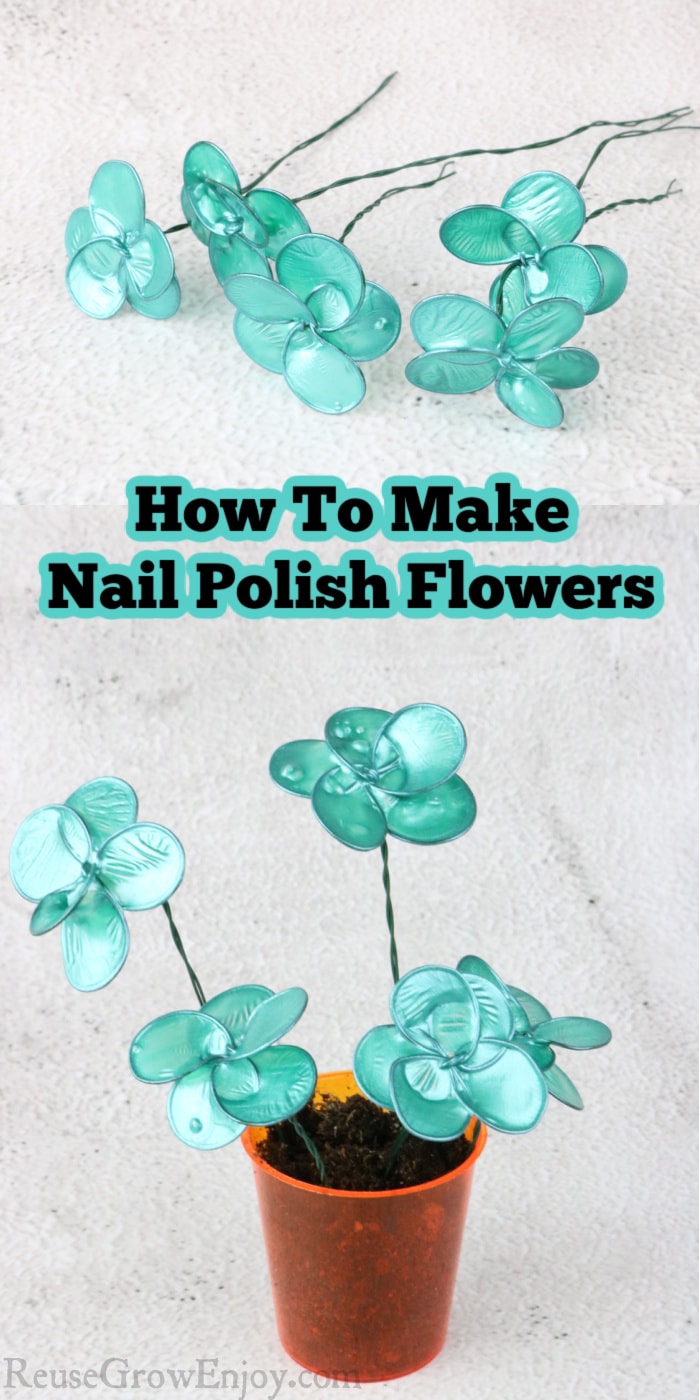
How To Make Nail Polish Wire Flowers
Transform your space with a unique and eye-catching decor idea - nail polish wire flowers! These beautiful creations are not only easy to make but also a great way to add a touch of color and elegance to any room. This innovative craft allows you to create stunning floral arrangements that are sure to impress. Whether you're looking to spruce up your living room, add a unique touch to a special event, or simply want to indulge in a creative project, nail polish wire flowers are the perfect choice. The beauty of nail polish wire flowers is that you have complete creative freedom to design them exactly as you envision.

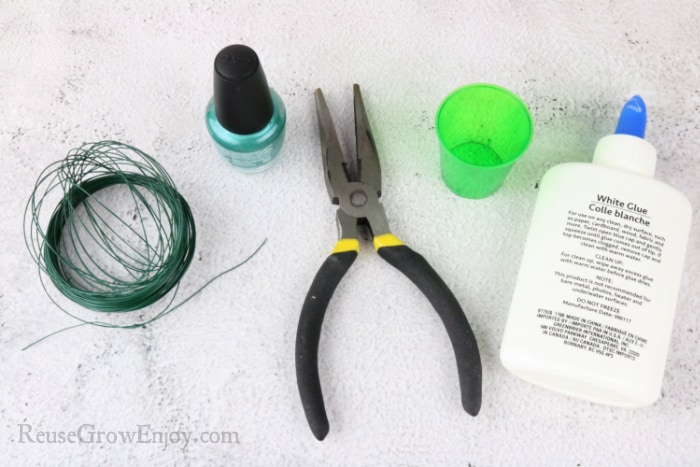
Supplies Needed:
- Floral Wire (or another small long wire but it also has to be a thin wire)
- Wire Cutter
- White School Glue (or wood glue)
- Fanger Nail Polish (colors of choice)
- Small Shot or Medican Cup (to hold the glue)
- Small Container of rice (optional holds flowers when drying)
How To Make Nail Polish Wire Flowers:
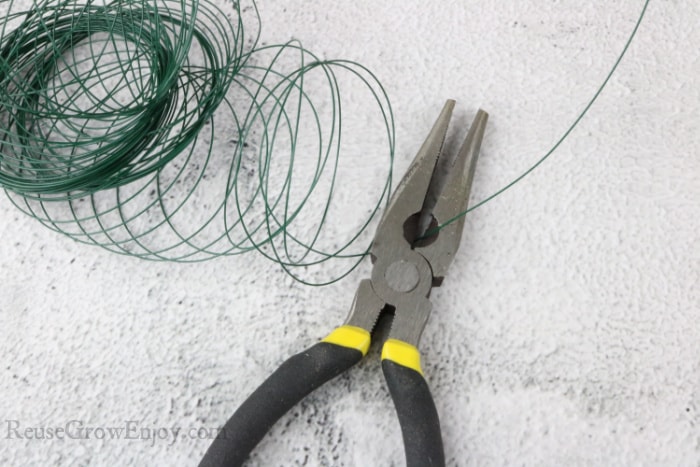
Step 1: Cut wire so you have about 12-inch pieces. You will need one piece for each flower you make.
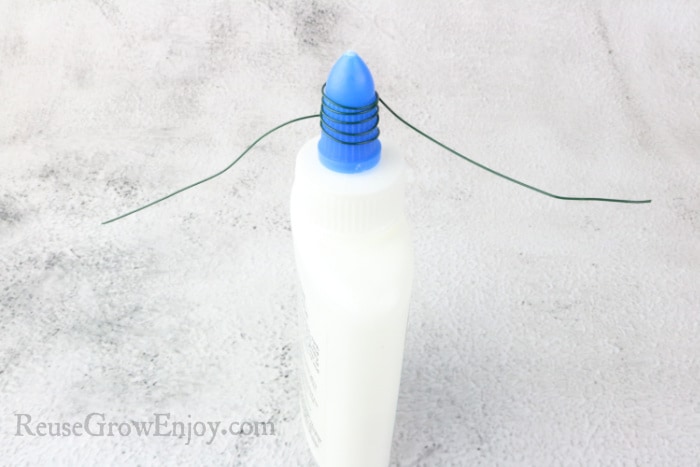
Step 2: Using the top of the glue bottle (or another like object) wrap the wire around it 5 times. Wrap it so it is in the center of the wire.
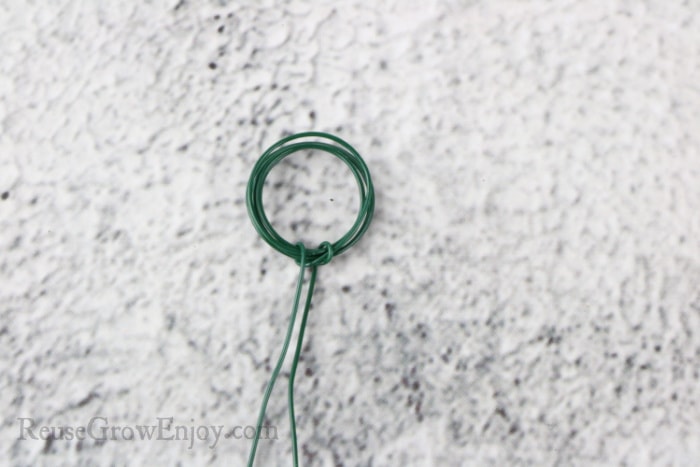
Step 3: Then remove it from the bottle. Run the end of the wire through the circles from each side so that it pulls and holds them all together.
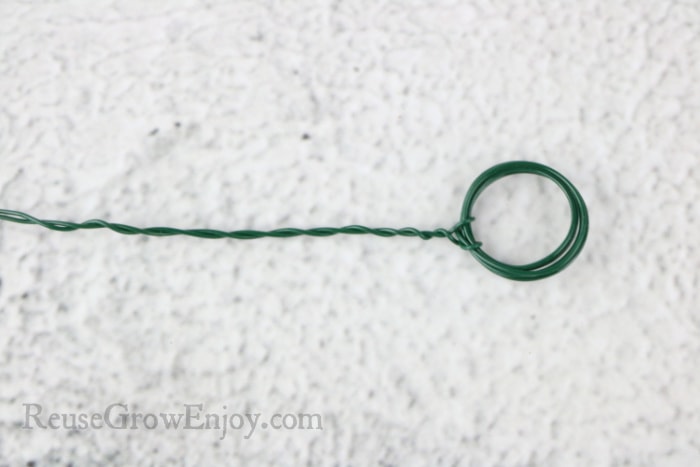
Step 4: Then twist the two long pieces of wire together.
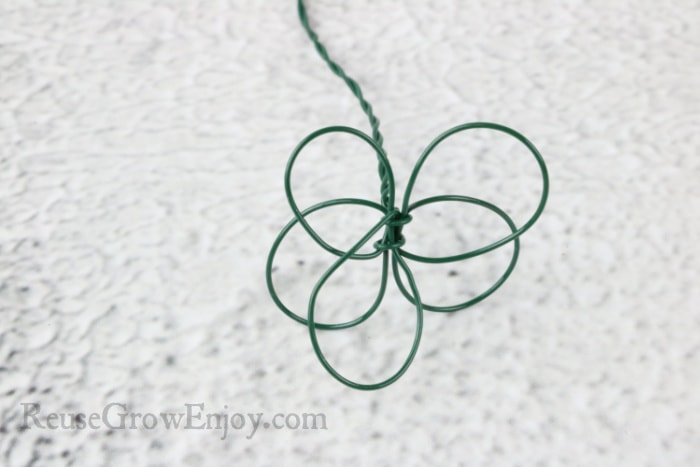
Step 5: Carefully separate those rings to form our petal shape. You will have to twist a few of them to get them to lay right. You want them to be not right on top of each other so that each piece can be coated in glue.

Step 6: Add some glue to the small cup. You don’t need it all the way full, just enough so it will fit the wire rings in it and cover them. Turn the wire rings upside down into the glue to fully coat them. Then slowly pull it straight up out of the glue. If all the places are not full of glue then redip it. If you can’t get them all coated at one time, you can allow them to dry and then dip them again when dry.
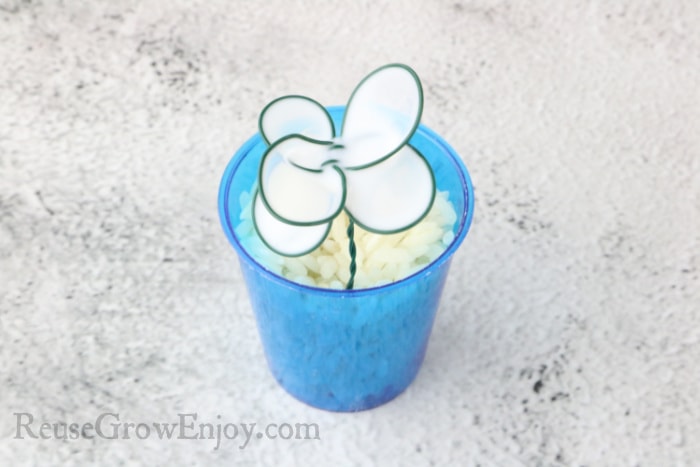
Using a small cup of rice you can put the twisted end of the wire into the rice to hold it upright while it dries.
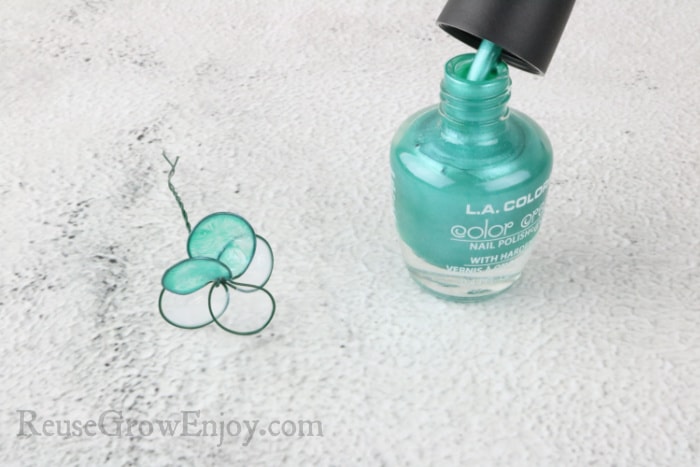
Step 8: When the glue is totally dry, shake the nail polish bottles and then paint all of the petals. Allow the first coat to fully dry and then give them a second coat. You will need to paint them 2-3 times allowing each coat to fully dry before adding the next.
Note: To get that cute little flower pot look we have in the pictures, simply take a small shot cup and fill it with dirt. Then sick the twisted end of the wires into the dirt.