Crochet Wrist Warmers
Keep your hands cozy and stylish with these trendy crochet wrist warmers. Crafted with love and attention to detail, these wrist warmers are the perfect accessory to add a touch of warmth and fashion to your outfit. Made from soft and durable yarn, they provide a comfortable fit while keeping your hands toasty during chilly days. These crochet wrist warmers are not only practical but also a fashion statement. With their intricate crochet patterns and vibrant colors, they are sure to catch everyone's attention. Whether you're heading out for a walk in the park or meeting friends for a coffee, these wrist warmers will keep your hands warm and make you stand out from the crowd. The beauty of crochet wrist warmers lies in their simplicity and functionality. They are easy to slip on and off, making them convenient for everyday use. The open-finger design allows you to use your phone, type on a keyboard, or perform any task without having to take them off. Say goodbye to cold hands and hello to warmth and style with these crochet wrist warmers.
WRIST WARMERS DIRECTIONS
These wrist warmers are super easy to make.
The pattern uses only basic crochet stitches - double and half-double crochets.
The pattern was made with Red Heart Bella.
Crochet hook 4.0 mm.
Difficulty Level: Level 1 – Easy, for beginners
US crochet term:
CH/s – chain/s
SC – single crochet
HDC - half double crochet
DC - double crochet
FPDC = front post double crochet
BPDC = back post double crochet
SK - skip
T - turn
ST/s - stitch(es)
REP - repeat
Pattern Notes
1) A ch2 at beg of the row counts as hdc, a ch3 at beg of the row counts as dc throughout.
2) The project is crocheted in rounds. Rounds are finished with sl st.
3) Bellow, there is a pattern for women size "M" wrist warmers - this one fits also to my 12 year old daughter. You can always adjust this pattern by making the starting chain longer or shorter.
Make a slip knot and ch30, join to first chain to make a circle. Be sure not to twist your chain.
R1: ch3 (counts as 1 dc), 1dc into each st around till end of the row, sl st into the 3rd ch from the beg.
You will have 30 dc
R2: ch3 (counts as 1 bpdc), 1fpdc in next st, *1bpdc in next st, 1fpdc in next st* repeat from * to * around till end of the row, sl st into the 3rd ch from the beg
You will have 30 stitches
R3 - R10 = repeat R2
Make sure you have 30 stitches in each row.
The first part is ready and we will start increasing!
R11: ch2 (counts as 1 hdc), 1hdc in next 3 st, 2hdc in next st,
*1hdc in next 4 st, 2hdc in next st* repeat from * to * around till end of the row, sl st into the 2rd ch from the beg
You will have 36 hdc.
R12: ch2 (counts as 1 hdc), 1hdc in each st around till end of the row, sl st into the 2rd ch from the beg
You will have 36 hdc.
R13: ch2 (counts as 1 hdc), 1hdc in next 4 st, 2hdc in next st,
*1hdc in next 5 st, 2hdc in next st* repeat from * to * around till end of the row, sl st into the 2rd ch from the beg
You will have 42 hdc.
R14: ch2 (counts as 1 hdc), 1hdc in each st around till end of the row, sl st into the 2rd ch from the beg
You will have 42 hdc.
R15 - R21: repeat R14
Make sure you have 42 hdc stitches in each row.
We will make the thumb hole in the next row.
R22: skip first 12 st, join the work by sl st into the 13th st, ch2 (counts as 1 hdc), 1hdc in each st around till end of the row, sl st into the 2rd ch from the beg
You will have 30 hdc.
R23 - R26: ch2 (counts as 1 hdc), 1hdc in each st around till end of the row, sl st into the 2rd ch from the beg
Make sure you have 30 hdc stitches in each row.
R27: 1 sl st in each st around till end of the row
Cut the yarn and fasten off.
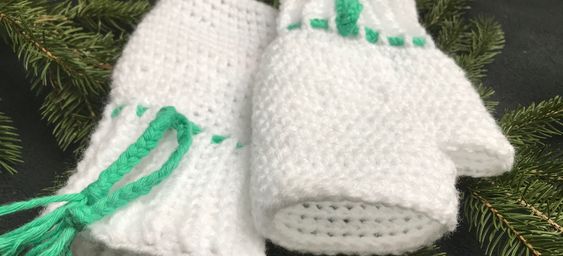
Optional: you can decorate your wrist warmers with a colourful string - do a basic braid.
Cut 9 strands (or more or less - just number must multiple of 3) of any color you like.
Make a knot of all strands.
Divide strands into 3 equal sections - 3 groups. One is on left side, one is in the middle, one is on the right side.
Do a braid - cross the group on the right side over into the middle, then cross the group on the left side over into the middle, again cross the group on the right over into the middle, then again take the group on the left side and cross it into the middle and repeat these steps till the end, finish by a knot.
Pull the string into the last row of double crochets (R10) - pull the string over each back front double crochets and under each front post double crochets.