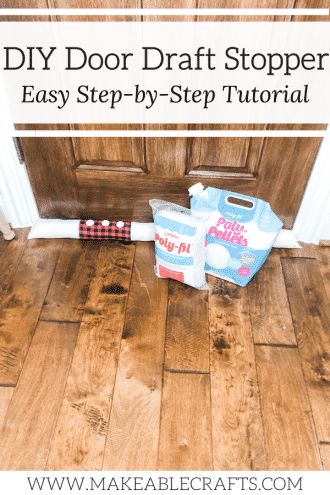
Do It Yourself Door Draft Stopper
Create your own door draft stopper with this easy DIY project. By making it yourself, you can customize the size, shape, and fabric to match your home decor perfectly. Start by measuring the width of your door and cutting a piece of fabric to fit. Then, fill the fabric with a material like rice or beans to give it weight and help it stay in place. Finally, sew the ends shut and place it at the bottom of your door to keep drafts out and warmth in. Not only is making your own door draft stopper a fun and creative project, but it can also help you save on energy costs by preventing heat loss. Plus, you can choose a fabric that complements your interior design style, adding a touch of personality to your home. With just a few simple steps, you can create a practical and stylish solution to keep your home cozy and draft-free during the colder months. Give it a try and see the difference it makes in your home!
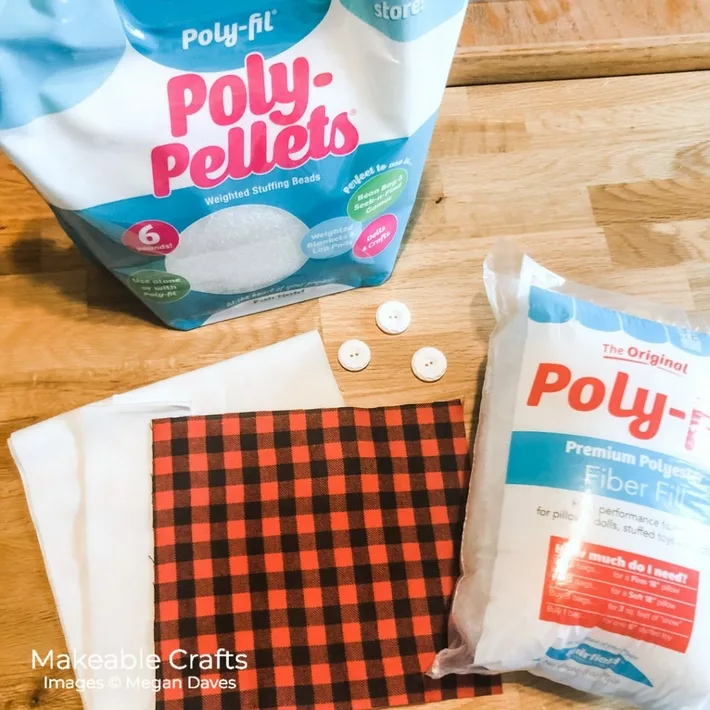
The Supplies
This post contains affiliate links.
Poly-Pellets
Poly-fil
Fabric
Sewing Machine
Thread
Buttons (optional)
The Making
We are going to make a tube within a tube. The more narrow tube will hold our heavy material and is sewn to the inside of our outer tube. I have step-by-step instructions to help you make your own draft stopper.
The first step is measuring your width of your door. My door is 36″ wide, and I knew I would have about a 1″ seam allowance on each end, leaving me with 38″ of door draft stopper. I started by cutting my white fabric 9″ x 40″.
Then I cut another piece of white fabric 4″ x 40″. This is going to be my long tube for my Poly-Pellets®. This can be another piece of leftover fabric that you have, since it will be sewn to the inside. Since I used white fabric for my outer piece, I decided to stick with white so it wouldn't show through. So depending on the width of the door, you probably need less than a yard of fabric.
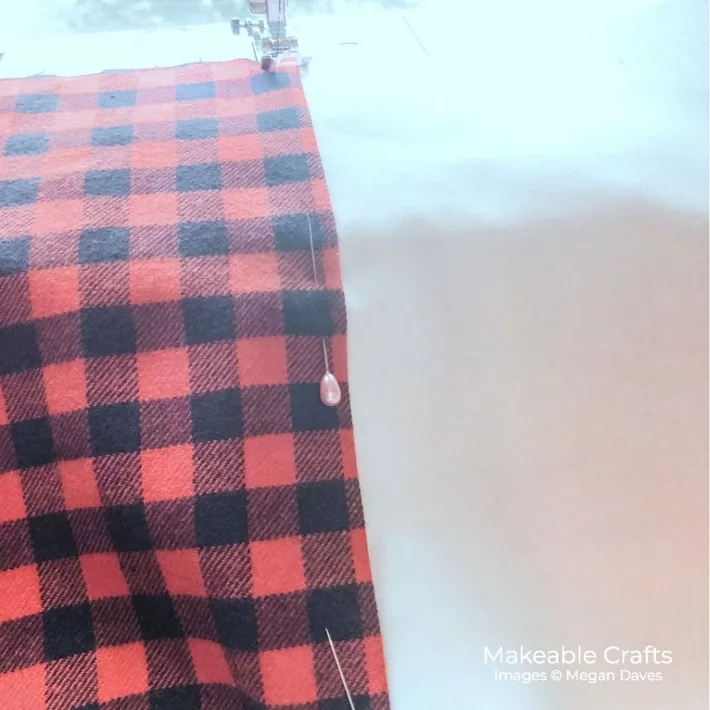
After that, I cut a piece of my red and black fabric at 8″ x 9″.
Then you will want to stitch your red and black fabric onto your 9″ x 40″ piece of material. I opted to fold my red and black fabric under and top straight stitch on my edges. You will want to do this before you make the tube part of this project. (Ask me how I know, lol!)
The next step is to fold your large piece of white fabric in half with wrong sides facing in. Fold your inner tube piece in half as well. Line up your seams and stitch the long side of the fabric.
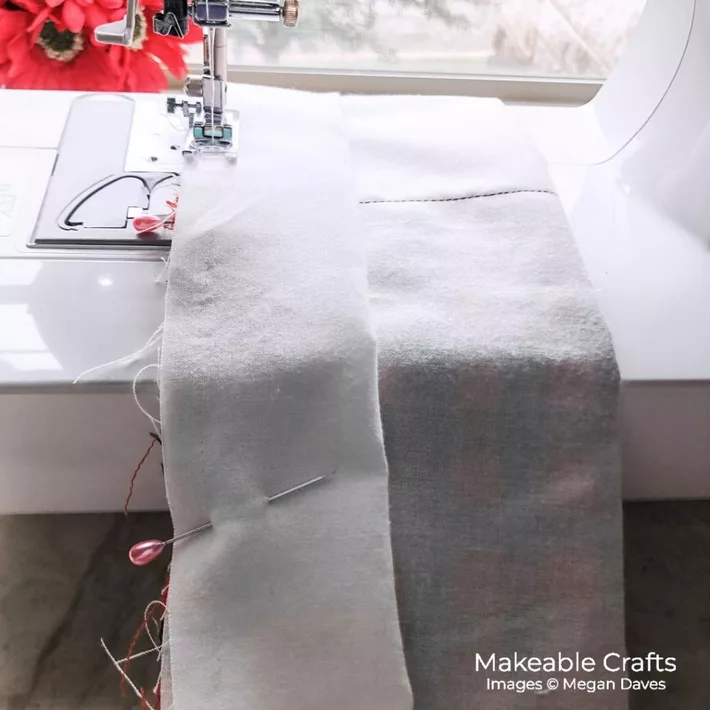
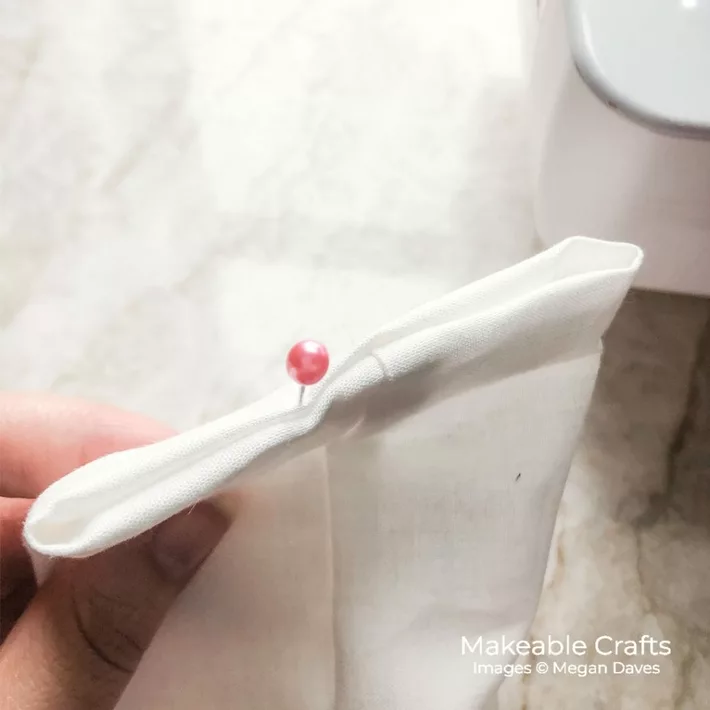
Turn your fabric right side out, giving us our tube shape. With the right sides facing out, it's time to use straight pins on one open end.
With one end double folded, top stitch the short side. You can also use a velcro strip if you prefer.
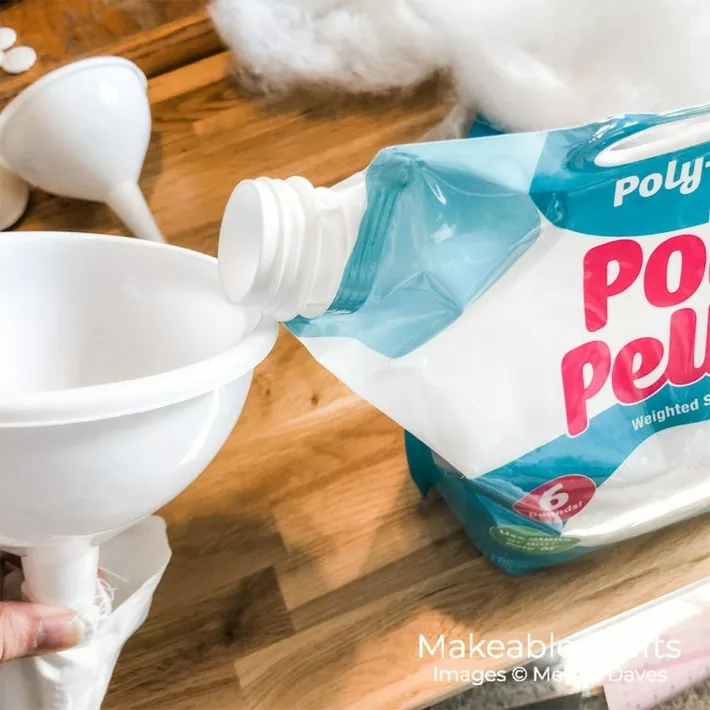
Time to fill
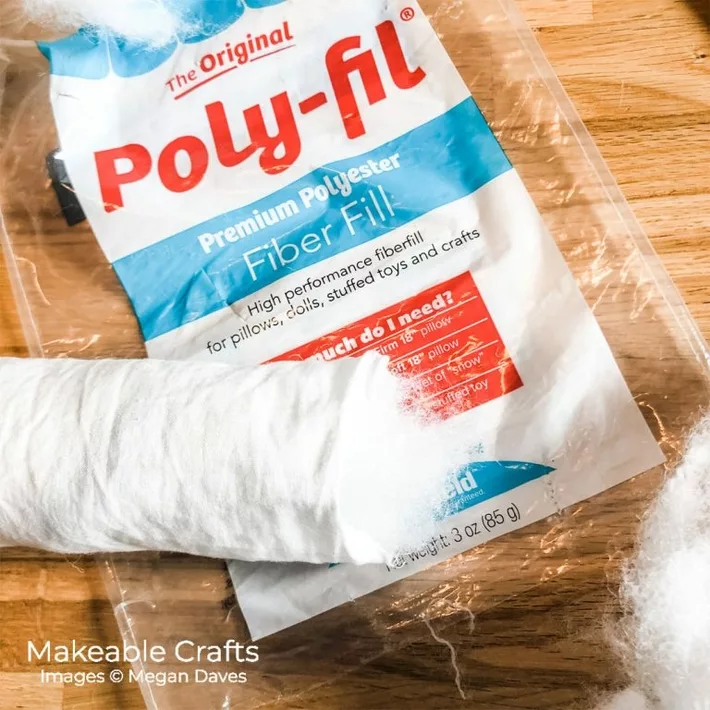
I used a funnel that I got from the dollar store with my Poly-Pellets® and worked in small sections at a time. I added about 8″ of Poly-Pellets® into my narrow tube and then filled around it with Poly-fil™.
If you have old pillows with stuffing laying around, this is the perfect time to reuse that filler. Use a chop stick to help push the fiber into the nooks and crannies and really stuff down the length of fabric. It takes a little time to do this, but you want it fully stuffed.
Work your way up the entire length of your tube alternating between filling your narrow tube and filling your wider tube.
Double fold in your seam at the end and top stitch again.
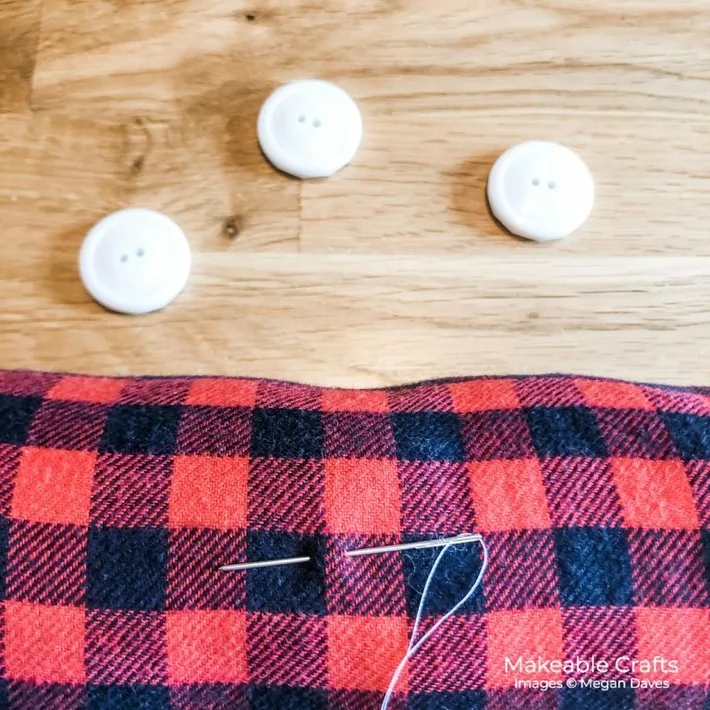
The buttons aren't necessary but they certainly are adorable! I just grabbed a needle and thread and sewed them on top. You can also hot glue if you want.
And just like that, your do it yourself door draft stopper project is complete!
Keep in mind, this doesn't have to be used just at the bottom of your door. You can make these for window sills as a window draft stopper to help save on heating bills. Measure the width of your window, add your seam allowance and follow the same steps. Anything you can do to keep the warm air in!