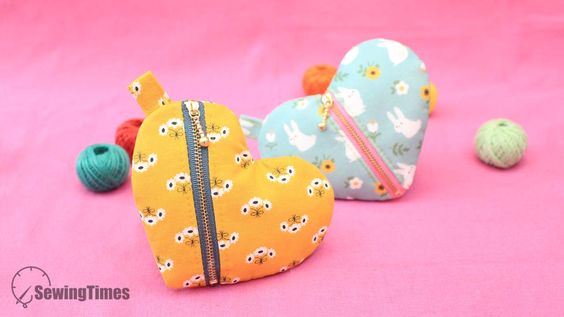
DIY Heart Coin Purse
Create your very own heart-shaped coin purse with this easy do-it-yourself project. By following a few simple steps, you can customize your coin purse to reflect your personal style and preferences. Choose your favorite fabric and embellishments to make it truly unique. This project is perfect for beginners and experienced crafters alike, so don't hesitate to give it a try! Crafting your own heart coin purse allows you to showcase your creativity and create a practical accessory at the same time. Whether you're making it for yourself or as a thoughtful gift for a friend, this DIY project is a fun and rewarding way to spend your time. With just a few materials and a little bit of patience, you can have a stylish and functional coin purse that you'll be proud to show off. So gather your supplies and get ready to make something special!
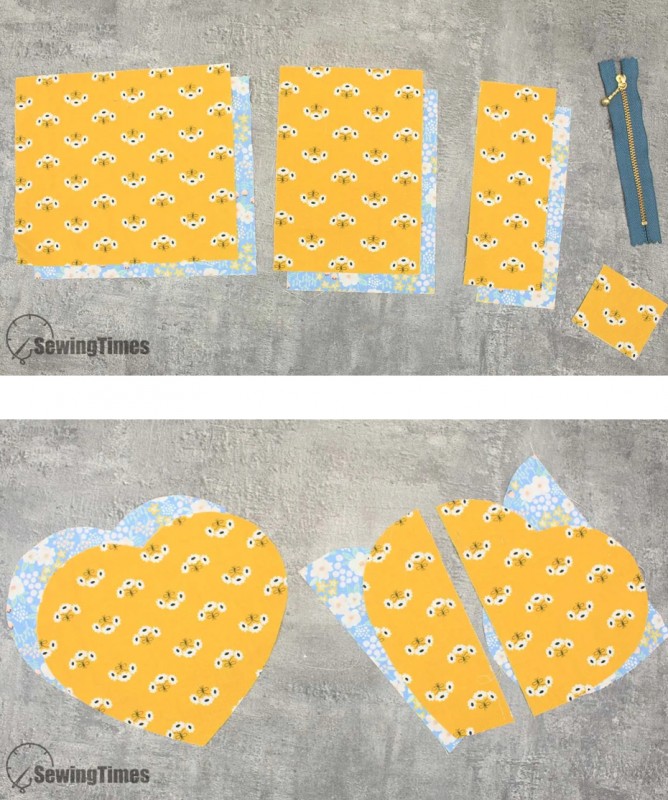
To make this you will need:
Outer layer (Quilting Cotton)
1 6¾" x 6" (17.5cm x 15cm)
2 3¾" × 6¼" (9.5cm x 15.5cm)
1 2⅜"×2" (6cm × 5cm)
Lining (Quilting Cotton)
1 6¾" x 6" (17.5cm x 15cm)
2 3¾" × 6¼" (9.5cm x 15.5cm)
Zipper
14" (10cm)
Fusible fleece (It is similar to Pellon
987F ' or 'Vilene H630')
2 6" × 5" (15cm x 12.5cm)
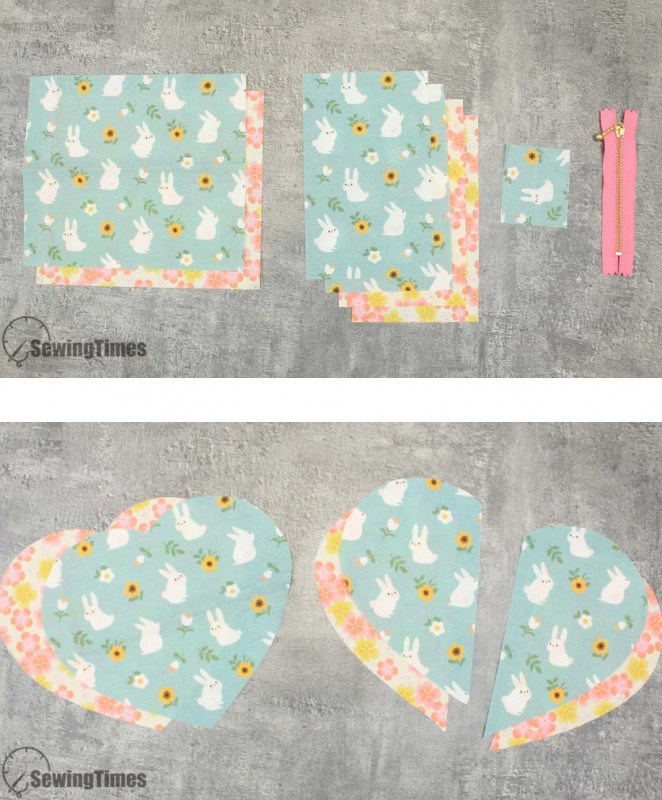
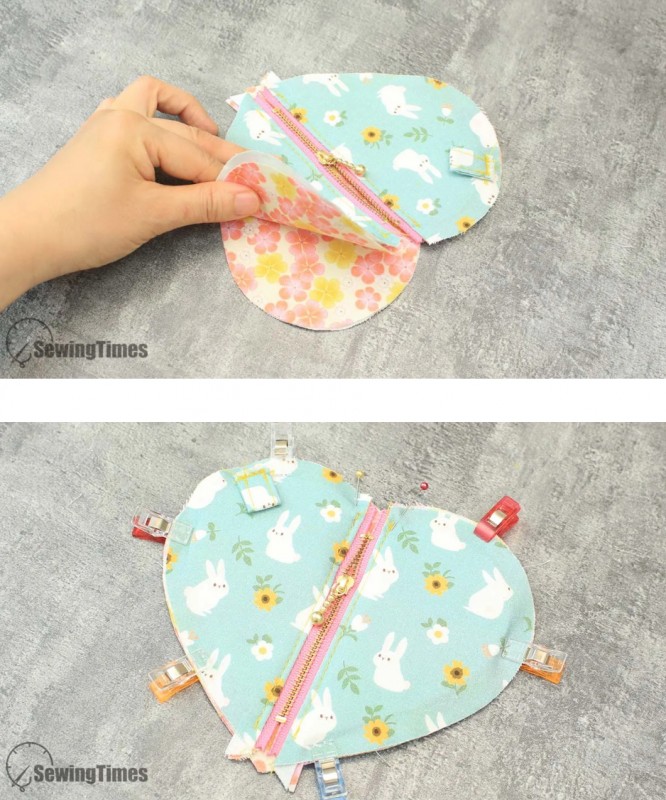
Cut the interfacing into the shape of the pattern. Fuse the fusible fleece, centered, to the wrong side.
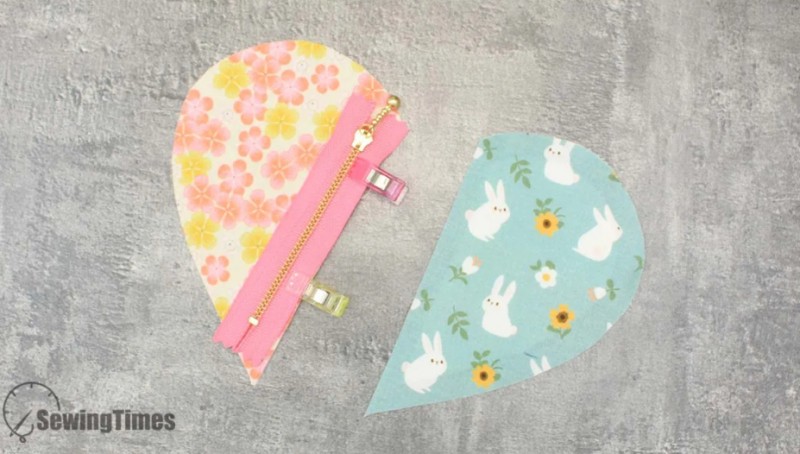
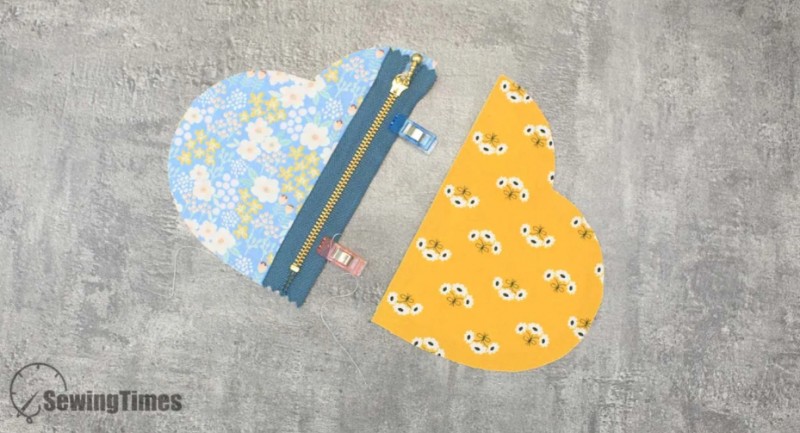
With assembled lining right side up, center zipper right side facing up along top edge. Pin in place. Place the outer layer, right side down on top. Pin in place. Using your zipper foot, sew along top edge using a 3/8" seam allowance. Open out, press pieces away from the zipper.
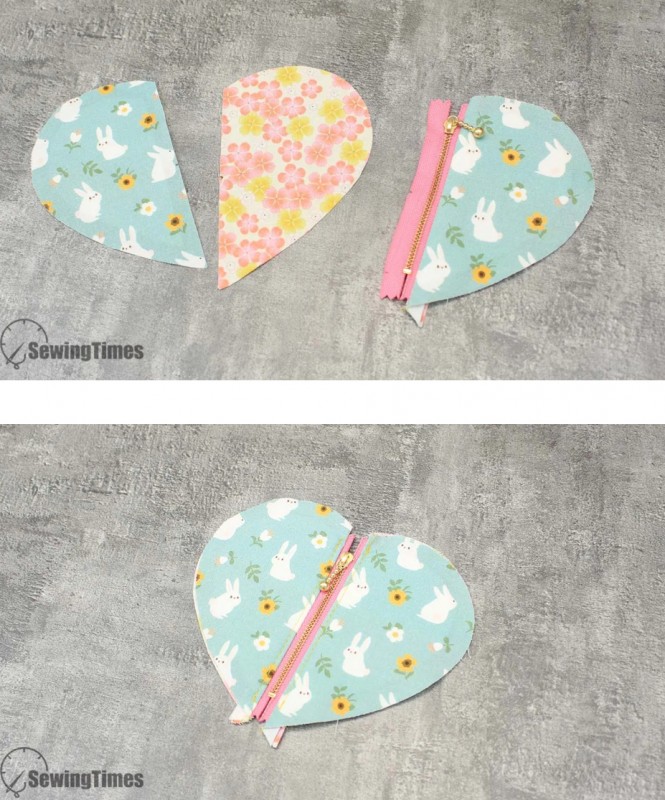
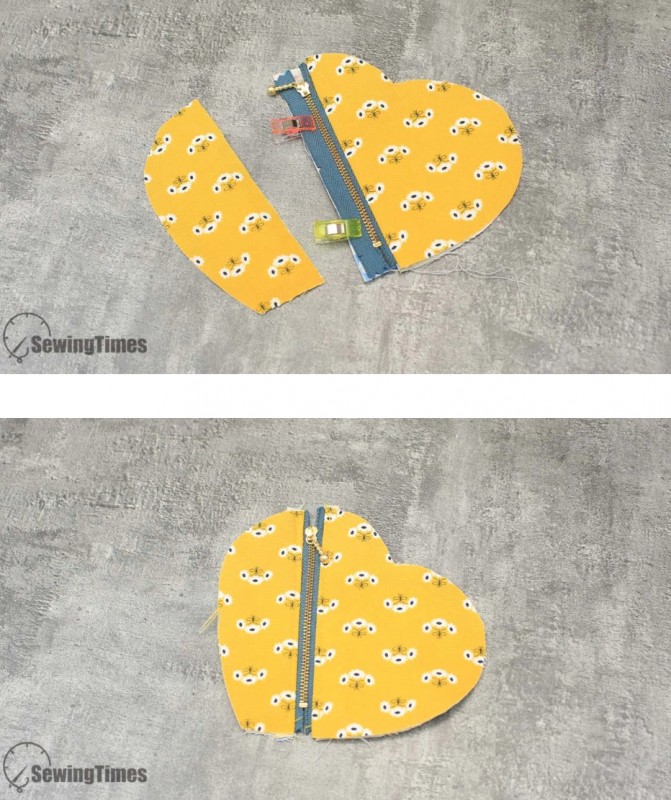
Attach the outer and lining to the other side of the zip the same way.
Open out, press pieces away from and top stitch on both 1/8" away from the zipper.
Place the wrong sides together of the outer and lining of the back panel. And place the wrong sides together of the front and back panel and sew with an allowance of about 0.2".
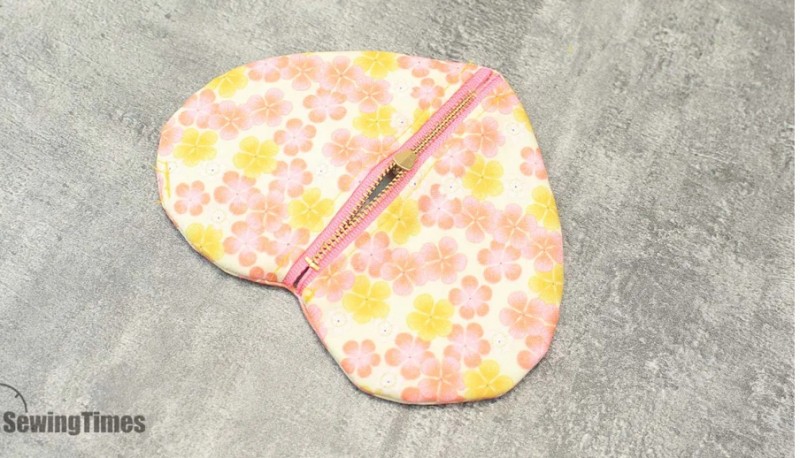
Turn wrong side out. Sew again with a seam allowance of 1/4".
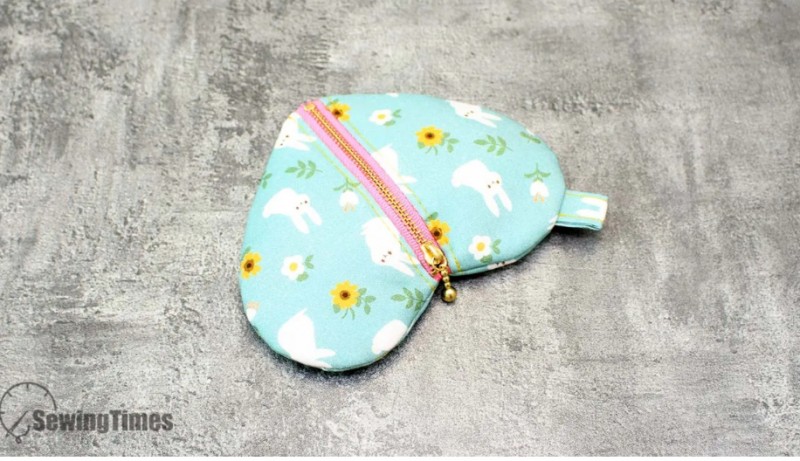
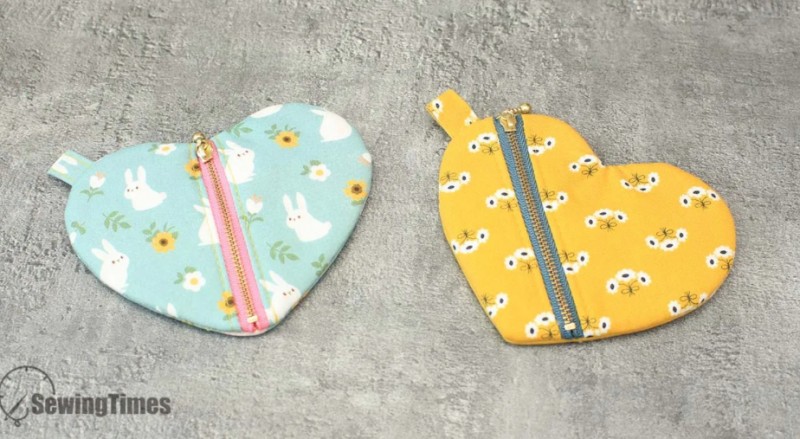
Turn out our heart coin purse through opening zipper, and the pouch is ready!
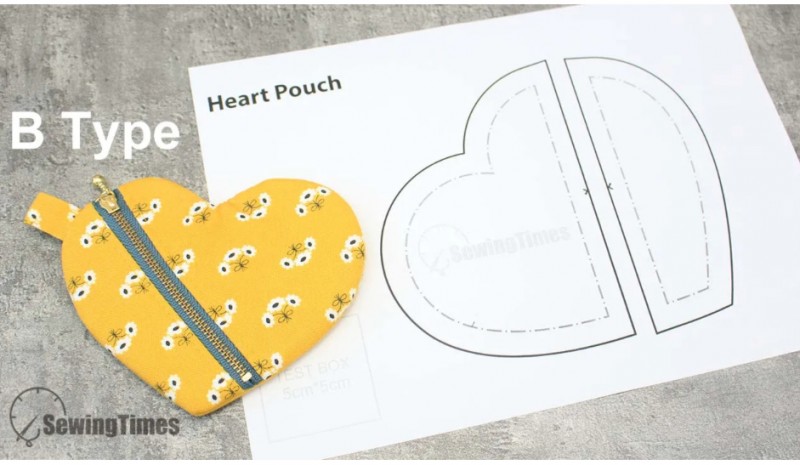
To make this you will need:
Outer layer (Quilting Cotton )
1 6¾ × 6" (17.5cm × 15cm)
1 4⅜" × 6¼" (11cm × 15.5с)
1 2⅜" × 6¼" (6cm × 15.5cm)
1 2⅜"×2" (6cm × 5cm).
Lining (Quilting Cotton)
1 6¾" × 6" (17.5cm x 15cm)
1 4⅜" × 6¼" (11cm × 15.5с)
1 2⅜" × 6¼" (6cm × 15.5cm)
Zipper
1 4¾" (12cm)
Fusible fleece (It is similar to Pellon
987F ' or 'Vilene H630)
2 6" × 5" (15cm x 12.5cm)
Cut the interfacing into the shape of the pattern. Fuse the fusible fleece, centered, to the wrong side.
With assembled lining right side up, center zipper right side facing up along top edge. Pin in place. Place the outer layer, right side down on top. Pin in place. Using your zipper foot, sew along top edge using a 3/8" seam allowance. Open out,
press pieces away from the zipper.
Attach the outer and lining to the other side of the zip the same way.
Open out, press pieces away from and top stitch on both 1/8" away from the zipper.
The rest of the process is the same as how to make type A.
YOU ARE FINISHED!
Happy sewing!