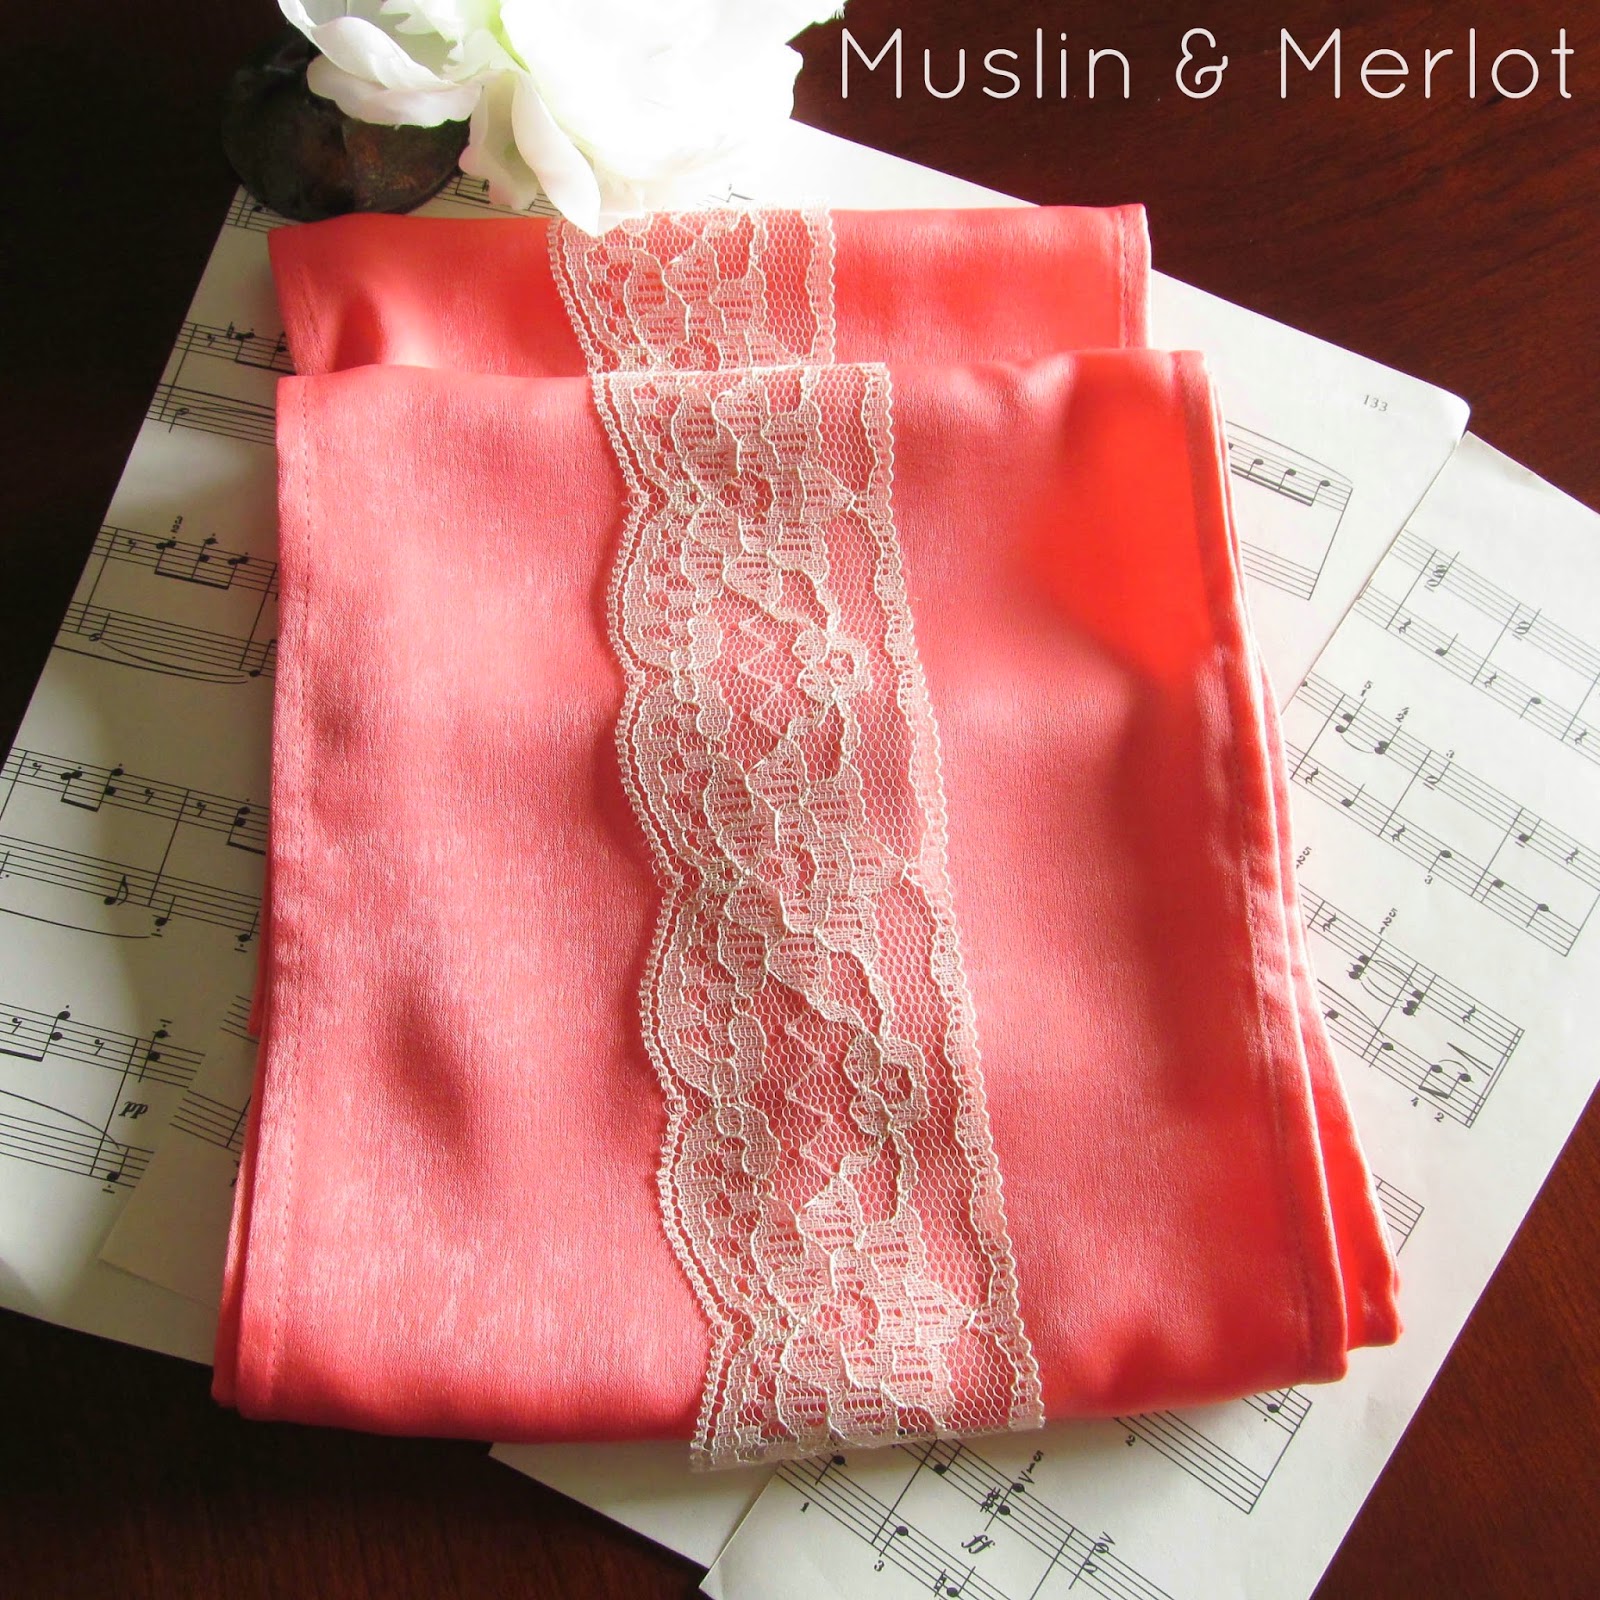
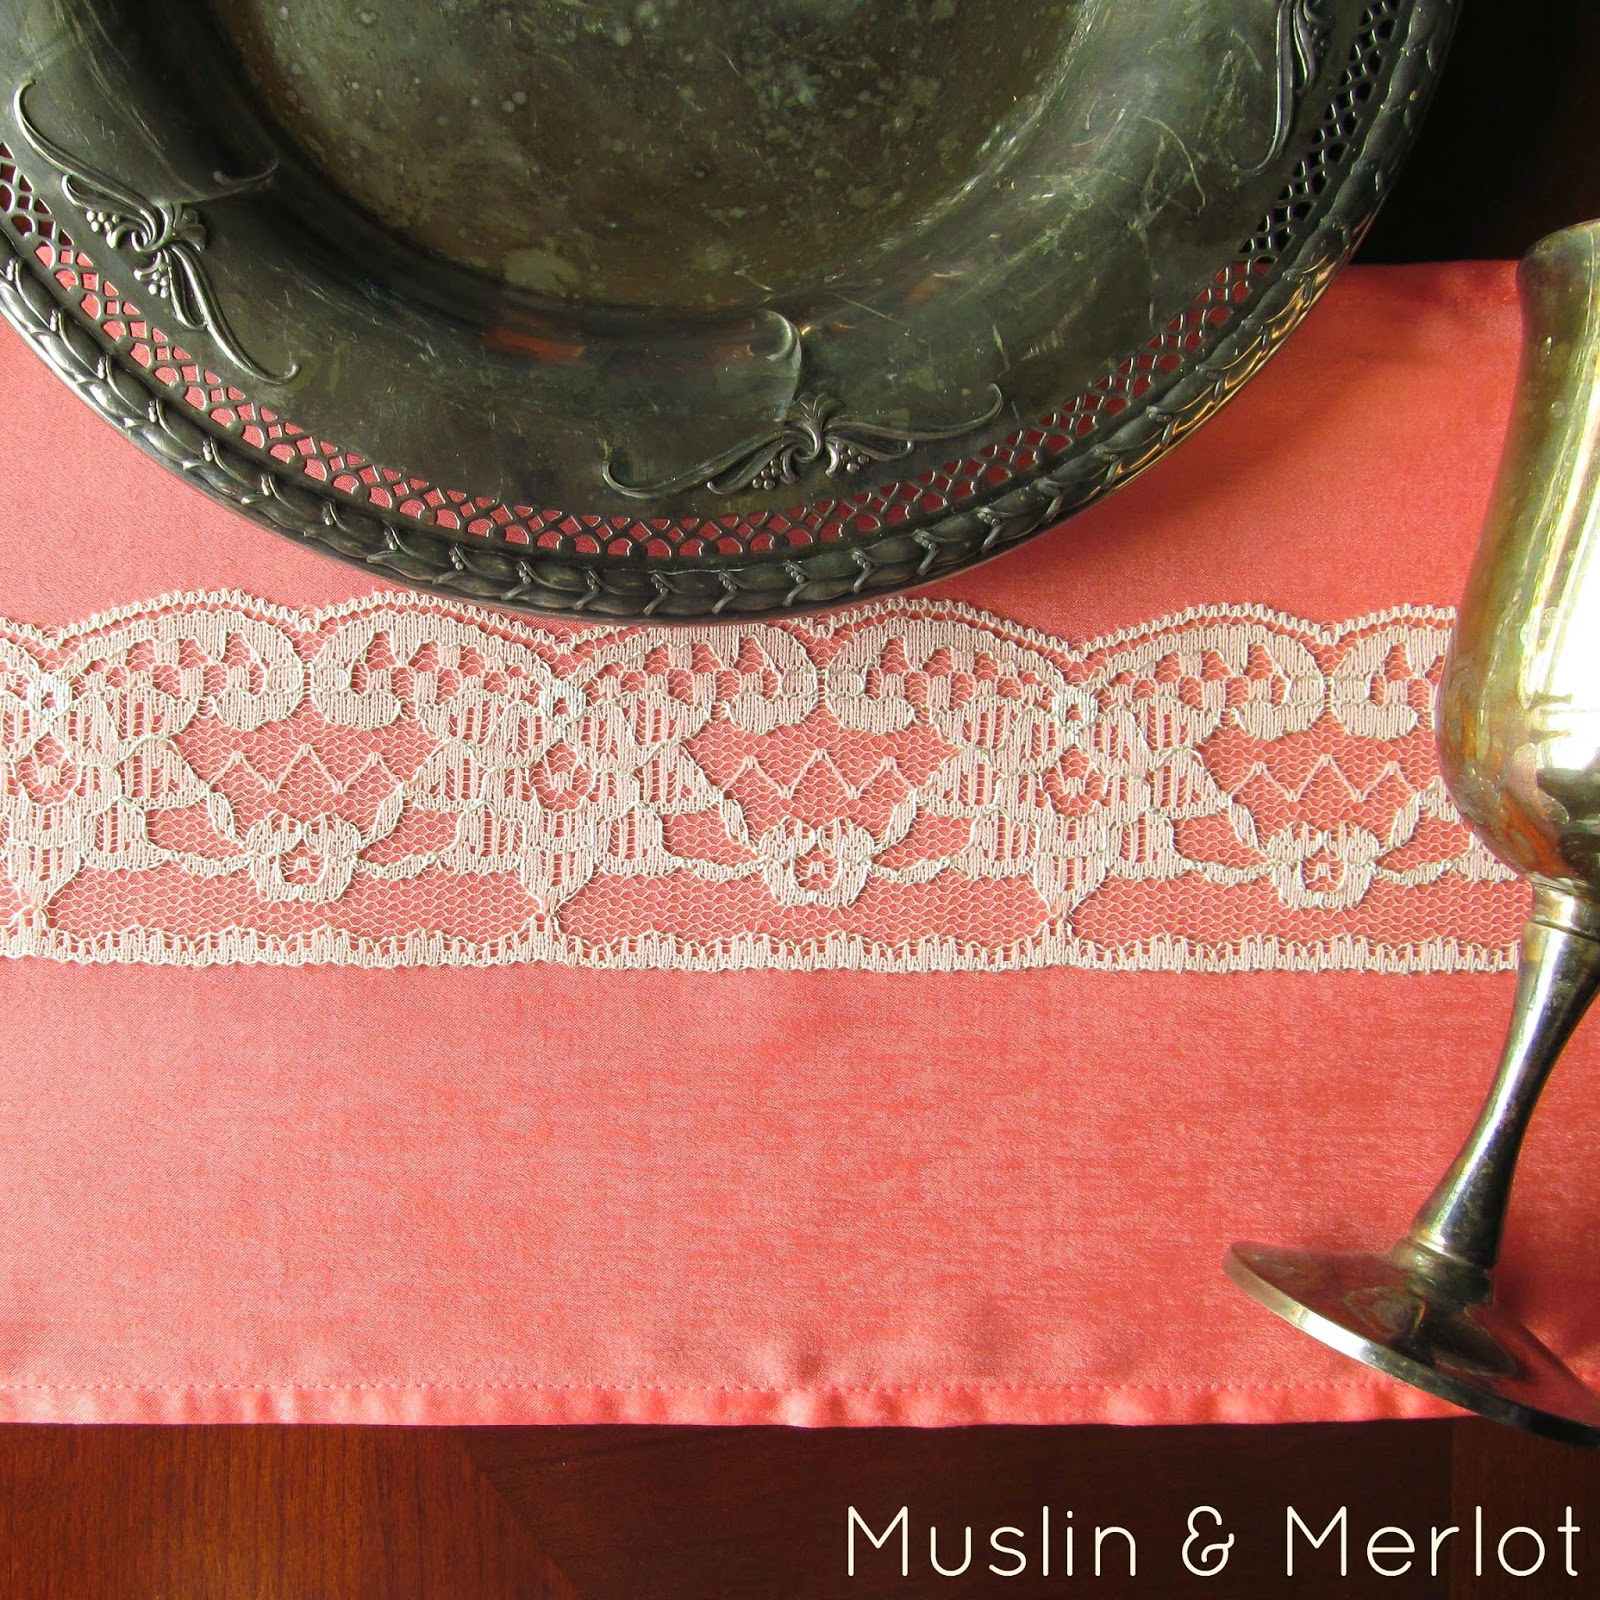
Create your own elegant table runners with this sewing pattern featuring charmuese and lace. The combination of these two luxurious fabrics will add a touch of sophistication to any dining table or special event. Whether you're hosting a dinner party or a wedding reception, these table runners will surely impress your guests with their delicate and intricate design. The pattern provides detailed instructions on how to sew the charmuese and lace together to create a beautiful and unique table runner that will elevate the look of your table setting. The versatility of this pattern allows you to make table runners for various occasions, from formal dinners to casual gatherings. Sewing your own table runners not only allows you to save money, but also gives you the satisfaction of creating something beautiful with your own hands. Get ready to impress your guests with your sewing skills and attention to detail by making these charmuese and lace table runners.
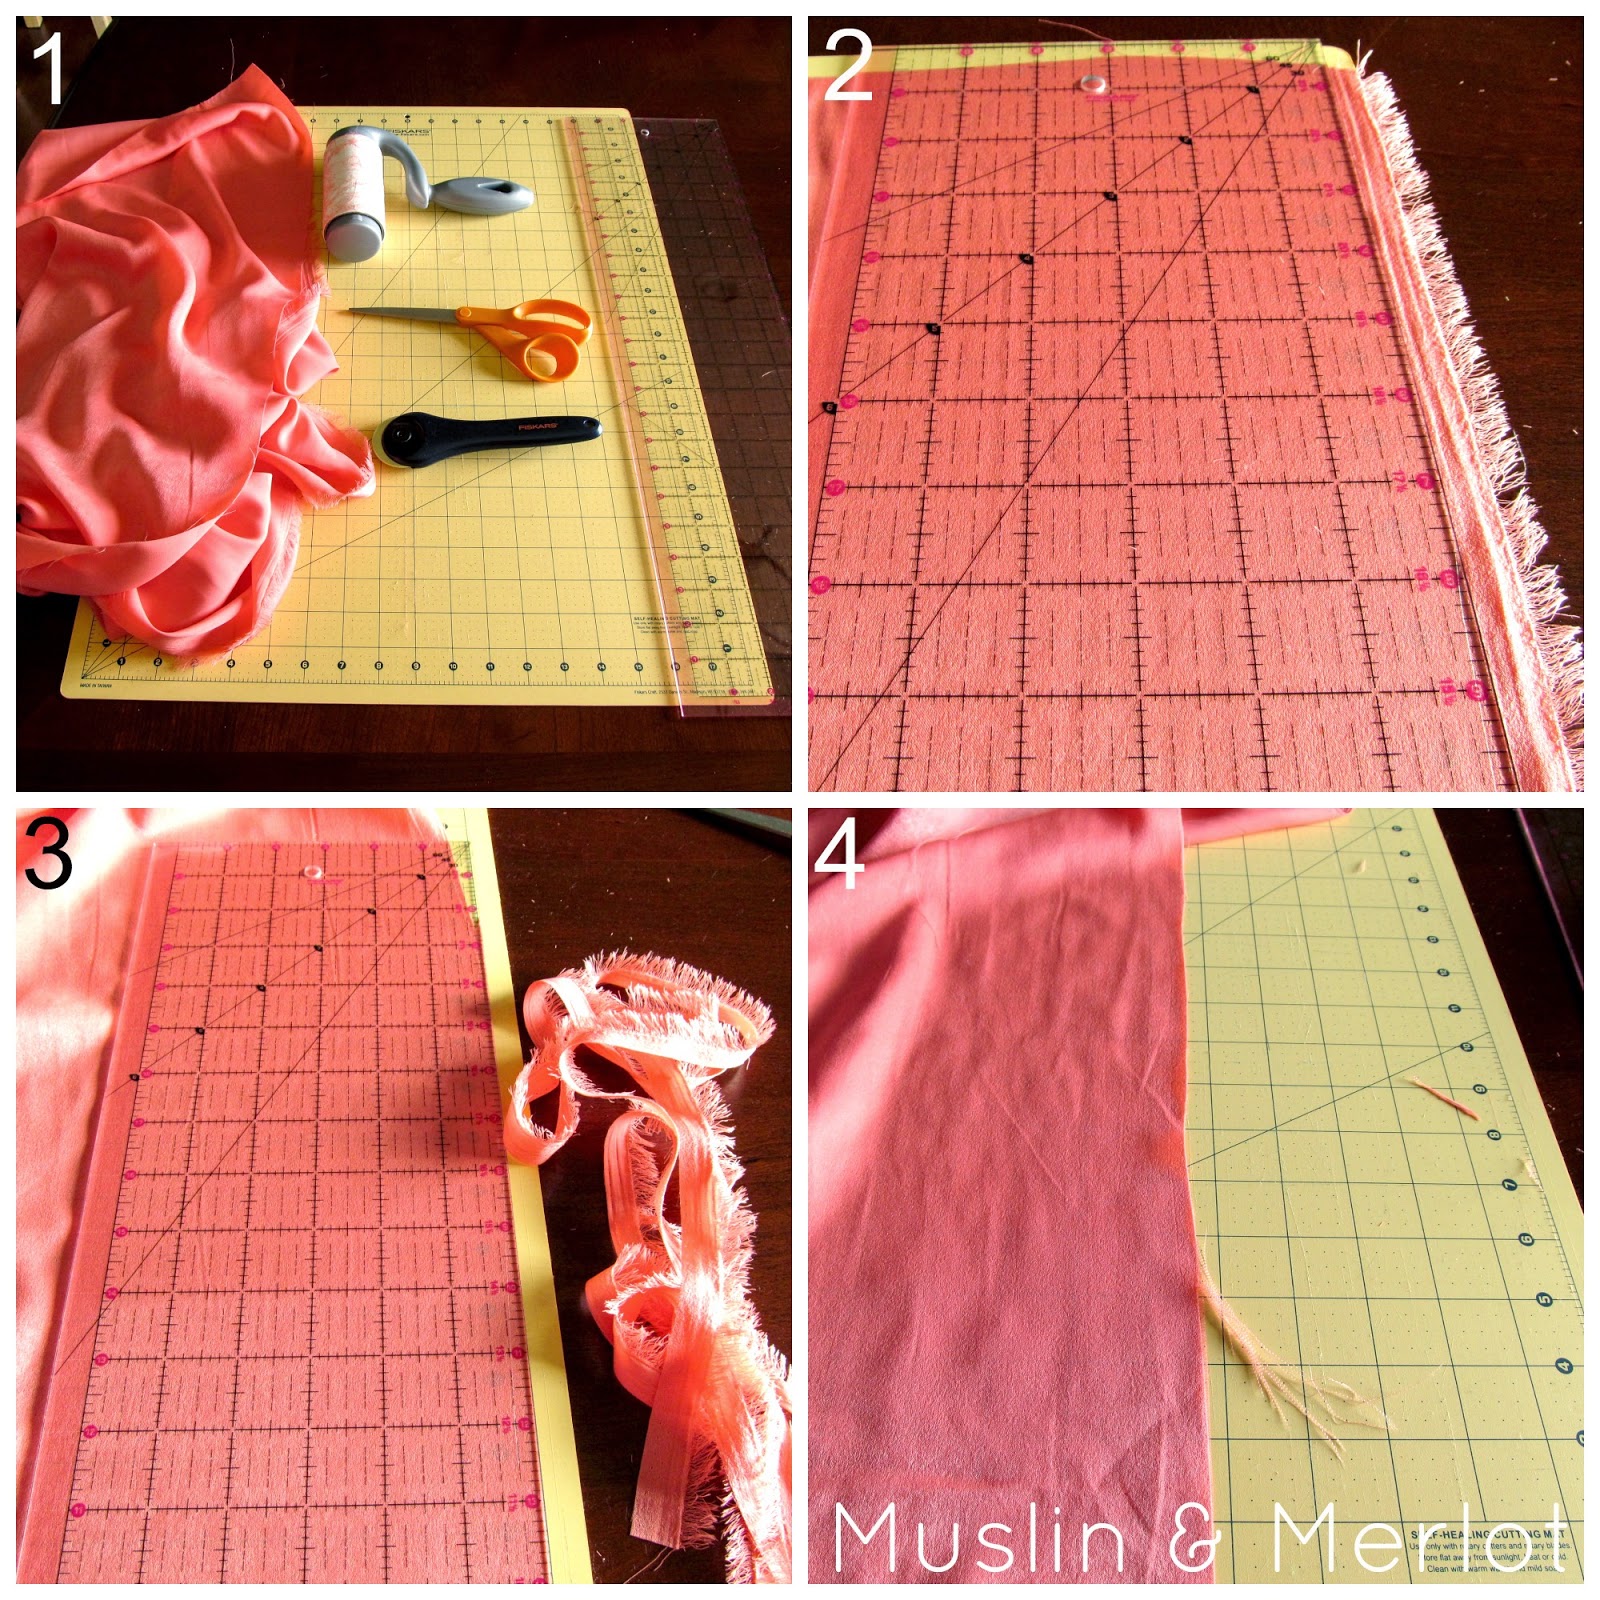
1. Get your cutting materials ready. If you do not have a wide acrylic ruler, find something that's heavy, long and smooth to hold the fabric in place. A painted wood plank would work. Iron your fabric on a LOW heat setting.
2. Place the selvage edge against the edge of the cutting mat. Carefully place your wide ruler on top of the fabric 1/2 inch away from where the selvage starts fringing. This fabric squirms like a living thing! Check to make sure that everything is still lined up correctly. Cut with your rotary blade.
3. Move the fabric up and keep cutting away the selvage. I do not recommend folding the length of fabric and cutting through multiple layers. The fabric is too slippery! The odds of uneven cutting are too great!
4. See the fraying threads? Carefully pull these off in order to create a straight edge.
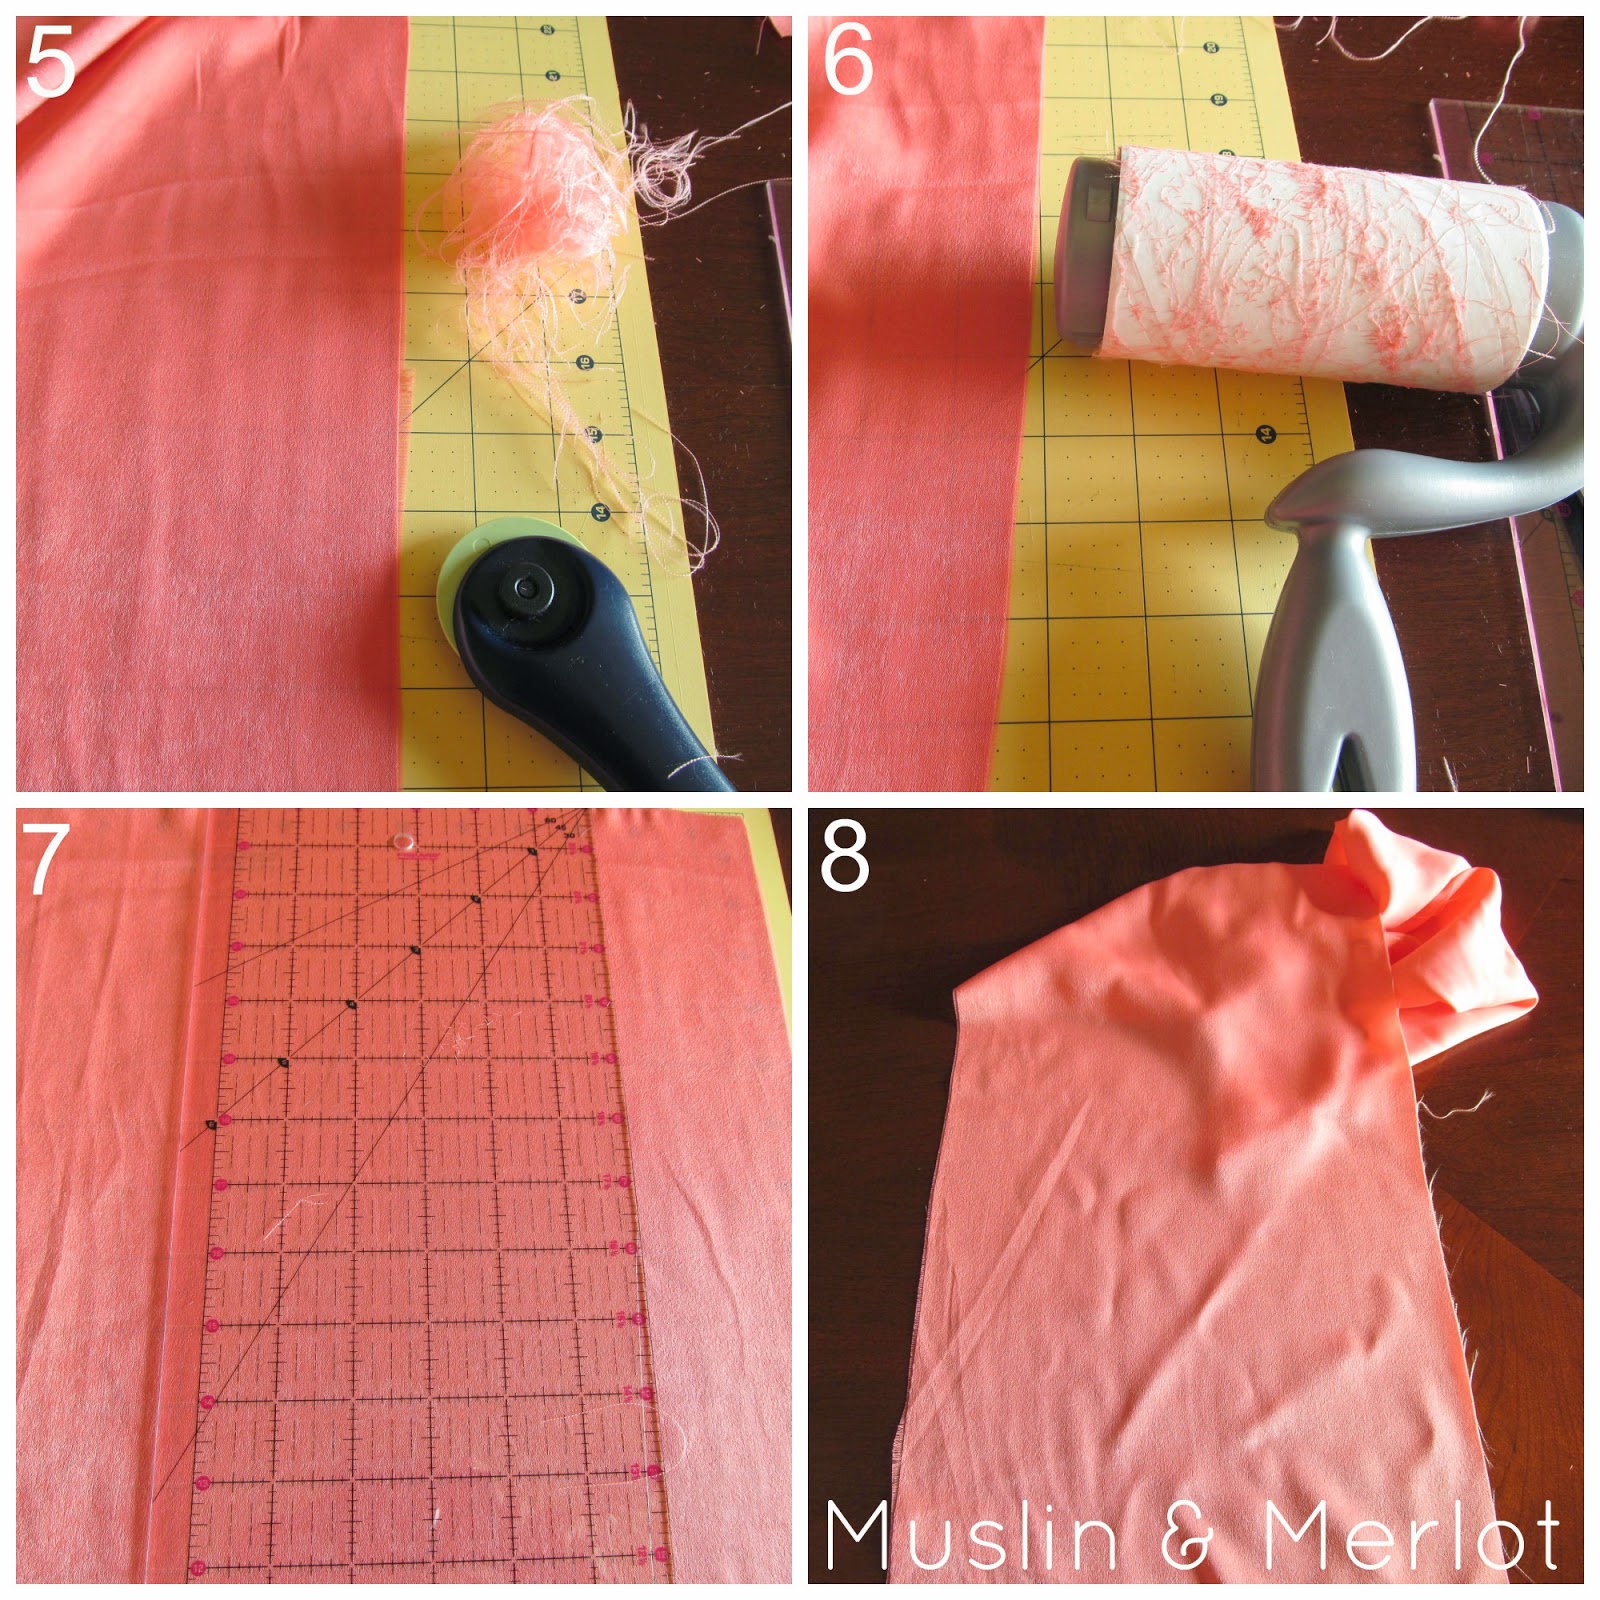
5. Pulling the threads will create a mini fringe. Carefully cut away the mini fringe.
6. Use a lint roller to pick up all the loose threads. Be sure NOT to touch the fabric length with the lint roller or threads will stick to the roller and you'll end up having to trim the fringe again!
7. The nice thing about this fabric? It's slightly sheer. You can see the lines of the cutting mat through the material.
Place the cut edge of the fabric at the edge of the ruled cutting area. Again, this fabric is super tricky and slippery. You may need to push slightly in small areas in order to get the fabric to line up correctly. Take your time. Be patient. Try not to swear when the whole thing slides off the mat and onto the floor ...
Now that your fabric is nicely lined up, CAREFULLY place your acrylic ruler at exactly the 9 1/4 inches wide notch. The nine inch mark will work just as well :-). Check to make sure that the fabric hasn't shifted. Cut the fabric.
8. Repeat steps five and six on the edge you just cut. Iron the length of fabric
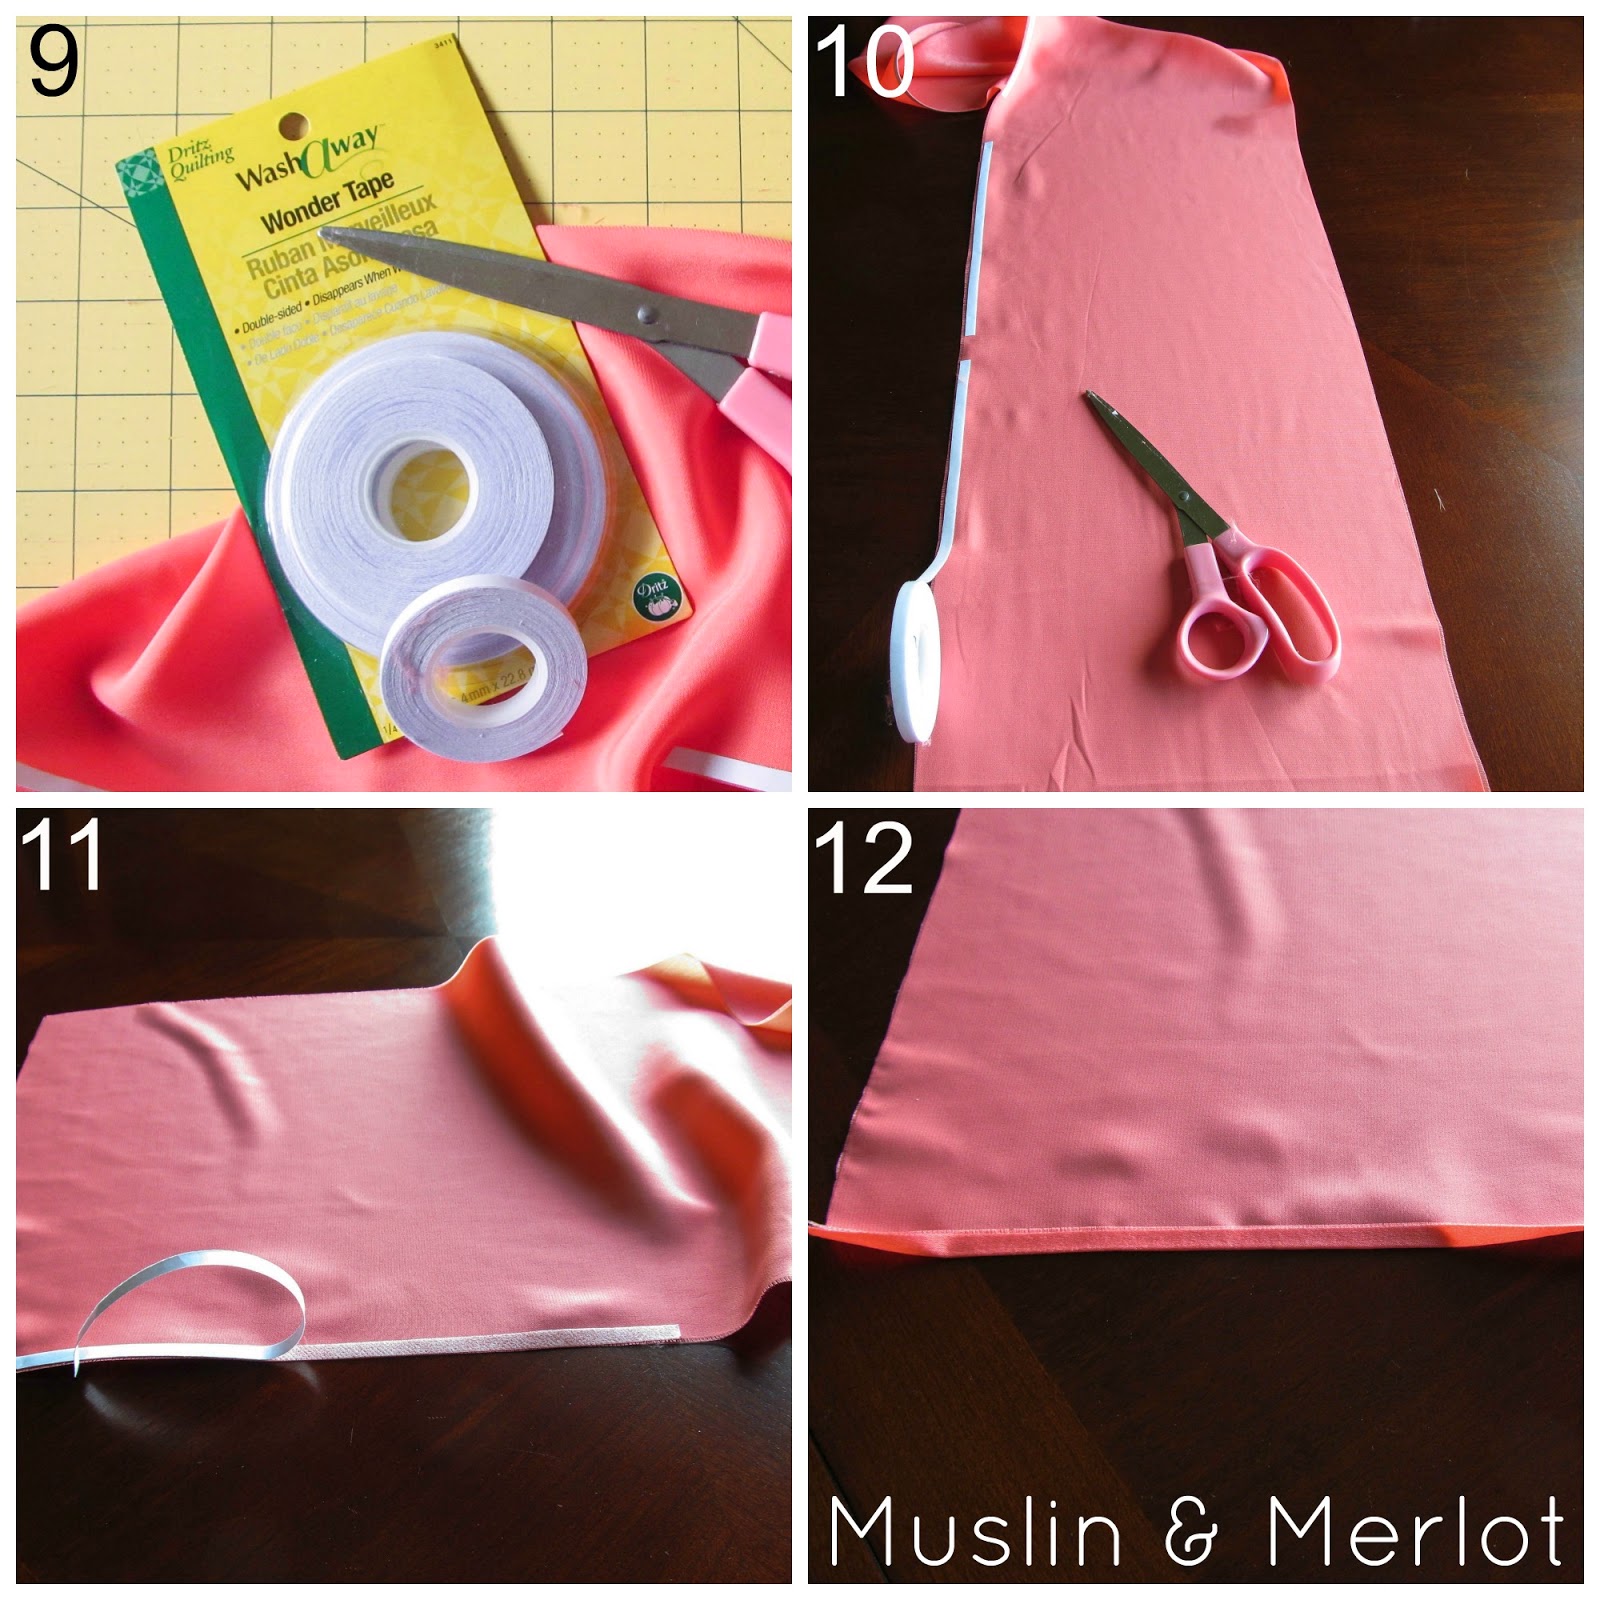
9. Get out your wonder tape. Wonder tape is sticky on both sides but one side has a peel away backing. At the store you will see quilting tape right next to the wonder tape. It will be cheaper. Do not buy the quilting tape! Quilting tape is not made to be sewn through. It will gum up your needle and you'll end up having to go back to the store to buy wonder tape. And possibly a new pack of needles.
Find a household scissors, not your sewing scissors. This scissors is going to be used to cut the wonder tape and will get sticky.
10. Place the edge of the tape along the edge of the WRONG side (the matte, non-iridescent side) of the fabric. Roll down the side about a foot. Cut the tape. Leave a couple inches between each section of tape.
11. Smooth down the tape with your fingers. Remove the tape backing from the first section.
12. We're going to use the inner side of the tape as our fabric fold line. Fold the taped fabric over. Repeat with the remaining tape.
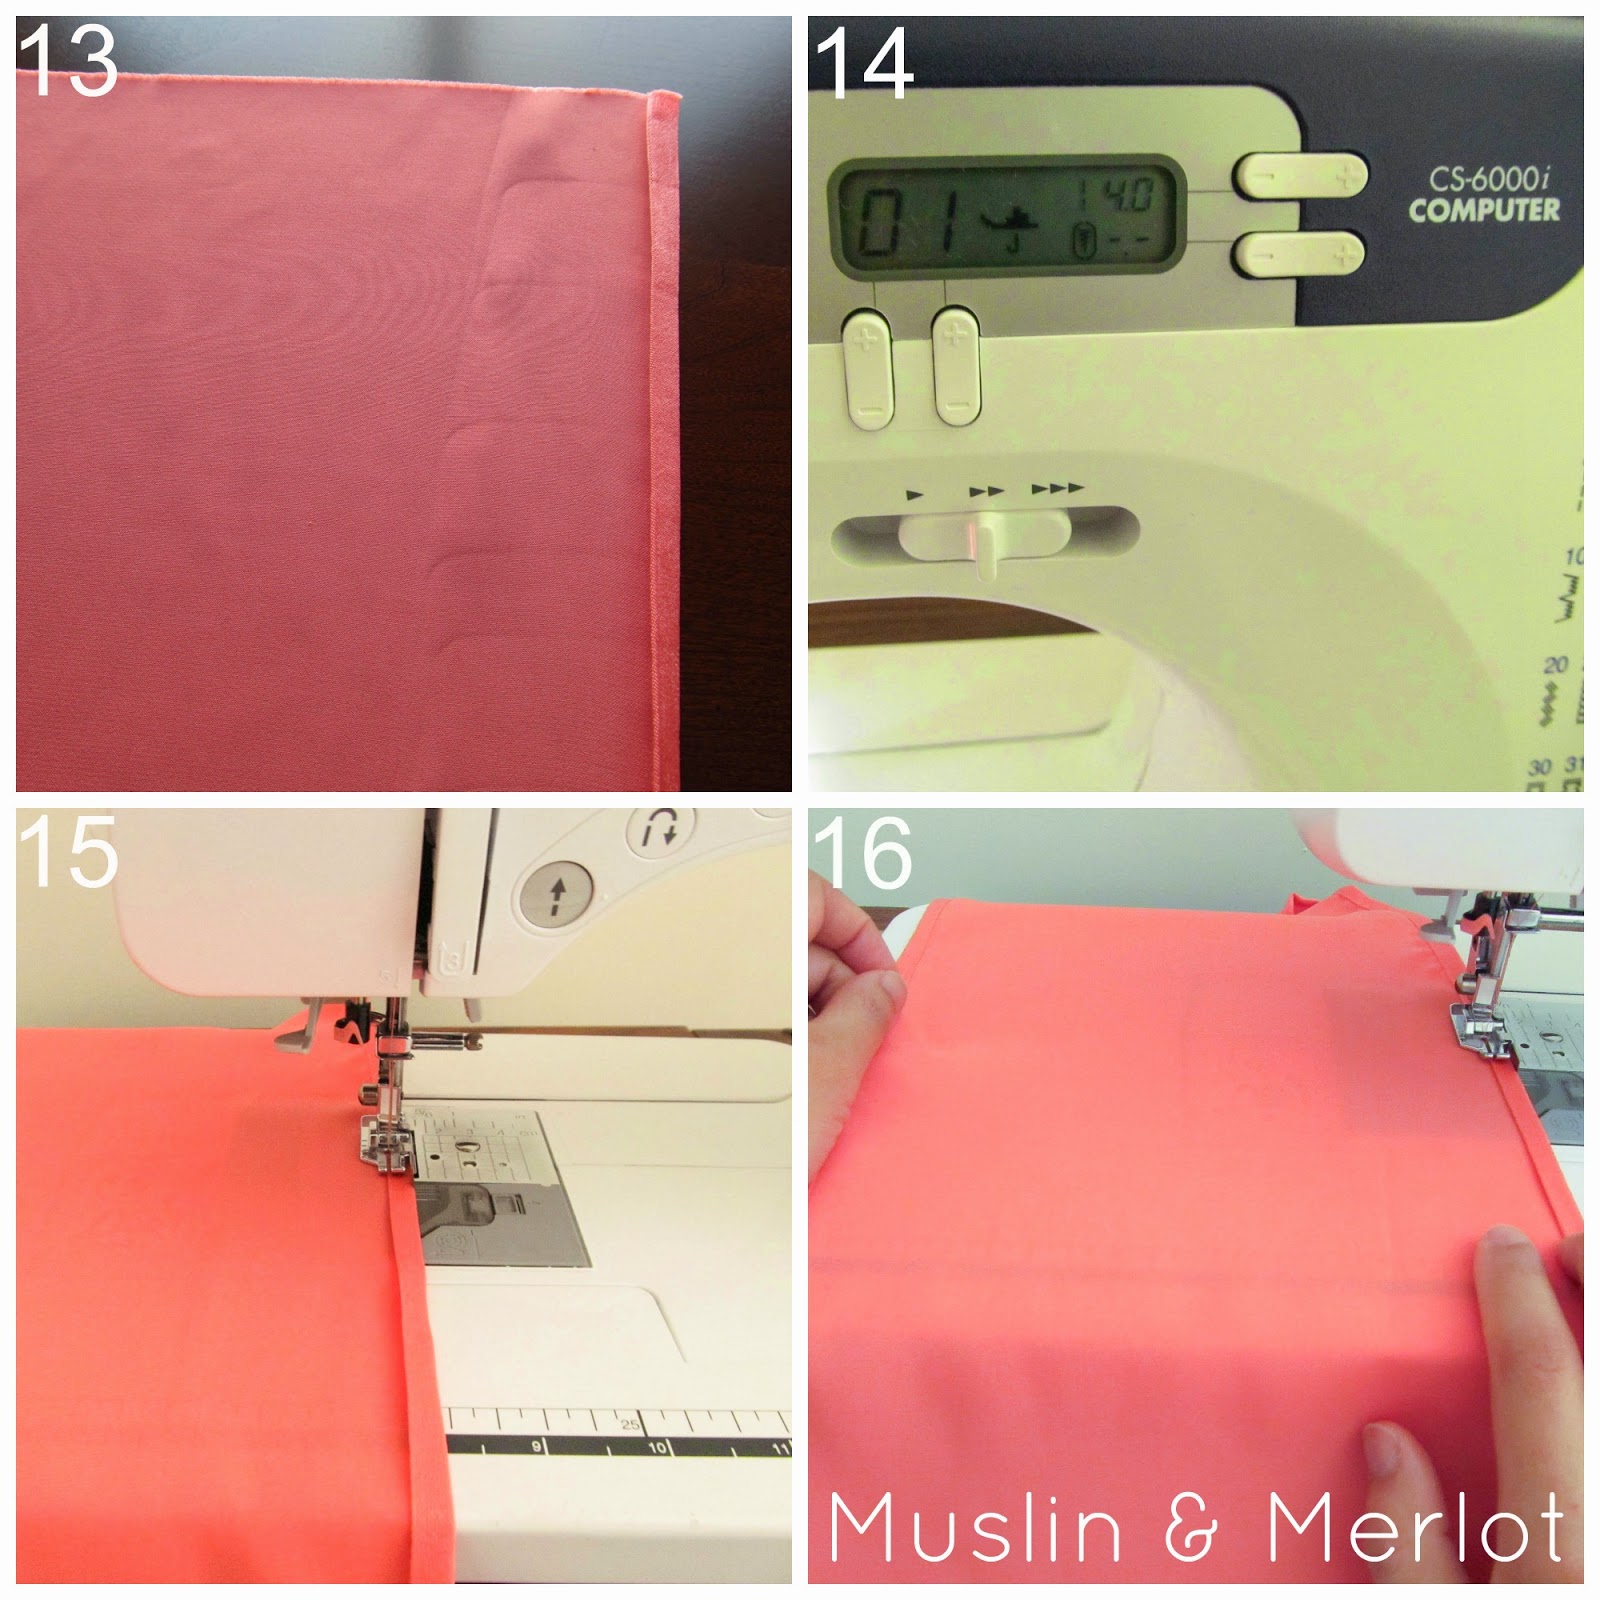
13. Fold the hem over again. Iron (again, on low heat).
14. Attach your 1/4 inch foot or walking foot to the machine. Set the stitch length to 4.0
15. Sew down the edge. Make sure the needle is catching the hem - don't let the needle and/or fabric wander!
16. Sewing tip: Hold the hem closed with a finger from your right hand. Use your left hand to keep the fabric straight while you're sewing.
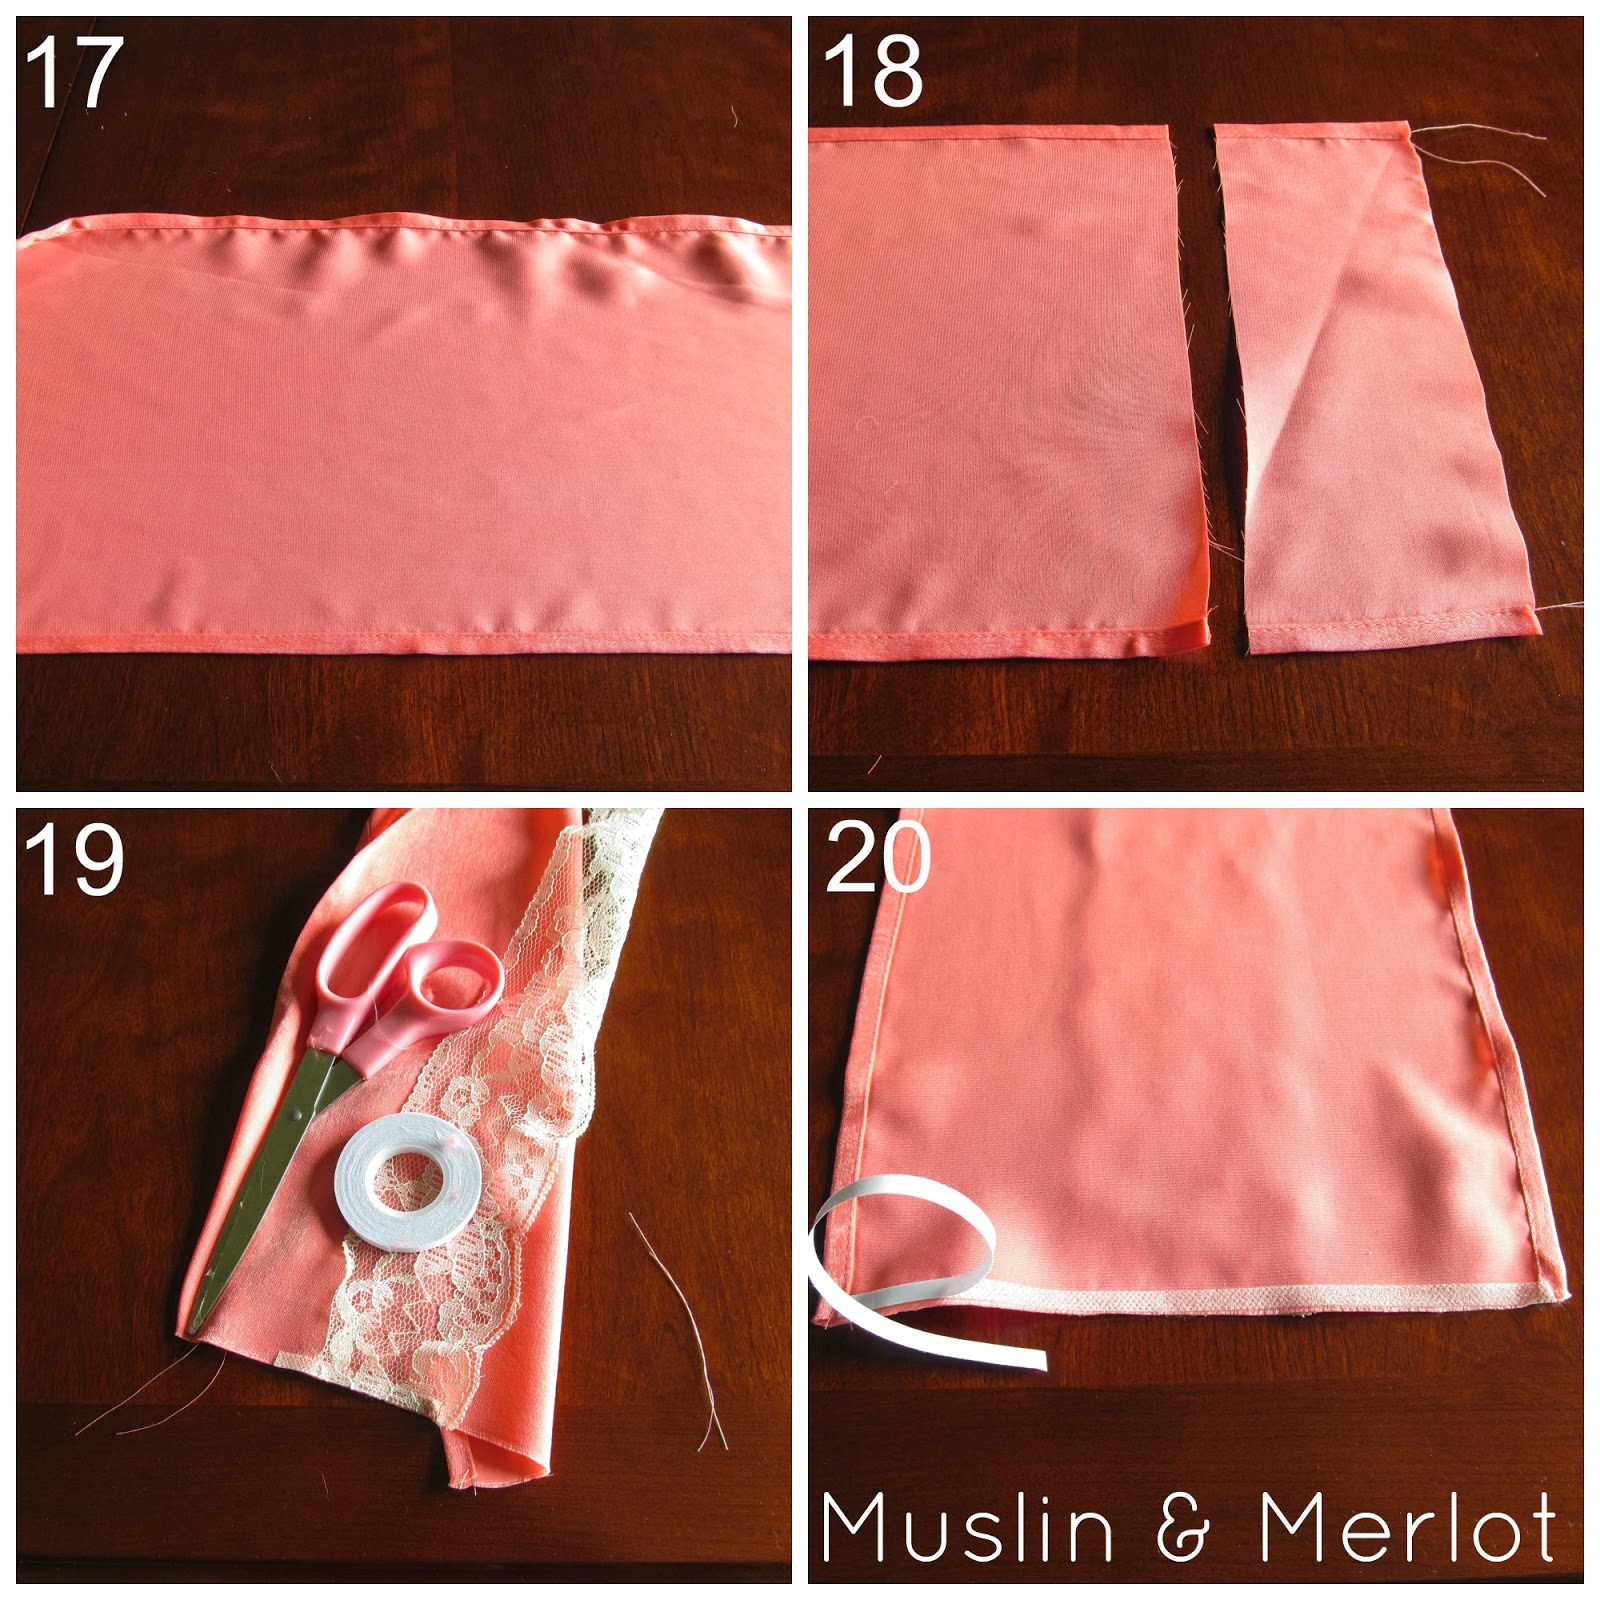
17. Repeat steps 9 through 16 on the other edge of the fabric. Iron the hems. See how the top hem is all wavy and horrible? and how the bottom looks a ton nicer? That's the difference between ironing and not ironing.
18. Cut off each end of the runner until the runner is 78 inches in length. Cut a length of 78 inch lace.
19. Center a small piece of wonder tape the width of your lace on the RIGHT side of the runner. Remove the backing and place the lace on top of the tape.
20. Flip the runner over and place length of tape along the bottom edge (on the WRONG side of the runner). Remove tape, fold over. Fold over again, just like you did with the side hems. Sew across the bottom of the runner, backstitching at each end
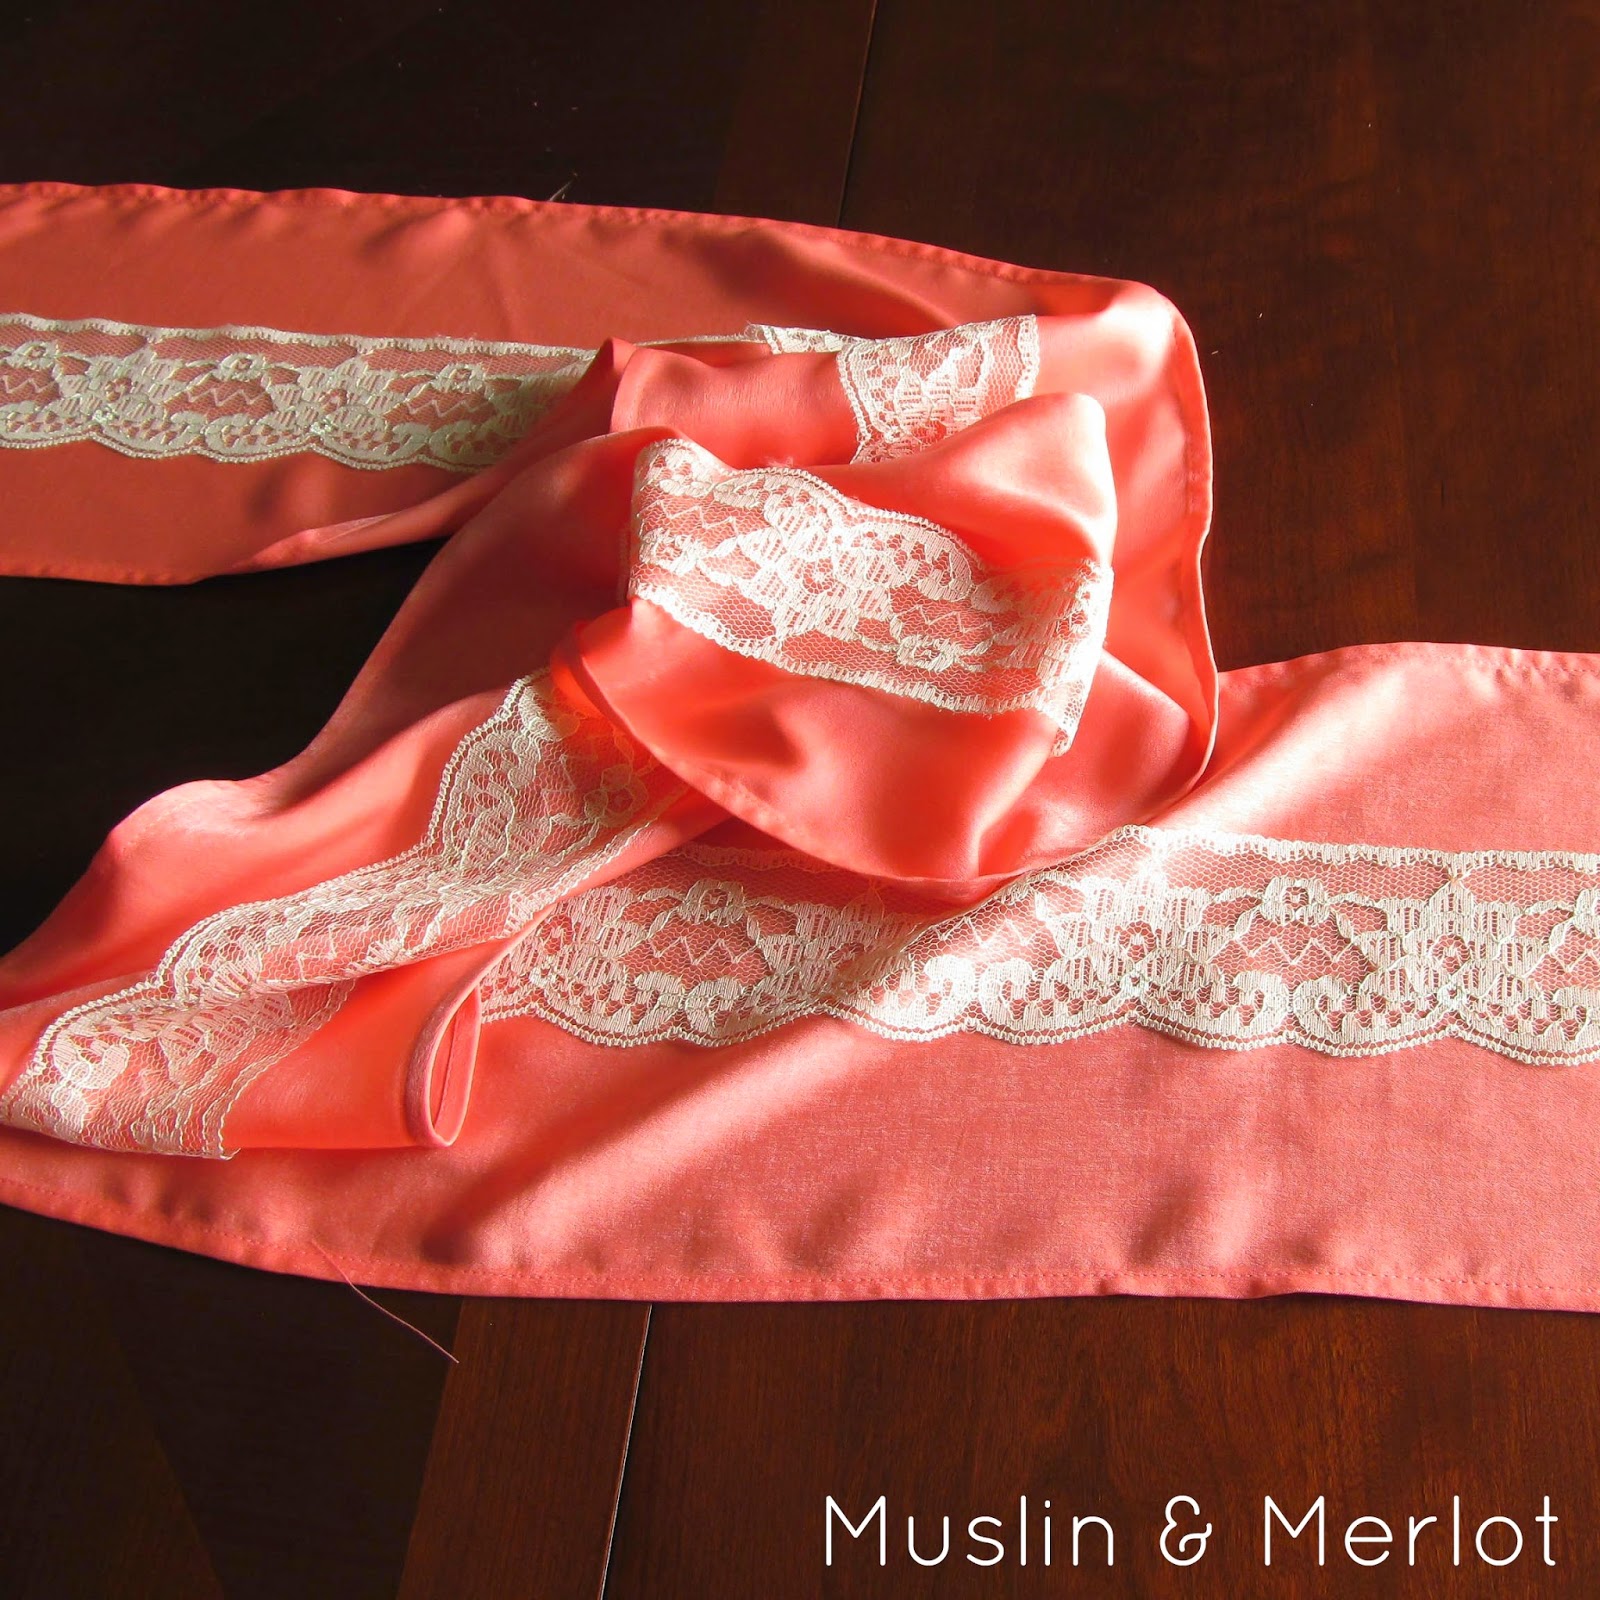
I chose to not sew the lace down the length of the fabric. Static electricity will be enough to hold it in place!
Press the runner again but lift the lace and press UNDER the lace. This particular lace seemed to stretch more than the fabric whenever I tried to iron the two together.