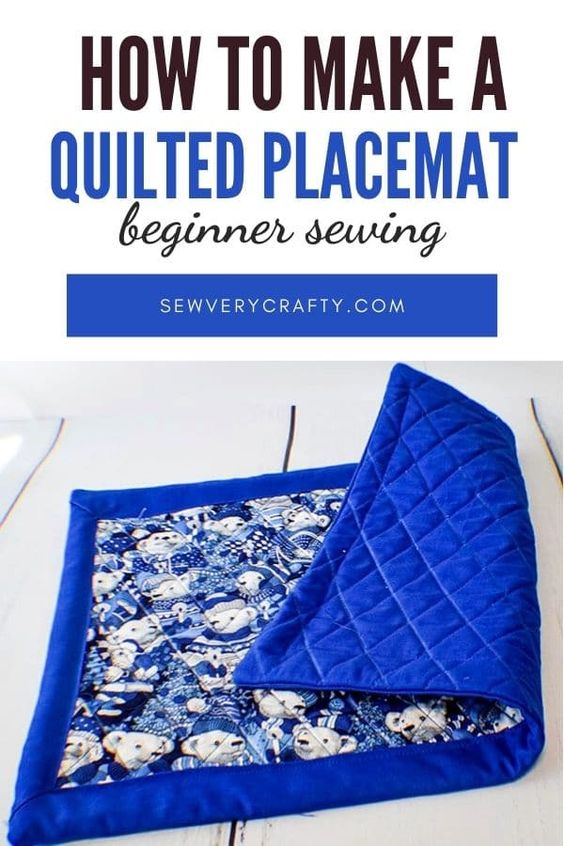
How to Make a Simple Quilted Placemat
Create a charming quilted placemat with this easy-to-follow sewing pattern. This pattern is perfect for beginners looking to add a handmade touch to their dining table. The simple design allows you to showcase your favorite fabric prints while practicing basic quilting techniques. Whether you're sewing for yourself or as a thoughtful gift for a friend, this pattern is sure to impress with its classic and timeless look. With detailed instructions and clear diagrams, you'll be able to whip up these quilted placemats in no time. The versatility of this pattern allows you to customize the size and shape to fit your personal style and needs. Whether you prefer a modern aesthetic or a more traditional look, this pattern can be adapted to suit your taste. So grab your sewing machine and fabric stash, and get ready to create a set of beautiful quilted placemats that will add a touch of handmade charm to your dining experience.
What you will Need: How to Make a Simple quilted placemat
- 2 pieces of fabric 21″ x 15″ per placemat
- 1 piece of quilt batting that measures 21″ x 15″
- 2 pieces of contrasting fabric 21 1/2 ” x 3 1/2″ for the border
- 2 pieces of contrasting fabric 14 1/2″ x 3 1/2″ for the border
What you will Need Placemat
Step 1: Cut your Fabrics
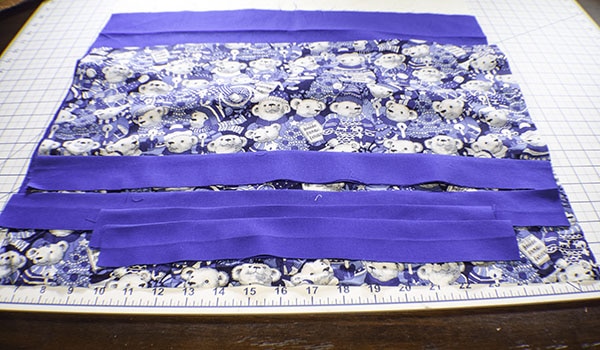
Cut your fabrics and batting in the dimensions listed above. Take your border strips fold in half lengthwise and press. Cut a 45° angle on each end so that when you open the ends they look like a chevron. To do this Lay the folded side to the top. Place your quilting ruler with the 45° angle line on the raw edge and cut. Repeat for the other end and for the smaller strips.
Step 2: Create the placemat
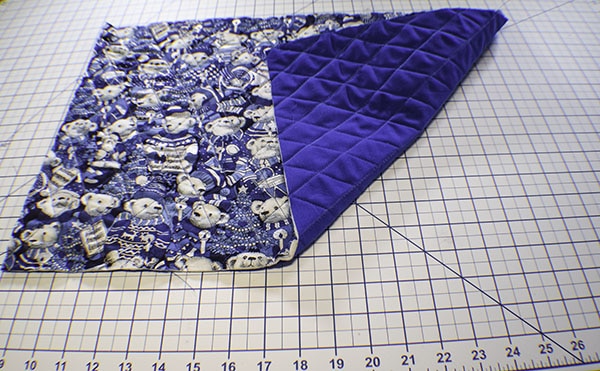
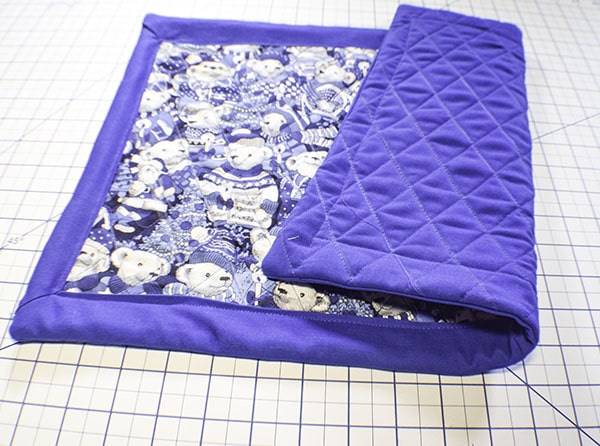
Take the two pieces of 21″ x 15″ fabric and the same sized batting piece and stack them so that the batting is in the middle of the fabric pieces which are right sides out. I used two different fabrics for my place mats but you could use the same for both sides if you like. Pin the layers together. Take some Taylors chalk or a frixion heat erasable pen and mark diagonal lines 1″ apart in both directions. Stitch along those lines. This is the quilting part of the project. Very easy. Trim the piece so that it measures 20″ x 14″.
Quilt the placemat
Step 3: Create the border
Take the border pieces and open them up. Place a long border piece right sides together with one of the short border pieces and stitch along the V shape using a 1/4″ seam allowance. Stitch the long piece to the short piece and so on until you have created a frame. Once you have finished stitching the frame clip the inside of the V up to the stitching line and refold the border. Clip off the ears that are sticking out from the ends of the points.
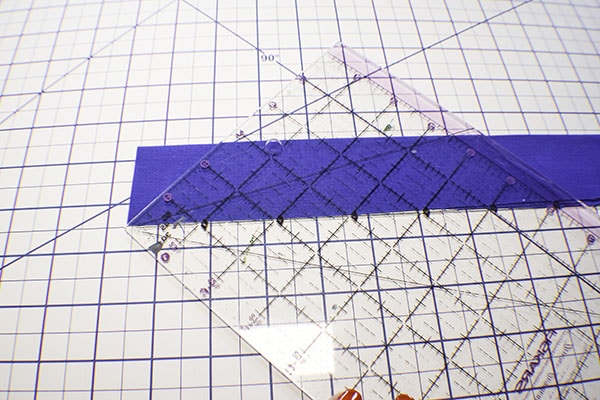
Cut the miters
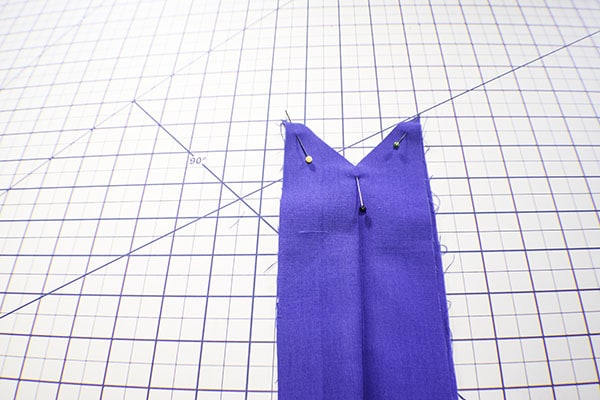
Place the miters right sides together
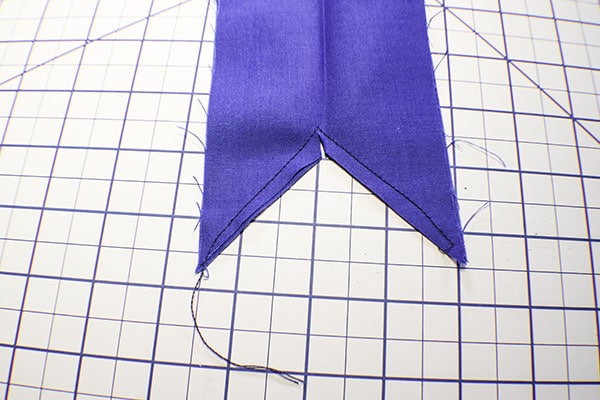
Clip the V
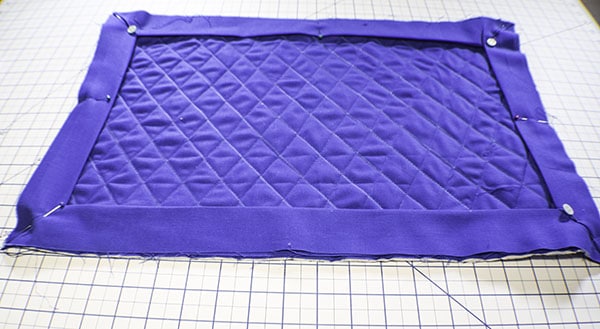
Step 4: Add the border
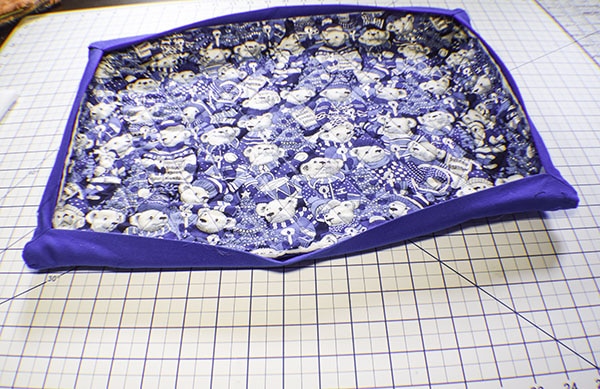
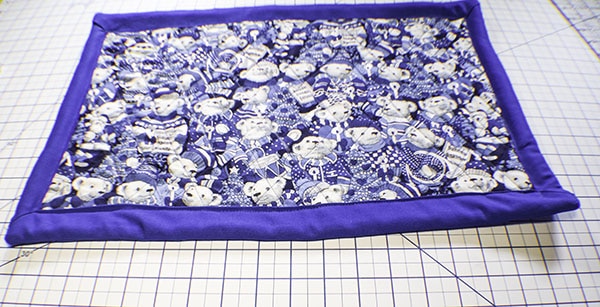
Add the border to the side of the placemat that you do not want it to be seen matching the raw edges and pin. Stitch all the way around using a 1/4″ seam allowance. Clip the corners and turn the border to the other side. Press well. Top stitch along the inner edge of the border. You have now finished your super simple quilted placemat.
Add the border
Turn the border to the other side
Stitch the inner border.
Finished Placemat